- RootUsers
- Guides, tutorials, reviews and news for System Administrators.
- Implement Work Folders in Windows Server 2016
- Install Work Folders
- GUI Install
- PowerShell Install
- Create Security Groups
- Create Sync Shares
- Create Client Work Folders
- Manually Configure Work Folders
- Automatically Configure Work Folders
- Summary
- Work folders windows server 2016
RootUsers
Guides, tutorials, reviews and news for System Administrators.
Implement Work Folders in Windows Server 2016
In this post I’ll show you how to implement Work Folders with a Windows Server 2016 file server and Windows 10 client. Work Folders allow a user to access their files from an internal file server remotely over the Internet.
As files are synchronized from the server to the client machine, it is possible to modify the files offline. Once the computer is back on the network, they will sync to the central file server. Work folders can be setup using failover clustering to provide highly available file sharing solution.
The file server provides a central access point for the files, a user can then connect to this from many devices. Security policy can be set to ensure the client system encrypts the contents of any work folders, this ensures that if a client machine is stolen the files remain safe.
The work folders role service can be installed in Windows Server 2012 R2 and above, and is also available in Windows 7 clients and newer. There’s even mobile application support for Android 4.4 and above and iOS 8 and above for iPhone. The work folders on the server must be stored on a disk formatted with the NTFS file system.
By default work folders are stored in the %USERPROFILE%\Work Folders directory on the client, and files cannot be larger than 10gb in size.
This post is part of our Microsoft 70-744 Securing Windows Server 2016 exam study guide series. For more related posts and information check out our full 70-744 study guide.
Install Work Folders
We can install the Work Folders role through either the graphical user interface (GUI) or command line interface (CLI).
GUI Install
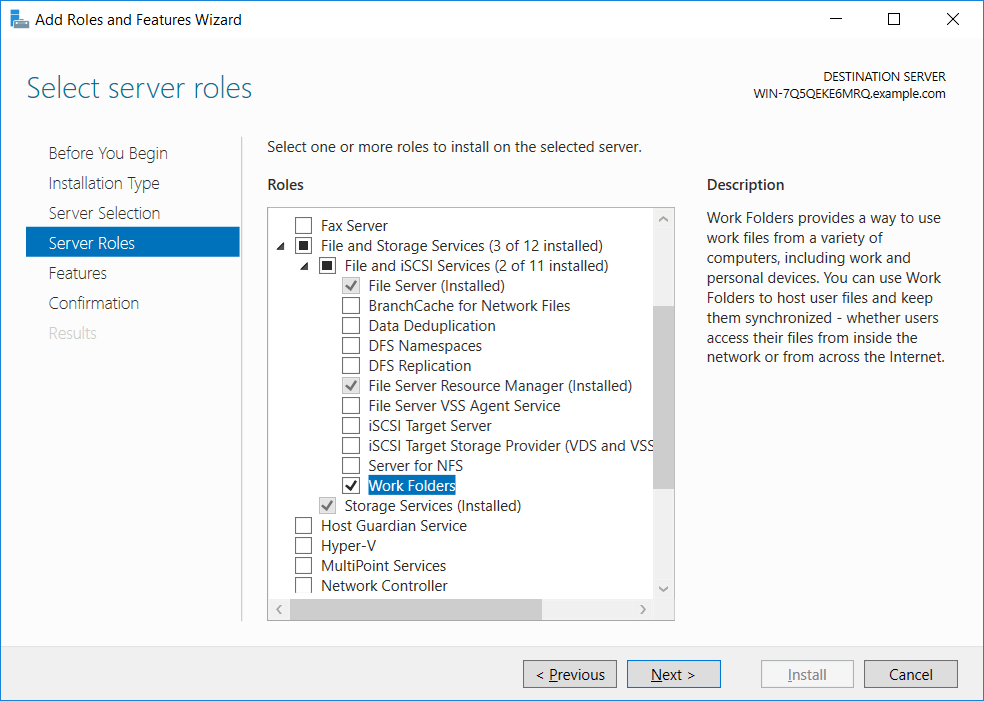
Simply open Server Manager and select to add a role. From the available server roles, select Work Folders found under File and Storage Services as shown below. This will also prompt you to add the IIS Hostable Web Core feature which is also required.
PowerShell Install
We can instead install the role much faster using the Install-WindowsFeature PowerShell cmdlet. The FS-SyncShareService is the Work Folders service, while Web-WHC is the IIS Hostable Web Core feature, which was suggested when installing the GUI.

Create Security Groups
We need to create specific groups to allow users permission to sync the shares. We need a group for each share that is to be synchronized, this contains the users that are allowed to sync the share. We can also create another group for work folder administrators which allows the users within to modify user object attributes which control the server that each user will use.
The two groups can be created in Active Directory, the names do no matter but should ideally be clear and make sense. For instance if there will be a share called “Finance Share” then perhaps a group name called “Finance Share Users” would make sense for this purpose.
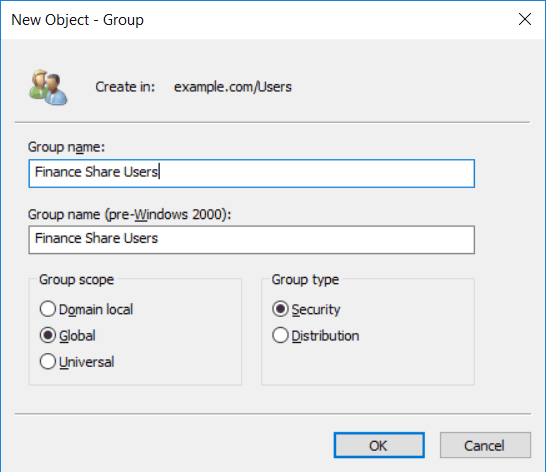
Microsoft recommend only putting the specific users in the group required rather than using other existing or generic groups, as more items can reduce performance as the time for work folders to query Active Directory increases.
Create Sync Shares
We’re now ready to create a sync share on the file server, which is simply a work folder that we’re sharing. We’ll cover how to create sync shares both through the GUI and with Windows PowerShell.
First open Server Manager and select File and Storage Services followed by Work Folders.
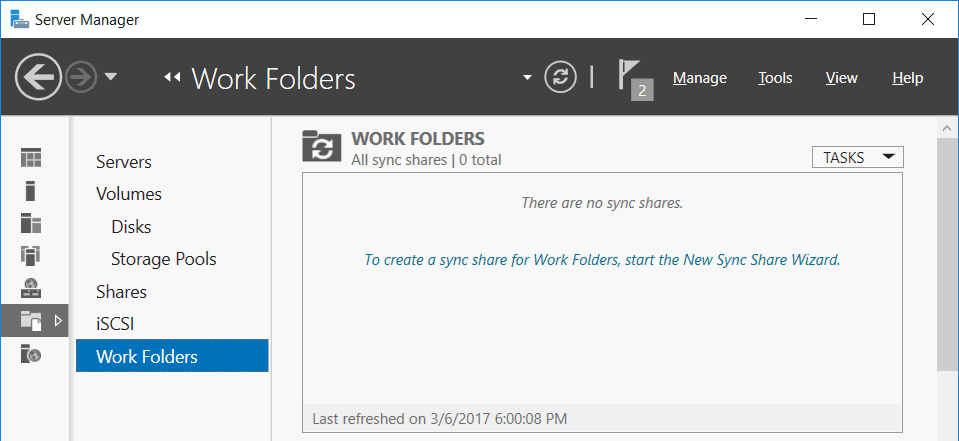
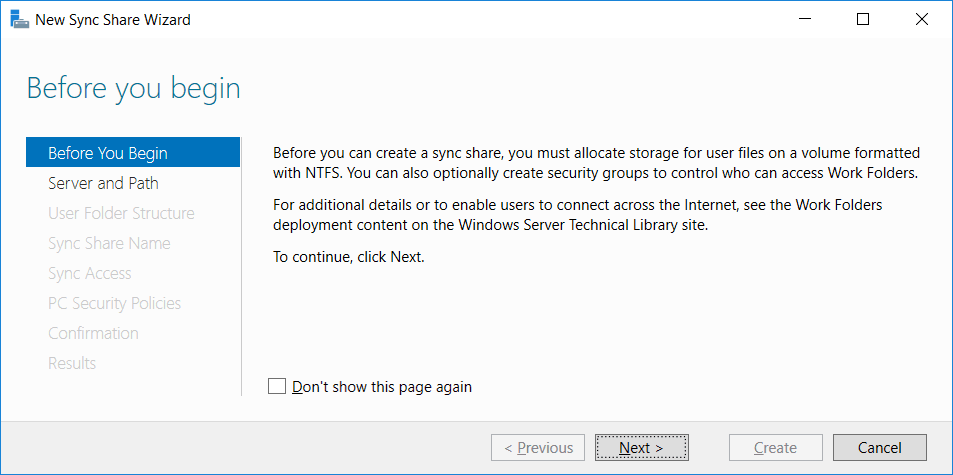
In this example we do not have any existing work folders so we can simply click the text shown under work folders. Alternatively if you already had work folders showing here, you would select the Tasks drop down menu and then select “New Sync Share”. This will open the New Sync Share Wizard, which notes that you need free space on an NTFS disk and security groups ready to use which we’ve already created.
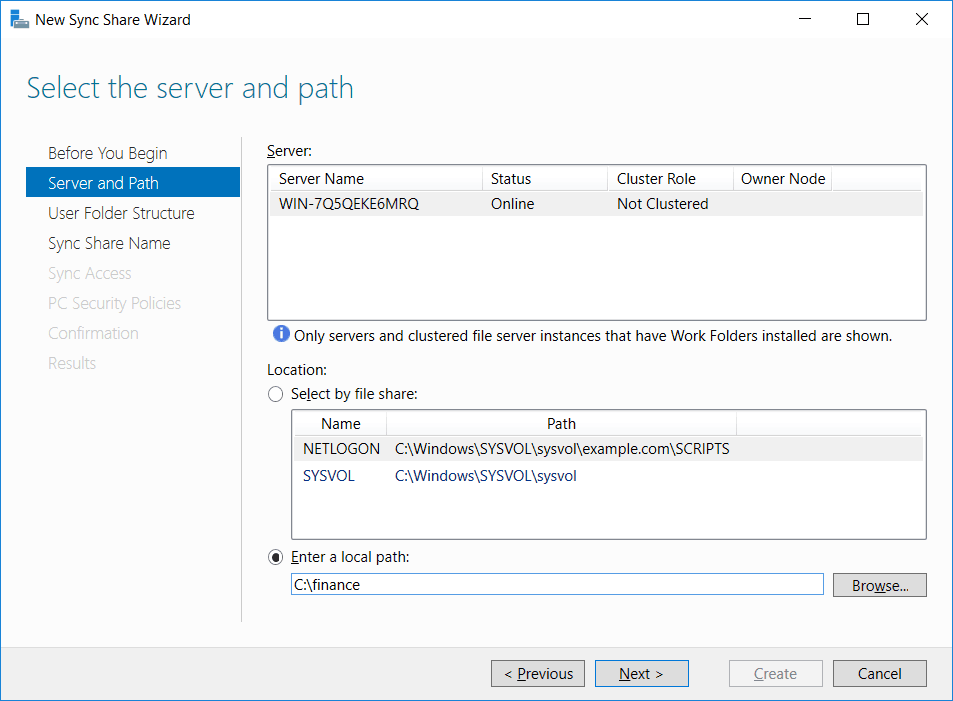
Next we need to specify the server and path to the folder that we’ll be sharing. In this example we’ll use the file server itself and the C:\finance folder path which is where we want to create our work folder for the finance group.
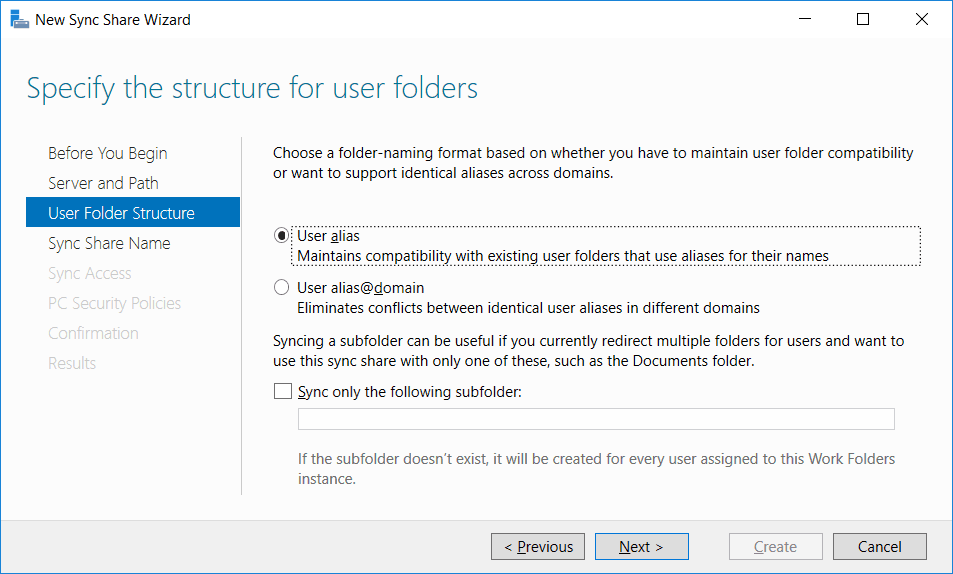
Next we can specify the structure for user folders, by default user alias is selected which is what we’ll be using here. We only have one domain in this example so there’s no need to specify [email protected]
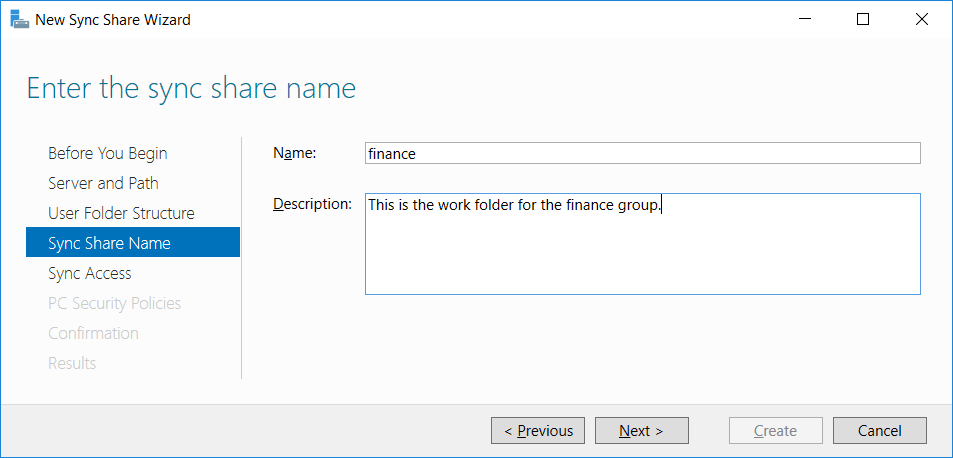
Now we can name the sync share, by default the name field populates with the name of the folder that we selected previously, which we’ll use here.
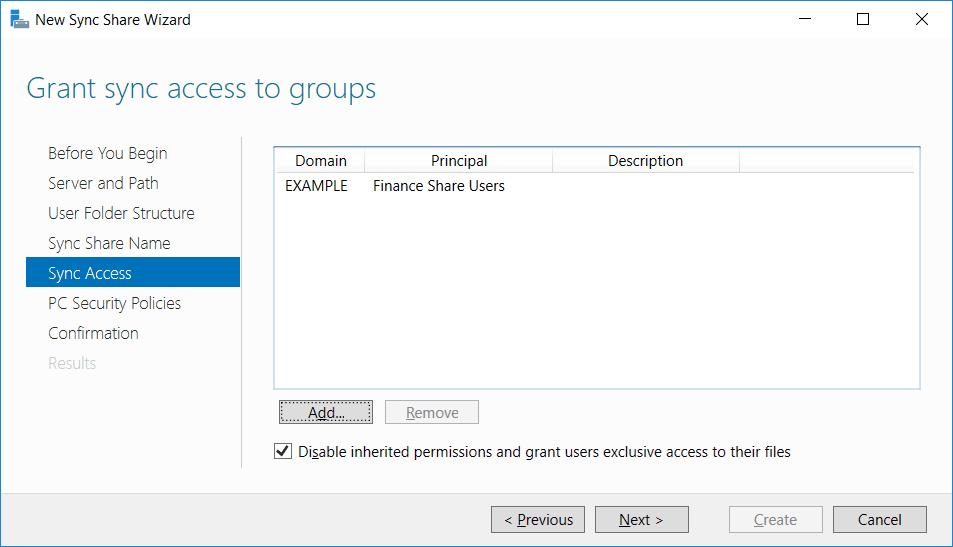
We can now grant sync access to our finance group, simply click the Add button and search for the group in AD. We can see that our “Finance Share Users” group that we created earlier from the EXAMPLE domain has been specified to be allowed access to the finance work folder sync share.
We can now specify our security policies for the work folders on the client. By default the automatically lock screen and require password option is selected. This makes the client system automatically lock the screen after 15 minutes of inactivity and require a minimum six character password to unlock. Accounts will be locked out for 10 minutes after failed login attempts.
We can optionally select to encrypt work folders on the client side, which is recommended as it protects the files in the event that the machine is stolen. If BitLocker is in use however then this may not be as useful.

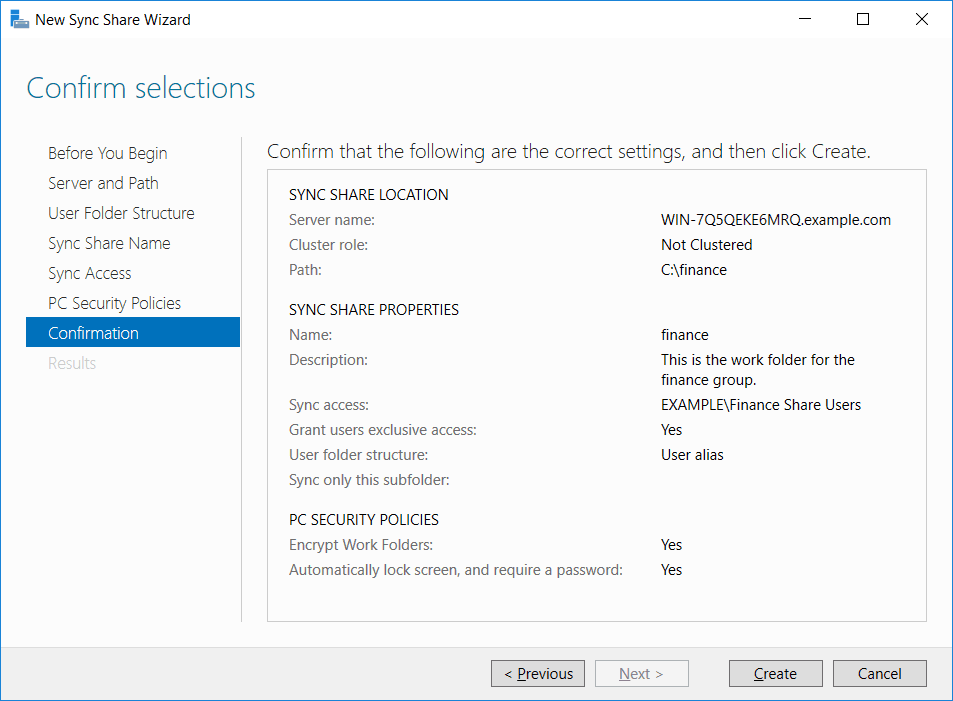
Finally we are presented with a summary of the settings selected, review these and click create to proceed.
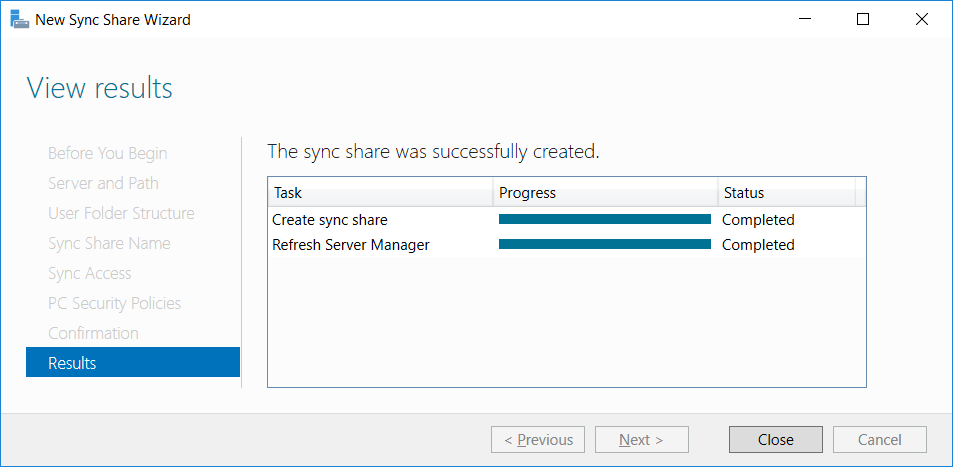
We can see that the file sync share has been created successfully.
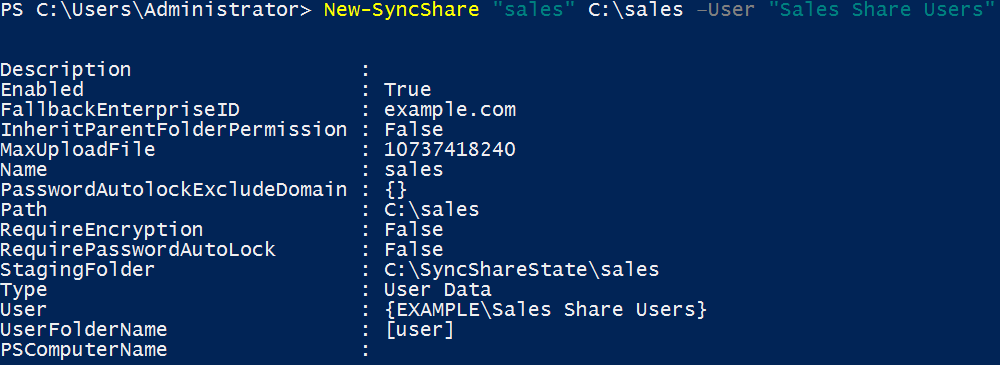
We could have also completed this through PowerShell rather than the GUI using the New-SyncShare cmdlet. While the group specified will already need to exist, the directory specified will be created if it does not already exist.
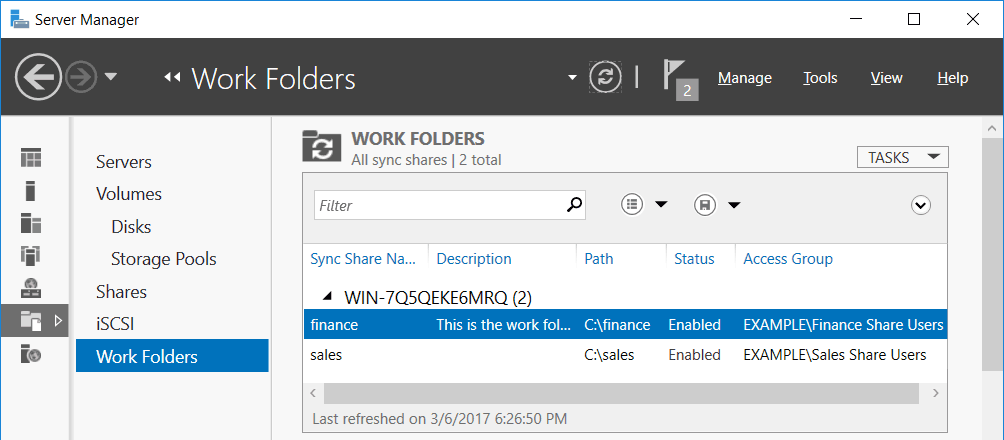
Back in the Work Folders section of Server Manager we can see our sync shares are listed with the details that we specified. The finance sync share was created through the GUI, while the sales sync share was created through PowerShell.
Create Client Work Folders
First we’ll discuss how a client can manually access a work folder, followed by how this can be automatically deployed through group policy.
Manually Configure Work Folders
A user logged into their Windows workstation can setup work folders. Note that the user must be a member of the group that was allowed access to the sync share. In this example, the user we are demonstrating with is a member of the “Finance Share Users” group and will be accessing the finance sync share. The example also takes place in Windows 10.
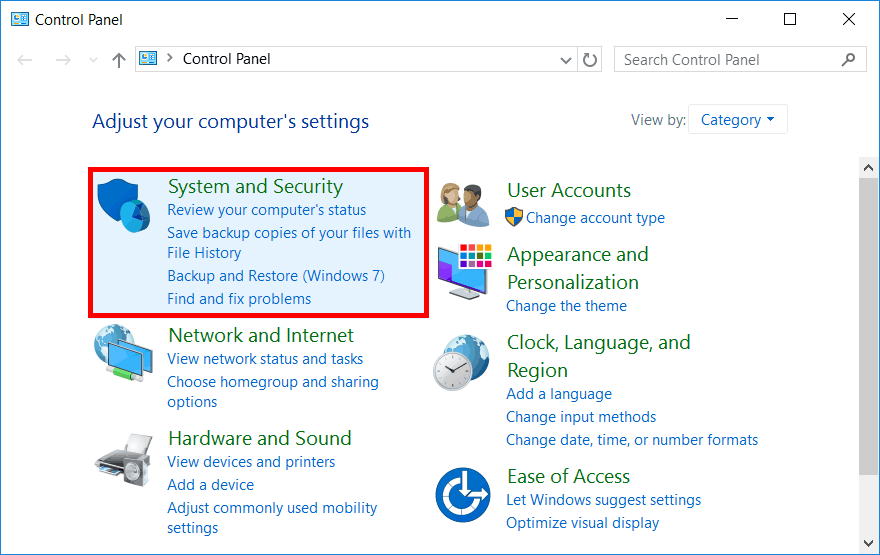
In Control Panel, select System and Security.
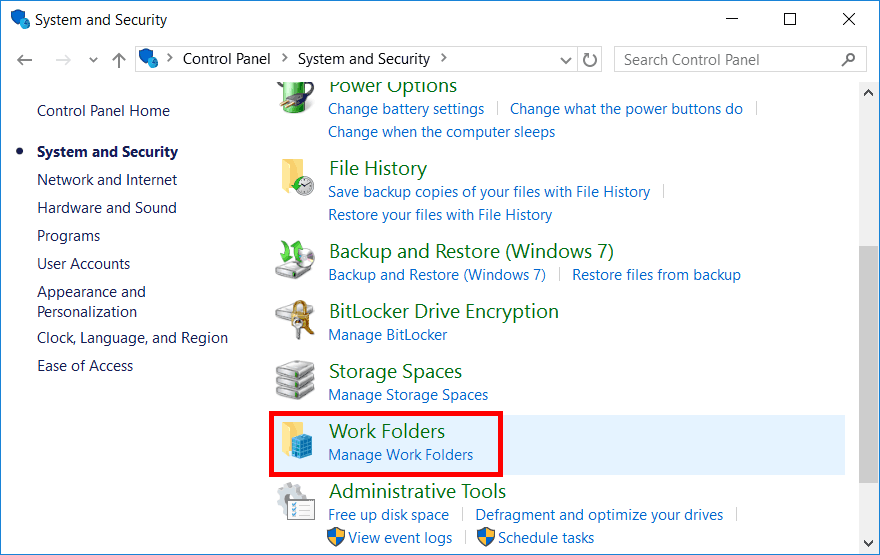
Next select Work Folders, note that this option does not appear on the server OS.
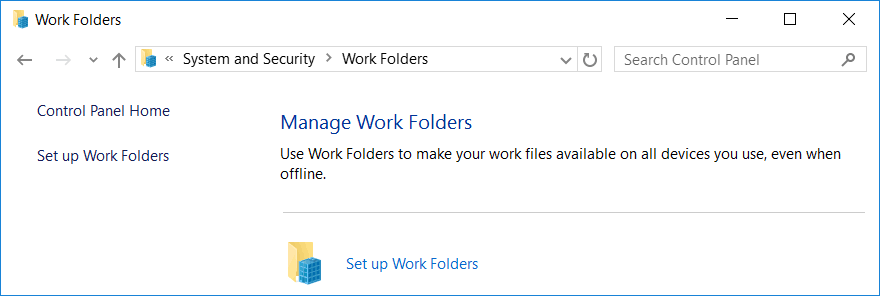
We can now select set up work folders.
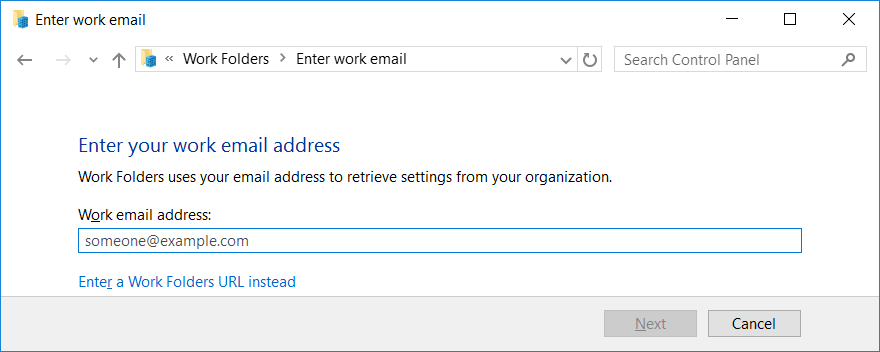
At this point we can either enter our work email address, or instead use a URL.
Once you provide your credentials to login, you can control where the work folder on the local machine will be stored. By default it will be stored in the users profile, however this can be changed. The user will then need to agree to the security policies to proceed.
This stores a copy of the files from the folder on the server, any changes you make to your local copies are synced to the server.
By default clients connect to the file server URL with HTTPS, in a test environment you can configure the client to use HTTP with the registry entry below. In production HTTPS is recommended so that the files being transferred between the client and server are encrypted.
Automatically Configure Work Folders
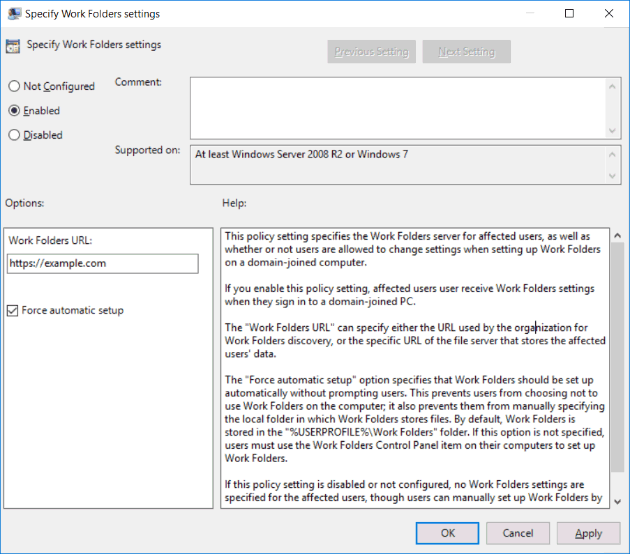
Create a new GPO and edit “Specify Work Folders Settings” from within User Configuration > Policies > Administrative Templates > Windows Components > WorkFolders. This will specify the work folders server URL for user’s that the policy applies to.
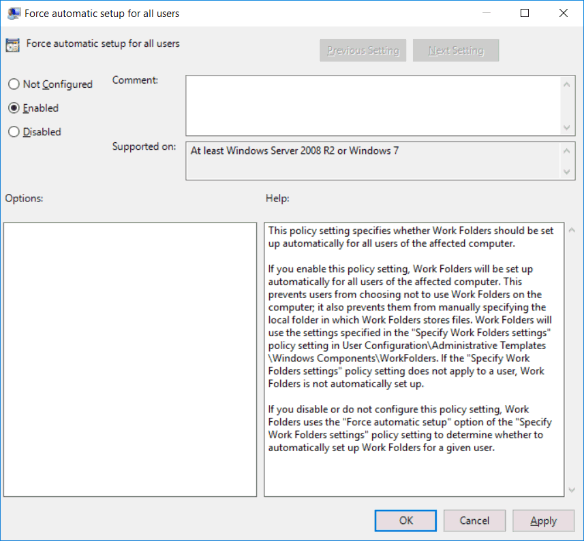
Next we also need to configure the “Force automatic setup for all users” policy from within Computer Configuration > Policies > Administrative Templates > Windows Components > WorkFolders. This will automatically setup Work Folders for all users that access the computer where the policy is applied to.
Both the manual and automatic work folder setup options have created a folder on the client system that is in sync with the folder on the server. By default the client will attempt to synchronize with the server every 10 minutes if there are no changes. If the client system makes a change, it’s synchronized with the server straight away. Additionally if the client makes changes that sync to the server, the server will notify other clients syncing this folder so that they can also update. This allows the user to access any Windows machine with work folders configured so that they can view the same files from the central file server. They can even take the files offline, modify them, and then they will sync with the server later once they are back on the network.
Also note that if the work folders need to be accessible over the Internet, you would also need to create a valid certificate for the file server, and appropriate DNS entries that can be resolved to a public domain.
Summary
We have shown you how to implement work folders in Windows Server 2016 for the file server, and Windows 10 for the client.
Work folders work with existing File Server Resource Manager (FSRM) options, including file quotas to limit how much disk space a user can use, file screening to control the types of files allowed to be stored, and file classification rules to classify files with custom properties.
Work Folders allows users the ability to work from anywhere and from different devices, while allowing system administrators the ability to ensure documents are encrypted on the client devices.
This post is part of our Microsoft 70-744 Securing Windows Server 2016 exam study guide series. For more related posts and information check out our full 70-744 study guide.
Work folders windows server 2016
Work Folders overview
Applies to: Windows Server (Semi-Annual Channel), Windows Server 2019, Windows Server 2016, Windows Server 2012 R2, Windows 10, Windows 8.1, Windows 7
This topic discusses Work Folders, a role service for file servers running Windows Server that provides a consistent way for users to access their work files from their PCs and devices.
If you’re looking to download or use Work Folders on Windows 10, Windows 7, or an Android or iOS device, see the following:
With Work Folders users can store and access work files on personal computers and devices, often referred to as bring-your-own device (BYOD), in addition to corporate PCs. Users gain a convenient location to store work files, and they can access them from anywhere. Organizations maintain control over corporate data by storing the files on centrally managed file servers, and optionally specifying user device policies such as encryption and lock-screen passwords.
Work Folders can be deployed with existing deployments of Folder Redirection, Offline Files, and home folders. Work Folders stores user files in a folder on the server called a sync share. You can specify a folder that already contains user data, which enables you to adopt Work Folders without migrating servers and data or immediately phasing out your existing solution.
Administrators can use Work Folders to provide users with access to their work files while keeping centralized storage and control over the organization’s data. Some specific applications for Work Folders include:
Provide a single point of access to work files from a user’s work and personal computers and devices
Access work files while offline, and then sync with the central file server when the PC or device next has Internet or intranet connectivity
Deploy with existing deployments of Folder Redirection, Offline Files, and home folders
Use existing file server management technologies, such as file classification and folder quotas, to manage user data
Specify security policies to instruct user’s PCs and devices to encrypt Work Folders and use a lock screen password
Use Failover Clustering with Work Folders to provide a high-availability solution
Work Folders includes the following functionality.
| Functionality | Availability | Description |
|---|---|---|
| Work Folders role service in Server Manager | Windows Server 2019, Windows Server 2016, or Windows Server 2012 R2 | File and Storage Services provides a way to set up sync shares (folders that store user’s work files), monitors Work Folders, and manages sync shares and user access |
| Work Folders cmdlets | Windows Server 2019, Windows Server 2016, or Windows Server 2012 R2 | A Windows PowerShell module that contains comprehensive cmdlets for managing Work Folders servers |
| Work Folders integration with Windows | Windows 10 Windows 7 (download required) | Work Folders provides the following functionality in Windows computers: — A Control Panel item that sets up and monitors Work Folders |
| Work Folders app for devices | Android Apple iPhone and iPad® | An app that allows popular devices to access files in Work Folders |
New and changed functionality
The following table describes some of the major changes in Work Folders.
| Feature/functionality | New or updated? | Description |
|---|---|---|
| Improved logging | New in Windows Server 2019 | Event logs on the Work Folders server can be used to monitor sync activity and identify users that are failing sync sessions. Use Event ID 4020 in the Microsoft-Windows-SyncShare/Operational event log to identify which users are failing sync sessions. Use Event ID 7000 and Event ID 7001 in the Microsoft-Windows-SyncShare/Reporting event log to monitor users that are successfully completing upload and download sync sessions. |
| Performance counters | New in Windows Server 2019 | The following performance counters were added: Bytes downloaded/sec, Bytes uploaded/sec, Connected Users, Files downloaded/sec, Files uploaded/sec, Users with change detection, Incoming requests/sec and Outstanding requests. |
| Improved server performance | Updated in Windows Server 2019 | Performance improvements were made to handle more users per server. The limit per server varies and is based on the number of files and file churn. To determine the limit per server, users should be added to the server in phases. |
| On-demand file access | Added to Windows 10 version 1803 | Enables you to see and access all of your files. You control which files are stored on your PC and available offline. The rest of your files are always visible and don’t take up any space on your PC, but you need connectivity to the Work Folders file server to access them. |
| Azure AD Application Proxy support | Added to Windows 10 version 1703, Android, iOS | Remote users can securely access their files on the Work Folders server using Azure AD Application Proxy. |
| Faster change replication | Updated in Windows 10 and Windows Server 2016 | For Windows Server 2012 R2, when file changes are synced to the Work Folders server, clients are not notified of the change and wait up to 10 minutes to get the update. When using Windows Server 2016, the Work Folders server immediately notifies Windows 10 clients and the file changes are synced immediately. This capability is new in Windows Server 2016 and requires a Windows 10 client. If you’re using an older client or the Work Folders server is Windows Server 2012 R2, the client will continue to poll every 10 minutes for changes. |
| Integrated with Windows Information Protection (WIP) | Added to Windows 10 version 1607 | If an administrator deploys WIP, Work Folders can enforce data protection by encrypting the data on the PC. The encryption is using a key associated with the Enterprise ID, which can be remotely wiped by using a supported mobile device management package such as Microsoft Intune. |
Work Folders has the following software requirements for file servers and your network infrastructure:
A server running Windows Server 2019, Windows Server 2016, or Windows Server 2012 R2 for hosting sync shares with user files
A volume formatted with the NTFS file system for storing user files
To enforce password policies on Windows 7 PCs, you must use Group Policy password policies. You also have to exclude the Windows 7 PCs from Work Folders password policies (if you use them).
A server certificate for each file server that will host Work Folders. These certificates should be from a certification authority (CA) that is trusted by your users—ideally a public CA.
(Optional) An Active Directory Domain Services forest with the schema extensions in Windows Server 2012 R2 to support automatically referring PCs and devices to the correct file server when using multiple file servers.
To enable users to sync across the Internet, there are additional requirements:
The ability to make a server accessible from the Internet by creating publishing rules in your organization’s reverse proxy or network gateway
(Optional) A publicly registered domain name and the ability to create additional public DNS records for the domain
(Optional) Active Directory Federation Services (AD FS) infrastructure when using AD FS authentication
Work Folders has the following software requirements for client computers:
PCs and devices must be running one of the following operating systems:
Android 4.4 KitKat and later
iOS 10.2 and later
Windows 7 PCs must be running one of the following editions of Windows:
Windows 7 Professional
Windows 7 Ultimate
Windows 7 Enterprise
Windows 7 PCs must be joined to your organization’s domain (they can’t be joined to a workgroup).
Enough free space on a local, NTFS-formatted drive to store all the user’s files in Work Folders, plus an additional 6 GB of free space if Work Folders is located on the system drive, as it is by default. Work Folders uses the following location by default: %USERPROFILE%\Work Folders
However, users can change the location during setup (microSD cards and USB drives formatted with the NTFS file system are supported locations, though sync will stop if the drives are removed).
The maximum size for individual files is 10 GB by default. There is no per-user storage limit, although administrators can use the quotas functionality of File Server Resource Manager to implement quotas.
Work Folders doesn’t support rolling back the virtual machine state of client virtual machines. Instead perform backup and restore operations from inside the client virtual machine by using System Image Backup or another backup app.
Work Folders compared to other sync technologies
The following table discusses how various Microsoft sync technologies are positioned and when to use each.
| Work Folders | Offline Files | OneDrive for Business | OneDrive | |
|---|---|---|---|---|
| Technology summary | Syncs files that are stored on a file server with PCs and devices | Syncs files that are stored on a file server with PCs that have access to the corporate network (can be replaced by Work Folders) | Syncs files that are stored in Microsoft 365 or in SharePoint with PCs and devices inside or outside a corporate network, and provides document collaboration functionality | Syncs personal files that are stored in OneDrive with PCs, Mac computers, and devices |
| Intended to provide user access to work files | Yes | Yes | Yes | No |
| Cloud service | None | None | Microsoft 365 | Microsoft OneDrive |
| Internal network servers | File servers running Windows Server 2012 R2, Windows Server 2016, and Windows Server 2019 | File servers | SharePoint server (optional) | None |
| Supported clients | PCs, iOS, Android | PCs in a corporate network or connected through DirectAccess, VPNs, or other remote access technologies | PCs, iOS, Android, Windows Phone | PCs, Mac computers, Windows Phone, iOS, Android |
[!NOTE] In addition to the sync technologies listed in the previous table, Microsoft offers other replication technologies, including DFS Replication, which is designed for server-to-server replication, and BranchCache, which is designed as a branch office WAN acceleration technology. For more information, see DFS Namespaces and DFS Replication and BranchCache Overview
Server Manager information
Work Folders is part of the File and Storage Services role. You can install Work Folders by using the Add Roles and Features Wizard or the Install-WindowsFeature cmdlet. Both methods accomplish the following:
Adds the Work Folders page to File and Storage Services in Server Manager
Installs the Windows Sync Shares service, which is used by Windows Server to host sync shares
Installs the SyncShare Windows PowerShell module to manage Work Folders on the server
Interoperability with Windows Azure virtual machines
You can run this Windows Server role service on a virtual machine in Windows Azure. This scenario has been tested with Windows Server 2012 R2, Windows Server 2016, and Windows Server 2019.
To learn about how to get started with Windows Azure virtual machines, visit the Windows Azure web site.


