- Альтернативы FormatFactory для Linux
- Лучшие альтернативы Format Factory
- 1. Mencoder
- 2. Handbrake
- 3. FFmpeg
- Выводы
- How to Make the Switch From Windows to Linux
- Choose Your Distribution
- Create Your Installation Drive
- Install Linux on Your PC
- Get Acquainted With Linux and Install Some Apps
- How to Install and Uninstall Apps
- How to Update Apps
Альтернативы FormatFactory для Linux
Если вы раньше использовали Windows или даже сейчас используете двойную загрузку Windows с Linux, то наверное, вы пользовались программой для Windows — FormatFactory, для преобразования и конвертирования ваших аудио и видео файлов, а также для копирования DVD дисков и создания ISO образов.
FormatFactory — это отличный инструмент, но если вы используете больше Linux чем Windows, то здесь есть хорошие альтернативы Format Factory Linux, делающие ту же работу не хуже, а иногда даже лучше. В этой статье мы рассмотрим альтернативы FormatFactory для Linux.
Лучшие альтернативы Format Factory
Иногда случается, что вы скачали видео или фильм для просмотра его на мобильном телефоне, но на самом устройстве, к сожалению, оно не работает из-за не поддерживаемого формата. Это может показаться сложной ситуацией, когда вы используете Linux, вы подумаете, что нужно найти знакомого с компьютером под Windows и конвертировать видео там, но все намного проще. Все операции можно выполнить и под Linux. Для этого достаточно использовать один из перечисленных ниже инструментов.
1. Mencoder
Mencoder — это программа с открытым исходным кодом, для конвертирования видео. Поддерживается только работа в командной строке. Mencoder — это часть MPlayer, а это значит, что программа может обрабатывать все форматы поддерживаемые MPlayer. Возможно, это не самый лучший аналог format factory для linux, но дальше мы рассмотрим и другие программы, в том числе с графическим интерфейсом.
Mencoder позволяет кадрировать, масштабировать видео, поворачивать кадр горизонтально и вертикально, отражать, изменять контрастность, преобразовывать цветовое пространство, цветовой тон, насыщенность, выполнять гамма коррекцию, применять различные эффекты и фильтры для уменьшения видимости артефактов сжатия или просто выполнять конвертирование видео в linux. Также поддерживается автоматическая коррекция яркости, усиление контраста, резкость, размытие, шумоподавление.
Mencoder — это бесплатный инструмент для перекодирования видео, а также применения различных эффектов. Для программы есть графический бекэнд, который называется DivX Converter.
Для установки программы в Ubuntu выполните:
sudo apt install mencoder lame
Программа будет нормально работать, только если в системе есть библиотека libavcodec5x. Это часть libav или ffmpeg и она содержит большое количество кодеков для поддержки различных форматов:
sudo apt install libavcodec54
2. Handbrake
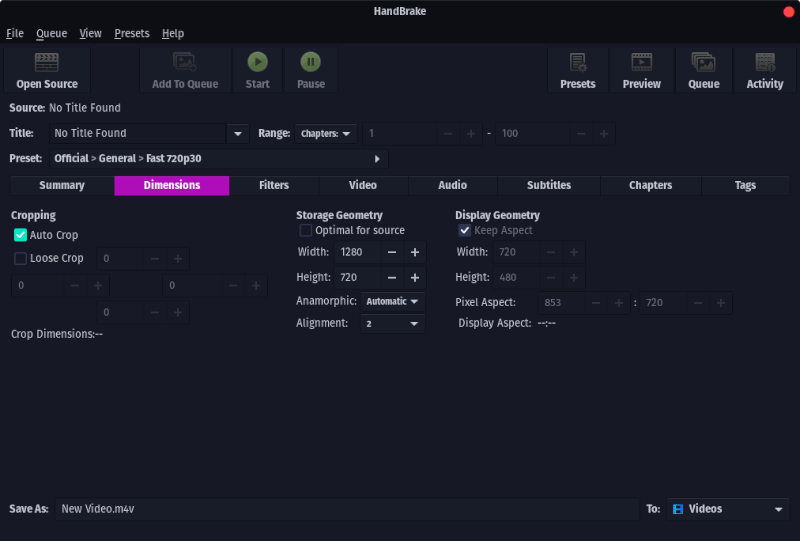
Handbrake — это лучший свободный, многопоточный инструмент с открытым исходным кодом и доступных на данный момент, если рассматривать другие аналоги format factory для linux, то этот самый лучший. Он был разработан в 2003 году Эриком Петитом. За это время программа сильно изменилась, теперь она поддерживает все основные платформы, включая Windows и Mac. Также официально поддерживается Ubuntu Linux, но также есть версии для других дистрибутивов. Handbrake использует такие сторонние библиотеки: x264, libav и faac.
Для Linux доступен как интерфейс командной строки, так и графический интерфейс. Установить Handbrake в Ubuntu очень просто, для этого нужно выполнить:
sudo apt install handbrake
А клиент командной строки:
sudo apt-get install handbrake-cli
Более подробно про использование программы вы можете узнать в статье Как пользоваться Handbrake.
3. FFmpeg
FFmpeg это комплексное кроссплатформенное решение для записи, конвертирования, сжатия аудио/видео, потокового аудио и видео файлов. Отличный аналог format factory для linux или даже windows. Проект FFmpeg основан в 2000 году Фабрисом Белларом и поддерживался до 2003 Майком Нидермаером с 2004.
Программа содержит в себе кодеки большинства известных форматов. FFmpeg может перекодировать, декодировать и изменять буквально все что было создано до сих пор. Проект разработан для Linux но может использоваться в других операционных системах, например, Windows.
У FFmpeg есть отличная утилита командной строки, а также графический интерфейс. Утилита командной строки довольно сложная в использовании для новых пользователей. Поэтому в этой инструкции рассмотрим графический интерфейс, а команды терминала вы без труда найдете в интернете.
Установить программу в Ubuntu можно из официальных репозиториев:
sudo apt-get install ffmpeg
Более подробно как пользоваться FFMpeg рассказано в этой статье.
Выводы
Как видите, в Linux есть тоже достаточно инструментов для того, чтобы выполнить конвертирование видео в linux. Мы рассмотрели только четыре аналога Format Factory Linux, но есть и другие подобные инструменты. Какие инструменты используете вы для конвертирования видео в Linux? Какие вам больше нравятся? Напишите в комментариях.
Источник
How to Make the Switch From Windows to Linux
If you’re sick of Windows 10 or don’t want to upgrade to Windows 11, you can install Linux instead. Here’s how to make the switch to an open-source operating system and install apps.

Microsoft is getting closer to replacing Windows 10 with the sleeker Windows 11, but if you’re sick of embedded advertisements, constant updates, data collection, software lock-ins, and rising hardware requirements, we don’t blame you. The good news is you have options.
If you’ve been thinking about making the jump to a different operating system, now is the perfect time. But you aren’t stuck with the Windows-macOS binary, and don’t have to settle for the browser-based Chrome OS. Instead, you can turn to the world of Linux.
Choose Your Distribution
Unlike Windows and macOS, there isn’t just one version of Linux. Instead, Linux is packaged into many different distributions, or «distros,» each with their own interface and set of features. One may use a Mac-like interface with a dock and an «app store,» while others may use a more minimalist interface and require installing apps from the command line.
Exploring the bevy of Linux distributions out there is a fun part of the hobby, but for your first installation, you will likely want something popular and beginner-friendly, so it’s easy to get help when you need it. That’s why I recommend starting with Linux Mint.
There are a lot of distributions that aim to mimic Windows in layout and functionality, like Zorin OS, but they’re on the smaller side, and you won’t have as big a community to tap as you learn your way around. Ubuntu, on the other hand, is arguably the most popular distro on desktop PCs, but it isn’t very Windows-like at all these days.
Linux Mint is a perfect in-between option: it’s designed for beginners, offers a familiar desktop environment, and it’s based on Ubuntu, so you can make use of the enormous Ubuntu/Mint community when you need help.
You’re free to check out other distros instead, but I’ll be using Mint for the purposes of this guide, and I recommend you do too. It’s not my personal distro of choice, but it’s great for new Windows migrants, and it’s easier to explore other distros once you’ve nailed down the basics on a beginner-friendly system.
Create Your Installation Drive
Head to Mint’s download page and choose the 64-bit «Cinnamon» version. Cinnamon is the desktop environment I recommend for former Windows users, though MATE is also pretty Windows-like, even though it’s a bit less modern. XFCE is ideal for old or low-powered PCs, thanks to its light resource usage. Mint’s download page provides a number of links depending on where you live. If you use BitTorrent, I recommend grabbing the torrent file, which will download much faster.
The installer will come as an ISO, or disc image file. To install it on your system, you’ll need to burn the file to a DVD or USB flash drive. We’re going to do the latter using a tool called Rufus. Install Rufus, open it up, and insert a flash drive that’s 2GB or larger. (If you have a fast USB 3.0 or 3.1 drive, all the better.) You should see it appear in the Device drop-down at the top of Rufus’ main window.
Next, click the Select button next to Disk or ISO image, and choose the Linux Mint ISO you just downloaded. Press the Start button, and if prompted to download new versions of Syslinux, click Yes. Note that this will erase your flash drive, so make sure there isn’t anything important on there before continuing. When it’s finished, you’ll see a success message and your flash drive will be named LINUX MINT.
Now it’s time to back up your data and reboot your computer. Buckle your seat belts because it’s time to install Linux.
Install Linux on Your PC
As your computer reboots, you should see a message telling you to press a certain key to access the Boot Menu (usually something like F12). If not, you’ll see a key to enter Setup (often Delete). Press one of those keys, and look for the option to boot from the inserted USB drive. (If you enter the full setup menu, it’ll be in a Boot settings menu somewhere, and you’ll have to exit the menu to reboot again when you’re done.)
You will then be greeted by GRUB, Linux Mint’s boot menu, where you can choose to boot into Linux Mint. If you run into any errors, you may need to Google around for a fix. I had to enable the nomodeset option for my graphics card, for example. Others may have to tweak or disable Secure Boot in the BIOS.
This installer is what we call a Live CD, where you can actually poke around and use the Linux Mint desktop before installing it. This will give you a chance to see if this particular distro appeals to you without it actually touching your system drive. Once you’re satisfied, double-click the Install Linux Mint icon and go through the wizard.
Be sure to check the box next to Install third-party software, since it contains useful drivers and codecs you almost certainly want. From here, you can wipe your hard drive entirely, erasing all traces of Windows and using Linux as your only operating system. (Make double sure you’ve backed up your data before doing this.)
Alternatively, you can divide your drive up into two partitions and dual boot Linux alongside Windows. This will allow you to reboot into one or the other whenever you want. If nothing else, it’s comforting to know you have that safety net during the transition before you remove Windows entirely.
Choose the relevant option from the Installation Type menu, and click Install Now. The process may take a little while, but when it’s done, you’ll get a success message. Click the Restart Now button to boot into Linux Mint and start getting acquainted with your new OS.
Get Acquainted With Linux and Install Some Apps
When you reboot, you’ll be dropped into the Linux Mint desktop once again—only this time, it’s installed on your PC. The basics are pretty familiar: click the button in the lower-left corner to see applications, manage windows from the bottom taskbar, and so on. There are, however, a few things in Linux that work differently than in Windows, with apps being the biggest.
In Linux, it’s less common to download apps from the web. Instead, each distro has its own repository—kind of like a free app store, with a directory of popular apps. You can install an app from the repositories in one of two ways: from a graphical software manager (again, which looks like an app store) or from the command line.
To open Linux Mint’s Software Manager, click the menu button in the lower-left corner and head to Administration > Software Manager (or just start typing «software manager,» like you would in Windows). From here, you can download plenty of free, open-source apps.
Some are Linux versions of their Windows counterparts, like Steam and Spotify, while others are open-source alternatives to common apps (Banshee is a music player similar to iTunes, Gimp is an image editor akin to Photoshop). You can browse here or search for apps using the bar at the top.
How to Install and Uninstall Apps
If you know what you’re looking for, it’s generally faster to install apps from the command line. And while it may seem intimidating at first, Linux relies on the command line for various tasks, so it might behoove you to get comfortable with it. To install an app—let’s say the open-source media player VLC—open a Terminal window and run:
Sudo apt update
sudo apt install vlc
Let’s break that down: «sudo» tells the system to run the command as root (or, as it might be called in Windows, as an administrator), «apt» is the name of Linux Mint’s package manager, and «update» ensures the list of available apps is up to date.
The second command, which includes «install vlc,» is self-explanatory. You should run «sudo apt update» before installing any app, and you can replace «vlc» with the name of any app you want to install. If you aren’t sure what the repository calls it, you can run:
sudo apt cache search vlc
To uninstall an app, just run:
sudo apt remove vlc
This will remove the app, but not your configuration files, so if you decide to reinstall it later, your settings will still be there.
If you want to remove configuration files too, you can instead run:
sudo apt purge vlc
How to Update Apps
You’ll also want to periodically update those apps, so you have the latest versions. You can do this, again, in two ways: from the graphical tool or from the command line.
For the graphical tool, click the shield icon in the lower-right corner to open the Update Manager app. You can then click the Install Updates button to update all your software.
Alternatively, you can open a Terminal and run two commands:
sudo apt update
sudo apt upgrade
Again, the «update» command checks for new versions of your software, and the «upgrade» command actually upgrades all your apps. You’ll want to run these two together, just like you do for installing new apps.
Those are the most crucial things to know right now, but take some time to browse around Mint’s interface and its settings to see what it has to offer. The Welcome window that appears at startup can be a big help—its First Steps area will show you how to choose different desktop layouts, install multimedia codecs you might want, and install necessary drivers for your hardware.
You’ll get the hang of the basics pretty quickly, but the Mint and Ubuntu forums are always there to help if you get stuck. Just be sure to search around, since there’s a good chance someone before you has had the same question.
Like What You’re Reading?
Sign up for Tips & Tricks newsletter for expert advice to get the most out of your technology.
This newsletter may contain advertising, deals, or affiliate links. Subscribing to a newsletter indicates your consent to our Terms of Use and Privacy Policy. You may unsubscribe from the newsletters at any time.
Your subscription has been confirmed. Keep an eye on your inbox!
Источник


