- «The Windows Installer service could not be accessed» when you try to install Office
- Symptoms
- Cause
- Resolution
- Method 1: Use the Msconfig tool to confirm that the installer service is running
- Method 2: Re-register Windows Installer
- Method 3: Try the methods that are listed in Microsoft Knowledge Base Article 319624
- Method 4: Reinstall Windows Installer
- More Information
- How to: Add Installers to Your Service Application
- To add installers to your service application
«The Windows Installer service could not be accessed» when you try to install Office
Office 365 ProPlus is being renamed to Microsoft 365 Apps for enterprise. For more information about this change, read this blog post.
Symptoms
When you try to install Microsoft Office, you may receive an error message that is similar to the following:
«The Windows Installer Service could not be accessed.»
Cause
This problem may occur if the Windows Installer files are damaged or missing.
Resolution
To resolve this problem, use one of the following methods.
Method 1: Use the Msconfig tool to confirm that the installer service is running
Click Start, and then click Run. (The screen shot for this step is listed below).

In the Open box, type msconfig, and then click OK. (The screen shot for this step is listed below). 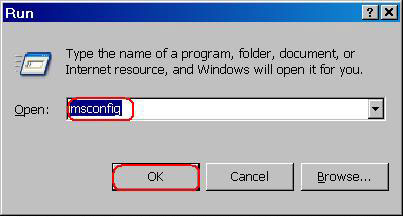
On the Services tab, click to select the check box that is next to Windows Installer. (The screen shot for this step is listed below). 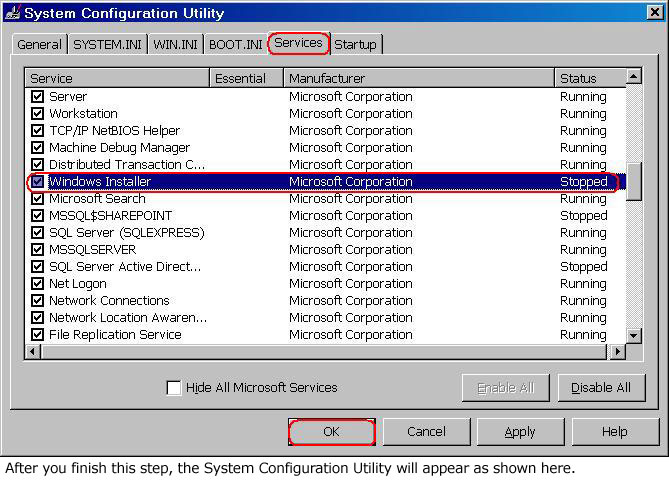
Click OK, and then click RestartВ to restart the computer. (The screen shot for this step is listed below). 
Install Office again. When you are prompted to enter the product key, type the product key, and then click Next.
Office will be installed, and you will not be prompted for the product key when the programs start.
Method 2: Re-register Windows Installer
This section, method, or task contains steps that tell you how to modify the registry. However, serious problems might occur if you modify the registry incorrectly. Therefore, make sure that you follow these steps carefully. For added protection, back up the registry before you modify it. Then, you can restore the registry if a problem occurs. For more information about how to back up and restore the registry, see How to back up and restore the registry in Windows.
Note Because there are several versions of Microsoft Windows, the following steps may be different on your computer. If they are, see your product documentation to complete these steps.
To re-register Windows Installer, follow these steps.
Note If you cannot complete the following steps, go to method 3.
Click Start, and then click Search. (The screen shot for this step is listed below).

Click All files and folders. (The screen shot for this step is listed below).

In the File name box, type Msiexec.exe, and then click Search. (The screen shot for this step is listed below).

After the search is complete, make a note of the location of the Msiexec.exe file. The location of the file should be similar to the following example: C:\Windows\System32 (The screen shot for this step is listed below).

On the File menu, click Close to close the SearchВ dialog box. (The screen shot for this step is listed below).

Click Start, and then click Run. (The screen shot for this step is listed below).

In the Open box, type regedit, and then click OK. (The screen shot for this step is listed below).

Locate and then click the following registry key: HKEY_LOCAL_MACHINE\SYSTEM\CurrentControlSet\Services\MSIServer(The screen shot for this step is listed below).

In the right pane of the Registry Editor window, double-click ImagePath. (The screen shot for this step is listed below).

In the Edit String dialog box that appears, make sure that the string in the Value data box contains the correct path for the Msiexec.exe file that you determined in step 4.
Note The following is an example of the correct path, where drive is the drive where Windows is installed:
drive:\Windows\System32\msiexec.exe /V
If the Value data box does not contain the correct path, make changes to correct the path, and then click OK to close the Edit String dialog box. (The screen shot for this step is listed below).

On the File menu, click ExitВ to quit Registry Editor. (The screen shot for this step is listed below).

Start your computer in Safe mode, and then register the Msiexec.exe file. To do this, follow these steps:
Shut down your computer, and then restart your computer.
Restart your computer and press the F8 key on your keyboard. On a computer that is configured for booting to multiple operating systems, press the F8 key when you see the Boot menu.
Use the ARROW keys to select Safe Mode, and then press ENTER.
If the Boot menu appears again, and the words «Safe Mode» appear in blue at the bottom, select the installation that you want to start, and then press ENTER.
Log on to the computer.
Click Start, click Run, type msiexec /regserver in the Open box, and then click OK. (The screen shot for this step is listed below).

Shut down your computer, and then restart your computer normally.
If you still cannot install Microsoft Office successfully and you receive an error message that is similar to the message listed in the «Symptoms» section, go to Method 3.
Method 3: Try the methods that are listed in Microsoft Knowledge Base Article 319624
Try the methods that are listed in the following Microsoft Knowledge Base article:
319624 «Windows Installer Service could not be accessed» error message when installing application
Method 4: Reinstall Windows Installer
Note This method applies to Microsoft Windows 95, Microsoft Windows 98, Microsoft Windows Millennium Edition (Me), and Microsoft Windows NT 4.0. For Microsoft Windows 2000, Microsoft Windows XP, and Microsoft Windows Server 2003, either reapply the latest service pack or repair the operating system.
To reinstall the Windows Installer, follow these steps.
Click Start, and then click Run. (The screen shot for this step is listed below).
In the Open box, type cmd, and then click OK. (The screen shot for this step is listed below). 
At the command prompt, type the following lines. Press ENTER after you type each line.
(The screen shot for this step is listed below).

ren msi.dll msi.old
(The screen shot for this step is listed below).

ren msiexec.exe msiexec.old
(The screen shot for this step is listed below).

ren msihnd.dll msihnd.old
(The screen shot for this step is listed below).

At the command prompt, type exit, and then press ENTER. (The screen shot for this step is listed below).

Restart your computer.
Update the Windows Installer files to the latest version. To do so, visit one of the following Microsoft Web sites, and then download and install Windows Installer 2.0.
Note Windows Installer 2.0 is included with Microsoft Windows XP. You do not have to perform this step if you are using Windows XP.
After the installation of the Windows Installer is complete, shut down and restart your computer normally before you install Microsoft Office.
More Information
For more information about how to restart Windows in Safe mode, see Advanced startup options (including safe mode).
How to: Add Installers to Your Service Application
Visual Studio ships installation components that can install resources associated with your service applications. Installation components register an individual service on the system to which it is being installed and let the Services Control Manager know that the service exists. When you work with a service application, you can select a link in the Properties window to automatically add the appropriate installers to your project.
Property values for your service are copied from the service class to the installer class. If you update the property values on the service class, they are not automatically updated in the installer.
When you add an installer to your project, a new class (which, by default, is named ProjectInstaller ) is created in the project, and instances of the appropriate installation components are created within it. This class acts as a central point for all of the installation components your project needs. For example, if you add a second service to your application and click the Add Installer link, a second installer class is not created; instead, the necessary additional installation component for the second service is added to the existing class.
You do not need to do any special coding within the installers to make your services install correctly. However, you may occasionally need to modify the contents of the installers if you need to add special functionality to the installation process.
The dialog boxes and menu commands you see might differ from those described in Help depending on your active settings or edition. To change your settings, choose Import and Export Settings on the Tools menu. For more information, see Personalize the Visual Studio IDE.
To add installers to your service application
In Solution Explorer, access Design view for the service for which you want to add an installation component.
Click the background of the designer to select the service itself, rather than any of its contents.
With the designer in focus, right-click, and then click Add Installer.
A new class, ProjectInstaller , and two installation components, ServiceProcessInstaller and ServiceInstaller, are added to your project, and property values for the service are copied to the components.
Click the ServiceInstaller component and verify that the value of the ServiceName property is set to the same value as the ServiceName property on the service itself.
To determine how your service will be started, click the ServiceInstaller component and set the StartType property to the appropriate value.
| Value | Result |
|---|---|
| Manual | The service must be manually started after installation. For more information, see How to: Start Services. |
| Automatic | The service will start by itself whenever the computer reboots. |
| Disabled | The service cannot be started. |
To determine the security context in which your service will run, click the ServiceProcessInstaller component and set the appropriate property values. For more information, see How to: Specify the Security Context for Services.
Override any methods for which you need to perform custom processing.
Perform steps 1 through 7 for each additional service in your project.
For each additional service in your project, you must add an additional ServiceInstaller component to the project’s ProjectInstaller class. The ServiceProcessInstaller component added in step three works with all of the individual service installers in the project.


