- The usable memory may be less than the installed memory on Windows 7-based computers
- Symptoms
- Cause
- What To Try
- Check the system configuration settings
- Update the system BIOS
- Check BIOS settings
- Check possible issues with the physical RAM
- More Information
- Memory status in Windows 7
- Windows 7 memory reporting
- Physical memory limits in Windows 7
- Viewing and Editing Memory in WinDbg
- Debugger Command Window
- Opening a Memory Window
- Using a Memory Window
- Memory Options Dialog Box
- Additional Information
The usable memory may be less than the installed memory on Windows 7-based computers
Symptoms
On a computer that is running Windows 7, the usable memory (RAM) may be less than the installed memory.
For example, a 32-bit version of Windows 7 may report that there is only 3.5 GB of usable system memory on a computer that has 4 GB of memory installed.
Or, a 64-bit version of Windows 7 may report that there is only 7.1 GB of usable system memory on a computer that has 8 GB of memory installed.
Note The amount of usable memory in the examples are not exact amounts. Usable memory is a calculated amount of the total physical memory minus «hardware reserved» memory.
To view the installed memory and the usable memory in Windows 7, follow these steps:
Click Start , right-click Computer, and then click Properties.
View the Installed memory (RAM) value under System. For example, if it displays 4.00 GB (3.5 GB usable), this means that you have 3.5 GB of usable memory out of 4 GB of installed memory.
Cause
This is expected behavior on computers that are running Windows 7. The reduction in available system memory depends on the configuration of the following:
The devices that are installed in the computer and the memory that is reserved by those devices
The ability of the motherboard to handle memory
The System BIOS version and settings
The version of Windows 7 that is installed (For example, Windows 7 Starter Edition only supports 2 GB of installed memory.)
Other system settings
For example, if you have a video card that has 256 MB of on-board memory, that memory must be mapped within the first 4 GB of address space. If 4 GB of system memory is already installed, part of that address space must be reserved by the graphics memory mapping. Graphics memory mapping overwrites a part of the system memory. These conditions reduce the total amount of system memory that is available to the operating system.
For more information about how to determine how memory is used on your computer, see the «Physical Memory Allocation in Windows 7» topic in the «More Information» section.
What To Try
There are several additional situations that could cause the usable RAM to be less than expected. These issues and possible solutions are listed here:
Check the system configuration settings
This problem may occur because the Maximum memory option is selected incorrectly. To fix this, follow these steps:
Click Start, type msconfig in the Search programs and files box, and then click msconfig in the Programs list.
In the System Configuration window, click Advanced options on the Boot tab.
Click to clear the Maximum memory check box, and then click OK.
Restart the computer.
Update the system BIOS
The problem may occur because the system BIOS is outdated. If you have an older computer, the system may be unable to access all the installed RAM. In this case, you have to update the system BIOS to the latest version.
To update the BIOS on your computer, visit the Web site of your computer manufacturer to download the BIOS update. Or, contact your computer manufacturer for help.
Check BIOS settings
The problem may occur because some BIOS settings are incorrect.
Enable the memory remapping feature
Check the BIOS settings to see whether the memory remapping feature is enabled. Memory remapping gives Windows access to more memory. You can enable the memory remapping feature in the BIOS by booting to the system setup. See the User’s Guide for your computer for instructions on how to boot to system setup on your computer. The name for the memory remapping feature may be different for different hardware vendors. This can be listed as memory remapping, memory extension, or something similar. Be aware that your computer may not support the memory remapping feature.
Change the AGP video aperture size in the BIOS settings
Check the BIOS settings to see how much memory that you have allocated to AGP video aperture. This is the memory that the system is sharing with the video card that is used for texture mapping and rendering. This memory would not be used by the system, because it is locked by the video card. You can adjust the AGP video aperture size in the BIOS. Standard settings are «32MB,»»64MB,»»128MB,»and «Auto.» After you change this setting in the BIOS, restart your computer, and then check the usable memory. You can test each setting to see which offers the best results.
Check possible issues with the physical RAM
The problem may occur because there are issues with the physical RAM installed.
Check whether you have bad memory modules
To check whether you are experiencing this issue, turn off the computer, unplug the computer, and then swap the order of the memory.
Make sure that the memory arrangement is correct
Refer to the User’s Guide of the computer to determine in what order the memory modules should be inserted into the memory slots. The system may require you to use specific slots when you are not using all the available slots. For example, the computer has four slots available. But you may have to use slot 1 and slot 3 if you want to use only two memory modules.
Check whether memory standoff cards are used
If you use a memory standoff card to hold multiple memory modules on the computer, the system may require specific configurations for this scenario. Therefore, the usable memory may be less than expected.
More Information
The following sections offer additional information about memory allocation as reported in the Resource Monitor, describe the terminology used, and offer additional information on Memory reporting and memory limitations in Windows 7.
The following table shows how the Resource Monitor categorizes the memory currently installed on a Windows 7-based computer.
Memory that is reserved for use by the BIOS and some drivers for other peripherals
Memory that is used by process, drivers, or the operating system
Memory whose contents must go to disk before it can be used for another purpose
Memory that contains cached data and code that is not actively in use
Memory that does not contain any valuable data and that will be used first when processes, drivers, or the operating system need more memory
Note To view how the installed memory is allocated in Windows 7, follow these steps:
Click Start, type resource monitor in the Search programs and files box, and then click Resource Monitor in the Programs list.
Click the Memory tab, and then view the Physical Memory section at the bottom of the page.
Memory status in Windows 7
The following table defines the Resource Monitors current reported status of the installed memory on a Windows 7-based computer.
Amount of memory (including standby and free memory) that is immediately available for use by processes, drivers, and the operating system
Amount of memory (including standby and modified memory) that contains cached data and code for rapid access by processes, drivers, and the operating system
Amount of physical memory that is available to the operating system, device drivers, and processes
Amount of physical memory installed in the computer
Windows 7 memory reporting
Windows 7 reports how much physical memory is currently installed on your computer. Windows NT-based operating systems before Windows Vista Service P1 report how much memory is available to the operating system. The available memory reported in these earlier versions of Windows does not include hardware reserved memory. This is a reporting change only.
You will see this reporting change in Windows Vista SP1 and later versions of Windows in the following locations:
The RAM value in Welcome Center
The Memory value at the bottom of the My Computer windows
The Memory value in the System Properties windows
The Total amount of system memory value of the View and Print Details page of the Performance Information and Tools item in Control Panel
Additionally, the System Information tool (Msinfo32.exe) displays the following entries on the System Summary page:
Installed Physical Memory (RAM)
Total Physical Memory
Available Physical Memory
The reporting in the following diagnostic tool has not changed:
The Performance tab in Task Manager
When the physical RAM that is installed on a computer equals the address space that is supported by the chipset, the total system memory that is available to the operating system is always less than the physical RAM that is installed.
For example, consider a computer that has an Intel 975X chipset that supports 8 GB of address space. If you install 8 GB of RAM, the system memory that is available to the operating system will be reduced by the PCI configuration requirements. In this example, PCI configuration requirements reduce the memory that is available to the operating system by an amount that is between approximately 200 MB and approximately 1 GB. The reduction depends on the configuration.
Physical memory limits in Windows 7
The following table specifies the limits on physical memory for the different versions of Windows 7.
Viewing and Editing Memory in WinDbg
In WinDbg, you can view and edit memory by entering commands or by using a Memory window.
Debugger Command Window
You can view memory by entering one of the Display Memory commands in the Debugger Command window. You can edit memory by entering one of the Enter Values commands in the Debugger Command window. For more information, see Accessing Memory by Virtual Address and Accessing Memory by Physical Address.
Opening a Memory Window
To open a Memory window, choose Memory from the View menu. (You can also press ALT+5 or select the Memory button ( ) on the toolbar. ALT+SHIFT+5 closes the active Memory window.)
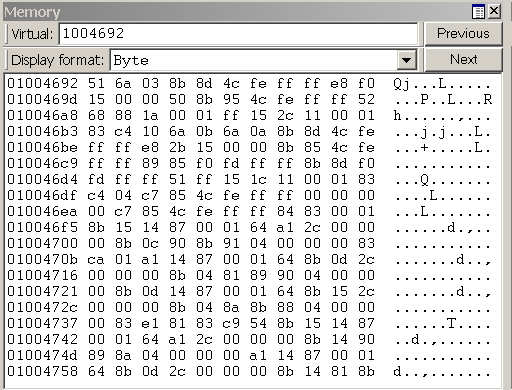
The following screen shot shows an example of a Memory window.
Using a Memory Window
The Memory window displays data in several columns. The column on the left side of the window shows the beginning address of each line. The remaining columns display the requested information, from left to right. If you select Bytes in the Display format menu, the ASCII characters that correspond to these bytes are displayed in the right side of the window.
NoteВ В By default, the Memory window displays virtual memory. This type of memory is the only type of memory that is available in user mode. In kernel mode, you can use the Memory Options dialog box to display physical memory and other data spaces. The Memory Options dialog box is described later in this topic.
In the Memory window, you can do the following:
To write to memory, select inside the Memory window and type new data. You can edit only hexadecimal data—you cannot directly edit ASCII and Unicode characters. Changes take effect as soon as you type new information.
To see other sections of memory, use the Previous and Next buttons on the Memory window toolbar, or press the PAGE UP or PAGE DOWN keys. These buttons and keys display the immediately preceding or following sections of memory. If you request an invalid page, an error message appears.
To navigate within the window, use the RIGHT ARROW, LEFT ARROW, UP ARROW, and DOWN ARROW keys. If you use these keys to move off of the page, a new page is displayed. Before you use these keys, you should resize the Memory window so that it does not have scroll bars. This sizing enables you to distinguish between the actual page edge and the window cutoff.
To change the memory location that is being viewed, enter a new address into the address box at the top of the Memory window. Note that the Memory window refreshes its display while you enter an address, so you could get error messages before you have completed typing the address. NoteВ В The address that you enter into the box is interpreted in the current radix. If the current radix is not 16, you should prefix a hexadecimal address with 0x. To change the default radix, use the n (Set Number Base) command in the Debugger Command window. The display within the Memory window itself is not affected by the current radix.
To change the data type that the window uses to display memory, use the Display format menu in the Memory window toolbar. Supported data types include short words, double words, and quad-words; short, long, and quad integers and unsigned integers; 10-byte, 16-byte, 32-byte, and 64-byte real numbers; ASCII characters; Unicode characters; and hexadecimal bytes. The display of hexadecimal bytes includes ASCII characters as well.
The Memory window has a toolbar that contains two buttons, a menu, and a box and has a shortcut menu with additional commands. To access the menu, select and hold (or right-click) the title bar or select the icon near the upper-right corner of the window (). The toolbar and shortcut menu contain the following choices:
(Toolbar only) The address box enables you to specify a new address or offset. The exact meaning of this box depends on the memory type you are viewing. For example, if you are viewing virtual memory, the box enables you to specify a new virtual address or offset.
(Toolbar only) Display format enables you to select a new display format.
(Toolbar and menu) Previous (on the toolbar) and Previous page (on the shortcut menu) cause the previous section of memory to be displayed.
(Toolbar and menu) Next (on the toolbar) and Next page (on the shortcut menu) cause the next section of memory to be displayed.
(Menu only) Toolbar turns the toolbar on and off.
(Menu only) Auto-fit columns ensures that the number of columns displayed in the Memory window fits the width of the Memory window.
(Menu only) Dock or Undock causes the window to enter or leave the docked state.
(Menu only) Move to new dock closes the Memory window and opens it in a new dock.
(Menu only) Set as tab-dock target for window type sets the selected Memory window as the tab-dock target for other Memory windows. All Memory windows that are opened after one is chosen as the tab-dock target are automatically grouped with that window in a tabbed collection.
(Menu only) Always floating causes the window to remain undocked even if it is dragged to a docking location.
(Menu only) Move with frame causes the window to move when the WinDbg frame is moved, even if the window is undocked. For more information about docked, tabbed, and floating windows, see Positioning the Windows.
(Menu only) Properties opens the Memory Options dialog box, which is described in the following section within this topic.
(Menu only) Help opens this topic in the Debugging Tools for Windows documentation.
(Menu only) Close closes this window.
Memory Options Dialog Box
When you select Properties on the shortcut menu, the Memory Options dialog box appears.
In kernel mode, there are six memory types available as tabs in this dialog box: Virtual Memory, Physical Memory, Bus Data, Control Data, I/O (I/O port information), and MSR (model-specific register information). Select the tab that corresponds to the information that you want to access.
In user mode, only the Virtual Memory tab is available.
Each tab enables you to specify the memory that you want to display:
In the Virtual Memory tab, in the Offset box, specify the address or offset of the beginning of the memory range that you want to view.
In the Physical Memory tab, in the Offset box, specify the physical address of the beginning of the memory range that you want to view. The Memory window can display only described, cacheable physical memory. If you want to display physical memory that has other attributes, use the d* (Display Memory) command or the !d\* extension.
In the Bus Data tab, in the Bus Data Type menu, specify the bus data type. Then, use the Bus number, Slot number, and Offset boxes to specify the bus data that you want to view.
In the Control Data tab, use the Processor and Offset text boxes to specify the control data that you want to view.
In the I/O tab, in the Interface Type menu, specify the I/O interface type. Use the Bus number, Address space, and Offset boxes to specify the data that you want to view.
In the MSR tab, in the MSR box, specify the model-specific register that you want to view.
Each tab also includes a Display format menu. This menu has the same effect as the Display format menu in the Memory window.
Select OK in the Memory Options dialog box to cause your changes to take effect.
Additional Information
For more information about memory manipulation and a description of other memory-related commands, see Reading and Writing Memory.


