- Create a Windows Forms app in Visual Studio with C#
- Create a project
- Create the application
- Add a button to the form
- Add a label to the form
- Add code to the form
- Run the application
- Next steps
- C# Windows Forms tutorial
- Windows Forms
- Building Windows Forms applications
- Windows Forms simple example
- Windows Forms tooltips
- Windows Forms Quit button
- Windows Forms Label
- Windows Forms CheckBox
- Windows Forms simple menu
- Windows Forms painting rectangles
Create a Windows Forms app in Visual Studio with C#
In this short introduction to the Visual Studio integrated development environment (IDE), you’ll create a simple C# application that has a Windows-based user interface (UI).
If you haven’t already installed Visual Studio, go to the Visual Studio downloads page to install it for free.
If you haven’t already installed Visual Studio, go to the Visual Studio downloads page to install it for free.
Some of the screenshots in this tutorial use the dark theme. If you aren’t using the dark theme but would like to, see the Personalize the Visual Studio IDE and Editor page to learn how.
Create a project
First, you’ll create a C# application project. The project type comes with all the template files you’ll need, before you’ve even added anything.
Open Visual Studio 2017.
From the top menu bar, choose File > New > Project.
In the New Project dialog box in the left pane, expand Visual C#, and then choose Windows Desktop. In the middle pane, choose Windows Forms App (.NET Framework). Then name the file HelloWorld .
If you don’t see the Windows Forms App (.NET Framework) project template, cancel out of the New Project dialog box and from the top menu bar, choose Tools > Get Tools and Features. The Visual Studio Installer launches. Choose the .NET desktop development workload, then choose Modify.

Open Visual Studio 2019.
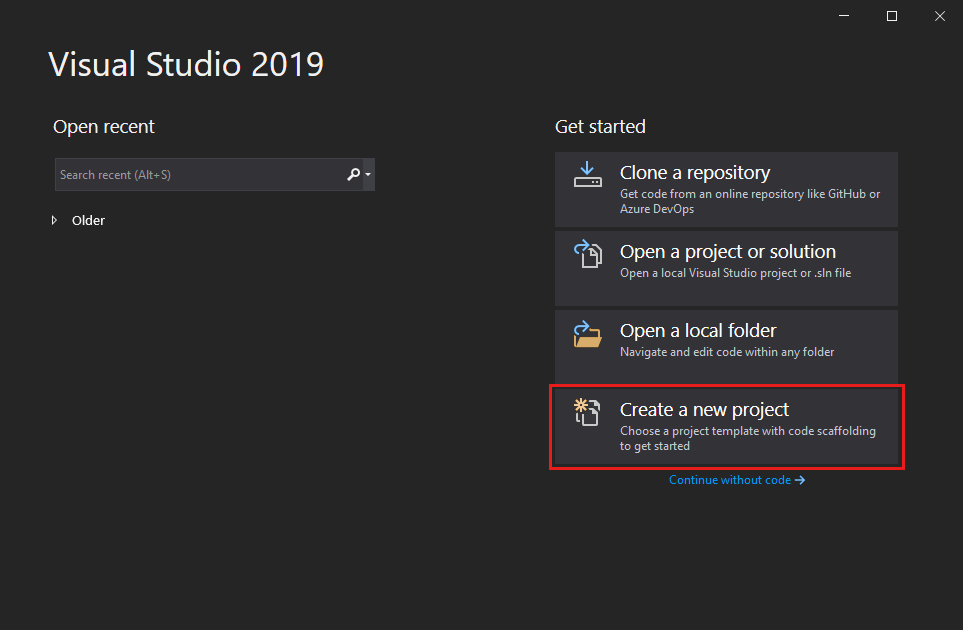
On the start window, choose Create a new project.
On the Create a new project window, choose the Windows Forms App (.NET Framework) template for C#.
(If you prefer, you can refine your search to quickly get to the template you want. For example, enter or type Windows Forms App in the search box. Next, choose C# from the Language list, and then choose Windows from the Platform list.)

If you do not see the Windows Forms App (.NET Framework) template, you can install it from the Create a new project window. In the Not finding what you’re looking for? message, choose the Install more tools and features link.

Next, in the Visual Studio Installer, choose the Choose the .NET desktop development workload.
After that, choose the Modify button in the Visual Studio Installer. You might be prompted to save your work; if so, do so. Next, choose Continue to install the workload. Then, return to step 2 in this «Create a project» procedure.
In the Configure your new project window, type or enter HelloWorld in the Project name box. Then, choose Create.

Visual Studio opens your new project.
Create the application
After you select your C# project template and name your file, Visual Studio opens a form for you. A form is a Windows user interface. We’ll create a «Hello World» application by adding controls to the form, and then we’ll run the app.
Add a button to the form
Choose Toolbox to open the Toolbox fly-out window.

(If you don’t see the Toolbox fly-out option, you can open it from the menu bar. To do so, View > Toolbox. Or, press Ctrl+Alt+X.)
Choose the Pin icon to dock the Toolbox window.

Choose the Button control and then drag it onto the form.
In the Properties window, locate Text, change the name from Button1 to Click this , and then press Enter.
(If you don’t see the Properties window, you can open it from the menu bar. To do so, choose View > Properties Window. Or, press F4.)
In the Design section of the Properties window, change the name from Button1 to btnClickThis , and then press Enter.
If you’ve alphabetized the list in the Properties window, Button1 appears in the (DataBindings) section, instead.
Add a label to the form
Now that we’ve added a button control to create an action, let’s add a label control to send text to.
Select the Label control from the Toolbox window, and then drag it onto the form and drop it beneath the Click this button.
In either the Design section or the (DataBindings) section of the Properties window, change the name of Label1 to lblHelloWorld , and then press Enter.
Add code to the form
In the Form1.cs [Design] window, double-click the Click this button to open the Form1.cs window.
(Alternatively, you can expand Form1.cs in Solution Explorer, and then choose Form1.)
In the Form1.cs window, after the private void line, type or enter lblHelloWorld.Text = «Hello World!»; as shown in the following screenshot:

Run the application
Choose the Start button to run the application.

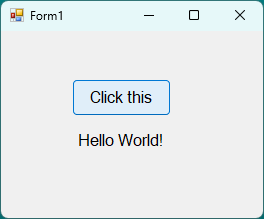
Several things will happen. In the Visual Studio IDE, the Diagnostics Tools window will open, and an Output window will open, too. But outside of the IDE, a Form1 dialog box appears. It will include your Click this button and text that says Label1.
Choose the Click this button in the Form1 dialog box. Notice that the Label1 text changes to Hello World!.
Close the Form1 dialog box to stop running the app.
Next steps
To learn more, continue with the following tutorial:
C# Windows Forms tutorial
last modified November 3, 2020
C# Windows Forms tutorial teaches the basics of GUI programming with C# & Windows Forms. In our tutorial, we will build our applications manually; we will not use Form designers.
Windows Forms
Windows Forms, sometimes abbreviated as Winforms, is a graphical user interface application programming interface (API) included as a part of Microsoft’s .NET Framework.
Windows Forms allows to create graphically rich applications that are easy to deploy and update. The applications are more secure than traditional Windows-based applications.
In December 2018, Microsoft announced releasing Windows Forms as open source project on GitHub. It is released under the MIT License. With this release, Windows Forms has become available on the .NET Core framework. Windows Forms is available on Windows only.
Building Windows Forms applications
We will be using .NET Core to create Windows Forms applications.
A new template for the Windows Forms application is created with the dotnet new winforms command.
The application is run with the dotnet run command.
Windows Forms simple example
In the first example, we display a simple window on the screen.
We create the template of the Windows Forms application. The command also generates Form1.Designer.cs and Form1.cs files. We will not use them and they can be safely deleted.
The example displays a main window on the screen. The window is centered.
We use the Windows Forms and Drawing namespaces.
In Windows Forms, any window or a dialog is a Form. This control is a basic container whose purpose is to display other child controls. The MyForm inherits from a form. This way it becomes a form itself.
As a good programming practice, the form initialization is delegated to the InitComponents method.
Text and Size are properties of a form. Changing these properties, we modify our form control. The first line displays text «First application» in the titlebar of the form control. The second line sets the size of the client area of the form. The CenterToScreen method centers the form on the screen.
The Main method is an entry point to the application. Windows Forms applications must declare the [STAThread] attribute; otherwise, the controls might not work correctly. This tells to use single-threaded apartment model instead of multi-threaded.
With the SetHighDpiMode method, we ensure that our application looks good on any display resolution.
The EnableVisualStyles method enables visual styles. The application will use the built-in Windows theming to style controls instead of the classic Windows look and feel.
The Run method starts the application. It begins running a standard application message loop on the current thread, and makes the specified form visible.
Windows Forms tooltips
A tooltip is a small rectangular pop-up window that displays a brief description of a control’s purpose when the user rests the pointer on the control.
The code example creates a tooltip for two controls: one Button control and the Form control.
We place two buttons on the FlowLayoutPanel . It dynamically lays out its contents horizontally or vertically. (The default dimension is vertical.)
We create a new tooltip. With the SetToolTip , we assign the tooltip to the FlowLayoutPanel control.
The FlowLayoutPanel fills the entire area of the form control.
A new Button control is created. We set its text with the Text property and size it automatically to fit the text size.
A tooltip is added to the first Button control.
The buttons are added to the flow panel and the flow panel is added to the form.
Windows Forms Quit button
Button control represents a Windows button control. It can be clicked by using the mouse, Enter key, or Spacebar if the button has focus.
The example creates a Quit button control; the application terminates when we click on the button.
The button has some margin around its borders. We add some space to the left and above the button control.
We plug an event handler to the Click event. When we click on the button, the application is closed with the Close method. Since we do not work with the sender object and event arguments, we use discards.
Windows Forms Label
Label is a simple control for displaying text or images. It does not receive focus.
The example displays lyrics using the Label control.
We use this font to display the text.
The label control is created. It is located at the x=10, y=10 coordinate on the form.
The main window is automatically sized to fit the lyrics.
Windows Forms CheckBox
CheckBox is a control that has two states: on and off. It is a box with a label or an image. If the CheckBox is checked, it is represented by a tick in a box.
The code example shows or hides the title of the window depending on its state.
When the application starts, we show the title. And we set the CheckBox control to checked state.
When we click on the CheckBox control, the CheckedChanged event is triggered.
Depending on the value of the Checked property, we toggle the title of the window.
Windows Forms simple menu
A menubar is a collection of menus. A menu groups commands of an application.
In our example, we have a menubar and one menu. Inside a menu there is one menu item. If we select the menu item, application is closed.
The application can be closed also by using the Ctrl + X shorcut or by pressing Alt , F , E keys.
MenuStrip creates a menu system for our form. We add ToolStripMenuItem objects to the MenuStrip that represent the individual menu commands in the menu structure. Each ToolStripMenuItem can be a command for your application or a parent menu for other submenu items.
Here we create a menu with the ToolStripMenuItem .
This line creates the exit menu item.
We provide a shortcut for the exit menu item.
The exit menu item is added to the drop down items of the menu object.
Here we add the menu object into the menu strip.
The MenuStrip is plugged into the form. In other words, the menubar is added to the main window of the application.
Windows Forms painting rectangles
Painting is done with the painting API provided by the Windows Forms. The painting is done within a method, that we plug into the Paint event.
We draw nine rectangles with nine different colours.
Paint events are delivered to the OnPaint method.
This is the signature of the OnPaint method.
In order to paint on the form, we must get the Graphics object. Painting on a form is actually calling various methods of the Graphics object.
The FillRectagle method fills a specified rectangle with a brush. A brush can be a colour or a pattern. There are some predefined colours available. We can get them from the Brushes enumeration. The last four values are the x, y values of the topleft point and the width and height of the rectangle.
In this tutorial, we have created simple GUI applications in C# and Windows Forms.


