- Use the System File Checker tool to repair missing or corrupted system files
- Run the System File Checker tool (SFC.exe)
- More Information
- Отсутствует или содержит ошибки файл \windows\system32\ winload.efi в Windows 10
- Включите режим совместимости CSM и отключите Secure Boot
- Автоматическое восстановление загрузчика Windows
- Отключите функцию защиты ELAM
- Выполните проверку дисков на ошибки и целостность системных файлов
- Восстановление BCD загрузчика и файла winload.efi для UEFI системы
- Пересоздание загрузочных записей в хранилище BCD с помощью bootrec и bcdedit
Use the System File Checker tool to repair missing or corrupted system files
If some Windows functions aren’t working or Windows crashes, use the System File Checker to scan Windows and restore your files.
Though the steps below might look complicated at first glance, just follow them in order, step-by-step, and we’ll try to get you back on track.
Run the System File Checker tool (SFC.exe)
To do this, follow these steps:
Open an elevated command prompt. To do this, do the following as your appropriate:
If you are running Windows 10, Windows 8.1 or Windows 8, first run the inbox Deployment Image Servicing and Management (DISM) tool prior to running the System File Checker. (If you are running Windows 7 or Windows Vista, skip to Step 3.)
Type the following command, and then press Enter. It may take several minutes for the command operation to be completed.
DISM.exe /Online /Cleanup-image /Restorehealth
Important: When you run this command, DISM uses Windows Update to provide the files that are required to fix corruptions. However, if your Windows Update client is already broken, use a running Windows installation as the repair source, or use a Windows side-by-side folder from a network share or from a removable media, such as the Windows DVD, as the source of the files. To do this, run the following command instead:
DISM.exe /Online /Cleanup-Image /RestoreHealth /Source: C:\RepairSource\Windows /LimitAccess
Note: Replace the C:\RepairSource\Windows placeholder with the location of your repair source. For more information about using the DISM tool to repair Windows, reference Repair a Windows Image.
At the command prompt, type the following command, and then press ENTER:
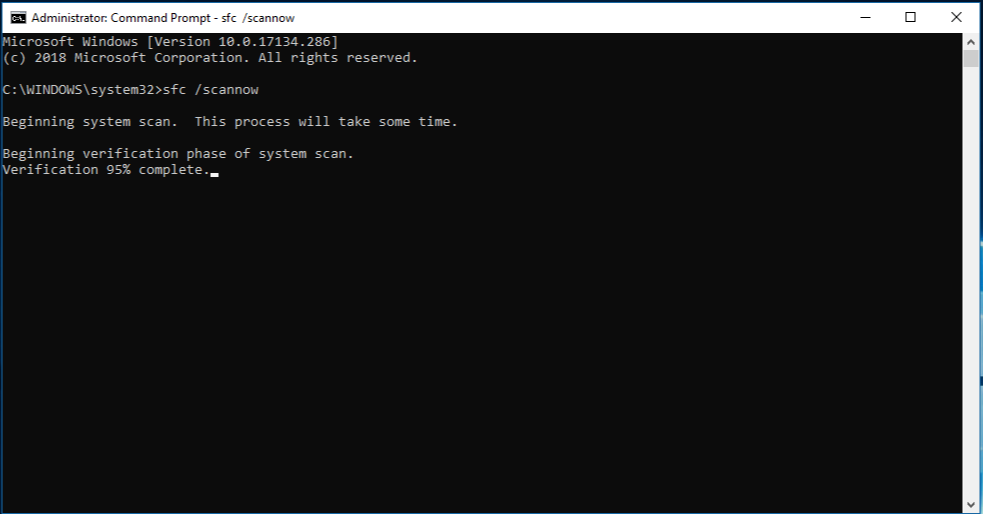
The sfc /scannow command will scan all protected system files, and replace corrupted files with a cached copy that is located in a compressed folder at %WinDir%\System32\dllcache.
The %WinDir% placeholder represents the Windows operating system folder. For example, C:\Windows.
Note Do not close this Command Prompt window until the verification is 100% complete. The scan results will be shown after this process is finished.
After the process is finished, you may receive one of the following messages:
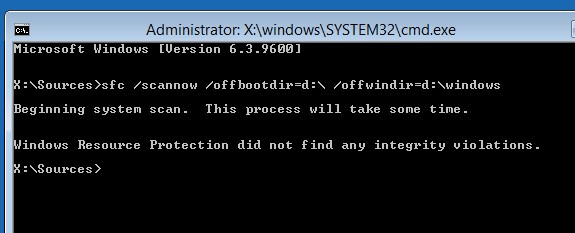
Windows Resource Protection did not find any integrity violations.
This means that you do not have any missing or corrupted system files.
Windows Resource Protection could not perform the requested operation.
To resolve this problem, perform the System File Checker scan in safe mode, and make sure that the PendingDeletes and PendingRenames folders exist under %WinDir%\WinSxS\Temp.
Windows Resource Protection found corrupt files and successfully repaired them. Details are included in the CBS.Log %WinDir%\Logs\CBS\CBS.log.
To view the detail information about the system file scan and restoration, go to How to view details of the System File Checker process.
Windows Resource Protection found corrupt files but was unable to fix some of them. Details are included in the CBS.Log %WinDir%\Logs\CBS\CBS.log.
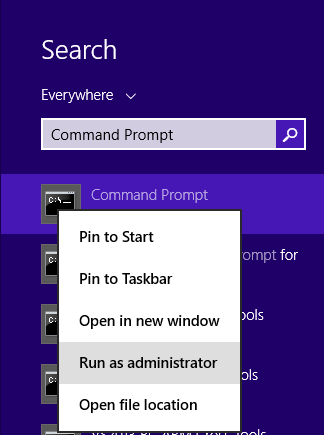
Swipe in from the right edge of the screen, and then tap Search. Or, if you are using a mouse, point to the lower-right corner of the screen, and then click Search. Type Command Prompt in the Search box, right-click Command Prompt, and then click Run as administrator. If you are prompted for an administrator password or for a confirmation, type the password, or click Allow.
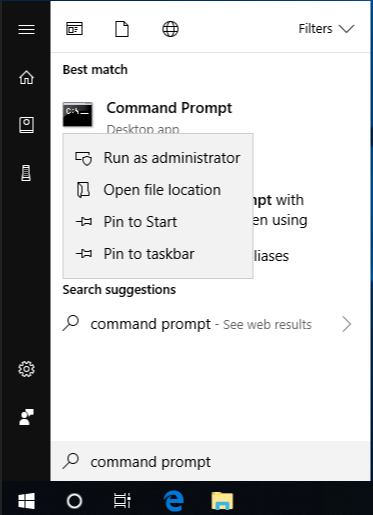
To do this, click Start, type Command Prompt or cmd in the Search box, right-click Command Prompt, and then click Run as administrator. If you are prompted for an administrator password or for a confirmation, type the password, or click Allow.
More Information
To view the details that included in the CBS.Log file, you can copy the information to the Sfcdetails.txt file by using the Findstr command, and then view the details in the Sfcdetails.txt. To do this, follow these steps:
Open an elevated command prompt as described in the previous step 1.
At the command prompt, type the following command, and then press ENTER:
Note The Sfcdetails.txt file contains details from every time that the System File Checker tool has been run on the computer. The file includes information about files that were not repaired by the System File Checker tool. Verify the date and time entries to determine the problem files that were found the last time that you ran the System File Checker tool.
Open the Sfcdetails.txt file from your desktop.
The Sfcdetails.txt file uses the following format:
Date/Time SFC detail The following sample log file contains an entry for a file that could not be repaired: 2007-01-12 12:10:42, Info CSI 00000008 [SR] Cannot repair member file [l:34<17>]»Accessibility.dll» of Accessibility, Version = 6.0.6000.16386, pA = PROCESSOR_ARCHITECTURE_MSIL (8), Culture neutral, VersionScope neutral, PublicKeyToken =
How to manually replace a corrupted system file with a known good copy of the file
After you determine which system file was corrupted and could not be repaired through the detail information in the Sfcdetails.txt file, find where the corrupted file located, and then manually replace the corrupted file with a known good copy of the file. To do this, follow these steps:
Note You may be able to get a known good copy of the system file from another computer that is running the same version of Windows with your computer. You may perform a System File Checker process on that computer to make sure the system file that you intend to copy is a good copy.
Take administrative ownership of the corrupted system file. To do this, at an elevated command prompt, copy and then paste (or type) the following command, and then press ENTER:
takeown /f Path_And_File_Name Note The Path_And_File_Name placeholder represents the path and the file name of the corrupted file. For example, type takeown /f C:\windows\system32\jscript.dll. 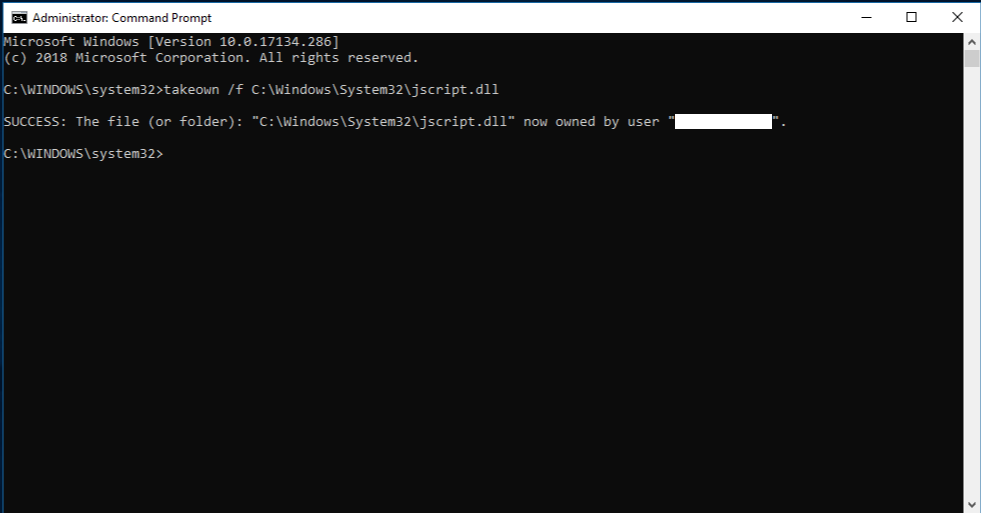
Grant administrators full access to the corrupted system file. To do this, copy and paste (or type) the following command, and then press ENTER:
icacls Path_And_File_Name /GRANT ADMINISTRATORS:F Note The Path_And_File_Name placeholder represents the path and the file name of the corrupted file. For example, type icacls C:\windows\system32\jscript.dll /grant administrators:F.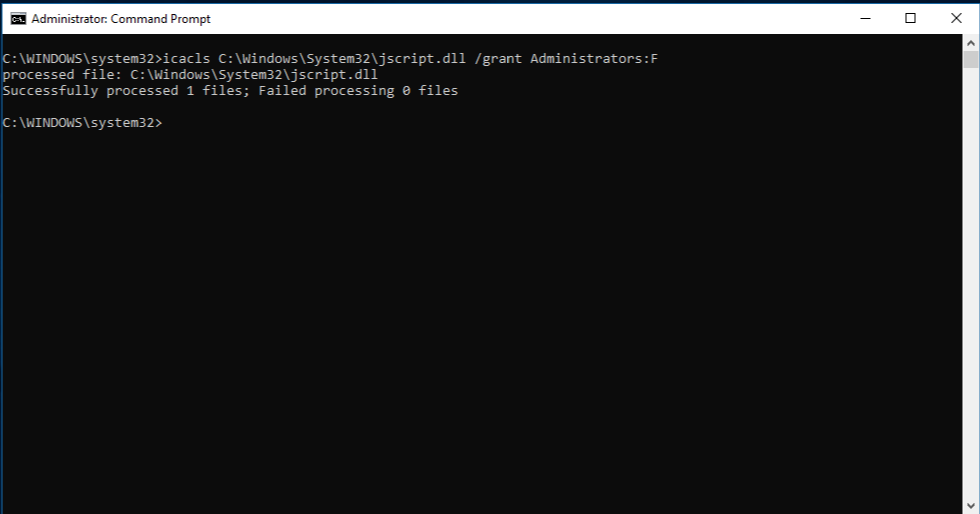
Replace the corrupted system file with a known good copy of the file. To do this, copy and paste (or type) the following command, and then press ENTER:
Copy Source_File Destination Note The Source_File placeholder represents the path and file name of the known good copy of the file on your computer, and the Destination placeholder represents the path and file name of the corrupted file. For example, type copy E:\temp\jscript.dll C:\windows\system32\jscript.dll.
If the steps above don’t work, you may need to reinstall Windows. For more info, see Windows 10 recovery options.
Отсутствует или содержит ошибки файл \windows\system32\ winload.efi в Windows 10
Рассмотрим еще одну распространенную ошибку загрузки Windows 10, вызванную повреждением или отсутствием файла winload.efi. Проблема проявляется следующим образом: Windows 10 перестает загружаться с ошибкой BSOD и следующим сообщением на экране загрузки:
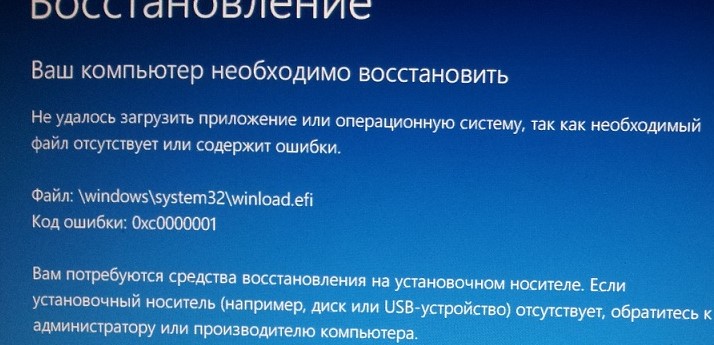
Данная проблема связана с отсутствием или повреждением файла загрузчика \windows\system32\winload.efi. Эта проблема появляется чаще всего после некорректного обновления системы, при повреждении диска или файловой системы, при переразбивке диска сторонними утилитами, обновлении антивируса, после переноса (клонирования) установленного образа Windows на новый диск, замене материнской платы компьютера и прочими вмешательствами.
Решение проблемы зависит от того, использовался ли у вас режим загрузки UEFI или Legacy до возникновения проблемы. Далее рассмотрим основные шаги, которые помогут исправить данную ошибку и корректно загрузить Windows 10/Windows Server 2016.
Включите режим совместимости CSM и отключите Secure Boot
Большинство компьютеров с поддержкой UEFI могут загружаться как с дисков с таблицей разделов GPT, так и с MBR дисков старого формата в режиме совместимости (Legacy).
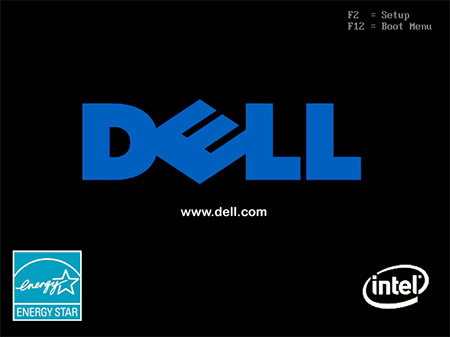
Перезагрузите компьютер и войдите в меню настройки UEFI. Клавиша входа в меню UEFI зависит от производителя компьютера, как правило, это клавиши F2, F8, Del или Esc. Либо на нажмите кнопку ESC прямо на экране с ошибкой.
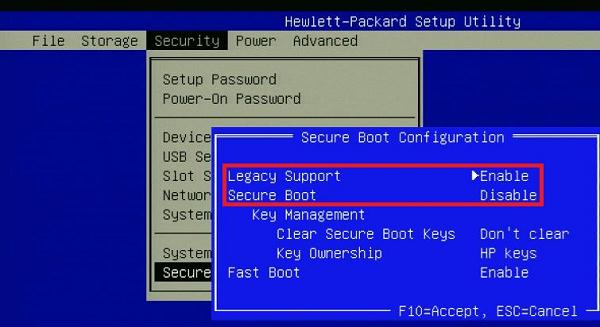
- Попробуйте в настройках UEFI включить режим совместимости CSMBoot (в некоторых версиях прошивок UEFI он может называться Legacy Boot);
- В настройках UEFI найдите и отключите режим Secure Boot. Местоположение данной настройки зависит от производителя прошивки UEFI. Как правило, ее стоит поискать в разделах Security, Authentication или Boot. На ноутбуке HP, например, пункт Secure Boot находится в разделе Security. Измените режим Secure Boot на Disabled или Off;

Автоматическое восстановление загрузчика Windows
Попробуйте исправить ошибку с помощью средства автоматического восстановления системы. Для этого:
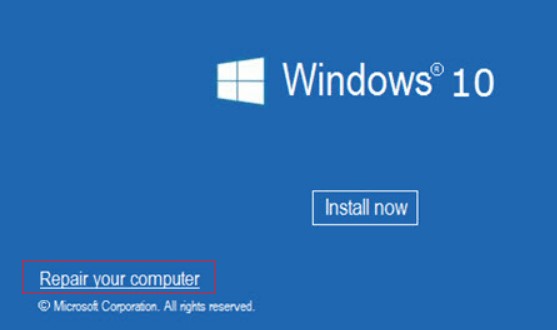
- Загрузитесь с установочного DVD диска (или загрузочной UEFI флешки) с Windows 10;
- Нажмите кнопку Repairyourcomputer (Восстановить ваш компьютер) или клавишу R;
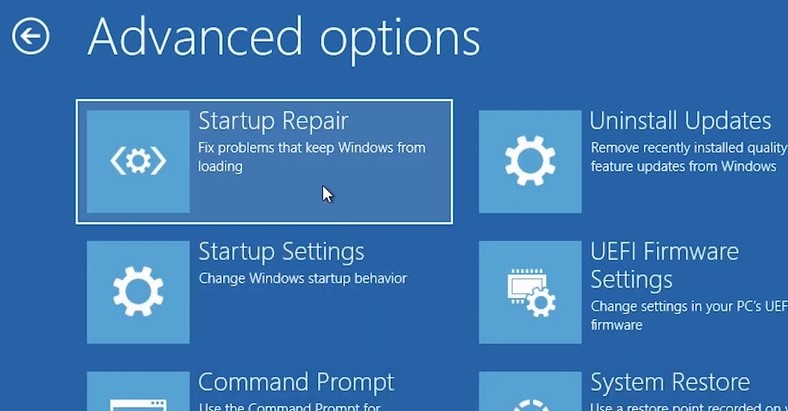
- Перейдите в раздел Troubleshoot-> Advancedoptions-> Startuprepair(Диагностика -> Дополнительные параметры -> Восстановление системы);
- Запустится мастер восстановления. Далее следуйте его инструкциям.
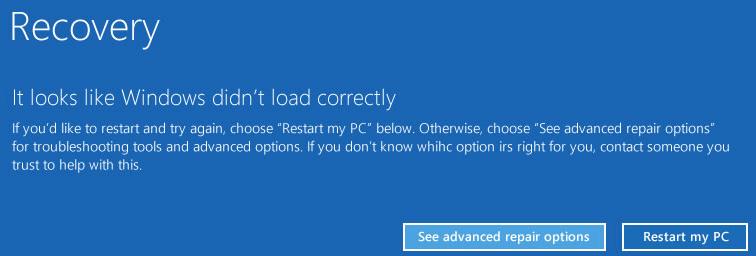
Если установочного диска с Windows под рукой нет, следует три раза перезагрузить компьютер нажатием на кнопку питания (Power) до тех пор, пока не появится экран консоли восстановления WinRe. Выберите пункт See advanced repair options (Дополнительные варианты восстановления). Далее все аналогично.
Отключите функцию защиты ELAM
Если предыдущие методы не исправили ошибку с загрузкой winload.efi, попробуйте отключить технологию ранней защиты от вредоносного ПО — ELAM (Early-launch Anti-Malware), которая по умолчанию активна для загрузчика Windows.
- Выполните шаги 1-2 из 2 способа;
- Перейдите в раздел Troubleshoot->Advancedoptions-> Startupsettings(Диагностика ->Дополнительные параметры -> Восстановление при загрузке);
- Перезагрузите компьютер, нажав кнопку Restart;
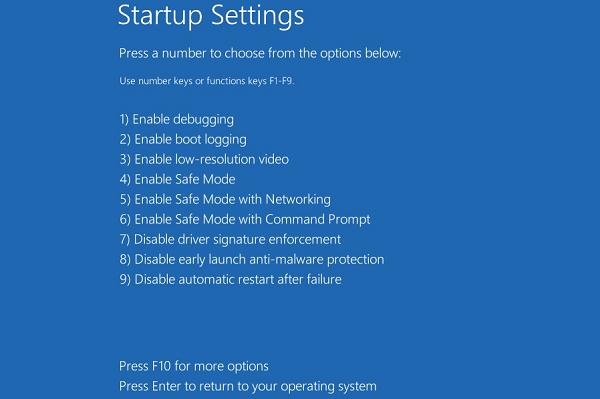
- После следующей загрузки, система автоматически откроет меню настройки параметров загрузки — StartupSetting / Параметры загрузки (кстати, именно отсюда можно Windows 10 в безопасном режиме);
- Нажмите F8 чтобы выбрать пункт 8)Disableearlylaunchanti-malwareprotection/ Отключить автоматическую перезагрузки при сбое системы.
Выполните проверку дисков на ошибки и целостность системных файлов
Проверьте свои диски на наличие ошибок, возможно имеются ошибки диска или файловой системы на разделе с файлом winload.efi. Чтобы проверить все диски на наличие ошибок и исправить их, выполните команду:
После этого желательно проверить целостность системных файлов с помощью утилиты sfc. Для использования утилиты sfc в офлайн режиме, нужно указать путь к системному диску и папке Windows. Вы можете определить букву диска, назначенную разделу Windows с помощью команды:
Bcdedit /enum | find «osdevice»
Предположим, в вашем случае это диск D:. Команда проверки системных файлов будет выглядеть так:
sfc /scannow /offboot=d:\ /offwindir=d:\windows
Также нужно выполнить офлайн проверку хранилища компонентов Windows с помощью DISM. Нужно сравнить ваш образ с оригинальным установочным wim файлом вашего билда Windows 10 (предположим, оригинальный wim образ лежите на диске E:):
Dism /image:D:\ /Cleanup-Image /RestoreHealth /Source:E:\sources\install.wim
Восстановление BCD загрузчика и файла winload.efi для UEFI системы
Если ваша Windows 10 была установлена в нативном UEFI режиме на GPT диске, мы рекомендуем вам воспользуетесь инструкцией по пересозданию EFI загрузчика Windows 10 на устройствах с UEFI . Рекомендую воспользоваться статьей по ссылке, там все описано довольно подробно. Здесь оставлю короткий гайд:
Загрузитесь с загрузочного диска и запустите командную строку:
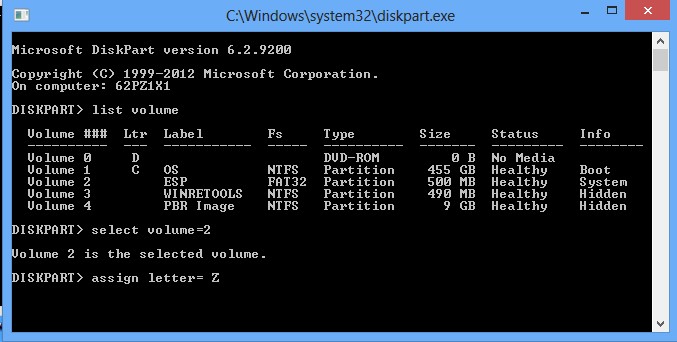
- Выполните команду: diskpart
- Выведите список разделов на дисках: list volume
- айдите раздел с меткой ESP или EFI размером 500 мб (размер и название раздела может отличаться в зависимости от версии Windows, но главное – его файловая система всегда должна быть FAT32). Запомните его номер. Если EFI раздел был случайно удален, его можно восстановить так;
- Выберите этот раздел: select volume 2
- Назначьте разделу букву диска: assign letter=Z
- Выйдите из diskpart: exit
- Теперь нужно пересоздать загрузчик, скопировать загрузочные файлы из каталога Windows: bcdboot c:\Windows /s Z: /f ALL (замените c:\ на букву диска, на котором у вас находится ОС); Если вы все сделали правильно, появится надпись Boot files successfully created ;
- Перезагрузите компьютер и проверьте, исправлена ли проблема.
Пересоздание загрузочных записей в хранилище BCD с помощью bootrec и bcdedit
Если у вас система установлена не в режиме UEFI, тогда вы можете восстановить пересоздать загрузочные записи и сам MBR загрузчик Windows с помощью утилиты bootrec.
- Выполните шаги 1-2 из 2 способа;
- Перейдите в раздел Troubleshoot > Command Prompt (Диагностика – Командная строка).
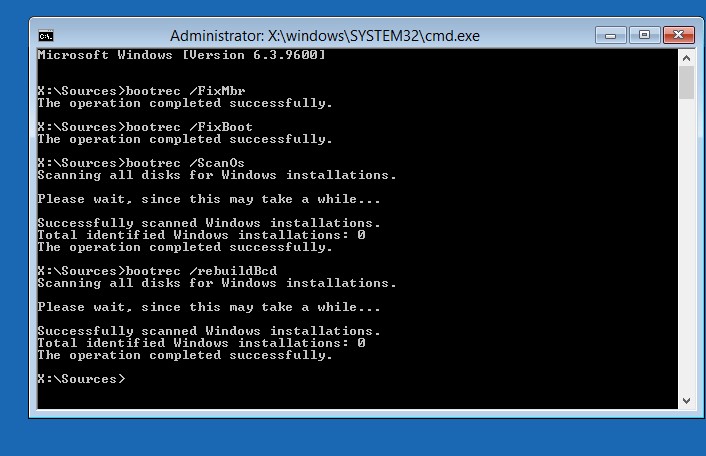
- В открывшемся окне командной строки выполните последовательно команды:
bootrec /FixMbr
(запись основной загрузочной записи в системный раздел)
bootrec /FixBoot
(перезапись нового загрузочного сектора в системном разделе)
bootrec /ScanOs
(сканирование дисков на предмет наличия установленных ОС)
bootrec /RebuildBcd
(пересоздание конфигурации загрузчика) - Закройте командную строку командой:
exit - Перезагрузите компьютер.
Если предбудущий способ не помог, нужно пересоздать файл конфигурации загрузки для MBR в командной строке консоли восстановления или загрузочного диска:
bcdedit /set
bcdedit /set
bcdedit /set
bcdedit /set
bcdedit /set
bcdedit /set
Перезагрузите компьютер и проверьте, исправлена ли проблема.


