- How to Disable Hardware Acceleration in Windows 7, 8, 8.1 and 10
- Method 1: Disabling Hardware Acceleration from your computer’s Display settings
- Method 2: Disabling Hardware Acceleration from your computer’s Registry
- Способы отключения аппаратного ускорения в Windows 10
- Варианты отключения аппаратного ускорения в Windows 10
- Способ 1: Использование «DirectX Control Panel»
- Способ 2: Редактирование системного реестра
- How to enable or disable Hardware Virtualization in Windows 10
- Enable or Disable Hardware Virtualization in Windows 10
- Acer
- Asus
- DELL
- HP
- Lenovo
- Enabling VT-x in ThinkPad (Tablets/Convertibles/Notebooks):
- Enabling VT-x in ThinkCentre (Desktops):
- Sony
- Toshiba
How to Disable Hardware Acceleration in Windows 7, 8, 8.1 and 10
Hardware Acceleration basically refers to using a computer’s hardware to perform a specific task (that is usually performed by software, not hardware) faster and better. In almost all cases, Hardware Acceleration is used to make the rendering of graphics on a computer smoother and faster by offloading graphic rendering responsibilities onto the computer’s graphics hardware (its Graphics Processing Unit) instead of software and its CPU (Central Processing Unit). The idea behind Hardware Acceleration is to speed up graphic performance and rendering and making it better by moving it from the CPU to the GPU, allowing for better performance.
Hardware Acceleration has been proven to allow for better graphics performance, but that does not mean that it is a feature that ALL Windows computers need. While Windows does have Hardware Acceleration enabled by default, it is entirely possible and actually pretty easy to disable Hardware Acceleration. Turning Hardware Acceleration will cause applications to be run in software rendering mode, meaning that all graphics will be rendered by software and the computer’s CPU and no graphics rendering work will be outsourced to the GPU. Disabling Hardware Acceleration on all currently supported versions of the Windows Operating System (Windows 7, 8, 8.1 and 10) is pretty similar, although users can go about disabling Hardware Acceleration two different ways:
Method 1: Disabling Hardware Acceleration from your computer’s Display settings
Here’s how you can disable Hardware Acceleration on your computer from its Display settings:
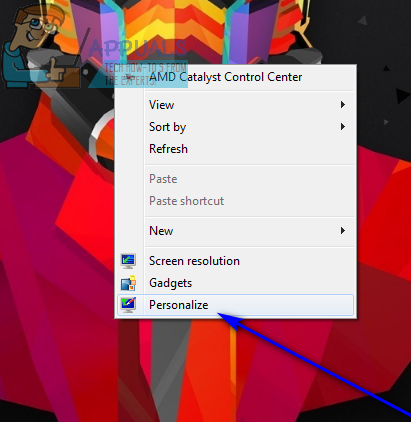
- Right-click on an empty space on your computer’s Desktop.
- Click on Personalize.

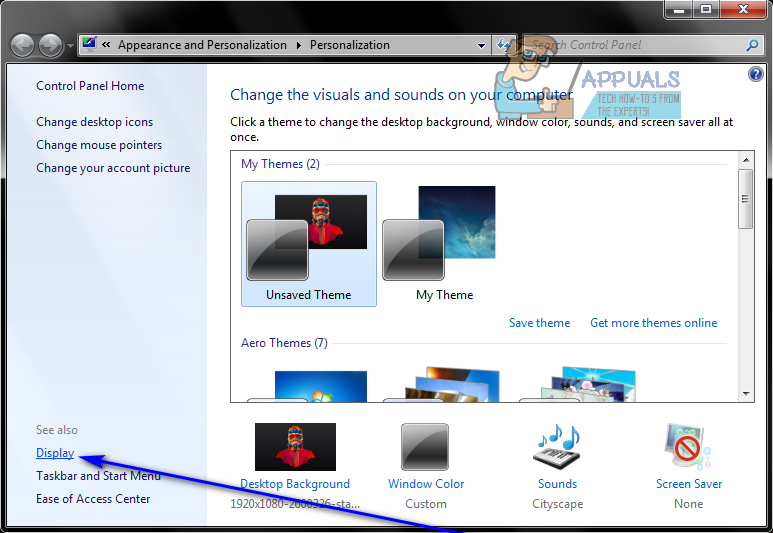
- In the left pane of the window that appears, click on Display.
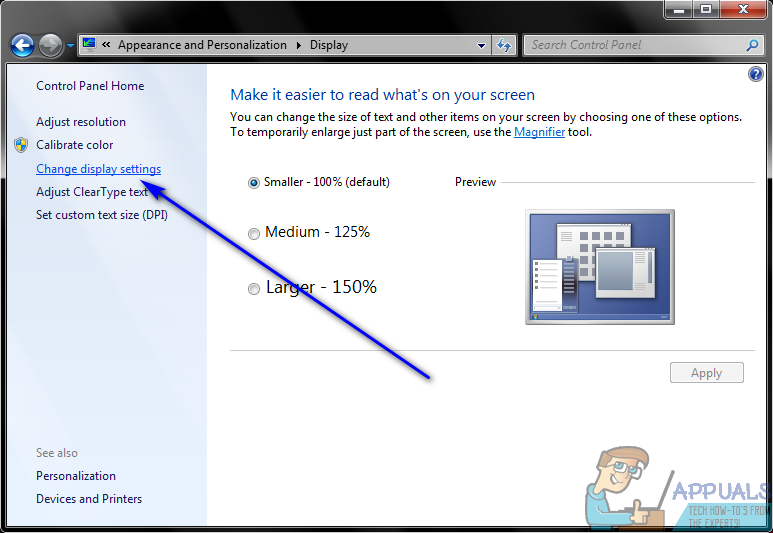
- In the left pane of the next window, click on Change display settings.
- Click on Advanced settings.
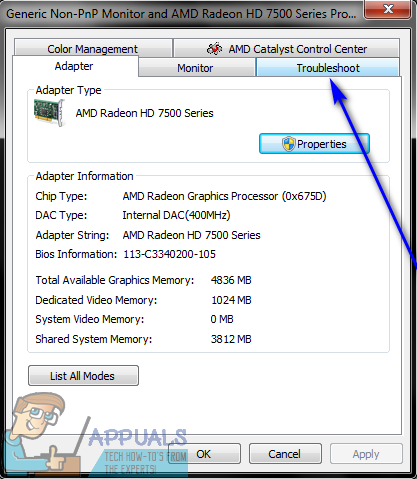
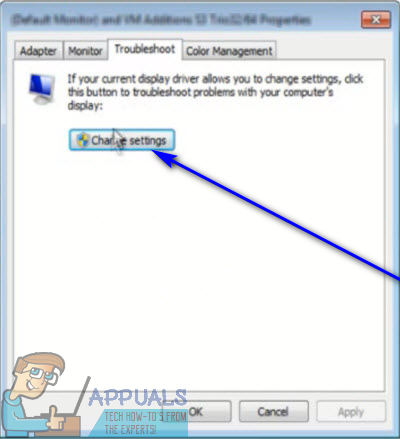
- Navigate to the Troubleshoot tab.
- Click on Change settings. If the Change settings button is grayed out, your computer’s current graphics hardware does not allow for users to tinker around with Hardware Acceleration settings, at least not from here.
- Under the Hardware Acceleration section, move the slider all the way to the left, to None. Moving the slider all the way to None will completely disable Hardware Acceleration.
- Click on OK.
- Click on Apply and then on OK.
- Click on Apply and then on OK.
- Restart your computer to have the changes applied. When the computer boots up, Hardware Acceleration will be disabled.

Method 2: Disabling Hardware Acceleration from your computer’s Registry
If Method 1 doesn’t work for you or if the Change settings button in the Troubleshoot tab is grayed out for you, fear not – you can still try and disable Hardware Acceleration in your computer’s Registry. To do so, you need to:
Способы отключения аппаратного ускорения в Windows 10

Аппаратное ускорение – очень полезная функция. Она позволяет перераспределить нагрузку между центральным процессором, графическим адаптером и звуковой картой компьютера. Но иногда возникают ситуации, когда по тем или иным причинам требуется отключить ее работу. Именно о том, как это можно сделать в операционной системе Windows 10, вы и узнаете из данной статьи.
Варианты отключения аппаратного ускорения в Windows 10
Существует два основных метода, которые позволяют отключить аппаратное ускорение в указанной версии ОС. В первом случае нужно будет устанавливать дополнительное программное обеспечение, а во втором – прибегнуть к редактированию реестра. Приступим.
Способ 1: Использование «DirectX Control Panel»
Утилита «DirectX Control Panel» распространяется как часть специального пакета SDK для Windows 10. Зачастую рядовому пользователю он не нужен, так как предназначен для разработки ПО, но в данном случае нужно будет его установить. Для реализации метода выполните следующие действия:
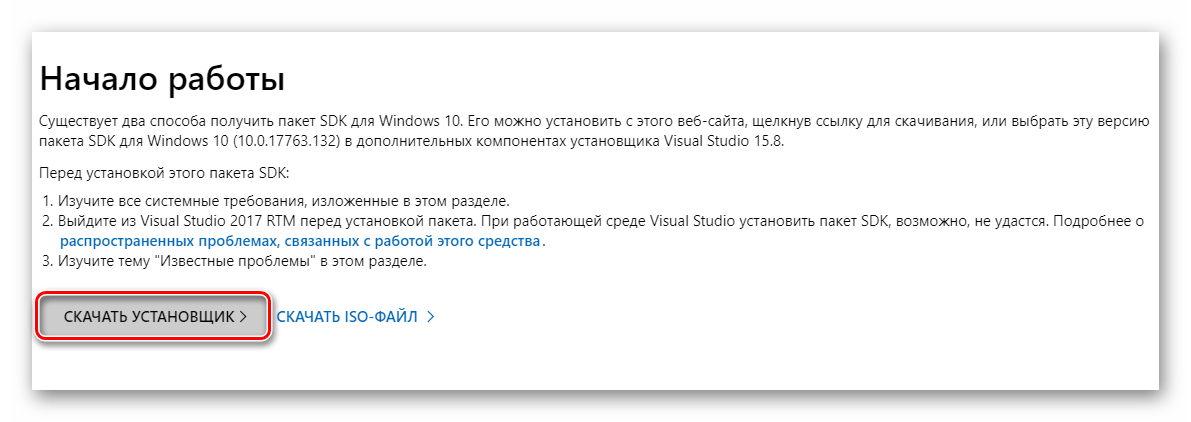
- Перейдите по данной ссылке на официальную страницу пакета SDK для операционной системы Windows 10. Найдите на ней серую кнопку «Скачать установщик» и нажмите на нее.
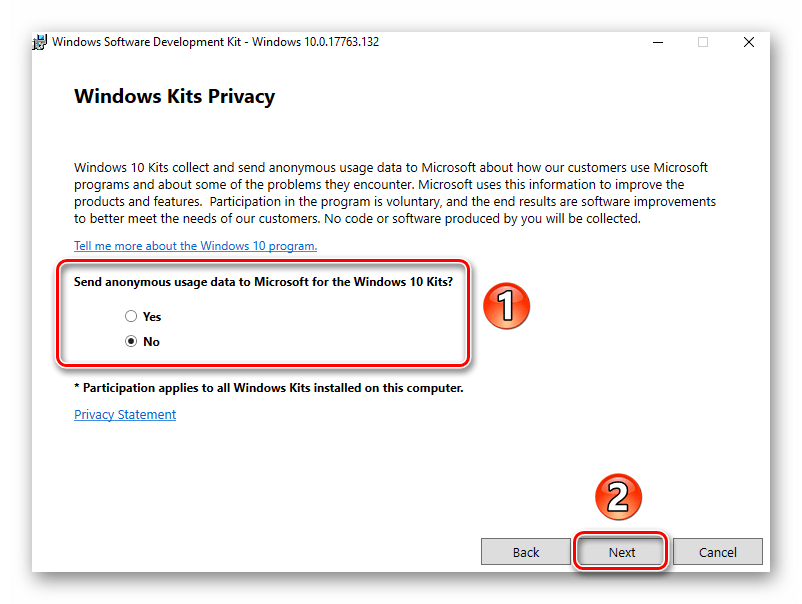
Далее вам предложат включить функцию автоматической анонимной отправки данных о работе пакета. Рекомендуем выключить ее, дабы не нагружать лишний раз систему разными процессами. Для этого установите отметку напротив строки «No». Затем нажмите кнопку «Next».

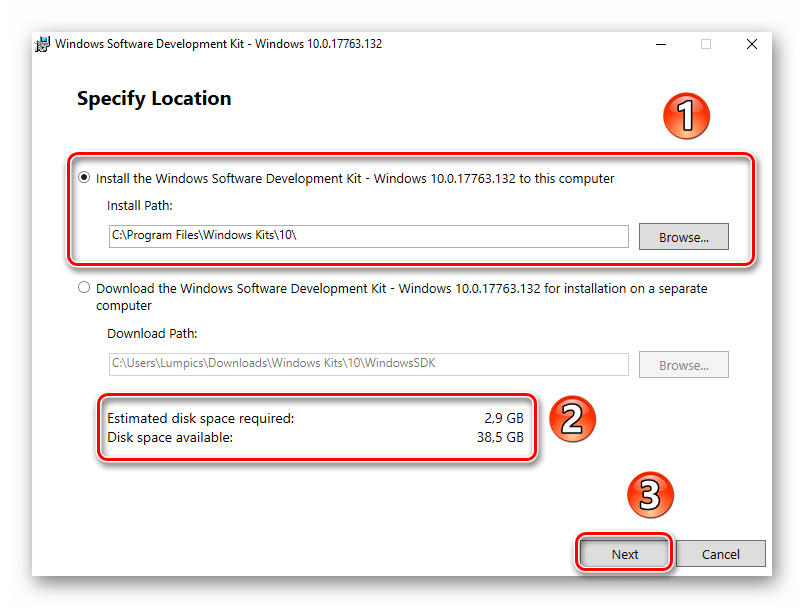
После этого вы увидите перечень компонентов, которые будут инсталлированы в составе пакета SDK. Мы рекомендуем ничего не изменять, а просто нажать «Install» для начала установки.

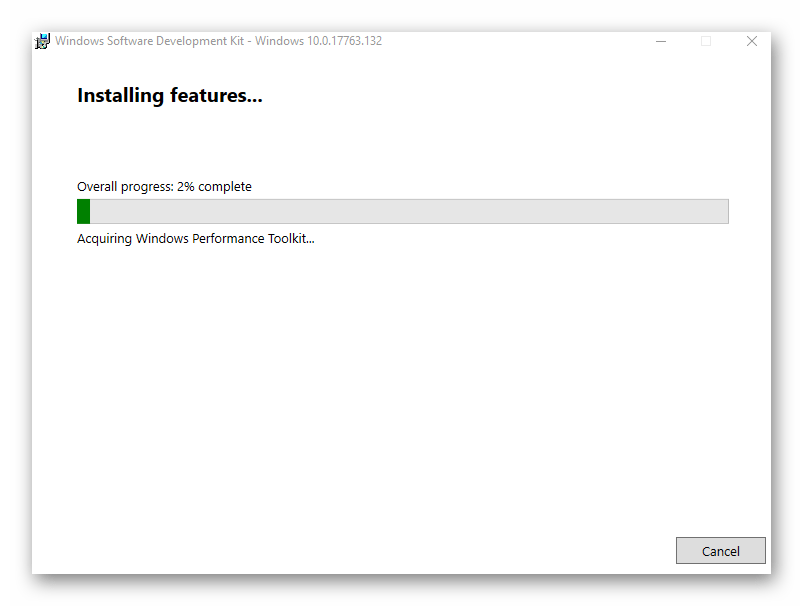
В результате запустится процесс инсталляции, он достаточно длительный, поэтому запаситесь терпением.
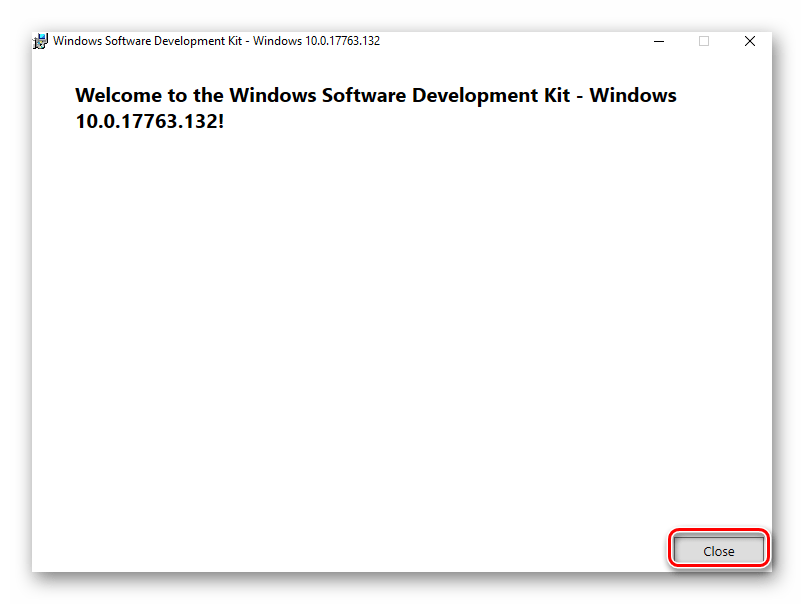
В завершении на экране появится сообщение с приветствием. Это значит, что пакет установлен корректно и без ошибок. Нажмите кнопку «Close» для закрытия окна.
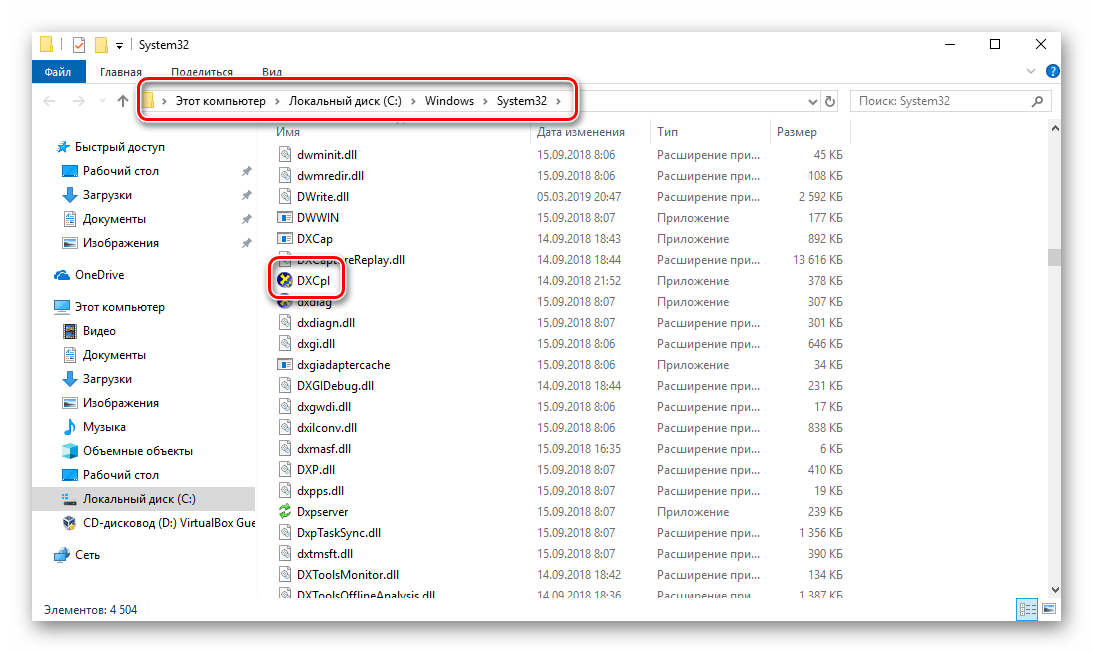
Найдите нужный файл в списке и запустите его.
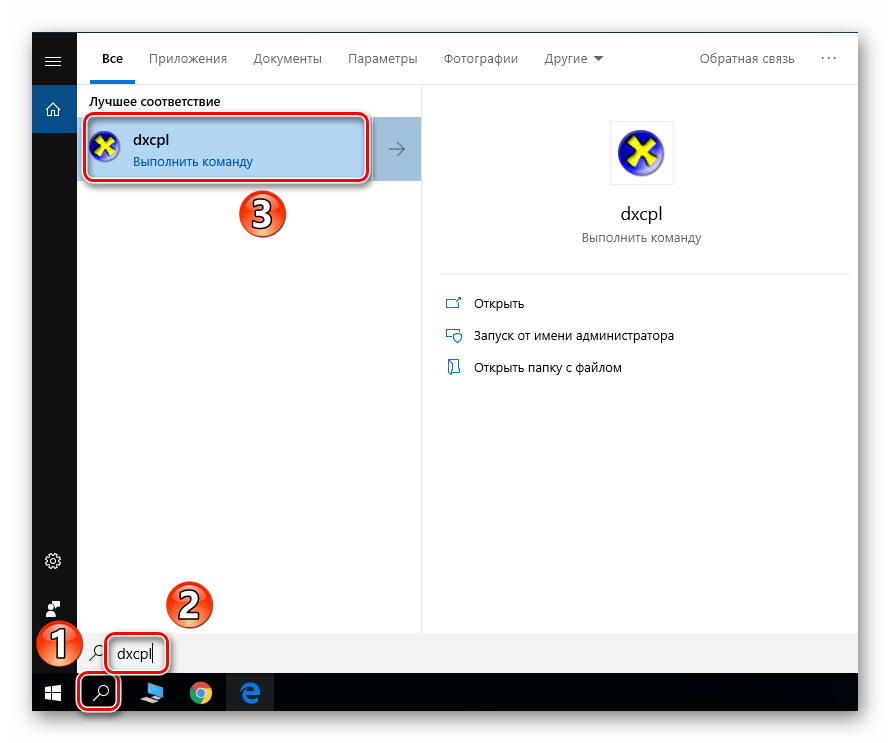
Также можно открыть окно поиска на «Панели задач» в Windows 10, ввести фразу «dxcpl» и кликнуть по найденному приложению ЛКМ.
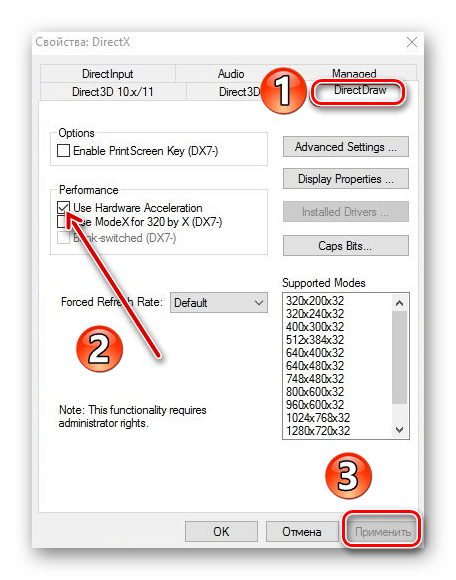
После запуска утилиты вы увидите окно с несколькими вкладками. Зайдите в ту, которая называется «DirectDraw». Именно она отвечает за графическое аппаратное ускорение. Для его отключения достаточно снять галочку возле строки «Use Hardware Acceleration» и нажать кнопку «Принять» для сохранения изменений.
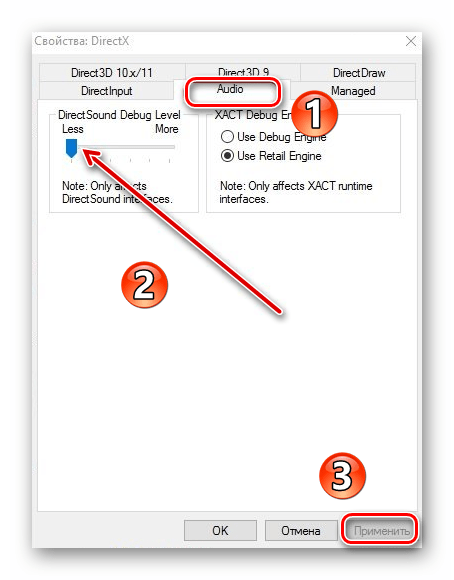
Для выключения звукового аппаратного ускорения в этом же окне необходимо перейти во вкладку «Audio». Внутри отыщите блок «DirectSound Debug Level», и переместите регулятор на полоске в положение «Less». Затем снова нажмите кнопку «Применить».
В результате аппаратное аудио- и видеоускорение будут отключены. Если по каким-то причинам вы не хотите инсталлировать пакет SDK, тогда стоит попробовать применить следующий метод.
Способ 2: Редактирование системного реестра
Данный способ несколько отличается от предыдущего — он позволяет отключить лишь графическую часть аппаратного ускорения. Если вы захотите перенести обработку звука с внешней карты на процессор, придется в любом случае использовать первый вариант. Для реализации данного способа от вас потребуется следующий ряд действий:
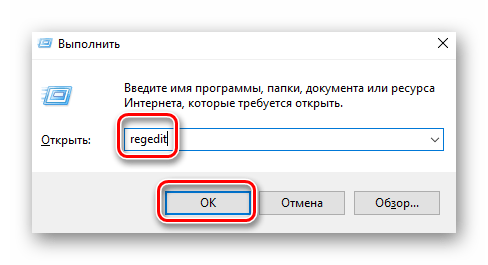
- Нажмите одновременно клавиши «Windows» и «R» на клавиатуре. В единственное поле открывшегося окна введите команду regedit и нажмите кнопку «OK».
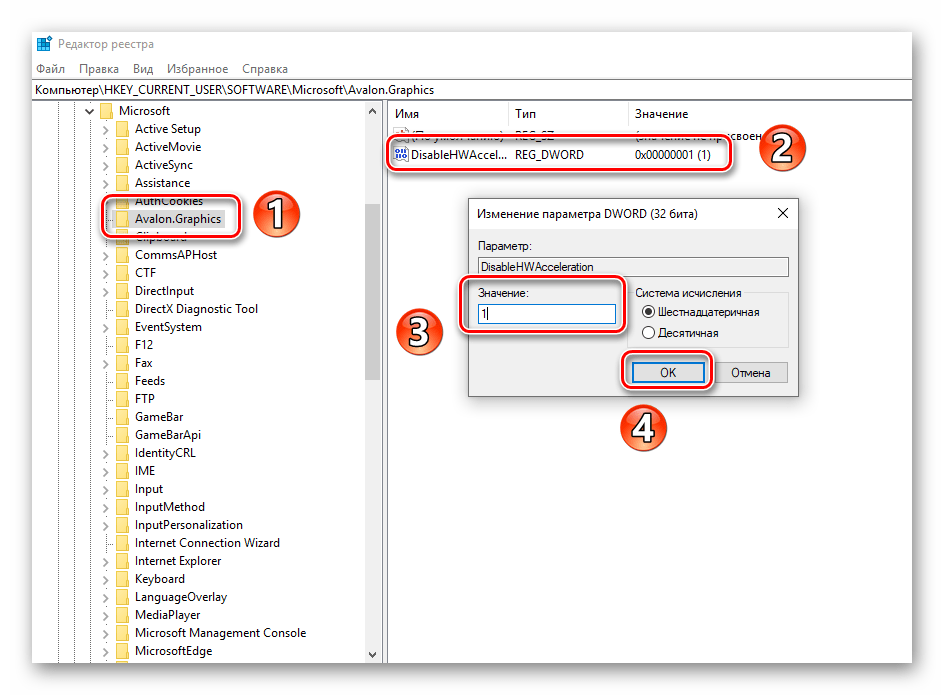
В левой части открывшегося окна «Редактор реестра» нужно зайти в папку «Avalon.Graphics». Она должна находиться по следующему адресу:
HKEY_CURRENT_USER => Software => Microsoft => Avalon.Graphics
Внутри самой папки должен находиться файл «DisableHWAcceleration». Если такового нет, тогда в правой части окна нажмите правой кнопкой мышки, наведите указатель на строку «Создать» и выберите из выпадающего списка строку «Параметр DWORD (32 бита)».

Затем двойным кликом откройте только что созданный ключ реестра. В открывшемся окне в поле «Значение» впишите цифру «1» и нажмите кнопку «OK».
Используя один из предложенных методов, вы без особого труда сможете отключить аппаратное ускорение. Хотим лишь напомнить о том, что без крайней необходимости это делать не рекомендуется, так как в результате может сильно снизиться производительность компьютера.
How to enable or disable Hardware Virtualization in Windows 10
Hardware Virtualization, also called Platform, Server virtualization is the virtualization of computers as complete hardware platforms. In this post, we will show you how to enable or disable Hardware Virtualization in Windows 10, via the BIOS settings.
Enable or Disable Hardware Virtualization in Windows 10
While most recent PCs support hardware virtualization, not all computer vendors enable this feature as shipped from the factory. The setting may be called VT-x, AMD-V, SVM, Vanderpool, Intel VT-d or AMD IOMMU if the options are available.
If you are unable to find the Virtualization settings in your BIOS it may mean that your PC does not support it. Nevertheless, you can check if your Windows 10 PC supports HAV.
If your computer doesn’t offer any options to access its BIOS before your OS loads then it is possible that it uses UEFI instead. On a UEFI-based computer, there is often no button press prompt before the OS loads. Instead, you will access these settings from within the OS.
For a Windows system; hold down the Shift key as you click Restart in Windows to reboot straight to that menu. To access the UEFI Firmware Settings, click the Troubleshoot tile, select Advanced Options, and select UEFI Firmware Settings. Click the Restart option afterward and your computer will reboot into its UEFI firmware settings screen.
Different MOBOs use different BIOS configurations – s o to enable or disable Hardware Assisted Virtualization (HAV) on your Windows 10 device, you can see the sections below for a list of the most common computer manufacturers and information regarding accessing the BIOS settings for each PC manufacturer.
Acer
Most commonly: F2 or Delete.
On older computers: F1 or the key combination CTRL+ALT+ESC.
- Turn ON the System.
- Press F2 key at startup BIOS Setup.
- Press the right arrow key to System Configuration tab, Select Virtualization Technology and then press the Enter key.
- Select Enabled and press the Enter key.
- Press the F10 key and select Yes and press the Enter key to save changes and Reboot into Windows.
Asus
Most commonly: F2.
Alternatively: Delete or Insert key, and less commonly F10.
- Turn ON the System.
- Press F2 key at startup BIOS Setup.
- Press the right arrow key to Advanced tab, Select Virtualization Technology and then press the Enter key.
- Select Enabled and press the Enter key.
- Press the F10 key and select Yes and press the Enter key to save changes and Reboot into Windows.
DELL
Newer models: F2 key whilst Dell logo is on screen.
Alternatively: F1, Delete, F12, or F3.
Older models: CTRL+ALT+ENTER or Delete or Fn+ESC or Fn+F1.
- Turn ON the System.
- Press F2 key at startup BIOS Setup.
- Press the right arrow key to Advanced tab, Select Virtualization and then press the Enter key.
- Select Enabled and press the Enter key.
- Press the F10 key and select Yes and press the Enter key to save changes and Reboot into Windows.
HP
Most commonly: F10 or ESC.
Alternatively: F1, F2, F6, or F11
On HP Tablet PCs: F10 or F12
- Turn ON the System
- Repeatedly press Esc key at startup.
- Press the F10 key for BIOS Setup.
- Press the right arrow key to System Configuration tab, Select Virtualization Technology and then press the Enter key.
- Select Enabled and press the Enter key.
- Press the F10 key and select Yes and press the Enter key to save changes and Reboot.
Lenovo
Most commonly: F1 or F2
Older hardware: the key combination CTRL+ALT+F3 or CTRL+ALT+INS or Fn+F1.
Enabling VT-x in ThinkPad (Tablets/Convertibles/Notebooks):
- Power ON the system.
- Press Enter or Tap the touch screen during Lenovo startup screen.
- Press or Tap F1 to enter into BIOS Setup.
- Navigate to Security tab, then press Enter on Virtualization.
- Select Intel(R) Virtualization Technology, Press Enter, choose Enable and press Enter.
- Press F10.
- Press Enter on YES to save the settings and boot into Windows.
Enabling VT-x in ThinkCentre (Desktops):
- Power ON the system.
- Press Enter during Lenovo startup screen.
- Press F1 key to enter into BIOS Setup.
- Navigate to the Advanced tab and press Enter on CPU Setup.
- Select Intel(R) Virtualization Technology, Press Enter, choose Enable and press Enter.
- Press F10.
- Press Enter on YES to save the settings and boot into Windows.
Sony
Sony VAIO: F2 or F3
If your VAIO has an ASSIST key, try to press and hold it while you power on the laptop. This also works if your Sony VAIO came with Windows 8.
- With the computer turned completely off, press and hold the Assist button until the black VAIO screen appears.
Note:The location of the Assist button will be different depending on the computer model. Refer to the operating instructions supplied with the computer for the exact location of the Assist button on your model.
- At the VAIOCare | Rescue Mode screen, press the Down Arrow key until the Start BIOS setup [F2] option is highlighted, and then press the Enter key.
- In the [BIOS Name] Setup Utility screen, press the right-arrow key until the Advanced tab is selected.
- On the Advanced tab, press the down-arrow key until Intel(R) Virtualization Technology is selected and then press the Enter key.
- Use the arrow keys to select Enabled, and then press the Enter key.
- Press the right-arrow key until the Exit tab is selected.
- Press the down-arrow key until Exit Setup is selected and then press the Enter key.
- In the Save screen, verify Yes is selected and then press the Enter key.
Toshiba
Most commonly: F2 key.
Alternatively: F1 and ESC.
Toshiba Equium: F12
- Turn ON the System.
- Press F2 key at startup BIOS Setup.
- Press the right arrow key to Advanced tab, Select Virtualization Technology and then press the Enter key.
- Select Enabled and press the Enter key.
- Press the F10 key and select Yes and press the Enter key to save changes and Reboot into Windows.
Hope you find this post informative enough!


