- How to Map a Network Drive in Windows 10
- How to map or add a Network Location or Map FTP Drive in Windows 10
- Map FTP Drive
- Add Network Location
- Map a Network Drive using Command Line
- Map a Network Drive using PowerShell
- How to Add Network Folders to the Windows Search Index
- Step 1 – Share Folder
- Step 2 – Map Network Drive
- How to Map a Network Drive in Windows
- How To Map a Network Drive On Windows 10
- Using File Explorer to Map Network Drive Windows 10
- Using Command Prompt to Map a Network Drive Windows 10
- How To Map a Network Drive On Windows 7, 8 & XP
How to Map a Network Drive in Windows 10
By Melanie Pinola 29 April 2019
You can easily create a shortcut to another drive or folder shared on your network by mapping that location. When you map a network drive, it will show up as a new drive under This PC in File Explorer, so you can quickly access the shared files you need, just like you would your local hard drive. Here’s how to make that network drive shortcut in Windows 10.

How to Map a Network Drive in Windows 10
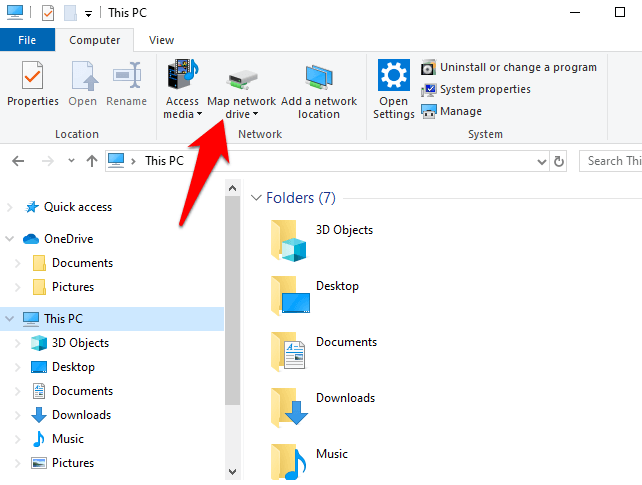
1. Open File Explorer and select This PC.
2. Click the Map network drive drop-down in the ribbon menu at the top, then select «Map network drive.» (This is under the Computer tab, which should open automatically when you go to This PC, as above.)
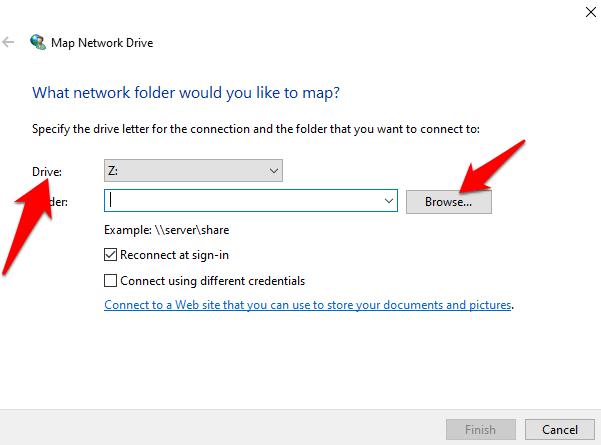
3. Select the drive letter you want to use for the network folder, then hit Browse.
4. If you receive an error message, then you’ll need to turn on network discovery. To do so, open the Control Panel, select Network and Sharing Center and choose Change advanced sharing settings from the top-left corner. From there, select Turn on network discovery. Save changes.
choose network folder
5. Navigate to the folder you want to map and hit OK after selecting it.
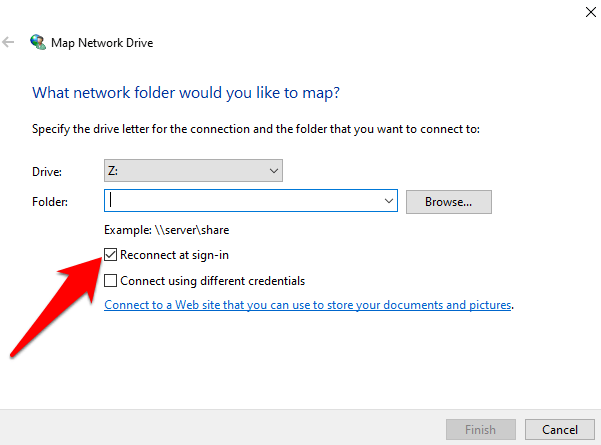
6. Confirm your selection and click Finish. You can choose to reconnect to the folder every time you sign in so it’s always available. You can even use a different user account to connect to the folder if needed.
7. When you’re done, you should see the new drive letter under This PC and will be able to access its contents like you would any other folder. If you want to disconnect the network drive, right-click on it and select Disconnect.
How to map or add a Network Location or Map FTP Drive in Windows 10
If you are looking for a way to add a network location or map an FTP drive and access files & folders on an FTP server, in Windows, natively, then this post may help you. You will be able to have one-click easy access to your files on networked locations via the Windows File Explorer.
Map FTP Drive
You can create or map a drive directly to your FTP site from within Windows. To do so, open File Explorer > Computer (This PC). Right-click and select Map Network Drive.
You can also use the Map network drive button:
It offers options to:
- Map network drive
- Disconnect network drive.
In the box which opens, type the FTP address or the path to your Network drive or browse to it using the Browse button. Your folder Properties must be set to Shared in order to map it as a network drive. You will get the setting under Properties > Sharing tab > Advanced Sharing > Check the Share this folder option.
Check the Reconnect at sign-in option to make the mapping permanent. If you plan to use credentials from the networked computer to access the shared folder, check the Connect using different credentials option and click OK. You will be asked to enter the username and password Next.
You will now have to enter the credentials for the user account, using the following format in the username name field so that your system knows which networked computer it is going to connect to – Computer\Username. Browse to your network folder for mapping and click OK.
Once you have done this, you will be able to see it in Explorer.
To map an FTP site, click on the Connect to a website that you can use to store your documents and pictures link to open the Add Network Location wizard.
Here you have to choose a custom network location and specify the location of your website, specify the login credentials that may be required and name the mapped FTP drive.
Add Network Location
Uncheck Log for anonymously and give the username & password. Click on Next. Give a name to the networked location, when asked. Click Next again. Now select Open this network location when I click Finish.
You will be asked to enter your credentials, and once you do so, you will be connected to your network drive or your FTP drive or your website.
This is quite useful if you need to connect your computers together for sharing files, store files online or run a website.
TIP: See this post if you are Unable to map Network drive.
Map a Network Drive using Command Line
To map Network Drives using the command line, in an elevated command prompt, you have to run the following command:
Here x is the drive letter, and the /persistent:yes parameter makes it permanent.
You can read more about the Net use command, which lets you connect a computer to a shared resource on Technet.
Map a Network Drive using PowerShell
To map Network Drives using Powershell, you have to run the following command:
You can read more about New-PSDrive, which helps you create mapped network drives on MSDN.
NOTES:
- The folders you map should be set to SHARE before you can access them via drive letters
- If you are trying to access a drive from another computer, it should be ON and running; even if the computer is sleeping, you cannot access that drive
- You should know the credentials of the folder, computer, or website you are trying to map or connect as a network drive
- Download FTP Drive tool from KillProg.com. It makes several things including adding a drive letter easier
- You may want also to check out FtpUse, a free tool that helps you map an FTP server as a Local Disk Drive.
- Use Network Drive Control to make Windows automatically map network drives by network name when you log in
- Visual Subst is a free tool that lets you easily create Virtual Drives for your Folders & map Cloud Storage as Virtual Drives.
If you want, you can also download and use one of these free FTP Clients for your Windows PC. How to set up and use SIP Server on Windows may also interest some of you.
Date: January 20, 2020 Tags: Features, FTP
How to Add Network Folders to the Windows Search Index
Quickly find what you need, wherever it is
In Windows 10, the default search function indexes your Internet Explorer history, Start Menu, and the entire users folder on the system partition. What if you want to add a network folder to the search index in Windows 10? For example, let’s say you have a NAS (network attached storage) device and you have a bunch of videos, pictures and files on there that simply won’t fit on your PC?
In this article, I’ll show you how to go about adding a network folder to the search index so that when you search for a file from Explorer, you will also get results that include files stored in the network folder.
Note: Technically speaking, the Windows client will not add a network location to the local search index. Instead, it will pass that search on to the server and the server will perform a search using its index. If you are trying to search a NAS device, it will perform the search in real-time, so the results will take some time to appear. If searching a Windows File server, you need to ensure that the search index on the server includes all desired locations.
Step 1 – Share Folder
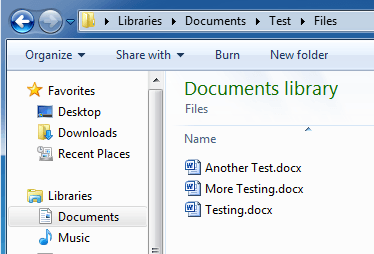
The first thing you want to do is actually share the folder you want to include in the index. You’ll need to share the folder on your NAS or on the host machine, if it’s files stored on a Windows PC, for example. As an example, I wanted to include some files stored on my Windows 7 PC in the Windows 10 search index. These are the three test files I want to include:
So I went to Windows 7 and shared the folder by right-clicking and choosing Properties.
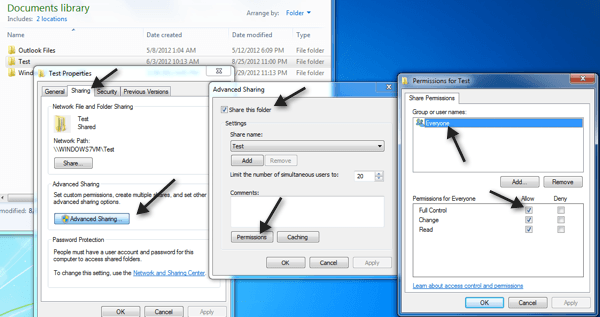
Then I clicked on the Sharing tab, Advanced Sharing, checked Share this folder, clicked on Permissions and gave Everyone Full Control. You obviously don’t have to give everyone full control, I’m just doing it here because it’s easier to setup.
Step 2 – Map Network Drive
Next you have to map the folder as a drive in Windows 10. You can do this by opening Explorer and then clicking on Network at the bottom. Find your NAS, file server or PC in the list and then double-click on it to see the shared folders.
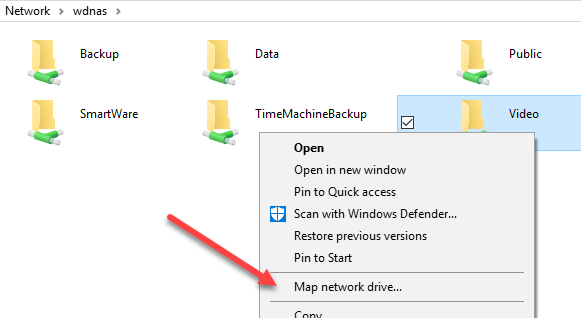
Go ahead and click on the shared folder and then click on Easy access and Map as drive. Note that you can also just right-click on the folder and choose Map network drive. You’ll need to provide credentials to log into the file server or network PC.
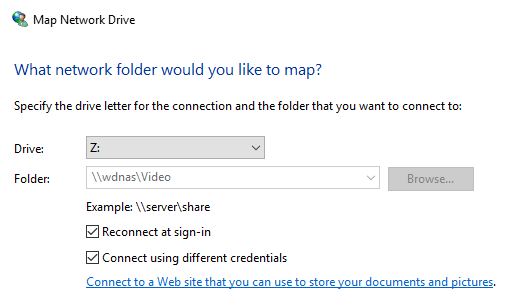
Note that unless both machines have the same username and password, you’ll need to check the Connect using different credentials box and then type in the username and password for that computer or file server. Now when you go to computer, the mapped drive should be listed.
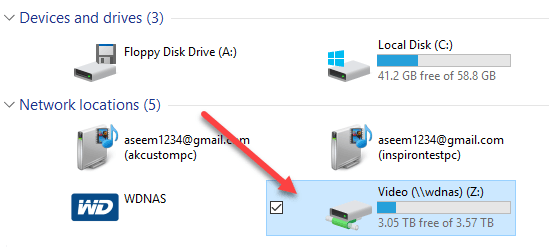
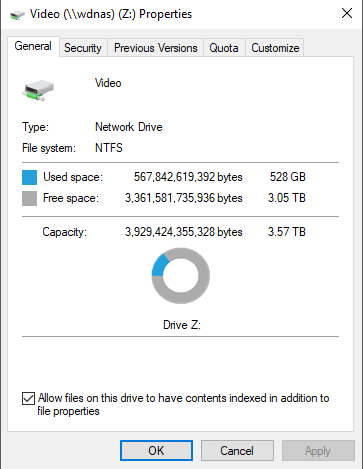
Now right-click on the network drive and click on Properties. At the bottom, make sure to check the Allow files on this drive to have contents indexed in addition to file properties.
Once you do this, the new files will be scanned and included in the Windows 10 search. Depending on how many files have been added, it could take some time before you start seeing the results. Now when I perform a search, I see files from my mapped NAS folder:

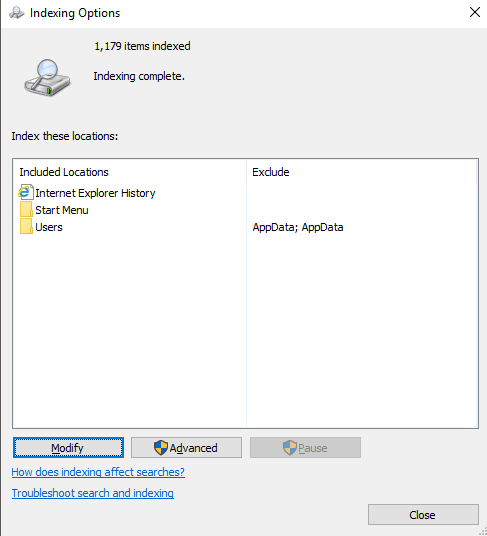
Sweet! Also, note that for certain file types like Word documents, it also indexes the contents of the files, so you can search inside text files, etc. As I mentioned earlier, these files aren’t being indexed in the local search index, though. If you click on Start and type in indexing options, you’ll see that the mapped network drive location is not listed nor can it be added.
Basically, it’s performing the search in real-time, which is why it’s going to be slow if you have a huge number of files on your network share. That’s about it! Also, be sure to check out my post on how to rebuild the search index in case you are not getting all the desired results when doing a search. If you have any problems with searching a network location in Windows 10, post a comment here and I’ll try to help. Enjoy!
Founder of Online Tech Tips and managing editor. He began blogging in 2007 and quit his job in 2010 to blog full-time. He has over 15 years of industry experience in IT and holds several technical certifications. Read Aseem’s Full Bio
How to Map a Network Drive in Windows
Tips for Windows XP, Vista, 7, 8, 10 and even via the command prompt
A mapped drive is a shortcut to the specific drive on a different device that enables you to access resources shared on a local network, or files on a FTP server or website.
It looks just like the shortcut on your local hard drive with its own letter, even opening as though it were on the drive, but the files are physically stored on a different computer or device altogether.
Mapping is different from mounting a drive as it allows you to open remote files as though they were stored on your own computer, while mounting allows you to open a file as if it were a folder.

The main limitation with using a mapped network drive is that it depends on a working network, so if it’s down, or the connection isn’t working properly, you can’t access the files in the mapped drive.
How To Map a Network Drive On Windows 10
We’ll show you two ways of mapping a network drive in Windows 10: Using File Explorer and using Command Prompt.
Using File Explorer to Map Network Drive Windows 10
- Connect your network drive to your router.
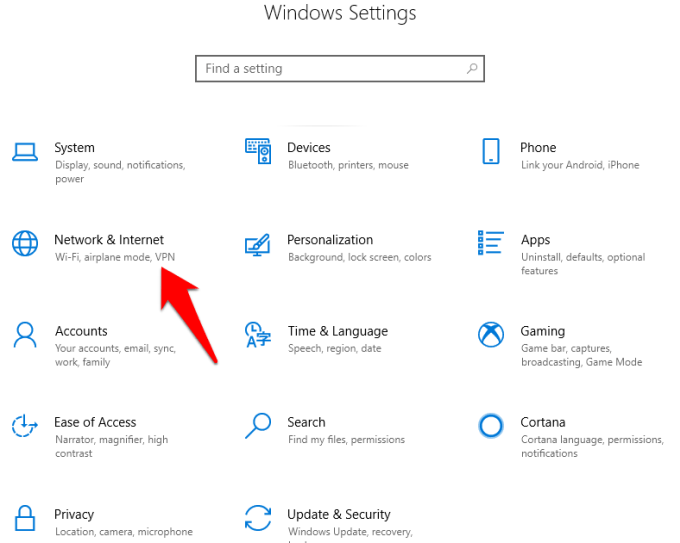
- Click Start on the taskbar and select Settings>Network & Internet.
- Go to Change AdvancedSharing options.
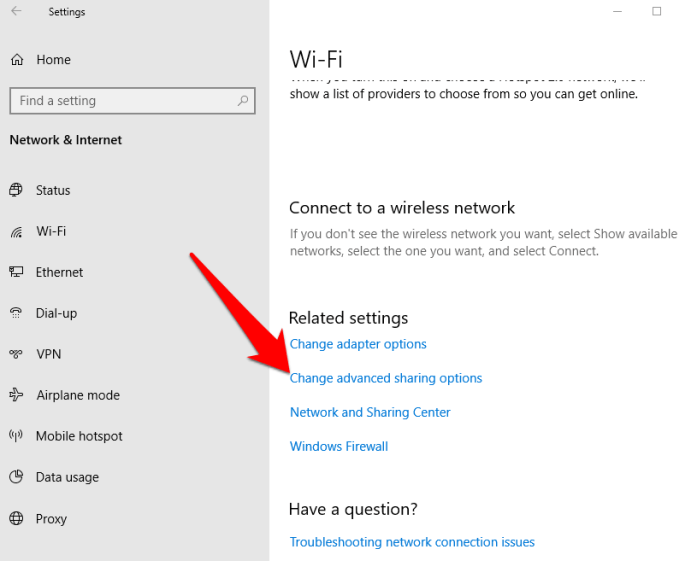
- Click Turn on network discovery.
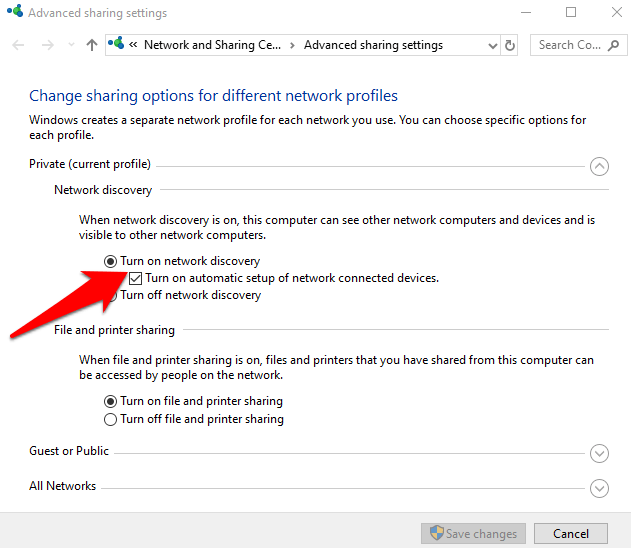
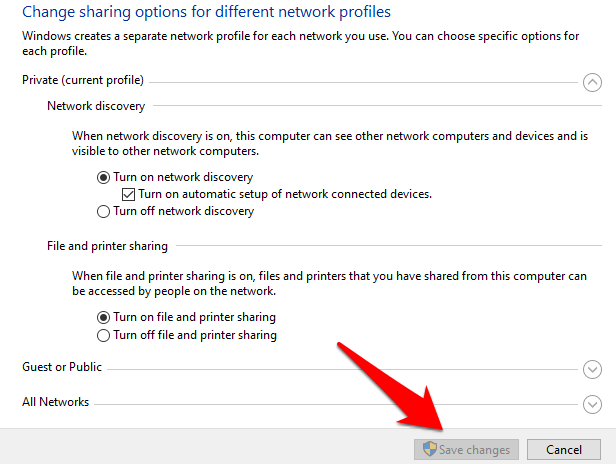
- Click Save changes. If the Save Changes button is grayed out, it means Network Discovery is already enabled, so you can ignore this step.
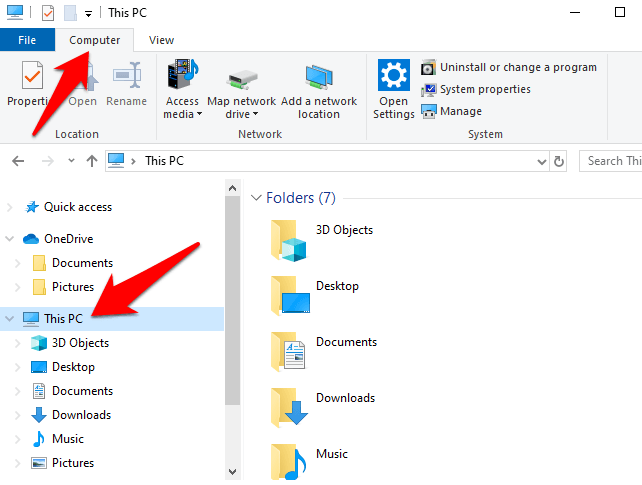
- Next, open File Explorer by pressing the Windows logo key+E.
- Click This PC and go to the Computer tab. Alternatively, search for This PC with Cortana.
- In the main window, check the letters for each drive you see and note them down so that you don’t create duplicate ones. Avoid using letters C, D and F as these are usually assigned to the local storage and removable media like USB drives and discs. This also ensures you don’t encounter complications down the line.
- Click the Map Network Drive button (helps you connect to a new remote resource on the network).
- Select a Drive letter in the drive list, and search for the network drive. To navigate to the drive itself, click Browse in the popup menu.
Note: If this is your first network drive, you’ll see one on the drive list. If you have several network drives, you’ll see several of them when you click the Browse button.
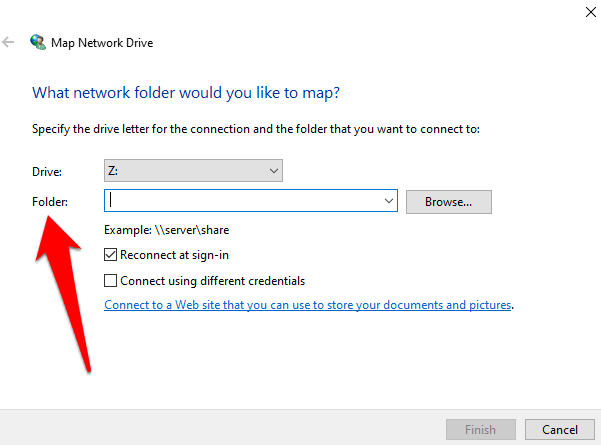
- In the Folder box, type the folder or computer path, or click Browse to find it.
- Select Reconnect at sign-in to connect each time you log into your computer. It ensures the mapped drive is available to you every time, but if you don’t want this, uncheck the box.
- Find the shared folder in the drive or create a new one, where you can drop files into for access from any location. To create a folder, right-click New Folder, and give it a name you can remember when you need to find it on a different device.
- If you need to access the shared network folder using credentials for a different account, tick Connect using different credentials.
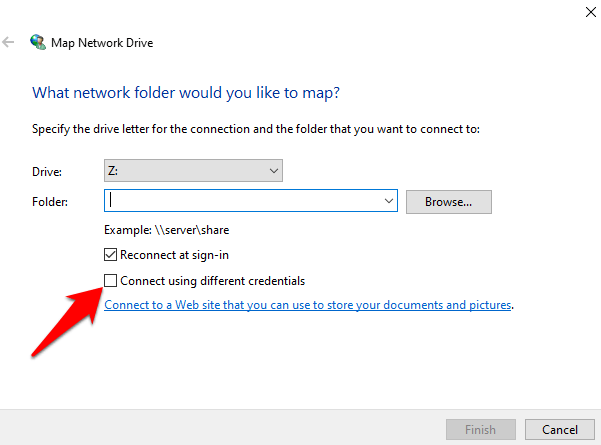
- You’ll get a prompt to enter the shared network login information i.e. username and password of the computer you want to connect to. Use a password you can remember in case other colleagues or family members need to use it.
Note: If your NAS device has a username and password, you may need to enter it to access the drive.
- Click Finish. You’ll see a new window for the drive denoted by the drive letter you assigned earlier. It’ll also display the shared folders, from which you can view and open files on the network drive.
Note: If you’re unable to map a network folder or drive, check whether the computer you’re trying to connect to is turned off, or check whether you have the correct permissions. You can also check with your network administrator.
You’ll see the network drive listed on the sidebar in File Explorer under This PC. From here, you can open it and drag files such as documents, media or others to it. You can also copy/cut and paste as you would with other files and folders.
When you’re done with the mapped drive and don’t need it anymore, just right-click on it and select Disconnect.
Using Command Prompt to Map a Network Drive Windows 10
An advanced way of working with a mapped drive in Windows is by using the net use command in Windows, or in PowerShell if you prefer.
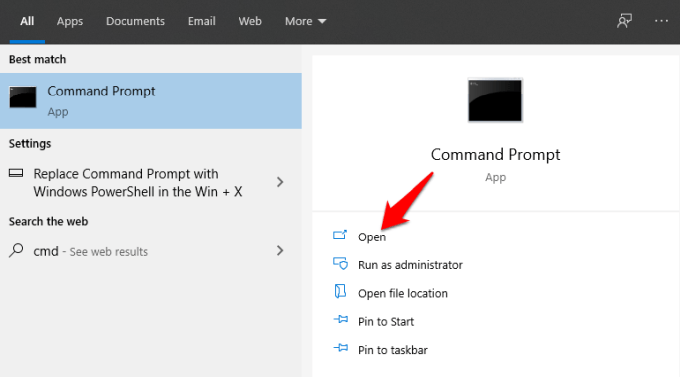
- Click Start and type CMD in the search bar.
- Click Open under Command Prompt.
- In the Command Prompt window, type net use DRIVE: PATH and press Enter. (DRIVE represents the drive letter you’ll use and PATH represents the UNC path for sharing. So it would look something like: net use g: \\tower\entertainment

- You can add your username and password to the command if the share you’re connecting to is protected with a password or other authentication and you don’t want to keep typing the credentials each time you open the network drive.
For example, if our username is OTT and password is bringthatbeatback, the command will look something like: net use g: \\tower\entertainment /user:OTT bringthatbeatback

- When you restart your computer, the mapped drive may disappear, as they’re not persistent by default. In this case, you can add the /persistent switch to make sure they stick around.
To create a persistent connection, type /persistent:Yes so future connections made using this command will be persistent until you turn it off using the /persistent:No toggle.

- To delete the mapped network drive in command prompt, specify the drive letter and add/delete switch as follows: net use DRIVE: /delete. For example, we used drive letter g, so you’ll type the command net use g: /delete
How To Map a Network Drive On Windows 7, 8 & XP
Microsoft stopped supporting Windows 7 as of January 2020, but you can upgrade to Windows 10 so you can get regular security updates and tech support.
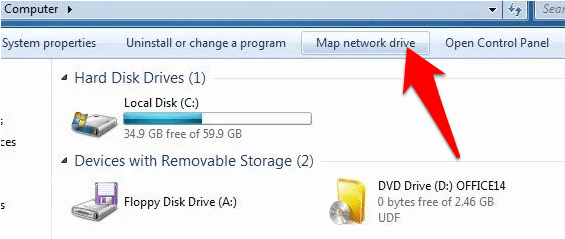
- Mapping a network drive in these older Windows versions is simpler. On the Start menu or desktop, click Computer and then select Map network drive.
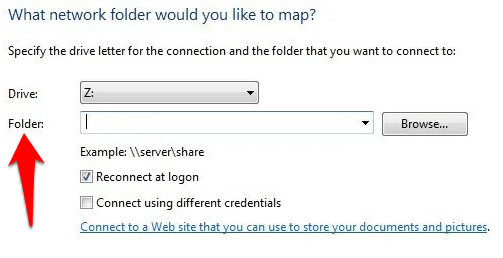
- Select the drive letter for the network drive you want to map. In the Folder field, enter the UNC path and then click Finish. Windows XP has several different methods to map a network drive, but the above steps use Windows Explorer to map the drive.
Were you able to map your network drive using the steps we’ve covered in this guide? Tell us in a comment below.
Elsie is a technology writer and editor with a special focus on Windows, Android and iOS. She writes about software, electronics and other tech subjects, her ultimate goal being to help people out with useful solutions to their daily tech issues in a simple, straightforward and unbiased style. She has a BCom degree in Marketing and currently pursuing her Masters in Communications and New Media. Read Elsie’s Full Bio


