- How to Fix Font Bugs in Windows 10
- Font bugs in Windows 10, how to fix them?
- Solution 1 – Check your language settings
- Solution 2 – Reinstall the font
- Solution 3 – Disable scaling on high DPI settings
- Solution 4 – Modify your registry
- Solution 5 – Remove the problematic update
- Solution 6 – Use FontReg tool to register your fonts
- Solution 7 – Delete FNTCACHE.DAT file
- Solution 8 – Rebuild the font cache
- Исправление установленных шрифтов, не отображаемых в Windows 10
- Включить опцию шрифтов на панели управления
- Обновление за апрель 2021 года:
- Использование командной строки
- Переустановите шрифт
- Заключение
How to Fix Font Bugs in Windows 10

Windows 10 is still a new operating system, and from time to time there will be bugs here and there. Some of these bugs are just annoying while others are more severe. Today, we’re going to explain to you how to fix font bugs in Windows 10.
Font bugs in Windows 10, how to fix them?
Font bugs can be rather annoying, and speaking of font bugs and Windows 10, many users reported the following problems:
- Windows 10 Arial font corrupted – This is one of the most common font problems that can happen on Windows 10. However, this issue can be easily resolved by using one of our solutions.
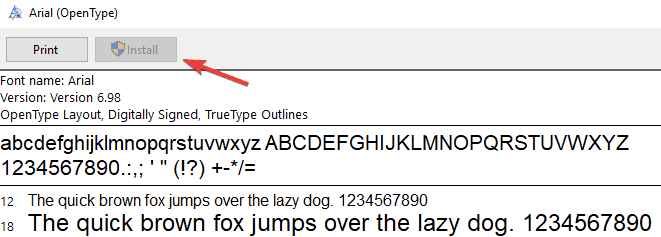
- Reinstall Arial font Windows 10 – If Arial font is corrupted, you can easily fix the problem by reinstalling it. Simply open the font and click the Install button.
- Fonts missing after Windows update – This is another problem that can occur with Windows 10. To fix this problem, you need to find and remove the problematic update from your PC.
- Windows 10 fonts missing, corrupted – This is another relatively common issue with Windows 10 and fonts. If your fonts are corrupted or missing, you just need to reinstall them in order to fix this problem.
- Font Windows 10 blurry – In some cases, your fonts can become blurry. This is an annoying problem, and we already covered how to fix blurry fonts in Windows in one of our older articles, so be sure to check it out for more instructions.
Solution 1 – Check your language settings
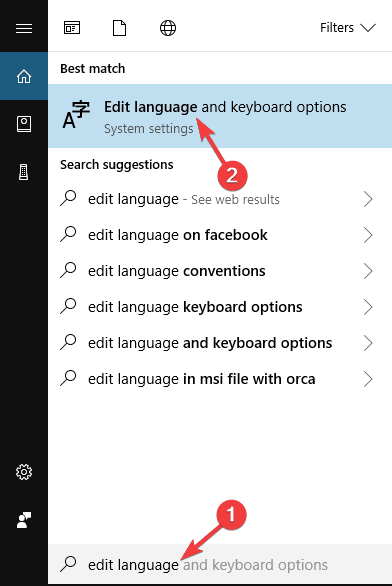
- Type edit language in Cortana. Then click on option Edit language and keyboard options.

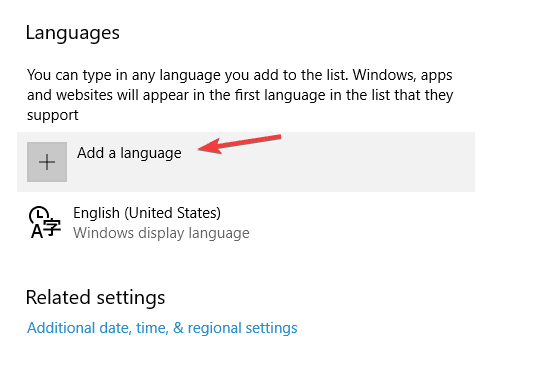
- Find Language option and check what language is set as default.
- If you want to set a different language, you can change it by clicking Add a language option.
- Choose your preferred language and click Set as default.
This isn’t the best solution, but it might help if English is not set as your predefined language, so it’s worth checking out.
Solution 2 – Reinstall the font
If you have upgraded to Windows 10 from Windows 7 or Windows 8, it might happen that your font wasn’t installed properly so you need to reinstall it manually.
If this sounds complicated, don’t worry, it’s actually simpler than it sounds. To do this, simply do this:
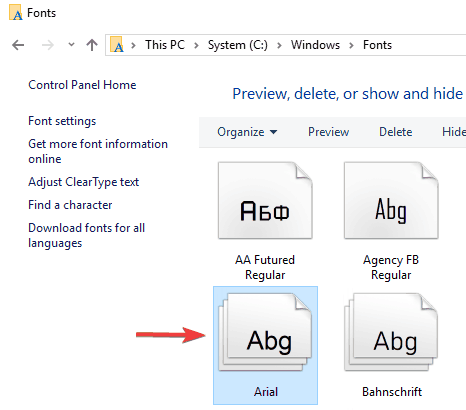
- Go to C:WindowsFonts if you did a clean install of Windows 10. If you have upgraded from Windows 7 or Windows 8 you need to go to C:Windows.oldWindowsFonts.
- Now you need to find the font that is giving you trouble. In most cases, it’s Arial or Mingliu. Find the font file and open it to preview the font.
- In the preview window click Install on the top right corner and you’ll reinstall the font manually.
- If for some reason these fonts are missing you can always download or copy them from another PC.
You can also install the missing font using the Command Prompt. This method is intended for advanced users, but it’s also faster than the previous method. To install the missing font, just do the following:
- Press Windows Key + X to open Win + X menu. Now select Command Prompt (Admin) from the list. If the Command Prompt isn’t available, you can also use PowerShell (Admin).
- When Command Prompt opens, enter C:WindowsFontsArial.ttf and press Enter.
- The font preview window will now appear. Click on the Install button to install the font.

Keep in mind that you need to repeat these methods for all missing fonts.
As you can see, this method is useful if you’re missing just one or two fonts, but if you’re missing more fonts, you might want to try a different method.
Solution 3 – Disable scaling on high DPI settings
Sometimes font bugs are caused by high DPI displays, so the solution is to disable high DPI settings. To do this do the following:
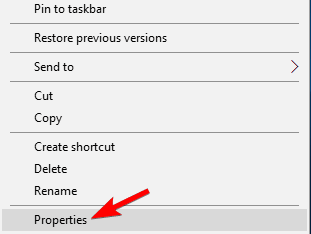
- Right-click the executable file that has font bugs. Select Properties from the context menu.
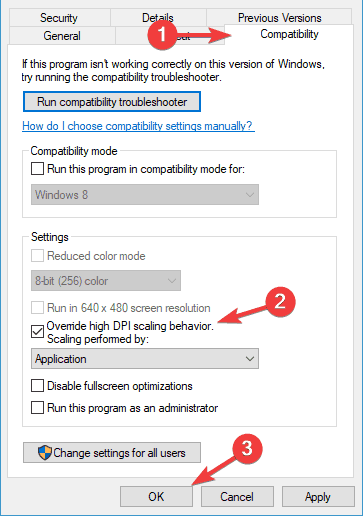
- Then go to the Compatibility tab. Disable Display scaling on high DPI settings and click Apply and OK to save changes.
Save the changes and restart your application to see if the problems were fixed.
We have to warn you that this solution might cause your fonts in the application to be smaller, so you might have to adjust their size manually.
Also, if several applications are giving you problems, you need to repeat this step for each one of them.
Solution 4 – Modify your registry
If you’re having font bugs on Windows 10, the issue might be caused by your registry. Sometimes certain problems can appear if your registry values aren’t correct, and in order to fix that, you need to change them manually.
To do that, follow these steps:
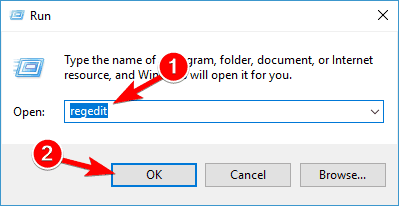
- Press Windows Key + R and enter regedit. Press Enter or click OK.
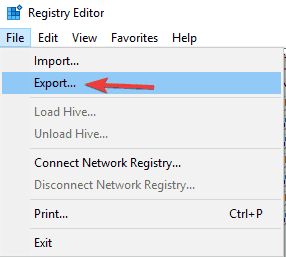
- Optional: Modifying the registry is potentially dangerous, so in order to avoid any future problems, it’s advised to export your registry and create a backup. To do that, just click on File > Export. Set Export range as All and enter the desired file name. Choose a save location and click on Save. After doing that, you’ll have a backup of your registry. If anything goes wrong after making the changes, simply run the exported file to restore your registry to the original state.
- In the left pane, navigate to HKEY_LOCAL_MACHINESOFTWAREMicrosoftWindows NTCurrentVersionGRE_Initialize and double click DisableFontBootCache in the left pane.
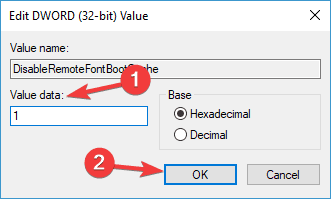
- Set Value data to 1 and click on OK to save changes.
- Close Registry Editor and restart your PC.
 Set Export range as All and enter the desired file name. Choose a save location and click on Save.
 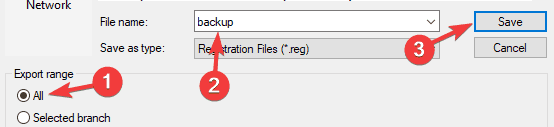 After doing that, you’ll have a backup of your registry. If anything goes wrong after making the changes, simply run the exported file to restore your registry to the original state.
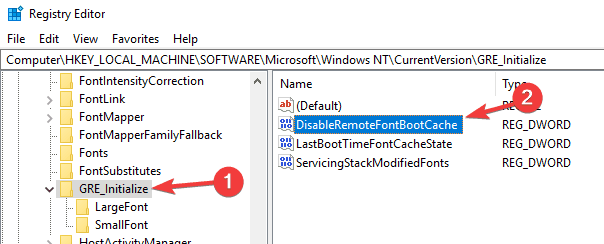
After doing that, the problem with fonts should be completely resolved. It’s worth mentioning that using this method might cause a slower boot, so don’t be surprised if your PC is booting slower than usual.
Solution 5 – Remove the problematic update
If you’re having font bugs on your PC, the problem might be related to a specific update. Sometimes an update can cause this problem to appear, and the only way to fix it is to find and remove the problematic update.
This is relatively simple, and you can do it by following these steps:
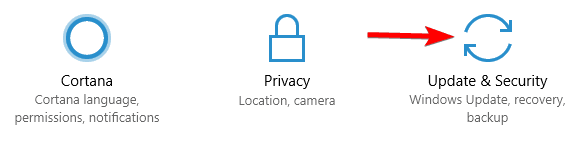
- Open the Settings app and navigate to Update & Security.
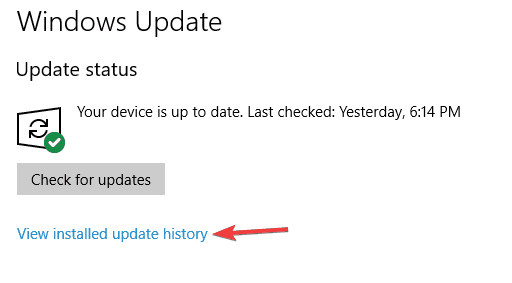
- Now choose View installed update history from the menu on the right.
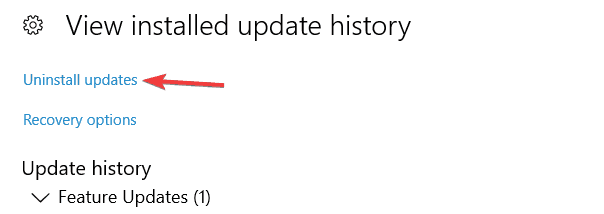
- Select Uninstall updates.
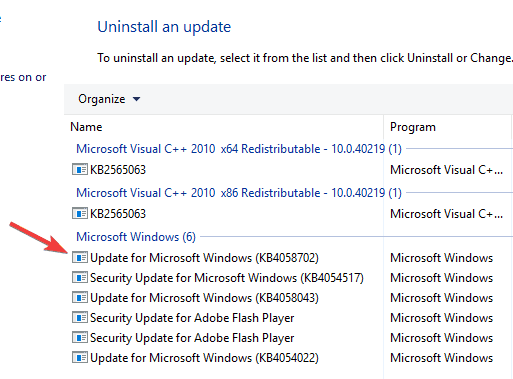
- A list of recent updates will now appear. Double click update to remove it.
Once you remove the update, check whether the issue is still there. It’s worth mentioning that Windows 10 will automatically install the missing updates causing the problem to reoccur.
To prevent this update from installing, be sure to check our guide on how to block automatic Windows updates for detailed instructions.
Solution 6 – Use FontReg tool to register your fonts
Several users reported that they fixed font bugs on Windows 10 by using the FontReg tool.
This is a freeware application that allows you to install missing fonts on your PC. The application is simple to use, and after using it, the font problems should be completely resolved.
Solution 7 – Delete FNTCACHE.DAT file
Font bugs can be rather annoying, but users found a useful workaround that you might want to try. According to them, you can fix this problem simply by deleting the FNTCACHE.DAT file.
To do that, just go to C:WindowsSystem32 directory and locate FNTCACHE.DAT. Delete that file, and restart your PC and the problem should be resolved. 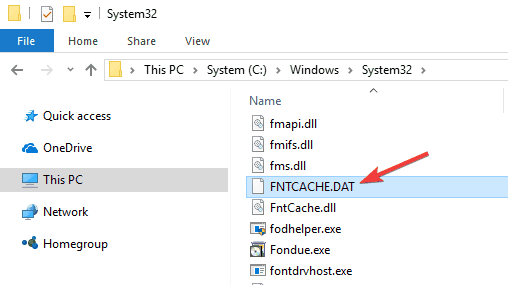
Keep in mind that this is just a workaround, so you’ll need to repeat it every time before you turn off or restart your PC.
Solution 8 – Rebuild the font cache
Sometimes font bugs can appear due to font cache corruption. To fix that, you need to delete temporary files in order to rebuild your cache. This is rather simple and you can do it by following these steps:
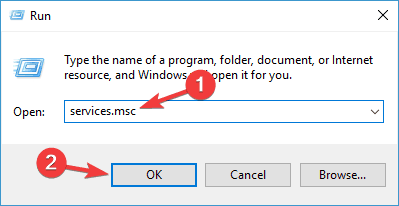
- Press Windows Key + R and enter services.msc. Now press Enter or click OK.
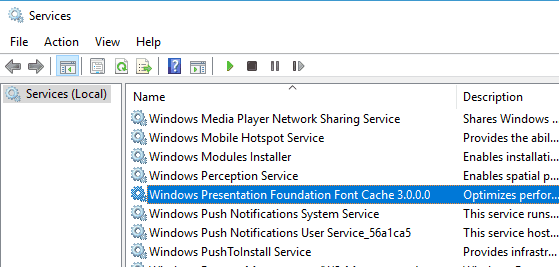
- When the Services window opens, locate Windows Presentation Foundation Font Cache 3.0.0.0 service and stop it. To do that quickly, just right-click the service and choose Stop from the menu. If the service is already stopped, move to the next step.
- Press Windows Key + R and enter %windir%ServiceProfilesLocalServiceAppData. Press Enter or click OK. If you get a warning dialog, just click on Continue.
- Navigate to the Local directory. Now locate any files that have

FontCache- prefix and delete them. If you can find any of these files in the Local directory, go to the FontCache directory. Now delete all files with
FontCache- prefix. 
After deleting these files, the issue should be resolved and your fonts should start working again. Font bugs can be rather annoying, but you should be able to fix them using one of our solutions.
If you have any other Windows 10-related issues you can check for the solution in our Windows 10 Fix section.
Исправление установленных шрифтов, не отображаемых в Windows 10
Иногда стандартные шрифты последней версии Windows 10 просто не хватает. Шрифты Times New Roman и Arial неподвластны времени, но вы можете захотеть чего-то более резкого. Вам не нужно ограничивать себя стандартными опциями Windows 10.
Вы всегда можете скачать шрифт, который лучше соответствует вашим потребностям, особенно если вы ищете шрифт, который привнесет в ваш проект немного вашей индивидуальности. Вы даже можете удалить шрифты, которые никогда не будете использовать. Все начинается с виртуального путешествия в Microsoft Store.
Некоторые пользователи Windows 10 жаловались, что когда они пытаются установить шрифты на свой компьютер, скопировать и вставить шрифт в свою папку Windows Fonts, шрифт не отображается в папке Fonts, и появляется сообщение о том, что шрифт уже установлен. Если вы хотите заменить расширение. Если вы также не видите установленный шрифт в папке Windows Fonts, вот исправление, которое вам нужно.
Включить опцию шрифтов на панели управления
Это связано с тем, что опция «Шрифты» не включена по умолчанию.
Обновление за апрель 2021 года:
Теперь мы рекомендуем использовать этот инструмент для вашей ошибки. Кроме того, этот инструмент исправляет распространенные компьютерные ошибки, защищает вас от потери файлов, вредоносных программ, сбоев оборудования и оптимизирует ваш компьютер для максимальной производительности. Вы можете быстро исправить проблемы с вашим ПК и предотвратить появление других программ с этим программным обеспечением:
- Шаг 1: Скачать PC Repair & Optimizer Tool (Windows 10, 8, 7, XP, Vista — Microsoft Gold Certified).
- Шаг 2: Нажмите «Начать сканирование”, Чтобы найти проблемы реестра Windows, которые могут вызывать проблемы с ПК.
- Шаг 3: Нажмите «Починить все», Чтобы исправить все проблемы.

Для решения этой проблемы:
- Нажмите кнопку «Пуск», выберите «Настройка», а затем «Панель управления».
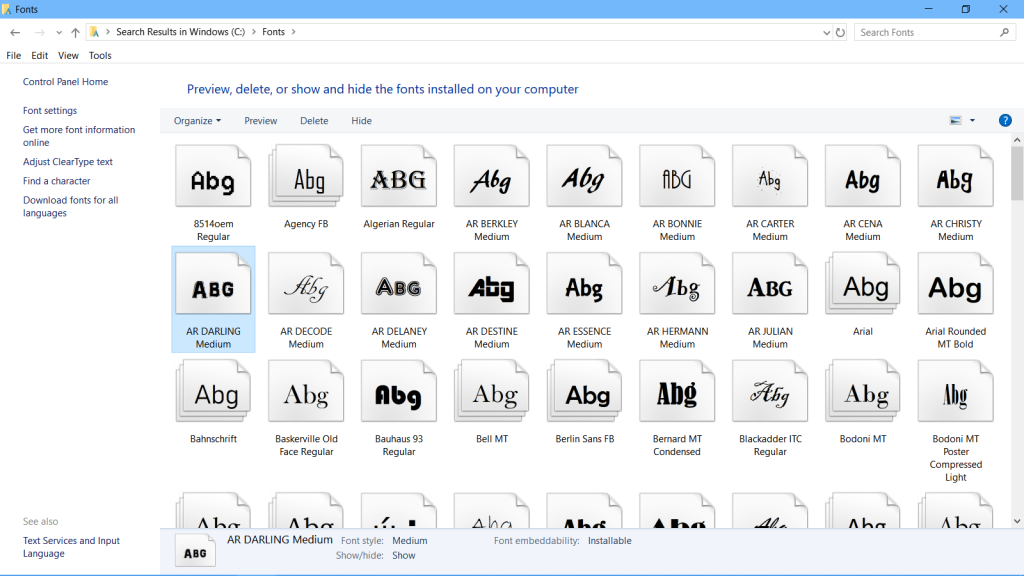
- Дважды щелкните шрифты.
- В меню «Файл» выберите «Шрифты», чтобы установить соответствующий флажок.
- В меню Файл выберите Установить новый шрифт.
- Чтобы проверить, отображаются ли шрифты, перейдите в папку, содержащую файлы шрифтов (например, папку Windows \ Fonts).
Использование командной строки
- Перейдите на диск C и создайте папку с именем новых шрифтов
- Скопируйте шрифт, который вы хотите установить, и вставьте его в эту папку. Например, в моем случае я хочу установить шрифт ALGER.TTF здесь.
- Ну ищи cmd в Windows 10 Search
- Щелкните правой кнопкой мыши результат поиска и выберите «Запуск от имени администратора».
- Теперь скопируйте приведенную ниже команду в командную строку и нажмите Enter, чтобы переместить ее в эту папку с помощью cmd.
- cd C: \ новые шрифты
- Теперь выполните следующую команду, чтобы скопировать шрифт в c: \ windows
- Копировать C: \ FONT NAME.TTF C: \ Fonts

Переустановите шрифт
Шрифты легко установить, но это не значит, что установка не может быть ошибочной. В таком случае проще всего удалить и переустановить шрифт.
- Откройте проводник и перейдите к следующей папке.
- C: \ Windows \ Fonts
- Скопируйте файл полиции и вставьте его в папку выше.
- Если командная строка спросит, хотите ли вы перезаписать файл, разрешите перезапись.
- Вы также можете удалить шрифт из папки выше и скопировать его снова.
Заключение
Шрифты бывают самых разных видов, и есть из тысячи на выбор. Если шрифт, который вы хотите использовать, не работает в конкретном приложении, или если вы не можете найти версию файла шрифта, которая «не» повреждена, вы всегда можете найти альтернативу.

CCNA, веб-разработчик, ПК для устранения неполадок
Я компьютерный энтузиаст и практикующий ИТ-специалист. У меня за плечами многолетний опыт работы в области компьютерного программирования, устранения неисправностей и ремонта оборудования. Я специализируюсь на веб-разработке и дизайне баз данных. У меня также есть сертификат CCNA для проектирования сетей и устранения неполадок.


