- How to use multiple monitors in Windows 10
- Video: Connecting a monitor
- Before you start
- Rearrange your displays
- Identify a display
- Detect a display
- Arrange your displays
- Change display options
- Change orientation
- Choose a display option
- Related topics
- Решение ошибки «Другой дисплей не обнаружен» в Windows 10
- Способ 1: Физическая проверка устройств
- Способ 2: Использование кнопки «Обнаружить»
- Способ 3: Добавление беспроводного монитора
- Способ 4: Установка драйверов на монитор
- Способ 5: Обновление драйверов видеокарты
- Способ 6: Проверка герцовки мониторов
- Способ 7: Изменение режима проецирования
- Windows 10 cannot detect the second monitor
- Windows 10 cannot detect the second monitor
- 1] Update Driver software
- 2] Manually detect Monitor settings
- 3] Hardware troubleshooting
- FIX: Second monitor not detected on Windows 10
- How do I get my computer to recognize a second monitor?
- 1. Update your display driver
- DriverFix
- 2. Rollback to an older driver
- 3. Uninstall your driver and use the default one
- 4. Use specialized software for multimonitor setup
- 5. Temporarily disable your graphics adapter
- 6. Change your monitor frequency
- 7. Temporarily switch only to the first monitor
- 8. Install Windows updates
How to use multiple monitors in Windows 10
After you’ve connected your Windows 10 PC to external displays, you can adjust the settings for each one.
Video: Connecting a monitor
Here’s a video on the basics of connecting to an external monitor.

Before you start
Before changing settings for your external displays, make sure everything is connected properly. Here’s what you can do:
Make sure your cables are properly connected to your PC or dock.
Check for Windows updates. To check for updates, select Start > Settings > Updates & Security > Windows Update > Check for updates.
Tip: If you’re using a wireless display adapter, connect to an HDMI port on newer TVs, then wirelessly connect your PC to it. After connecting your wireless display adapter to your TV, go to your Windows 10 PC and select Start > Settings > System > Display, then select Connect to a wireless display.
Rearrange your displays
You’ll see this option when Windows detects more than one display. Each display will be numbered to help you identify them more easily.
Identify a display
To see which number corresponds to a display, select Start > Settings > System > Display > Rearrange your displays, then select Identify. A number appears on the screen of the display it’s assigned to.
Detect a display
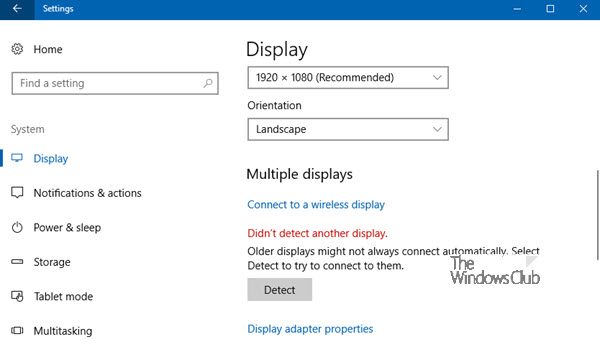
If you connected another display and it isn’t showing in Settings, select Start > Settings > System > Display > Rearrange your displays, then select Detect.
Arrange your displays
If you have multiple displays, you can change how they’re arranged. This is helpful if you want your displays to match how they’re set up in your home or office. In Display settings, select and drag the display to where you want. Do this with all the displays you want to move. When you’re happy with the layout, select Apply. Test your new layout by moving your mouse pointer across the different displays to make sure it works like you expect.
Change display options
After you’re connected to your external displays, you can change settings like your resolution, screen layout, and more. To see available options, select Start > Settings > System > Display.
Change orientation
Windows will recommend an orientation for your screen. To change it in Display settings, go to Scale and Layout, then choose your preferred Display orientation. If you change the orientation of a monitor, you’ll also need to physically rotate the screen. For example, you’d rotate your external display to use it in portrait instead of landscape.
Choose a display option
To change what shows on your displays, press Windows logo key + P. Here’s what you can choose.
See things on one display only.
See the same thing on all your displays.
See your desktop across multiple screens. When you have displays extended, you can move items between the two screens.
See everything on the second display only.
Second screen only
Related topics
Simply Windows on Youtube — These videos are only available in English
Решение ошибки «Другой дисплей не обнаружен» в Windows 10
Способ 1: Физическая проверка устройств
Для начала следует остановиться на основных проверочных действиях, которые выполняются буквально за несколько секунд. Все они банальные и просты в реализации, а проверить нужно следующее:
- Убедитесь в том, что используемый кабель точно рабочий. Для этого можно подключить его к первому монитору.
- Удостоверьтесь в надежной фиксации входов и выходов кабеля в портах. Они должны быть полностью вставлены, а VGA еще и дополнительно прикручены на крепления, если таковые имеются.
- Проверьте второй монитор, используя его в качестве первого. Он должен быть подключен к сети, а кнопка включения — находиться в активном режиме.
- Поменяйте порт для подключения или используйте порты для интегрированной графики, находящиеся на материнской плате.
Если эти рекомендации не принесли никакого результата, переходите к выполнению следующих, поэтапно выполняя каждый метод поочередно.
Способ 2: Использование кнопки «Обнаружить»
Существует вероятность того, что второй монитор не обнаружился автоматически, и тогда придется задействовать специально отведенную кнопку в настройках, чтобы запустить эту операцию.
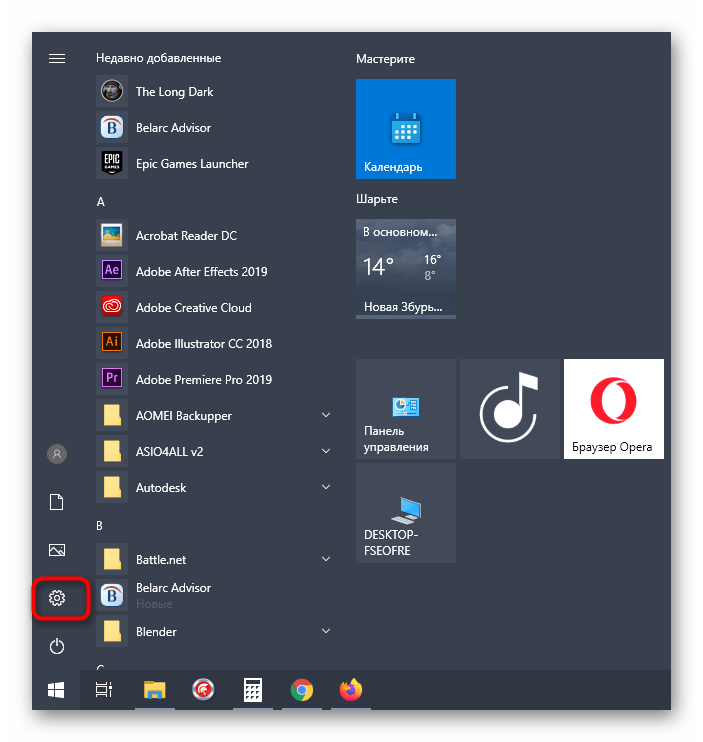
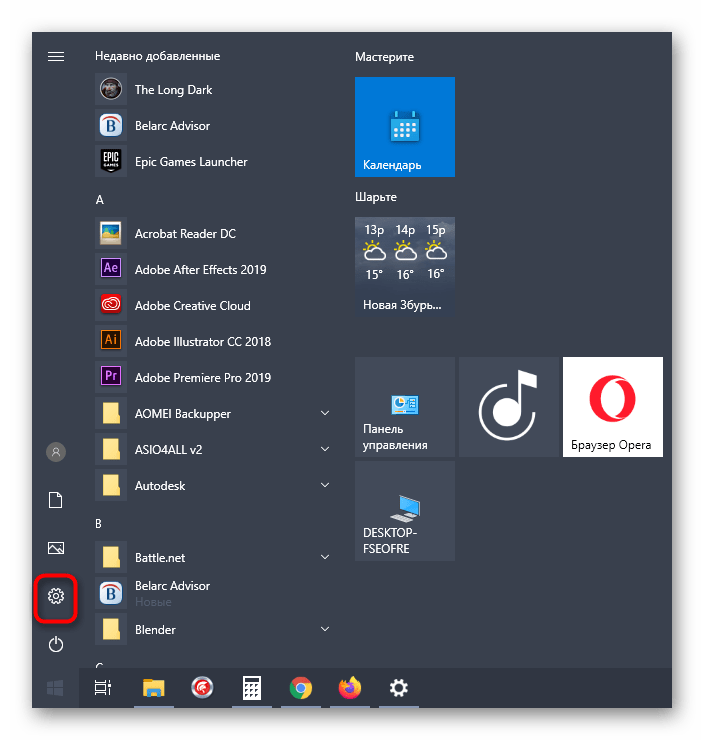
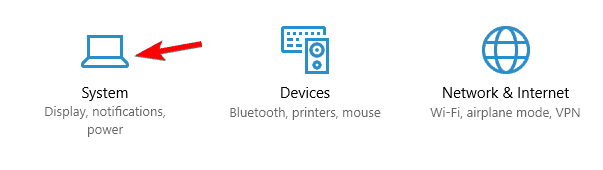
- Откройте меню «Пуск» и перейдите в «Параметры», щелкнув по соответствующей кнопке слева.
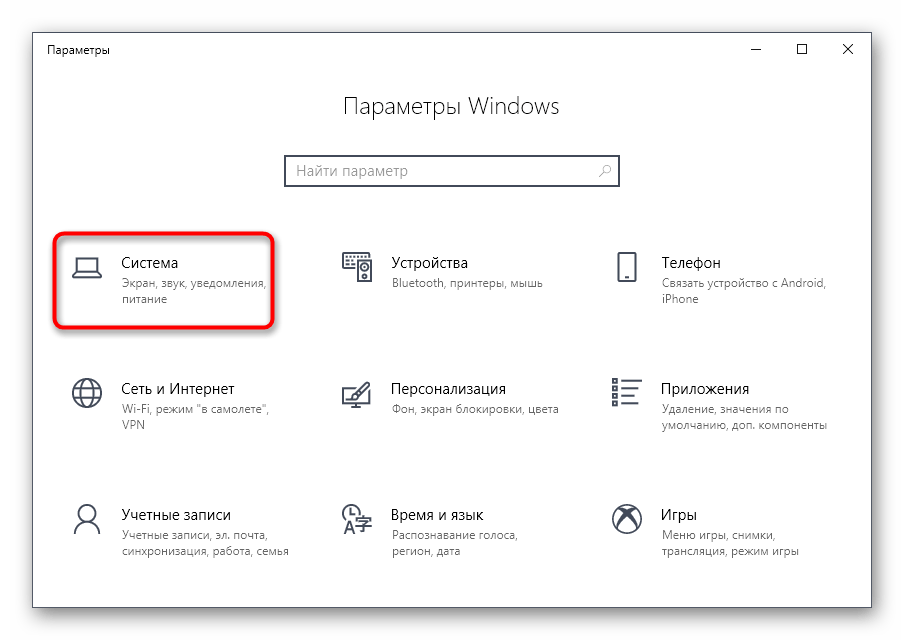
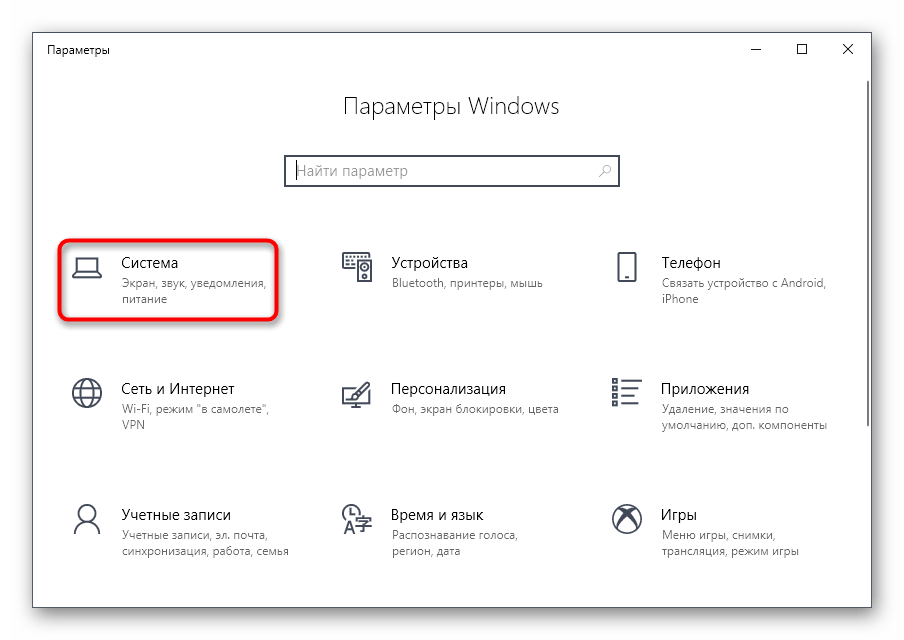
Там выберите первый же раздел «Система».
Находясь в категории «Дисплей», опуститесь ниже и кликните «Обнаружить».

Остается только дождаться отображения результатов сканирования на экране. Если снова появится уведомление о том, что второй монитор не найден, переходите далее.
Способ 3: Добавление беспроводного монитора
Этот вариант подойдет только для тех пользователей, кто в качестве второго дисплея хочет подключить беспроводной монитор. Тогда он может не обнаруживаться при использовании предыдущего метода, из-за чего возникает надобность перейти к другой настройке.
- В этом же меню «Параметры» вас интересует второй раздел «Устройства».
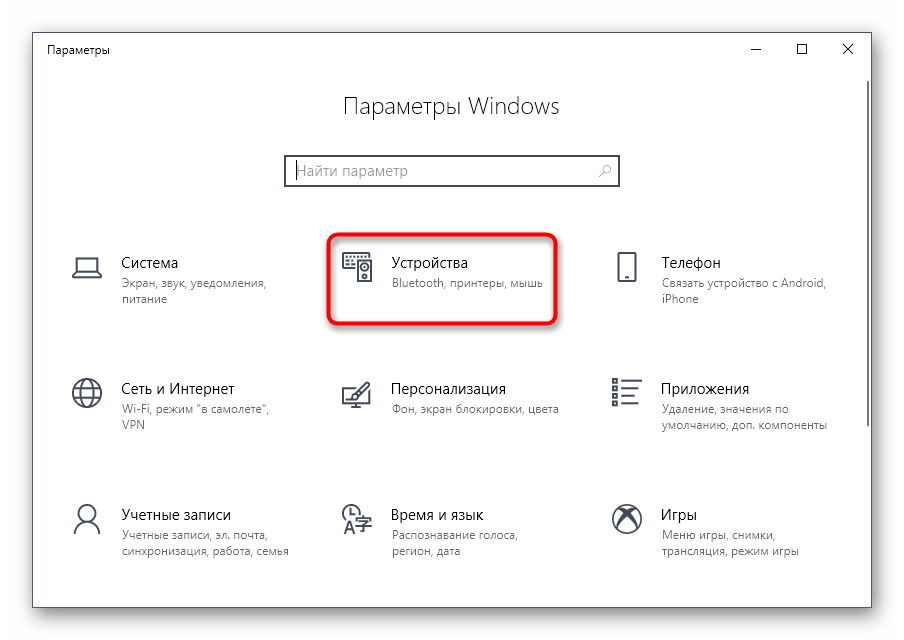
Оказавшись в новом окне, щелкните «Добавление Bluetooth или другого устройства».
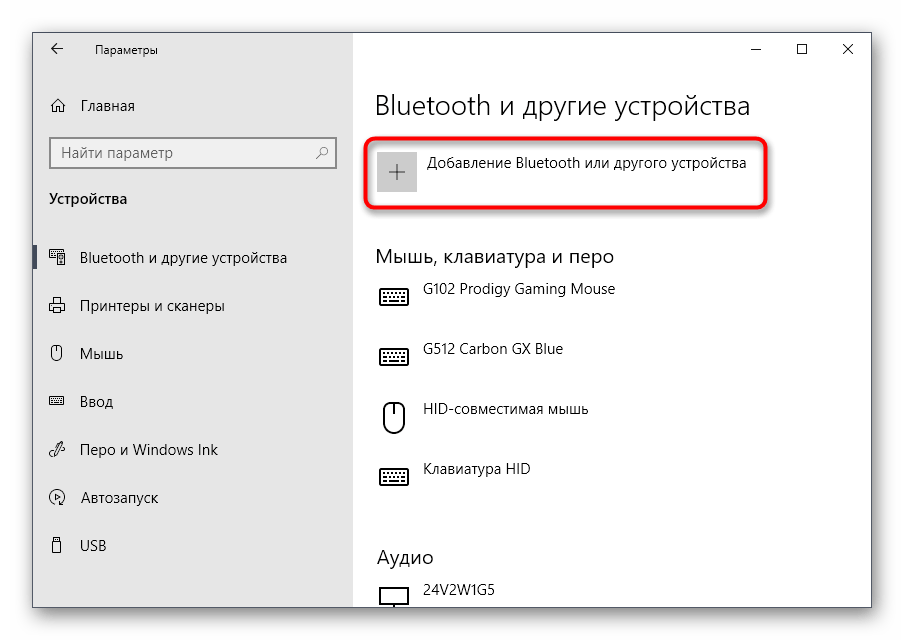
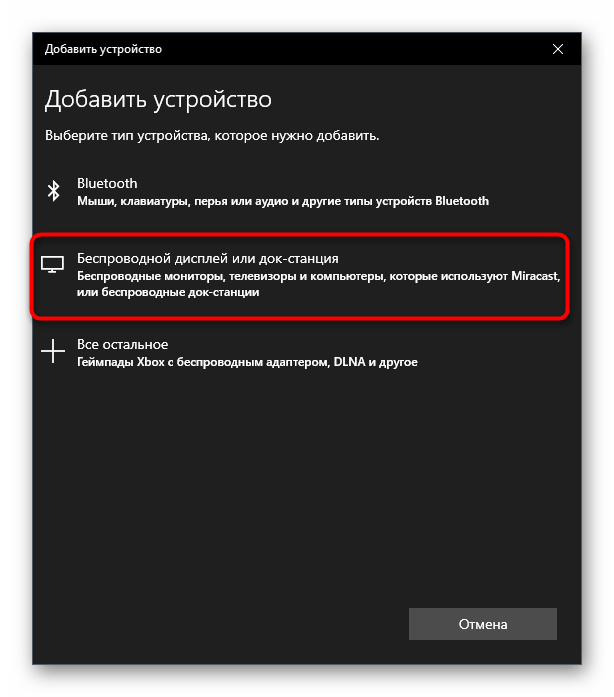
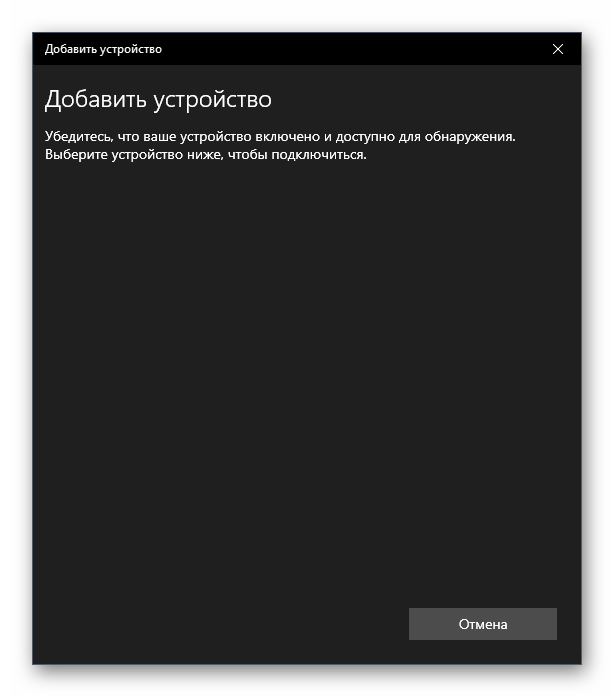
Следуйте отобразившимся на экране инструкциям, чтобы завершить добавление.
Способ 4: Установка драйверов на монитор
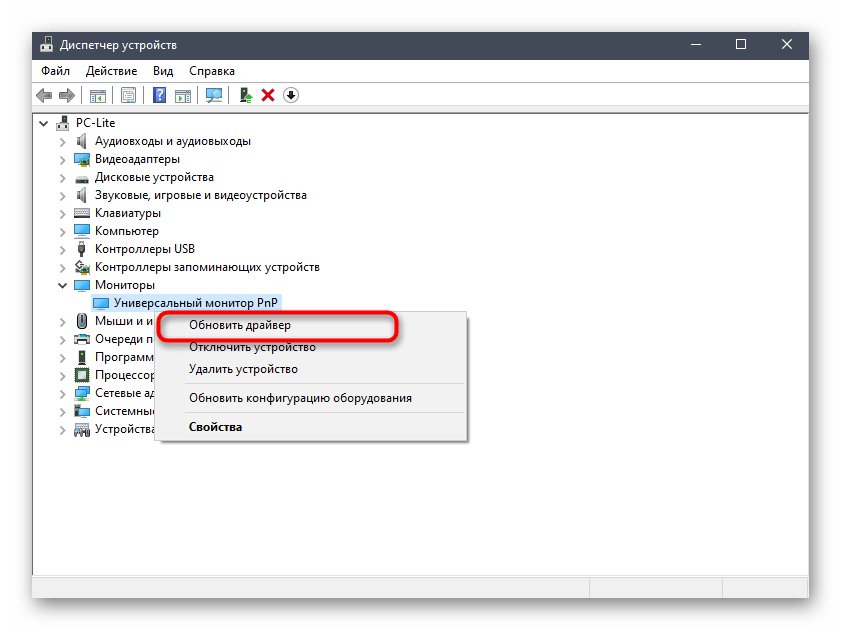
Случается такая ситуация, что второй монитор даже отображается в «Диспетчере устройств» или в драйвере видеокарты, но при этом изображение на него не выводится. Тогда следует установить его фирменные драйверы одним из доступных методов. Советуем выполнить это и тем пользователям, у кого дисплей не виден в Windows. Детальнее обо всех доступных вариантах инсталляции программного обеспечения читайте в материале по ссылке ниже.
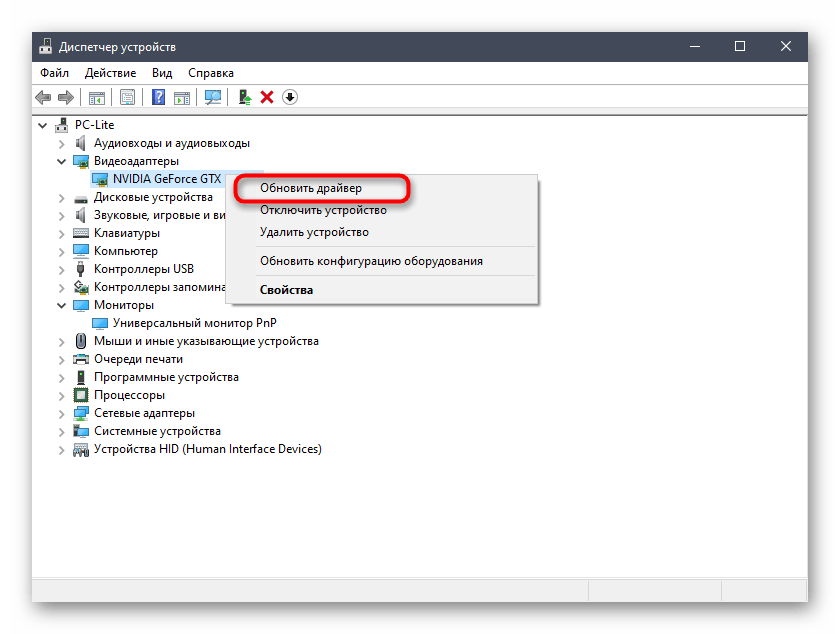
Способ 5: Обновление драйверов видеокарты
Этот вариант схож с прошлым, но уже заключается в обновлении драйверов видеокарты. Возможно, вы используете его старую или несовместимую с двумя дисплеями версию, что и вызывает проблемы при обнаружении второго дисплея. Апдейт графических драйверов не займет много времени, а разобраться в этом поможет другая статья от нашего автора далее.
Подробнее: Обновляем драйвера видеокарты NVIDIA / AMD Radeon
Способ 6: Проверка герцовки мониторов
Иногда проблемы с отображением второго монитора связаны с невозможностью видеокарты обработать разную герцовку либо это не позволяет сделать сама операционная система. Тогда пользователю требуется убедиться в том, что оба дисплея работают на одной и той же частоте, что можно сделать так:
- Снова через «Пуск» перейдите в раздел «Параметры».
Здесь вас интересует первый раздел «Система».
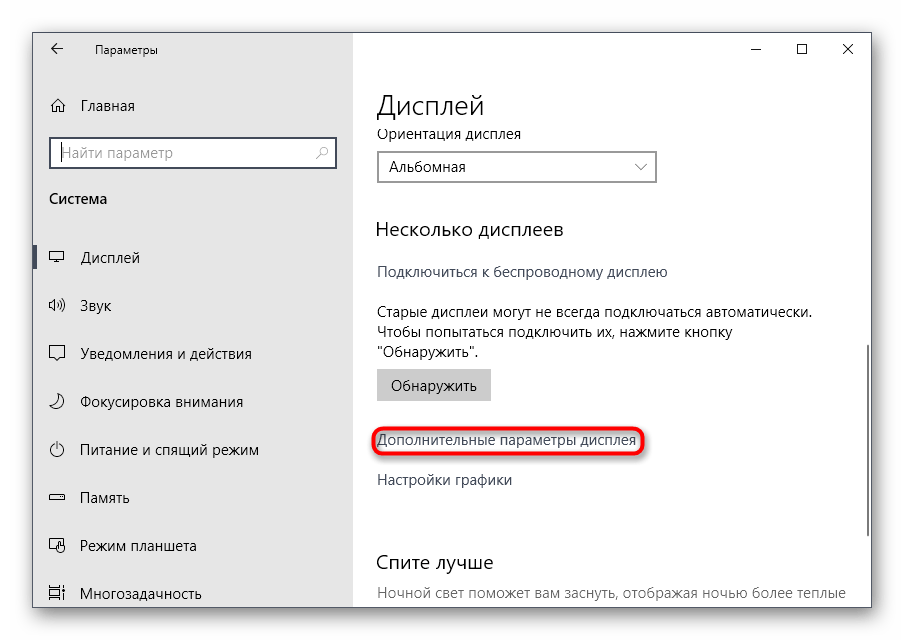
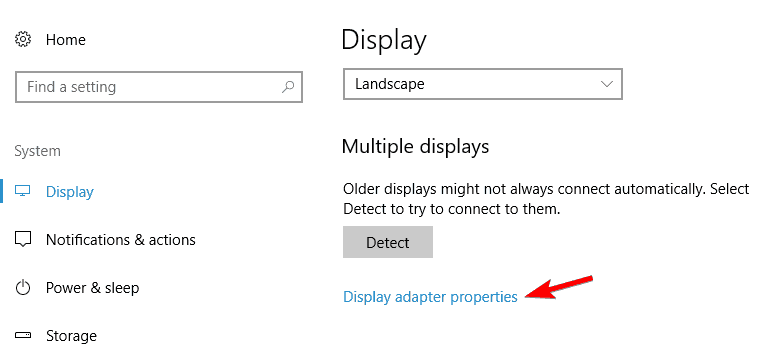
В категории «Дисплей» опуститесь ниже и отыщите кликабельную строку «Дополнительные параметры дисплея».
Сначала выберите первый монитор в выпадающем меню.
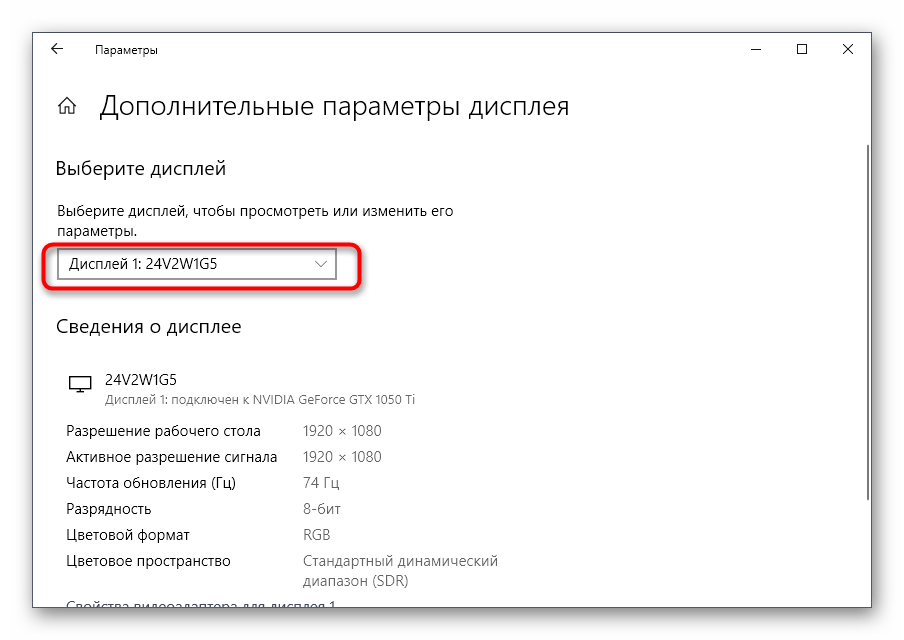
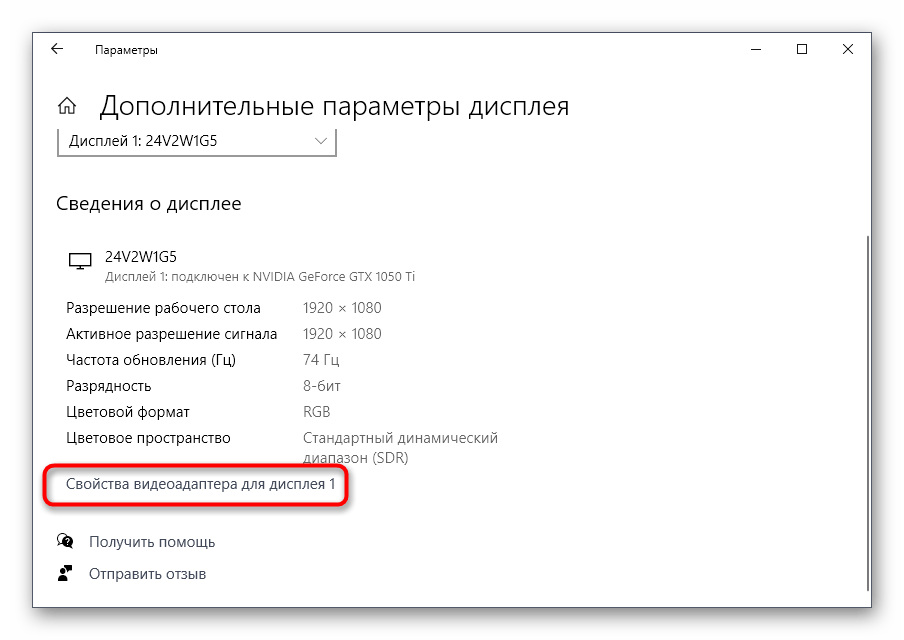
Опуститесь вниз и щелкните «Свойства видеоадаптера для дисплея 1».
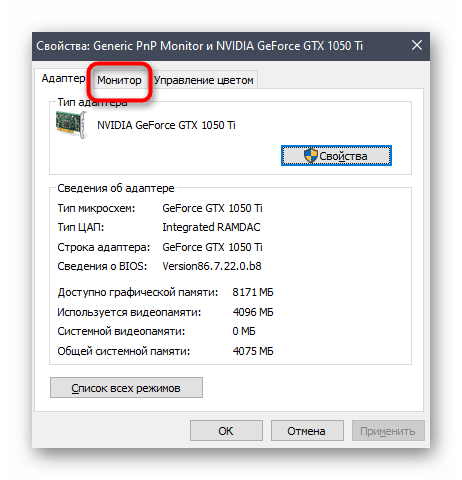
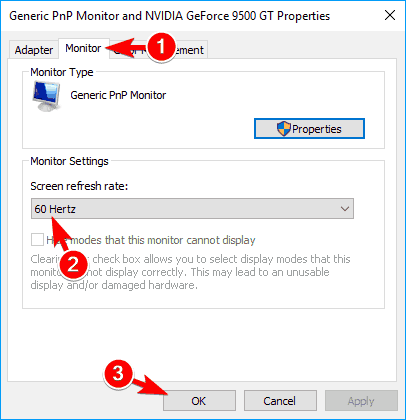
В появившемся окне перейдите на вкладку «Монитор».
Посмотрите текущую герцовку и запомните ее значение.
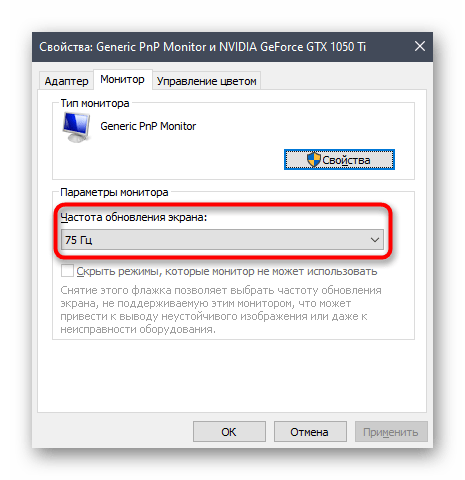
Точно таким же образом понадобится проверить второй монитор. В выделенном всплывающем списке с вариантами герцовки выберите одинаковые значения для каждого дисплея, примените изменения, перезагрузите Windows 10 и повторно произведите обнаружение.
Способ 7: Изменение режима проецирования
Последний метод срабатывает крайне редко, поскольку при подключении двух мониторов режим проецирования выбирается автоматически. Однако можно попробовать вручную изменить его, используя для этого клавишу Win + P. Выберите один из необходимых вариантов и проверьте, будет ли обнаружен дисплей сейчас.
Windows 10 cannot detect the second monitor
Other than its many utilities, a second monitor could be very helpful for work. However, in some situations, despite the second monitor being connected to the system, Windows is unable to detect it and sens a message like – Windows 10 cannot detect the second monitor or Didn’t detect another display. While the reasons could be many, we could narrow it down to a few. If it’s with the software, it could probably be traced to the drivers.
Windows 10 cannot detect the second monitor
Before you begin, make sure that your Windows 10 has all the latest Windows Updates installed, your second monitor hardware is working, and that you have set up the dual monitors properly.
1] Update Driver software
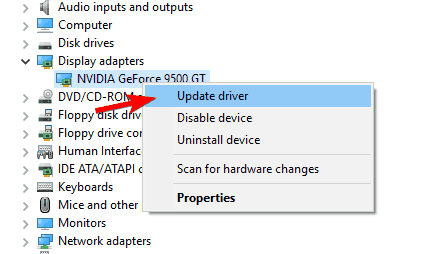
More often than not, the inability of Windows to find the second monitor has to do with the video card. It can’t detect the second display because the video card or graphics card does not have the latest drivers installed. So you need to update the drivers for Display adapters and Monitors … maybe you need to update or reinstall your NVIDIA driver. So update the device drivers and see.
If updating the drivers doesn’t work, you can re-install them:
- Go to Windows key + X key and then, choose Device Manager.
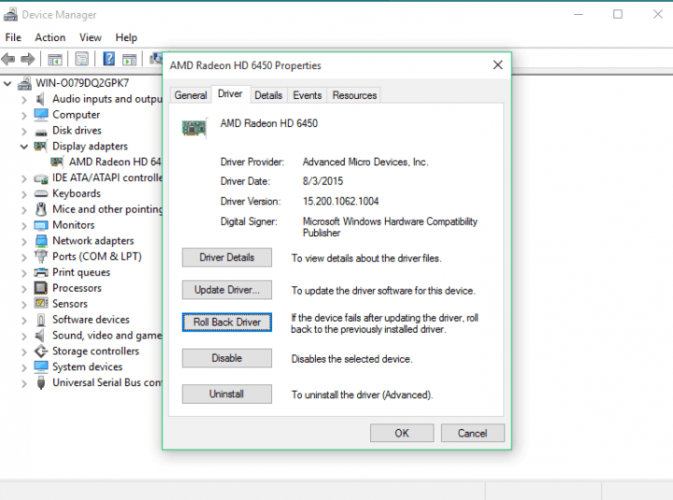
- Find the concerned driver in the Device Manager Window. If you see a yellow exclamation mark against it, right-click on it and select Roll back to rollback the driver.
- If that option is not available, right-click on it and select Uninstall. Restart the system.
- Open Devices Manager again and select Scan for hardware changes to install the driver.
2] Manually detect Monitor settings
If your operating system cannot detect the other monitor, right-click on Start, Select Run, and type desk.cpl in the Run box and hit Enter to open the Display Settings. Usually, the second monitor should be detected automatically, but if not, you can try detecting it manually.
- Click on the Start button and then on the gear like a symbol to open the Settings app.
- Go to System and in the Display tab, under the Multiple Displays column, click on “Detect.” This button helps the OS detect other monitors or displays, especially if they are older models. You can also connect to a wireless display here.
Also, make sure that the bar directly below is set to Extend these displays.
3] Hardware troubleshooting
- Try changing the HDMI cable connecting the second monitor. If it works, we know the previous cable was faulty.
- Try using the second monitor with a different system. It would help isolate whether the issue is with the monitor or the primary system.
- Run the Hardware & Devices Troubleshooter and see.
Let us know if you have any other ideas.
TIP: You might want to check out our TWC Video Hub which offers a lot of interesting videos, including How-Tos and Tutorials.
Date: February 5, 2018 Tags: Multiple Monitors
FIX: Second monitor not detected on Windows 10

- If the second monitor was not detected , check their connections first.
- Sometimes, if your PC didn’t detect another display, that can be caused by problematic drivers.
- You should also consider using specialized multimonitor setup software.
- The Windows not detecting the second monitor issue can also be fixed by tweaking the display frequency.
- Download Restoro PC Repair Tool that comes with Patented Technologies (patent available here).
- Click Start Scan to find Windows issues that could be causing PC problems.
- Click Repair All to fix issues affecting your computer’s security and performance
- Restoro has been downloaded by 0 readers this month.
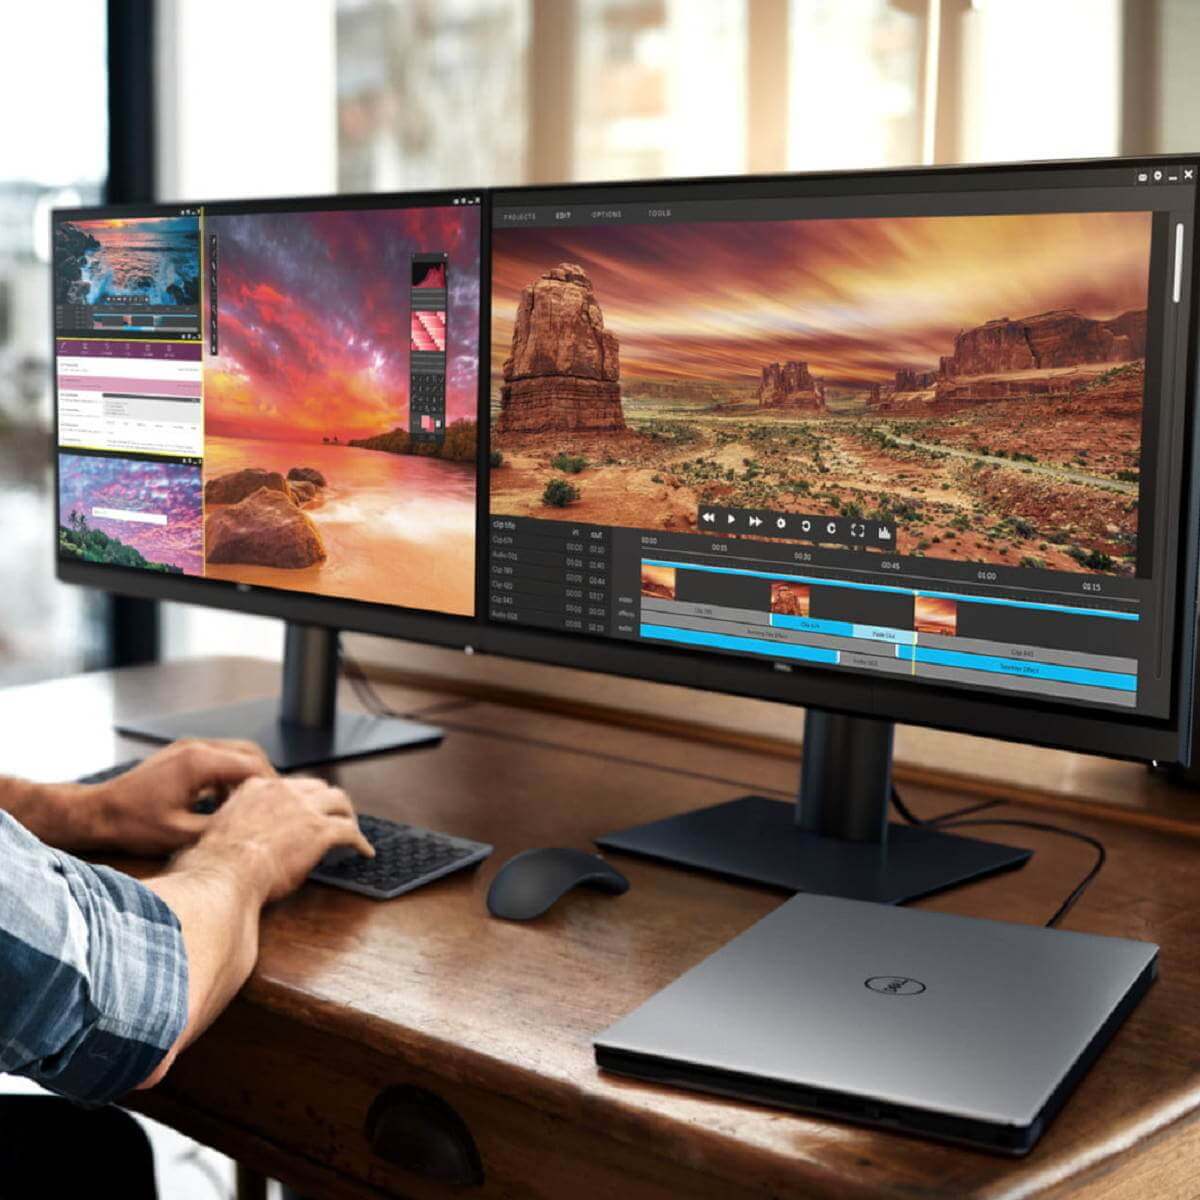
Many users tend to use two or more monitors on their computer to get more workspace and improve their productivity.
Some users have been complaining that Windows 10 only detects one of the two monitors that are plugged in.
Windows not being able to detect a second monitor can be a big problem, but users also reported the following issues:
- Windows 10 can’t detect second screen – This is a just a variation of this problem, and if you’re having issues detecting a second screen, you might want to try some of our solutions.
- Windows 10 can’t detect HDMI,VGAmonitor – If your monitor can’t be detected by Windows 10, that can be a big problem. According to users, these types of problems usually appear while using HDMI or VGA monitor.
- Windows 10 second monitor not working – This is a common problem that can occur with dual monitor configurations. Many users reported that second monitor isn’t working on their Windows 10 PC.
- Windows 10 can’t find my second screen – Issues with dual monitor setups are fairly common, and many users reported that Windows 10 wasn’t able to find the second screen.
- Second monitor not recognized Windows 10 – Many users reported that Windows 10 can’t recognize the second monitor. This is a common problem, but you should be able to fix it by using one of our solutions.
- Second monitor flickering Windows 10 – This is another problem that can appear on dual monitor configurations. Many users reported that the second monitor is constantly flickering.
- Windows 10 second monitor goes black – If you’re using a dual monitor setup, you probably encountered this issue before. According to users, their second monitor goes black or to sleep for unknown reason.
- Windows 10 second monitor keeps turning off – This is another relatively common problem on dual monitor configurations. However, this isn’t a serious issue, and you should be able to solve it by using one of our solutions.
These issues are commonly caused by display drivers but don’t worry, there are few simple solutions that can help you out.
How do I get my computer to recognize a second monitor?
- Update your display driver
- Rollback to an older driver
- Uninstall your driver and use the default one
- Temporarily disable your graphics adapter
- Change your monitor frequency
- Temporarily switch only to the first monitor
- Install Windows updates
- Connect your monitors while the PC is running
- Use Windows Key + P shortcut
- Uninstall IDE ATA/ATAPI driver
- Adjust your resolution
- Close your laptop lid / use Sleep Mode
- Check if Extended desktop is enabled
- Update DisplayLink to the latest version
- Enable Scale to the full panel size option
- Disable Monitor Deep Sleep feature
1. Update your display driver
Since this is a driver issue, it won’t hurt that you update your display driver. Just go to your graphic card manufacturer’s website, find your graphic card, and download drivers for it.
While searching for drivers, make sure that you download the latest drivers, preferably ones for Windows 10.
1.1 Update drivers manually
- Right-click the Start button and select Device Manager.
- Find Display Adapter and right-click it.
- Choose Update Driver and follow the instructions.

Want the latest GPU drivers? Bookmark this page and always stay updated with the latest and greatest.
1.2 Update drivers automatically (suggested)

Downloading drivers manually is a process that carries the risk of getting the wrong driver installed, which may lead to serious malfunctions.
The safer and easier way to update drivers on a Windows computer is by using an automatic tool such as DriverFix.
This awesome tool automatically identifies each device on your computer and matches it with the latest driver versions from an extensive online database.
First, you need to download and install DriverFix. After installing, the software will start running automatically and identifying any driver problems on your system.
After a few seconds, you will get the full report and a list with potential drivers to install. The only clicking required is on the Update all button that you will see on top of the list.
You can also update individual drivers by checking their corresponding boxes on the left and pressing their update buttons from the right.

DriverFix
2. Rollback to an older driver
- Go to Device Manager and find your display driver.
- Right-click it and choose Rollback driver.
- Follow the instructions.
After you rollback the driver, you need to prevent Windows from updating it. To do that, follow the easy steps in this guide.
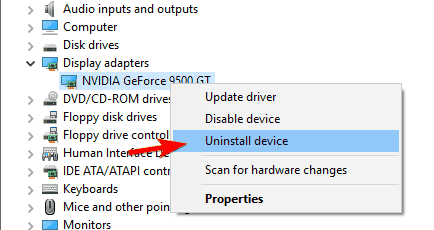
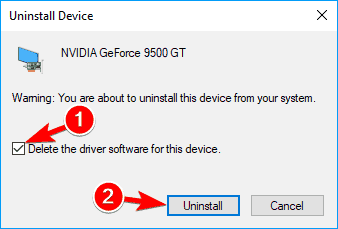
3. Uninstall your driver and use the default one
- Open Device Manager and find your display driver.
- Right-click your display driver and choose Uninstall.
- Check Delete the driver software for this device and click Uninstall.
- After the uninstall process is complete restart your computer and you’ll have your default driver installed.
4. Use specialized software for multimonitor setup
DisplayFusion is a great tool for Windows that is specialized in setting up your multi-monitor setup. It’s easy to use although it comes with complex features that will transform the multiple monitor management process into a breeze.
DisplayFusion can also be controlled with hotkeys and the experience is customizable by using Power User Menu, TitleBar Buttons, to your own liking.
This awesome tool also offers an impressive library of wallpapers and screen savers to choose from and multi-monitor taskbars to help you keep your windows organized.
You don’t need to commit to it from the start. You can still test it under a free trial period.
5. Temporarily disable your graphics adapter
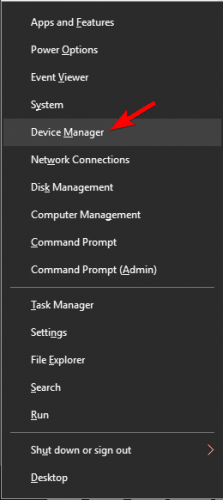
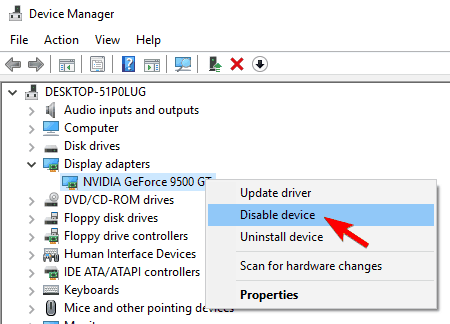
- Press Windows Key + X to open the Win + X menu and choose Device Manager from the list.
- Locate your graphics adapter, right-click it, and choose Disable device from the menu.
- A confirmation message will now appear. Click on Yes to continue.
- Right click your display adapter again and choose Enable device from the menu.
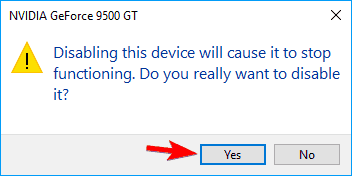
After doing that, Windows should detect your second monitor without any problems.
Keep in mind that this might not be a permanent solution, so if the issue reappears, you’ll need to perform these steps again.
If your laptop doesn’t recognize a second monitor, check out this useful guide to fix the issue easily.
6. Change your monitor frequency
- Open the Settings app. You can do that quickly by using Windows Key + I shortcut.
- When the Settings app opens, navigate to the System section.
- Scroll down to the Multiple displays section and click on Display adapter properties.
- Navigate to the Monitor tab. Set Screen refresh rate to 60 Hertz and click on Apply and OK to save the changes.
- If your monitor is already set to 60 Hertz, select a different value, and then return it back to 60 Hertz (Keep in mind that not all frequencies are compatible with your monitor, so if you want to avoid causing damage to your display, use the frequencies recommended by the manufacturer).
After doing that, you should be able to use your second monitor.
If you’re using driver software such as Nvidia Control Panel or Catalyst Control Center, be sure to change your monitor frequency using these tools as well.
Can’t open Nvidia Control Panel on Windows 10? Don’t worry, we’ve got the right solution for you.
7. Temporarily switch only to the first monitor

- Navigate to the Settings app and go to System section.
- In the display settings select Show only on 1 option (By doing that the picture will be displayed only on your main monitor)
- Save the changes.
- Change your monitor settings to Extended and save the changes once again.
This is a small glitch that can occur, but you should be able to solve it by using this workaround.
According to users, this glitch appears frequently while starting your PC, so you’ll have to repeat this workaround whenever the issue occurs.
8. Install Windows updates
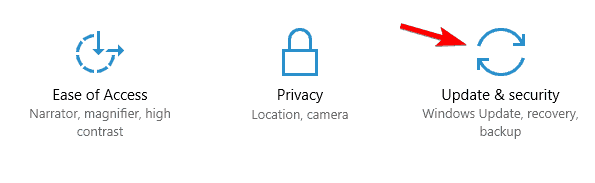
- Open the Settings app and navigate to Update & security.
- Now click on Check for updates button.
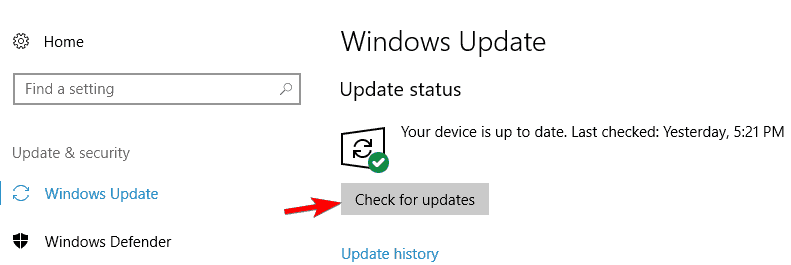
Windows will now check for available updates. If updates are available, Windows will download them automatically in the background and install them once you restart your PC.
Windows 10 is a solid operating system, but sometimes you might find a certain bug.
Microsoft is working hard to fix all Windows 10 bugs, and the simplest way to keep your PC bug free is to install Windows updates.
Several users reported that Windows 10 can’t detect the second monitor, but they solved the issue by installing the latest updates for Windows.
By default, Windows 10 automatically downloads the updates in the background, but sometimes you might skip an important update.
After installing the necessary updates, the issue should be resolved completely.


