- Создание установочного носителя для Windows
- Mount, Burn, & Create ISO in Windows 10
- Mounting ISO File
- Burning ISO File
- Creating ISO File
- You Might Also Like
- Create an ISO File from a Folder in Windows
- Use AnyBurn To Create ISO From The Folders On Your PC
- Create An ISO In Windows 10 Using WinCDEmu
- Use ImgBurn To Create ISO Files From Folders On Windows
- Use a Portable Tool To Create An ISO From Folders
- How to Create an ISO Image File from DVD on Windows 10
- Prerequisites
- Steps Involved
Создание установочного носителя для Windows
Вы можете использовать установочный носитель (USB-устройство флэш-памяти или DVD-диск) для установки новой копии Windows, выполнения чистой установки или переустановки Windows 10.
Чтобы создать установочный носитель, перейдите на веб-сайт скачивания ПО, где вы найдете пошаговые инструкции. На этом веб-сайте вы можете выбрать версию Windows и создать собственный установочный носитель с помощью USB-устройства флэш-памяти или DVD-диска. Чтобы перейти непосредственно к одной из версий, выберите одну из следующих ссылок:
Windows 10 (Затем выберите Скачать средство сейчас.)
Важно: Создайте резервную копию файлов перед установкой и переустановкой Windows на компьютере. Узнайте, как это сделать для Windows 10 или для Windows 7 и Windows 8.1.
Чтобы создать установочный носитель, необходимо следующее:
Компьютер с надежным подключением к Интернету. Время скачивания зависит от скорости подключения к Интернету.
USB-устройство флэш-памяти или DVD-диск. Необходимо пустое USB-устройство флэш-памяти с 8 ГБ свободного места или пустой DVD-диск (и устройство записи DVD). Рекомендуем использовать чистый носитель, поскольку все его содержимое будет удалено. Если при записи DVD-диска из ISO-файла отображается сообщение о том, что файл образа диска слишком большой, необходимо использовать DVD-носитель с двумя слоями (DL).
Ключ продукта. 25-значный ключ продукта (не требуется для цифровых лицензий). Если вам требуется помощь, см. раздел Как найти ключ продукта Windows.
После создания установочного носителя вы можете сбросить или переустановить Windows. Дополнительные сведения см. в разделе Параметры восстановления в Windows 10.
Mount, Burn, & Create ISO in Windows 10
By Mitch Bartlett 4 Comments
Many options for working with ISO files are included with Microsoft Windows 10. Here’s how to mount, burn, or create an ISO image in Windows 10.
Mounting ISO File
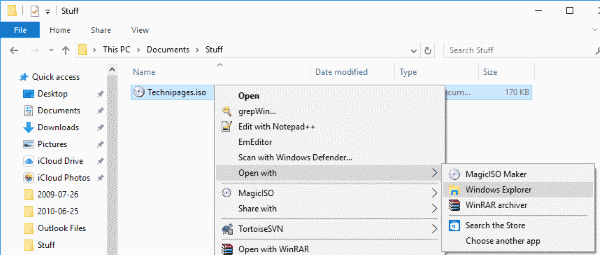
- If you have an existing ISO file and wish to mount it as a disc drive, simply right-click the file and select “Open with” > “Windows Explorer“.

- The contents of the ISO will then show as a DVD or CD drive in Windows Explorer just like it’s on a disc in a drive.
You can unmount the ISO file when you’re done with it by right-clicking the drive in Windows Explorer and selecting “Eject“.
Burning ISO File
If you have an existing ISO file you wish to burn to disc, simply insert a disc in your drive, right-click the ISO file in Windows Explorer, then choose “Share” > “Burn to disc“. 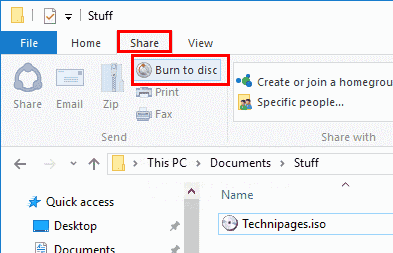
Creating ISO File
Creating an ISO file is one thing Windows 10 cannot do without a third party solution. You can follow these steps.
- Download and install Magic ISO.
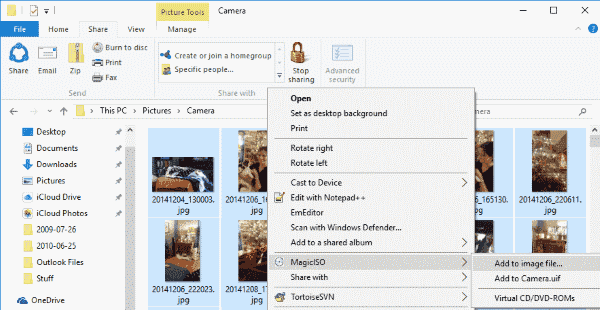
- After installing the software, you will now have an option to highlight files, right click, and select “Add to image file…“.
- Once the software opens, you can choose “File” > “Save“, then save it as a Standard ISO Image file.
If you are not a fan of Magic ISO, Infrarecorder is free and does a fine job as well.
You Might Also Like
Filed Under: Windows Tagged With: Windows 10
Create an ISO File from a Folder in Windows
A great tool for distribution or backups
If you don’t already know, an ISO file is a container that can hold a number of files in it. It’s usually used to create backups of your CD and DVD discs. However, you can create an ISO from the folders on your Windows PC as well. There are actually multiple apps that help you do it on your machine.
There are many reasons why you may want to create an ISO on your Windows 10 PC. Maybe you want to keep all of your folders in a single place. Or maybe you want to keep some of your folders handy ready to burn to your discs.
Regardless of the reasoning, it’s pretty easy to create an ISO from folders on a Windows computer. Also, check out the video from our sister site where we walk you through the steps in a short video.
Use AnyBurn To Create ISO From The Folders On Your PC
One of the free apps you can use to create an ISO from your folders is AnyBurn. It’s actually an app that helps you burn your data to your discs but you can use it to create ISO files as well. It has an option on the main interface that helps add your chosen folders to an ISO which you can then save anywhere on your computer.
- Download, install, and launch AnyBurn on your computer.
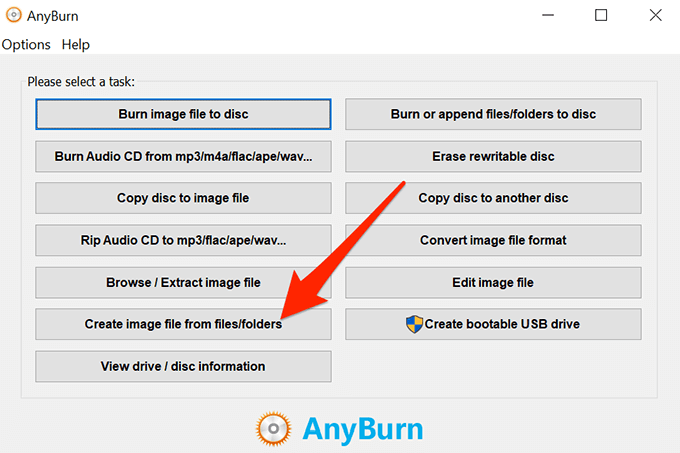
- You’ll find several options regarding creating ISOs on the main interface. Find the one that says Create image file from files/folders and click on it.
- The following screen will let you choose the folders that you want to add to your ISO. Click on the Add button at the top to add your folders.

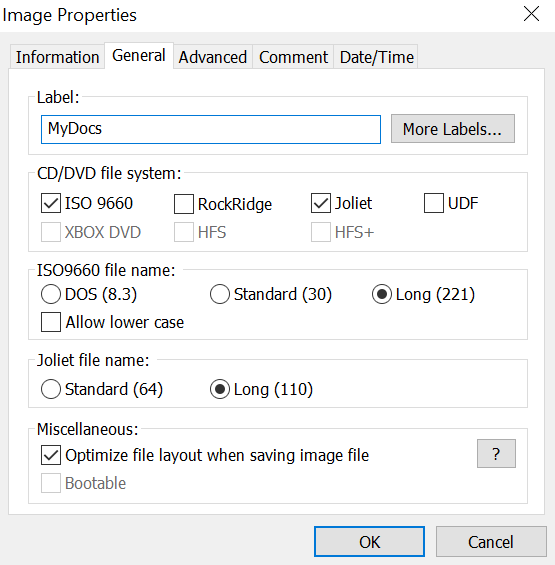
- If you want to specify any custom settings for your file, click on the Properties button at the top. It’ll then let you modify options like the file system for your ISO, file naming standard, compression level, and so on. Click on OK when you’ve configured them.
- Click on the Next button to go to the next screen of the ISO creation process.
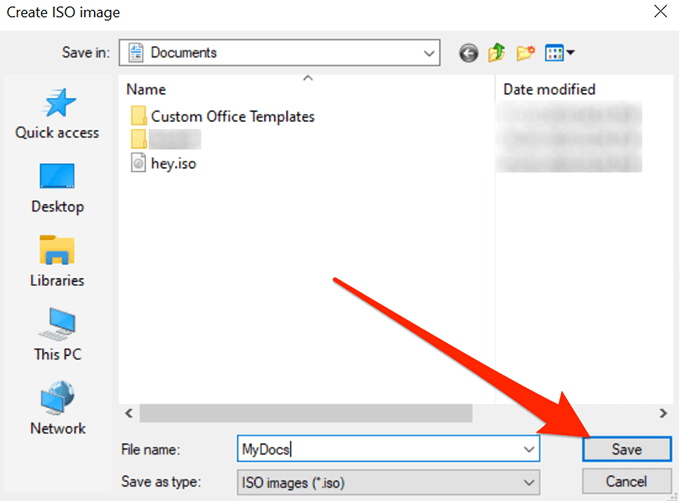
- On the following screen, click on the folder icon to choose the folder where you want to save your ISO. You can also enter a name for your file on the same screen.
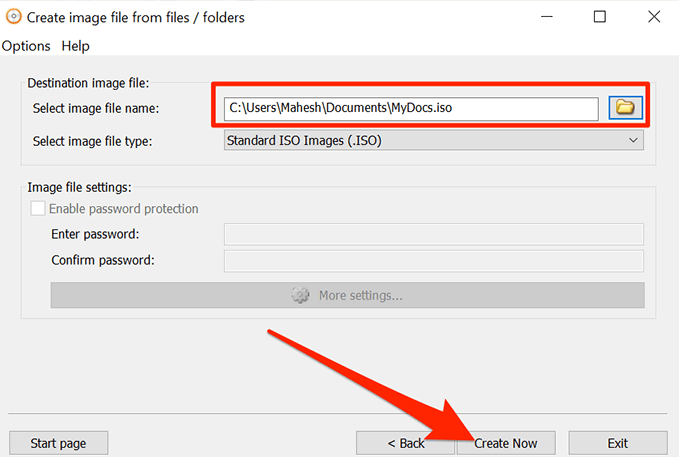
- Finally, click on Create Now to start creating an ISO out of your chosen folders.
Create An ISO In Windows 10 Using WinCDEmu
WinCDEmu is an open-source tool that lets you create virtual drives out of various image file formats on your computer. If you have downloaded an ISO file and you want to view its contents, this app can help you mount that as a drive on your machine.
You can use the app to create ISO files from folders in Windows as well, and it actually provides you with the easiest way to make an ISO from your folders. All you basically need to do is install the app and it’ll add an option to your context menu. You can then use that option to generate an ISO from your folders.
- Download and install the WinCDEmu app on your PC.
- Right-click on your taskbar and select Task Manager.
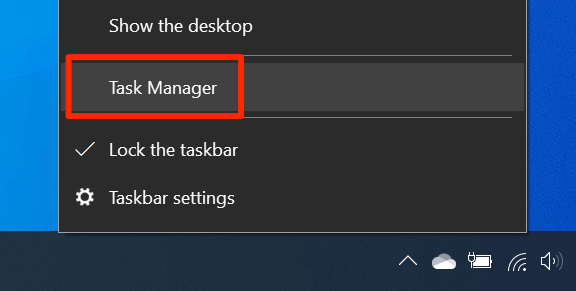
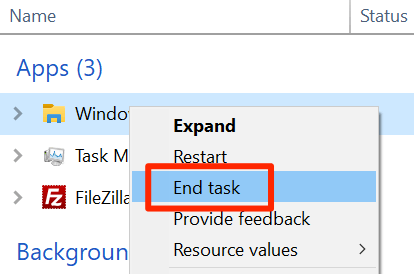
- Right-click on the process that says Windows Explorer and select End task. You need to close the Explorer before you can see the newly added item in the context menu.
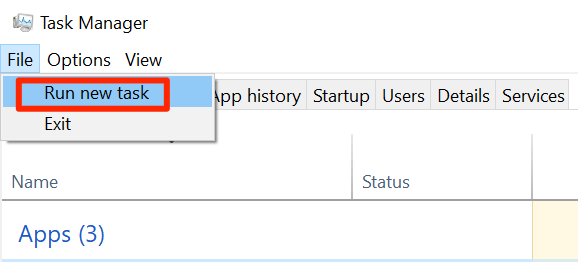
- Click on the File menu in Task Manager and select Run new task.
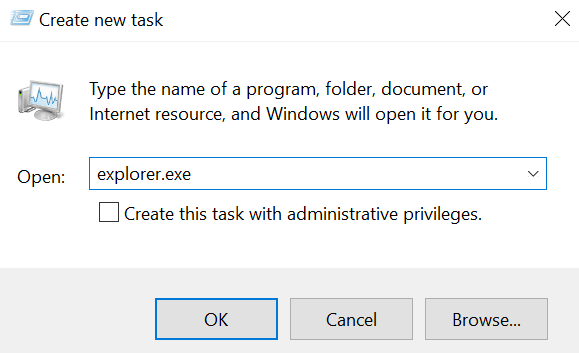
- Type in explorer.exe and hit Enter. It’ll relaunch the Windows File Explorer.
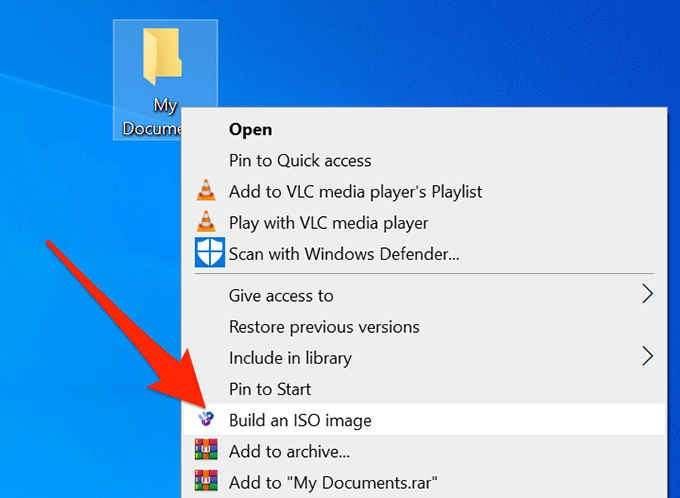
- Find the folder that you want to create an ISO for, right-click on it, and select Build an ISO image.
- It’ll ask you to enter a name for your ISO and the location where you want to save it. Enter these details and click on Save.
- It’ll quickly create the ISO for you and let you know when it’s fully built.
Use ImgBurn To Create ISO Files From Folders On Windows
ImgBurn has been a popular app to create and burn image files for a long time. If you’ve ever created a backup of your discs or you’ve burned a disc, you’ll likely recognize the app.
The app can be used to create ISO files from your folders as well.
- Download, install, and open the ImgBurn app on your computer.
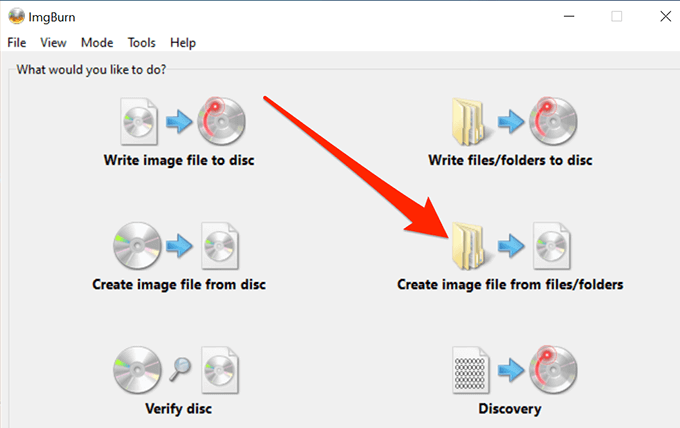
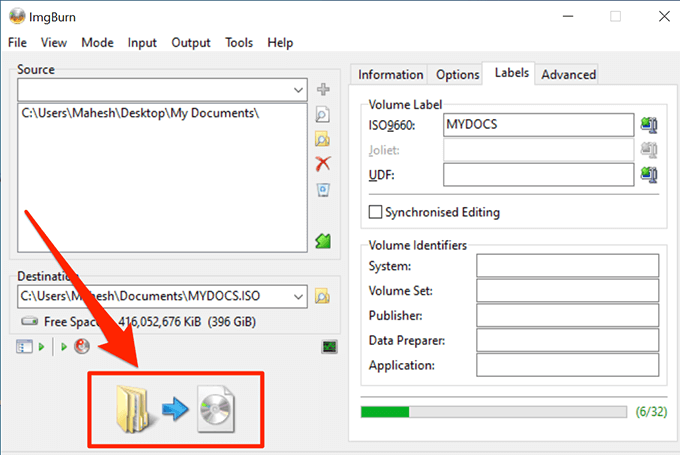
- On the main interface, find and click on the option that says Create image file from files/folders.
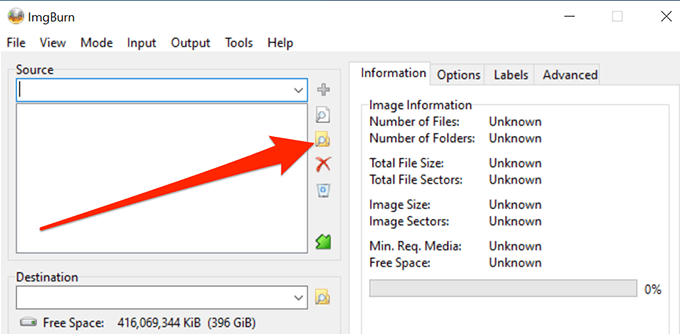
- You’ll see a screen that lets you add the folders you want to include in your ISO. Click on the little folder icon and add the folders for your ISO file.
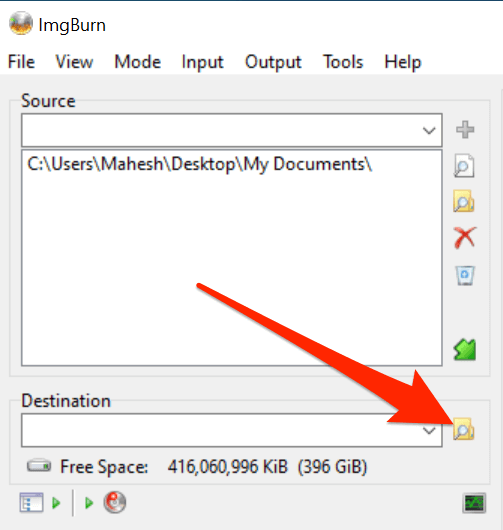
- Click on the tiny folder icon next to where it says Destination and select a name and target folder for your ISO file.
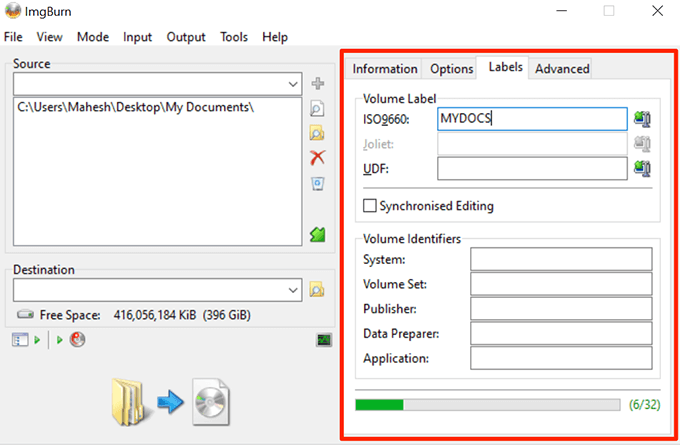
- On the right-hand side pane, you’ll find various options to configure for your ISO. With these options, you can change your image type, enter a label for your image, specify restrictions, and do a few other things.
- Finally, click on the large Build button on your screen to start building an ISO file out of your selected folders.
Use a Portable Tool To Create An ISO From Folders
If it’s just a single ISO that you’ll be making and you don’t think you’ll be doing it again anytime soon, you might prefer something that doesn’t require an installation. Folder2Iso can actually help you out as it’s a free and portable tool that helps quickly create ISOs without any hassle.
It works on many versions of Windows including Windows 7, 8, 10, and Linux.
- Download the Folder2Iso app and double-click on it to extract the actual app contents.
- Run the executable file that you extracted from the archive.
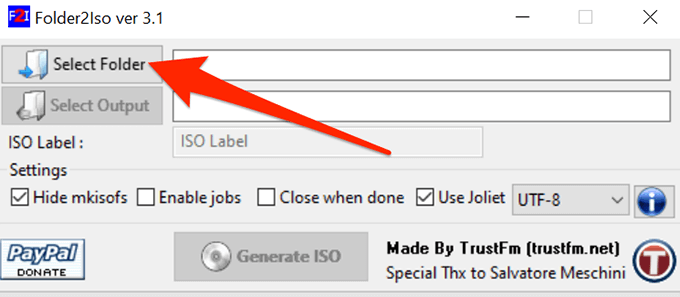
- You’ll see a simple interface with only a few options on it. Click on the Select Folder option and select the folder you want to add to your ISO.
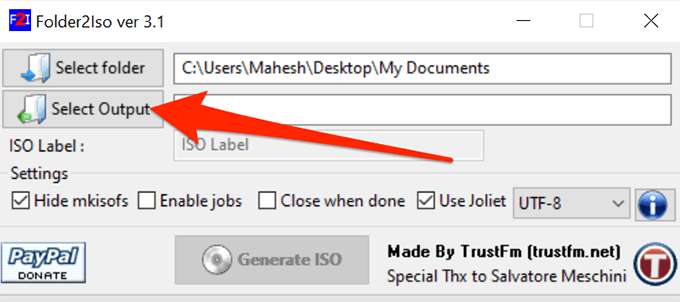
- Click on the Select Output button and choose the folder where you’d like to save your ISO file. Remember you can’t choose the folder that you’ve chosen to include in your ISO.
- You can then specify the extra options available on your screen, if you want.
- Click on the Generate ISO button to make an ISO out of your chosen folders.

- The progress bar will go all green when the ISO has been generated.
It’s a good idea to create an ISO from your folders in Windows so you can mount them all as a single drive on your PC. If you have done it on your computer already, let us know what app you chose to do it and why. We await your response in the comments below!
Mahesh has been obsessed with technology since he got his first gadget a decade or so ago. Over the last few years, he’s written a number of tech articles on various online publications including but not limited to MakeTechEasier and Android AppStorm. Read Mahesh’s Full Bio
How to Create an ISO Image File from DVD on Windows 10
Creating an ISO image file from DVD is straight forward when you have chosen the right tool. In this tutorial, I’ll help you to create an ISO image file from Windows 10 DVD using the BurnAware free tool.
Prerequisites
- An ISO image creation tool (BurnAware Free)
- A required DVD (Windows 10/8/7)
Steps Involved
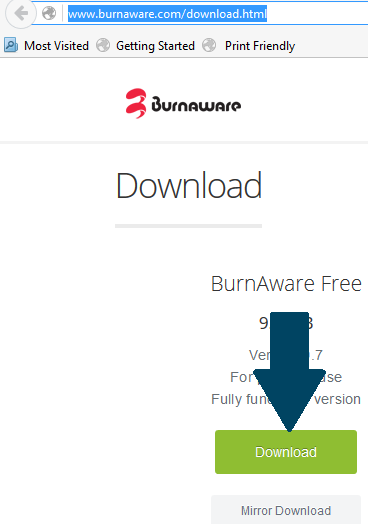
Step 1: Download BurnAware free program from here
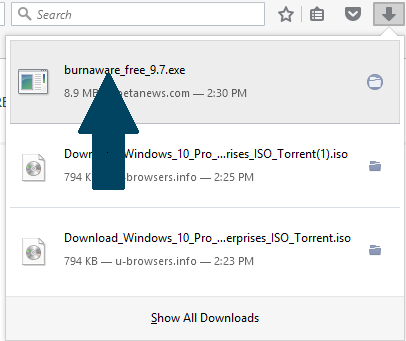
Step 2: Install the program on your machine by executing .exe file you downloaded in step 1.
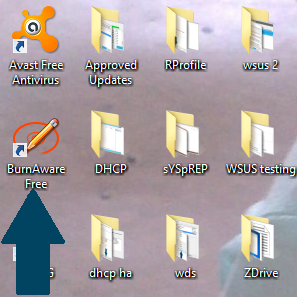
Step 3: Run the program either from shortcut created on the desktop or right after last installation step.
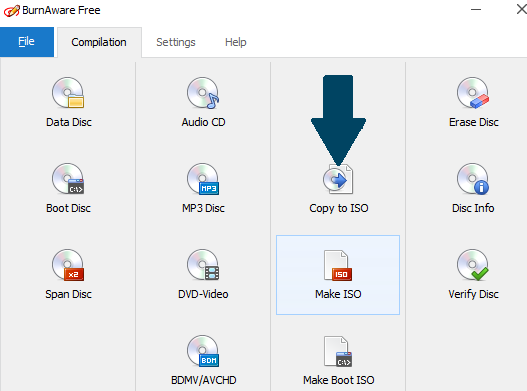
Step 4: Click Copy to ISO located in Compilation tab.
Step 5: From Compilation tab, choose the optical disc drive that you are planning to use from drop down.
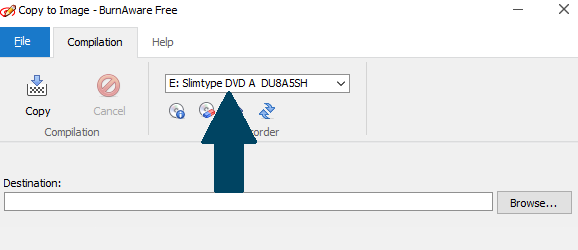
Step 6: Click Browse button and navigate to the path where you would like to place your ISO image and click Copy. Wait for 10 — 15 min to finish creating an ISO image


