- BrightnessSlider — панель для удобного изменения яркости экрана в Windows 10
- Win10 BrightnessSlider 1.7.6
- Похожие программы
- Windows 10 brightness slider
- About
- Яркость экрана в трее Windows 10
- Удобная яркость экрана в трее Windows 10
- Программа Win10 BrightnessSlider
- Скачать Win10 BrightnessSlider
- ПОЛЕЗНОЕ ВИДЕО
- How to Fix Brightness Slider Missing on Windows 10?
- What Causes the Brightness Slider to go Missing on Windows 10?
- Solution 1: Enable a Device in Device Manager
- Solution 2: Update Your Graphics Card Driver
- Solution 3: Return the Brightness Setting to Quick Actions
- Solution 4: Update Windows to the Latest Version
BrightnessSlider — панель для удобного изменения яркости экрана в Windows 10

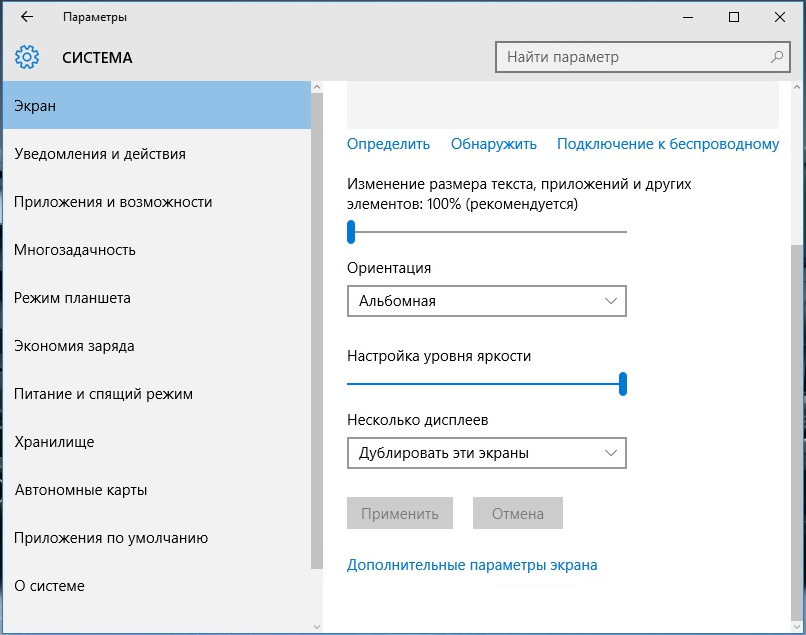
Изменить яркость экрана в Windows 10 можно как минимум двумя способами — перетаскиванием ползунка в разделе Система → Экран и через дополнительные параметры области уведомления. В некоторых моделях ноутбуков регулировать яркость можно с помощью соответствующей комбинации клавиш. Если эти способы кажутся вам неудобными, воспользуйтесь BrightnessSlider — маленькой утилитой, позволяющей регулировать яркость экрана непосредственно из системного трея.
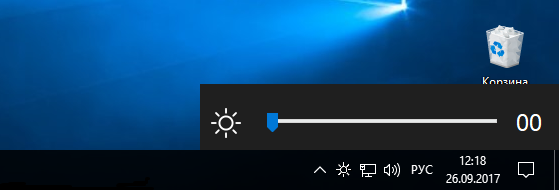
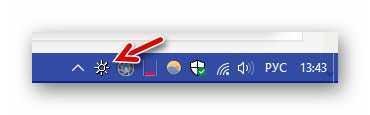
Установки утилита не требует. После её запуска в системном трее появится иконка в виде солнышка. Клик по ней правой кнопкой мыши вызывает панель регулировки яркости, имеющую аналогичный интерфейс панели изменения звука.
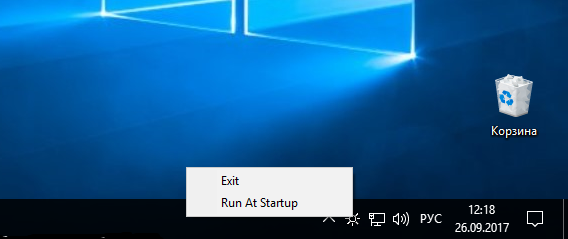
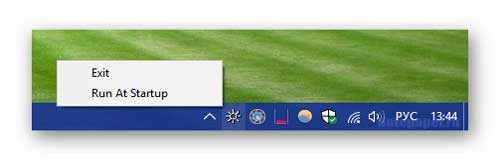
Клик левой кнопкой открывает контекстное меню, включающее всего две опции. Exit завершает работу альтернативного регулятора, Run At Startap добавляет программу в автозагрузку Windows.
Никаких других настроек BrightnessSlider не имеет.
Загрузить программку можно со странички разработчика:
Утилита бесплатна, имеет открытый исходный код, язык интерфейса — английский, но ввиду отсутствия каких-либо сложных настроек это не имеет значения.
Примечание: если на вашем ПК регулировка яркости не работает в принципе, ситуацию BrightnessSlider никак не исправит. Проблема эта решается обновлением драйверов для вашего оборудования.
Win10 BrightnessSlider 1.7.6
Win10 BrightnessSlider — это легкое, простое приложение с открытым исходным кодом, которое поместит небольшой элемент управления «Яркость монитора» на панель задач. Утилита предлагает вам возможность отрегулировать яркость вашего монитора одним щелчком мыши. Кроме того, вы сможете настроить яркость для нескольких мониторов с помощью этой программы.
Win10 BrightnessSlider подходит в основном для ноутбуков, позволяя вам регулировать яркость монитора в зависимости от окружающего освещения для лучшей видимости. Приложение поставляется с поддержкой мониторов DDC / CI.
Win10 BrightnessSlider может быть настроен на автоматический запуск при запуске системы. Программа способна автоматически повторно сканировать систему после подключения / отключения монитора. Каждый монитор может управляться отдельным ползунком яркости.
| Название | Win10 BrightnessSlider |
|---|---|
| Версия | 1.7.6 |
| Разработчик | blackholeearth |
| Домашняя страница продукта | Win10 BrightnessSlider |
| Лицензия | Бесплатно (Freeware) |
| Загрузки прошлой недели | 7 |
| Все время загрузки | 235 |
| Имя файла | Win10_BrightnessSlider.exe |
| Размер файла | 0.3Mb |
| Контрольная сумма MD5 | 3B62E939C3A3EC2385AA5DE0B18BCCBE |
| Поддержка ОС | Версия 7/8 / 8.1 / 10 |
| Категория | — |
Похожие программы
Win10Clean 0.14.2
Инструмент, который поможет вам легко очистить систему Windows 10.
Win10 Wizard 1.0.0.28
Возьмите под свой контроль Windows 10.
Win10 Spy Disabler 1.3.0.0
Небольшой инструмент, который мешает Windows отслеживать вашу активность и собирать данные.
Windows 10 brightness slider
this app puts a Monitor Brightness icon to on Taskbar Tray. So you can access it with 1 click. targeting laptops.
supported os: win7 , win8 , win10
requirements:
- .net4 framework. (win7 may need to install)
- for ddci monitors, (make sure ddci is enabled on monitor menu )
- make sure you do install/update your graphic driver
Note For VirusAlert, Developers:
dont open issues about virus total trojan alert etc. if you dont trust dont use it.
code version is first working version (maybe 1.01). but executable is always up to date
old code published here is free to play.
uptodate code is my private intellectual property. coding effort made without any money, wont be put here.
DONATE:
bitcoin QR Code:

Download Link All Versions
- Supports ddc/ci monitors
- Seperate Sliders For Multiple Monitors
- Volume like Slider to Change Monitor Brightness
- Option to Run At Startup
- Ability to «Rescan/Detect Monitor» after a Monitor Plugged in/out


- if slider working. but suddenly (you plug/unplug monitor/MirrorScreen in any way) then screen act up weird for second. you CAN get error while trying to change birghtness, you gotta press «Detect monitor».
- fixed: when the autohide taskbar is on and the taskbar is at the top of screen,the slider is still at the bottom
- fixed: parseError with nonUsa culture at dxvaMon.setbrightness
- prevent log error
- added: hide sliderform even when clicked on taskbar icon
- fixed: in ltr system(ie arabic) taskbar is at other side .
- added: taskbar icon tooltip-text shows pct of all sliders ( after first form_show)
- fixing: null check richscreen.getbrighness>get_physicalmonitor()
- added: sun image near each slider shows name on hover
- fixed: (ddci problem )slider doesnt change birghtness at first time, i have to rightclick trayIcon > Press «detect Monitor»
- added: Check For Updates , shows in rightclick menu.
- fixed: new monitor populator
- fixed: ddci brightness displaying -1 (may not work on all ddci monitors)
- fixed: blurry text high dpi
- fixed: i got 3 screens, but i have 5 sliders . (slider popualtion method changed )
v1.04 [most stable]
- added: author page to menu item that shows version no.
- trying to fix: fallback doesnt handle management not supported exception.
- added: seperately change brightness of multiple monitors.
- added: supports setting Brighness on ddc/ci Monitors(at startup, it may show -1, )
- fixed: slider showing itself on second screen onhide
- fixed: popup stays under taskbar, if taskbar is autoHiding
- fixed: slider wasn’t positioning itself according to taskbar position (Top Or Bottom Or Left Or Right of Screen)
About
this app puts a Monitor Brightness icon on Taskbar Tray. for win 7, 8, 10
Яркость экрана в трее Windows 10
Согласитесь, регулировать яркость экрана в трее Windows 10 было бы гораздо удобнее и доступнее стандартного метода от производителей этой операционной системы.
Любой Ваш каприз — бесплатная компьютерная программа Win10 BrightnessSlider с лёгкостью засунет регулятор этого дела туда.
Удобная яркость экрана в трее Windows 10
Давайте вспомним, где живёт регулятор яркости в Windows 10 (путь не очень близкий, поэтому возьмите с собой бутерброды):
- заходим в меню «Пуск»
- находим там «Параметры Windows»
- переходим в раздел «Система»
- в подразделе «Дисплей» (возле настроек ночного света) находим наше «Изменение яркости»…
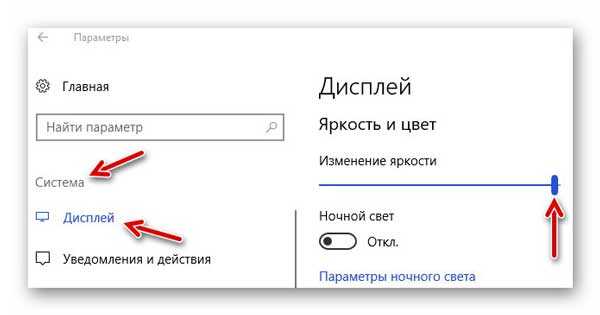
Согласитесь, далековато и не слишком удобно? Исправляем это безобразие всего за несколько секунд.
Программа Win10 BrightnessSlider
Кроме того, что данная утилита абсолютно бесплатна — она ещё и портативная (устанавливать её в систему не нужно).
Скачиваем её исключительно по ссылке, что в конце статьи!
Кликаем по файлу…
…получаем ярлык-солнышко запущенной программы Win10 BrightnessSlider в трее…
Клик правой кнопки мыши по нему вызовет совсем коротенькое меню, в котором можно только закрыть программу и добавить её в автозагрузку операционной системы…
Читайте также на сайте:
А вот клик по значку левой кнопкой мыши отобразит наш удобный регулятор яркости экрана в трее Windows 10 с ползунком…
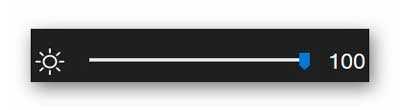
Теперь уменьшить или увеличить яркость экрана можно буквально одним кликом.
Скачать Win10 BrightnessSlider
Даю официальную ссылку на скачивание абсолютно безопасной версии программы под номером 1.4, по которой и писал этот обзор несколько лет назад…
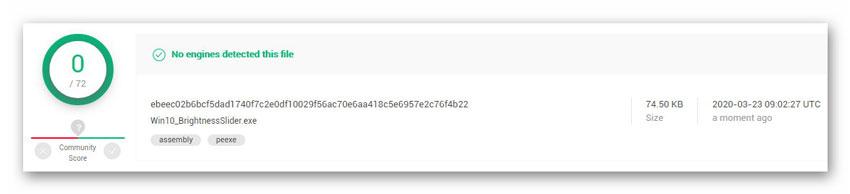
Все последующие модификации этого регулятора яркости (1.7.7, 1.7.8, 1.7.9) напичканы ее автором десятками вирусов и троянов! Они даже по размеру в разы больше первоначальной программы от 7-го июля 2018 года.
| Предназначение: | Бесплатная портативная программа для размещения регулятора яркости экрана в трее Windows 10 |
| Название программы: | Win10 BrightnessSlider |
| Производитель (автор): | Blackholerearth |
| Статус: | Бесплатно |
| Категория: | Интерфейс |
| Размер инсталлятора (архива): | 74.5 кб |
| Поддержка ОС: | Windows 10 |
| Язык интерфейса: | Английский |
| Безопасность: | Вирусов нет |
| Похожие программы: | — |
| Ссылка на инсталлятор/сайт: | Скачать/Перейти |
Кстати, уже как-то описывал удобный регулятор громкости для Windows 10, тоже в трее.
Теперь знаете, как увеличить или уменьшить яркость экрана в трее Windows 10.
P.S. Конечно, почти у всех пользователей ноутбуков есть функциональные кнопки, чтоб регулировать яркость экрана в Windows 10, да и многие владельцы стационарных компьютеров имеют продвинутые мультимедийные клавиатуры — им эта программа совершенно не нужна (не обязательно упоминать об этом в комментариях).
До новых полезных и интересных компьютерных программ.
ПОЛЕЗНОЕ ВИДЕО
How to Fix Brightness Slider Missing on Windows 10?
Not being able to change the brightness of your screen from the taskbar or the Notification Center is a big inconvenience for Windows 10 users as they would alternatively have to search for brightness settings deep inside the Settings app each time they have to change the brightness of the screen.
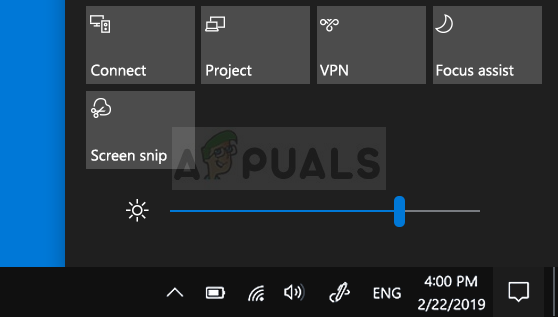 Brightness Slider Missing on Windows 10
If you are not able to find the option to change the brightness anywhere in your taskbar or the Notification Center, you’ve come to the right place as we have gathered several great methods to make sure you resolve this problem as soon as possible! The slider was apparently introduced in Feature Update 1903.
What Causes the Brightness Slider to go Missing on Windows 10?
New Windows 10 updates often bring design changes to the taskbar and the Notification Center but the brightness slider should still be available somewhere in that area. There are quite a few things which can cause to go missing and we have decided to list the most important causes for you to check out below:
- Monitor driver disabled in Device Manager – If this driver is disabled, Windows switches to older versions which don’t provide the capability to change the brightness in that manner. Make sure you re-enable it.
- Old graphics drivers – Having old and outdated graphics card drivers can also provide instability when it comes to brightness settings and we strongly recommend you install the latest drivers as soon as possible.
- Brightness settings removed from Notification Center – Something or someone may have removed this option from the Notification Center and you simply need to turn it back on in Settings.
Solution 1: Enable a Device in Device Manager
This simple method was suggested by a user on a forum and many other users were able to benefit from this method even though it appears to be totally unrelated to the problem. The key is to enable the device you have under the Monitors section in Device Manager. Enabling this device should resolve the problem and return the brightness slider back to where it belongs!
- Click the Start menu button, type “Device Manager” on your keyboard, and select the tool from the list of available results by clicking the first entry in the list. You can also tap the Windows Key + R key combo in order to bring up the Run box. Type in “devmgmt.msc” in the box and click OK in order to run it.
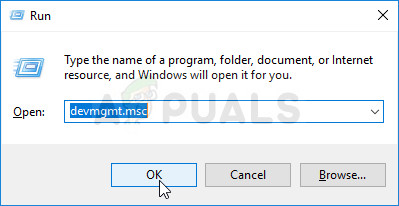 Running Device Manager
- In order to properly perform this method, expand the Monitors section in Device Manager by clicking the arrow next to it, right-click on the only device you find there and choose the Enable device option if available.
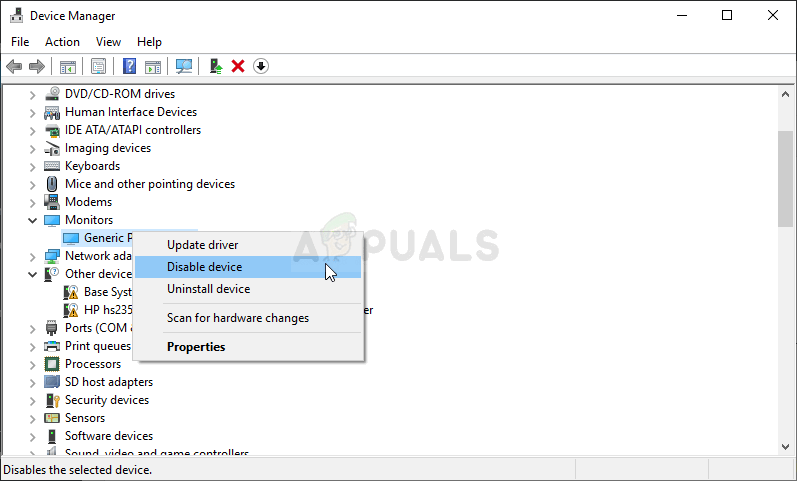 Enable the monitor driver
- If it’s already enabled, choose the Properties option from the context menu instead and navigate to the Driver Check to see if the Driver Provider is anyone but Microsoft (e.g. TeamViewer). If it is, click the Uninstall button in the same tab and confirm your choice in the next dialog box.
- You can now go back to Device Manager and click Action from the top menu. Click the Scan for hardware changes option and it will check for devices without drivers and reinstall them automatically.
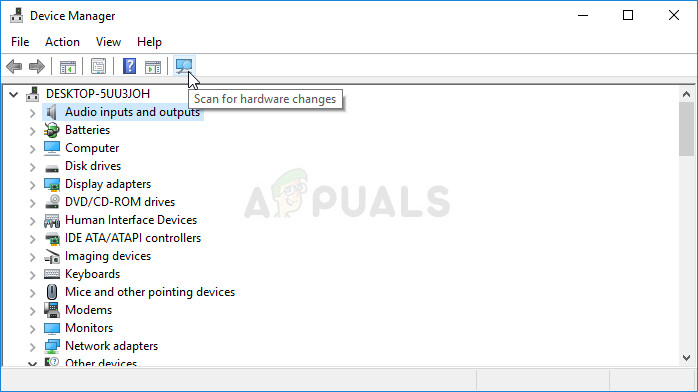 Scanning for hardware changes
- Confirm any dialogues or prompts which may ask you to confirm your choice and check to see if the brightness slider is still missing on Windows 10!
Solution 2: Update Your Graphics Card Driver
This is quite a straightforward way of resolving the problem and it’s definitely something you should try immediately. Reinstalling the driver won’t do you any harm and it’s recommended that you always have the latest drivers installed. Follow the steps below in order to perform a clean install of the latest NVIDIA driver.
- Tap the Start menu button, type in “Device Manager” afterward, and select it from the list of available search results simply by clicking the first one. You can also utilize the Windows Key + R key combo in order to bring up the Run. Type in “devmgmt.msc” in the dialog box and click OK in order to run it.
Running Device Manager
- In order to install the video card driver, you want to update on your computer, expand the Display adapters section, right-click on your graphics card and choose the Uninstall Device
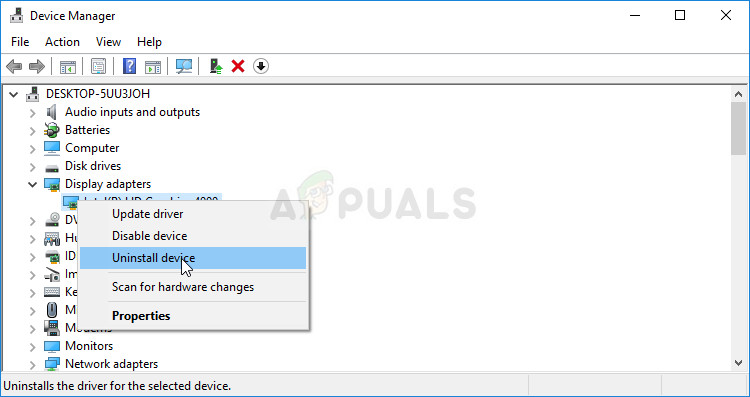 Uninstalling the graphics adapter
- Confirm any pop-up dialogues or prompts which may ask you to confirm the uninstallation of the current graphics device driver and wait for the process to complete.
- Look for your graphics card driver on NVIDIA’s or AMD’s Input the required information about the card and your operating system and click on Search or Submit.
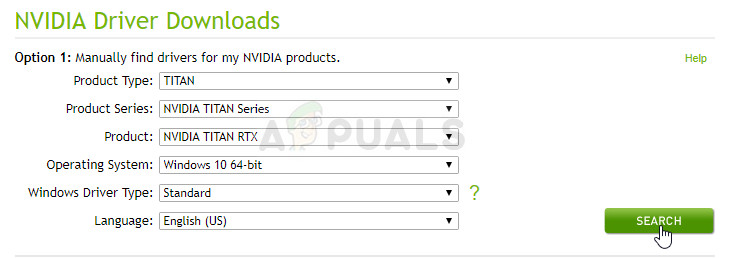 NVIDIA – Search for drivers
- A list of all available drivers should appear. Make sure you scroll down until you reach the required entry, click on its name and the Download button afterward. Save it to your computer, open it, and follow the instructions on-screen.
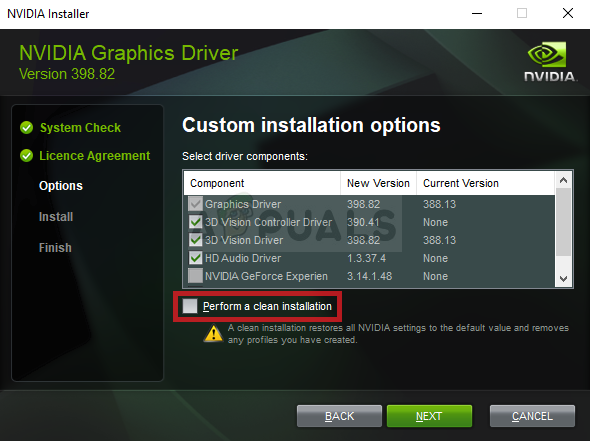
- When you reach the Installation Options screen, choose the Custom (Advanced) option before clicking Next. You will be presented with a list of components which will be installed. Check the box next to the Perform a clean installation box and click Next and install the driver.
 Performing a clean install of NVIDIA’s driver
- Check to see if the problem has been resolved and if the brightness slider is back!
Solution 3: Return the Brightness Setting to Quick Actions
It’s also possible that someone or something has removed the brightness management option from the Quick actions menu in the Notification Center. It’s very easy to bring back the brightness options simply by using the Windows 10 Settings app.
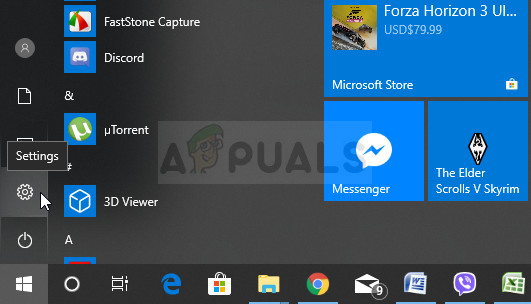
- Search for Settings in the Start menu and click on the first result which pops up. You can also click directly on the cog button at the lower left part of the Start menu or you can use the Windows Key + I key combination.
 Opening Settings from Start menu
- Locate the System section at the bottom part of the Settings window and click on it. Navigate to the Notifications & actions tab and check under the Quick actions
- Locate the Add or remove quick actions button below and click on it in order to open the list of all quick actions. Scroll down until you locate brightness and set the slider next to it to On.
 Adding Brightness to Quick Actions list
- Check to see if the problem has been resolved and if the brightness slider is back to where it belongs!
Solution 4: Update Windows to the Latest Version
The latest versions of Windows 10 seem to have resolved this problem for good as long as it wasn’t caused by third-party programs. Updating your operating system to the latest version is always helpful when it comes to dealing with similar errors and users have reported that the latest Windows 10 versions actually deal with this problem in specific.
- Use the Windows Key + I key combination in order to open Settings on your Windows PC. Alternatively, you can search for “Settings” by using the search bar located at the taskbar.
Opening Settings from Start menu
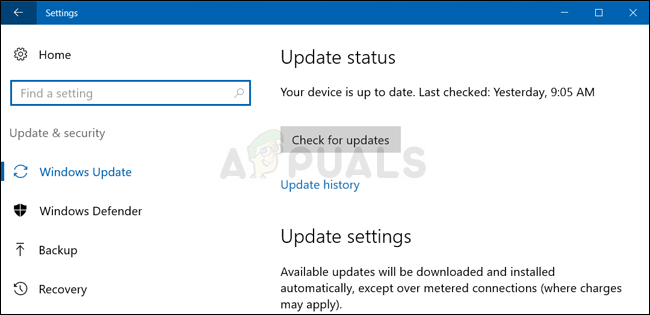
- Locate and open the “Update & security” section in the Settings Stay in the Windows Update tab and click on the Check for updates button under the Update status in order to check whether there is a new version of Windows available.
 Checking for updates on Windows 10
- If there is one, Windows should install the update immediately and you will be prompted to restart your computer afterward.
Note: If you have gotten this issue after updating your Bios or after making changes to the Bios, it is recommended to reset your Bios to factory defaults.


