- nproc Command in Linux with Examples
- Working with nproc Command
- Linux nproc Command Tutorial
- Getting started with nproc Command
- Conclusion
- About the author
- Wardah Batool
- How to set nproc (Hard and Soft) Values in CentOS / RHEL 5,6,7
- Viewing Current nproc soft/hard limits
- How to set nproc (Hard and Soft) Limits
- Examples of setting nproc limits
- Difference between nproc and ulimit?
- 2 Answers 2
- 9 команд для проверки информации о CPU в Linux
nproc Command in Linux with Examples
nproc is a simple Unix command which is used to print the number of processing units available in the system or to the current process. This command could be used in system diagnostics and related purposes. It is part of GNU Core utils, so it comes pre-installed with all modern Linux operating systems.
Syntax:
Working with nproc Command
1. Use nproc command

It prints the number of processing units available to the current process. It may be less than the number of online processors.
2. To print total installed processing units

We use the “–all” option when we want nproc to display the total installed processing units.
3. To exclude some processing units

We use “–ignore” option when we want nproc to exclude a set number of processing units.
4. To display the help section

This command will display the help section of the nproc command which will have all the information related to the nproc command.
5. To display version

This command will display the version of nproc command in Linux.
6. To display nproc manual

This command will print the manual of the nproc command.
Источник
Linux nproc Command Tutorial
This command is helpful when the CPU is overloaded with various kinds of processes, and you need to display the number of available processing units for the new process.
The “nproc” is a built-in command in a Linux system that can also be used to diagnose the system.
Syntax of nproc command is:
Getting started with nproc Command
Available Processing Units
Use the “nproc” command in the terminal to get how many processing units are available in your system; they may be less than online processers:
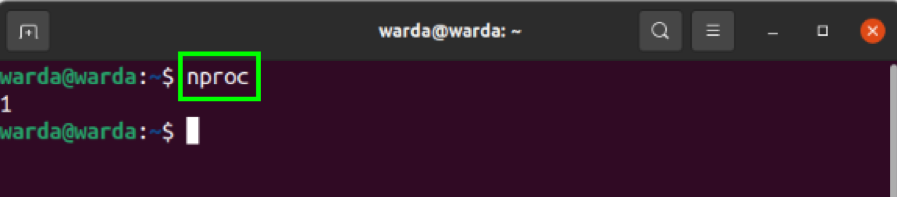
As you can see, one (1) processing unit is available in my system.
Total Processing Units
If you want to print the total number of installed processing units in your system instead of available processing units, you can type the “–all” option in the terminal.

Exclude Some Processing Units
The “nproc” command tool allows users to exclude some of the processing units from the system.
Use the “ignore” command in the terminal, and it will exclude some processing units:

(As I have only one existing processing unit in the system, so it cannot be excluded).
Help Option
The “help” command is used to print the help section in the terminal, which includes all information related to the “nproc” command:

Version Option
To check the version of the “nproc” command in Linux, use the “version” command:

Conclusion
The “nproc” command is used to check how many processing units are available or installed in your system. In Linux-like systems, we can have multiple processing units in our system and check them. We use the “nproc” command. The “nproc” command can also display the total number of installed processing units on the system.
About the author
Wardah Batool
I am a Software Engineer Graduate and Self Motivated Linux writer. I also love to read latest Linux books. Moreover, in my free time, i love to read books on Personal development.
Источник
How to set nproc (Hard and Soft) Values in CentOS / RHEL 5,6,7
This post outlines how a Linux System administrator can limit the allowed number of processes for each user of the Operating System. There are two places where the maximum number of process allowed (nproc) can be configured.
- /etc/security/limits.conf
- /etc/security/limits.d/90-nproc.conf ( CentOS/RHEL 5,6 ) and /etc/security/limits.d/20-nproc.conf ( CentOS/RHEL 7 )
from the man page of pam_limits
Viewing Current nproc soft/hard limits
The Red Hat Enterprise Linux system uses two types of values to define the limits: soft and hard. The difference is that the ‘soft’ limit can be adjusted up to the ‘hard’ limit while ‘hard’ limit can only be lessened and it is the maximum resource limit a user may have.
Whenever a user runs a “ulimit -n” command, it will be presented with the “soft” limit. Hence, if the ‘/etc/security/limits.conf’ file has a hard value set, it will not be presented by default.
– To view soft limits, use the below command:
– Similarly, to view hard limits, use the below command:
How to set nproc (Hard and Soft) Limits
1. Setting soft nproc limits temporarily
The ‘soft’ limit can be adjusted upon the ‘hard’ limit with the below where N is less or equal of the ‘hard’ limit.
The above value is not permanent and will not persists across re-logins. You can make an entry of the above command in the users bash profile so that the limit is set every time user logins.
2. Setting nproc hard/soft limits permanently
– To set the nproc limit to unlimited system wide, the file /etc/security/limits.d/90-nproc.conf (RHEL5, RHEL6), /etc/security/limits.d/20-nproc.conf (RHEL7) should read. By default, the rules are read from the/etc/security/limits.conf file.
– Additionally, you can create individual configuration files in the /etc/security/limits.d directory specifically for certain applications or services.
– A default limit of user processes is defined in the file /etc/security/limits.d/90-nproc.conf (RHEL5, RHEL6), /etc/security/limits.d/20-nproc.conf (RHEL7), to prevent malicious denial of service attacks, such as fork bombs.
To set a hard/soft limit of nproc, use the below syntax.
Here,
[domain] can be a username, a group name, or a wildcard entry.
[type] denotes the type of the limit and it can have the following values:
- soft: This is a soft limit which can be changed by user
- hard: This is a cap on soft limit set by super user and enforced by kernel
[item] is the resource to set the limit for.
Examples of setting nproc limits
Below are a few examples of setting nproc values using the files /etc/security/limits.conf file and the /etc/security/limits.d/90-nproc.conf (RHEL5, RHEL6), /etc/security/limits.d/20-nproc.conf (RHEL7):
1. In the example below nproc limit is set as 2047 as there is a hard limit of 2047 in limits.conf.
2. Here 1022 is used because the last entry is “test soft nproc 1022”, maximum hard limit would be “1025”.
3. Here 1025 is used because “test hard nproc 1025” is set, “test soft nproc 1066” is being used because the soft limit exceeds the hard limit.
4. Here 1066 is used because the last entry is “test soft nproc 1066” and 1066 does not exceed the hard limit.
Источник
Difference between nproc and ulimit?
Ulimit and nproc are both used for limiting the system processes and resources for a particular user or application (correct me if I am wrong) in *nix system. What is the major difference between the two?

2 Answers 2
nproc from coreutils prints the number of processors. From man nproc :
However, the nproc setting in /etc/security/limits.conf indeed limits the number of processes:
From man limits.conf :
If you are referring to the nproc parameter in limits.conf then yes it’s for limiting the number of processes.
The shell utility ulimit is used for getting/setting resources’ limits, too. For example, getting the stack size for each process:
Changing the stack size to 1MB:
Changing the stack size to unlimited :
There’s no difference between setting/changing resources via /etc/security/limits.conf« and ulimit`.
However, the shell utility ulimit changes are only applicable to the current shell. But /etc/security/limits.conf changes will be applicable system-wide for all the specified users. Besides /etc/security/limits.conf typically can be changed only by a privileged users.
But ulimit doesn’t require privileges.
So you can think of ulimit as for temporary changes to resource limits just for you, which you can change yourself; whereas /etc/security/limits.conf is for system-wide setting (for one or more users) which you can’t usually change (typically your system administrators sets resource limits, if any).
Whereas nproc(1) utliity is totally different which just lists the available number of processors.
Источник
9 команд для проверки информации о CPU в Linux

Информация об аппаратном обеспечении CPU
Информация о CPU (Central Processing Unit. Центральный процессор) включает в себя подробные сведения о процессоре, такие как архитектура, название производителя, модель, количество ядер, скорость каждого ядра и т.д.
В linux существует довольно много команд для получения подробной информации о CPU.
В этой статье мы рассмотрим некоторые из часто встречающихся команд, которые можно использовать для получения подробной информации о CPU.
1. /proc/cpuinfo
Файл /proc/cpuinfo содержит подробную информацию об отдельных ядрах CPU.
Выведите его содержимое с помощью less или cat .
Каждый процессор или ядро перечислены отдельно, а различные подробности о скорости, размере кэша и названии модели включены в описание.
Чтобы подсчитать количество процессоров, используйте grep с wc
Количество процессоров, показанное в /proc/cpuinfo, может не соответствовать реальному количеству ядер процессора. Например, процессор с 2 ядрами и гиперпоточностью будет показан как процессор с 4 ядрами.
Чтобы получить фактическое количество ядер, проверьте идентификатор ядра на наличие уникальных значений
Соответственно, есть 4 разных идентификатора ядра. Это указывает на то, что существует 4 реальных ядра.
2. lscpu — отображение информации об архитектуре CPU
lscpu — это небольшая и быстрая команда, не требующая никаких опций. Она просто выводит информацию об аппаратном обеспечении CPU в удобном для пользователя формате.
3. hardinfo
Hardinfo — это gui инструмент на базе gtk, который генерирует отчеты о различных аппаратных компонентах. Но он также может запускаться из командной строки, в случае если отсутствует возможность отображения gui (Graphical User Interface — графический интерфейс пользователя).
Он создаст большой отчет о многих аппаратных частях, читая файлы из каталога /proc. Информация о CPU находится в начале отчета. Отчет также может быть записан в текстовый файл.
Hardinfo выполняет несколько эталонных тестов, занимающих несколько минут, прежде чем вывести отчет на экран.
4. lshw
Команда lshw может отобразить ограниченную информацию о CPU. lshw по умолчанию показывает информацию о различных аппаратных частях, а опция ‘ -class ‘ может быть использована для сбора информации о конкретной аппаратной части.
Производитель, модель и скорость процессора отображаются правильно. Однако из приведенного выше результата невозможно определить количество ядер в процессоре.
Чтобы узнать больше о команде lshw, ознакомьтесь с этой статьей:
5. nproc
Команда nproc просто выводит количество доступных вычислительных блоков. Обратите внимание, что количество вычислительных блоков не всегда совпадает с количеством ядер.
6. dmidecode
Команда dmidecode отображает некоторую информацию о CPU, которая включает в себя тип сокета, наименование производителя и различные флаги.
7. cpuid
Команда cpuid собирает информацию CPUID о процессорах Intel и AMD x86.
Программа может быть установлена с помощью apt на ubuntu
А вот пример вывода
8. inxi
Inxi — это скрипт, который использует другие программы для создания хорошо структурированного легко читаемого отчета о различных аппаратных компонентах системы. Ознакомьтесь с полным руководством по inxi.
Вывод соответствующей информации о CPU/процессоре
Чтобы узнать больше о команде inxi и ее использовании, ознакомьтесь с этой статьей:
9. Hwinfo
Команда hwinfo — это программа для получения информации об оборудовании, которая может быть использована для сбора подробных сведений о различных аппаратных компонентах в системе Linux.
Она также отображает информацию о процессоре. Вот быстрый пример:
Если не использовать опцию «—short», команда отобразит гораздо больше информации о каждом ядре CPU, например, архитектуру и характеристики процессора.
Чтобы более подробно изучить команду hwinfo, ознакомьтесь с этой статьей:
Заключение
Это были некоторые команды для проверки информации о CPU в системах на базе Linux, таких как Ubuntu, Fedora, Debian, CentOS и др.
Примеры других команд для проверки информации о CPU смотрите в этой статье:
Большинство команд обрабатываются с помощью интерфейса командной строки и выводятся в текстовом формате. Для GUI интерфейса используйте программу Hardinfo.
Она показывает подробности об аппаратном обеспечении различных компонентов в простом для использования GUI интерфейсе.
Если вы знаете какую-либо другую полезную команду, которая может отображать информацию о CPU, сообщите нам об этом в комментариях ниже
Если вы хотели бы узнать подробнее о формате обучения и программе, познакомиться с преподавателем курса — приглашаем на день открытых дверей онлайн. Регистрация здесь.
А если вам интересно развитие в этой сфере с нуля до pro, рекомендуем ознакомиться с учебной программой специализации.
Источник


