- Advantages from switching Windows to Mac
- Power Management
- Gestures
- Installing Applications
- Quicklook
- Spotlight
- Tagging Files with Color Codes
- The Bad: “Enter” doesn’t open the file/folder
- Closing Windows / Programs
- Create a Virtual Machine with Hyper-V
- Windows 10 Fall Creators Update (Windows 10 version 1709)
- Windows 10 Creators Update (Windows 10 version 1703)
- Before Windows 10 Creators Update (Windows 10 version 1607 and earlier)
- The easy guide to switching from Windows to Mac
- Productivity
- Image Editing
- Video Editing
- When you can’t take it with you.
- Comments (76)
- Äpfelundbirnen
- WildCottage
- thedba
- Äpfelundbirnen
- dysamoria
Advantages from switching Windows to Mac

May 12, 2018 · 5 min read
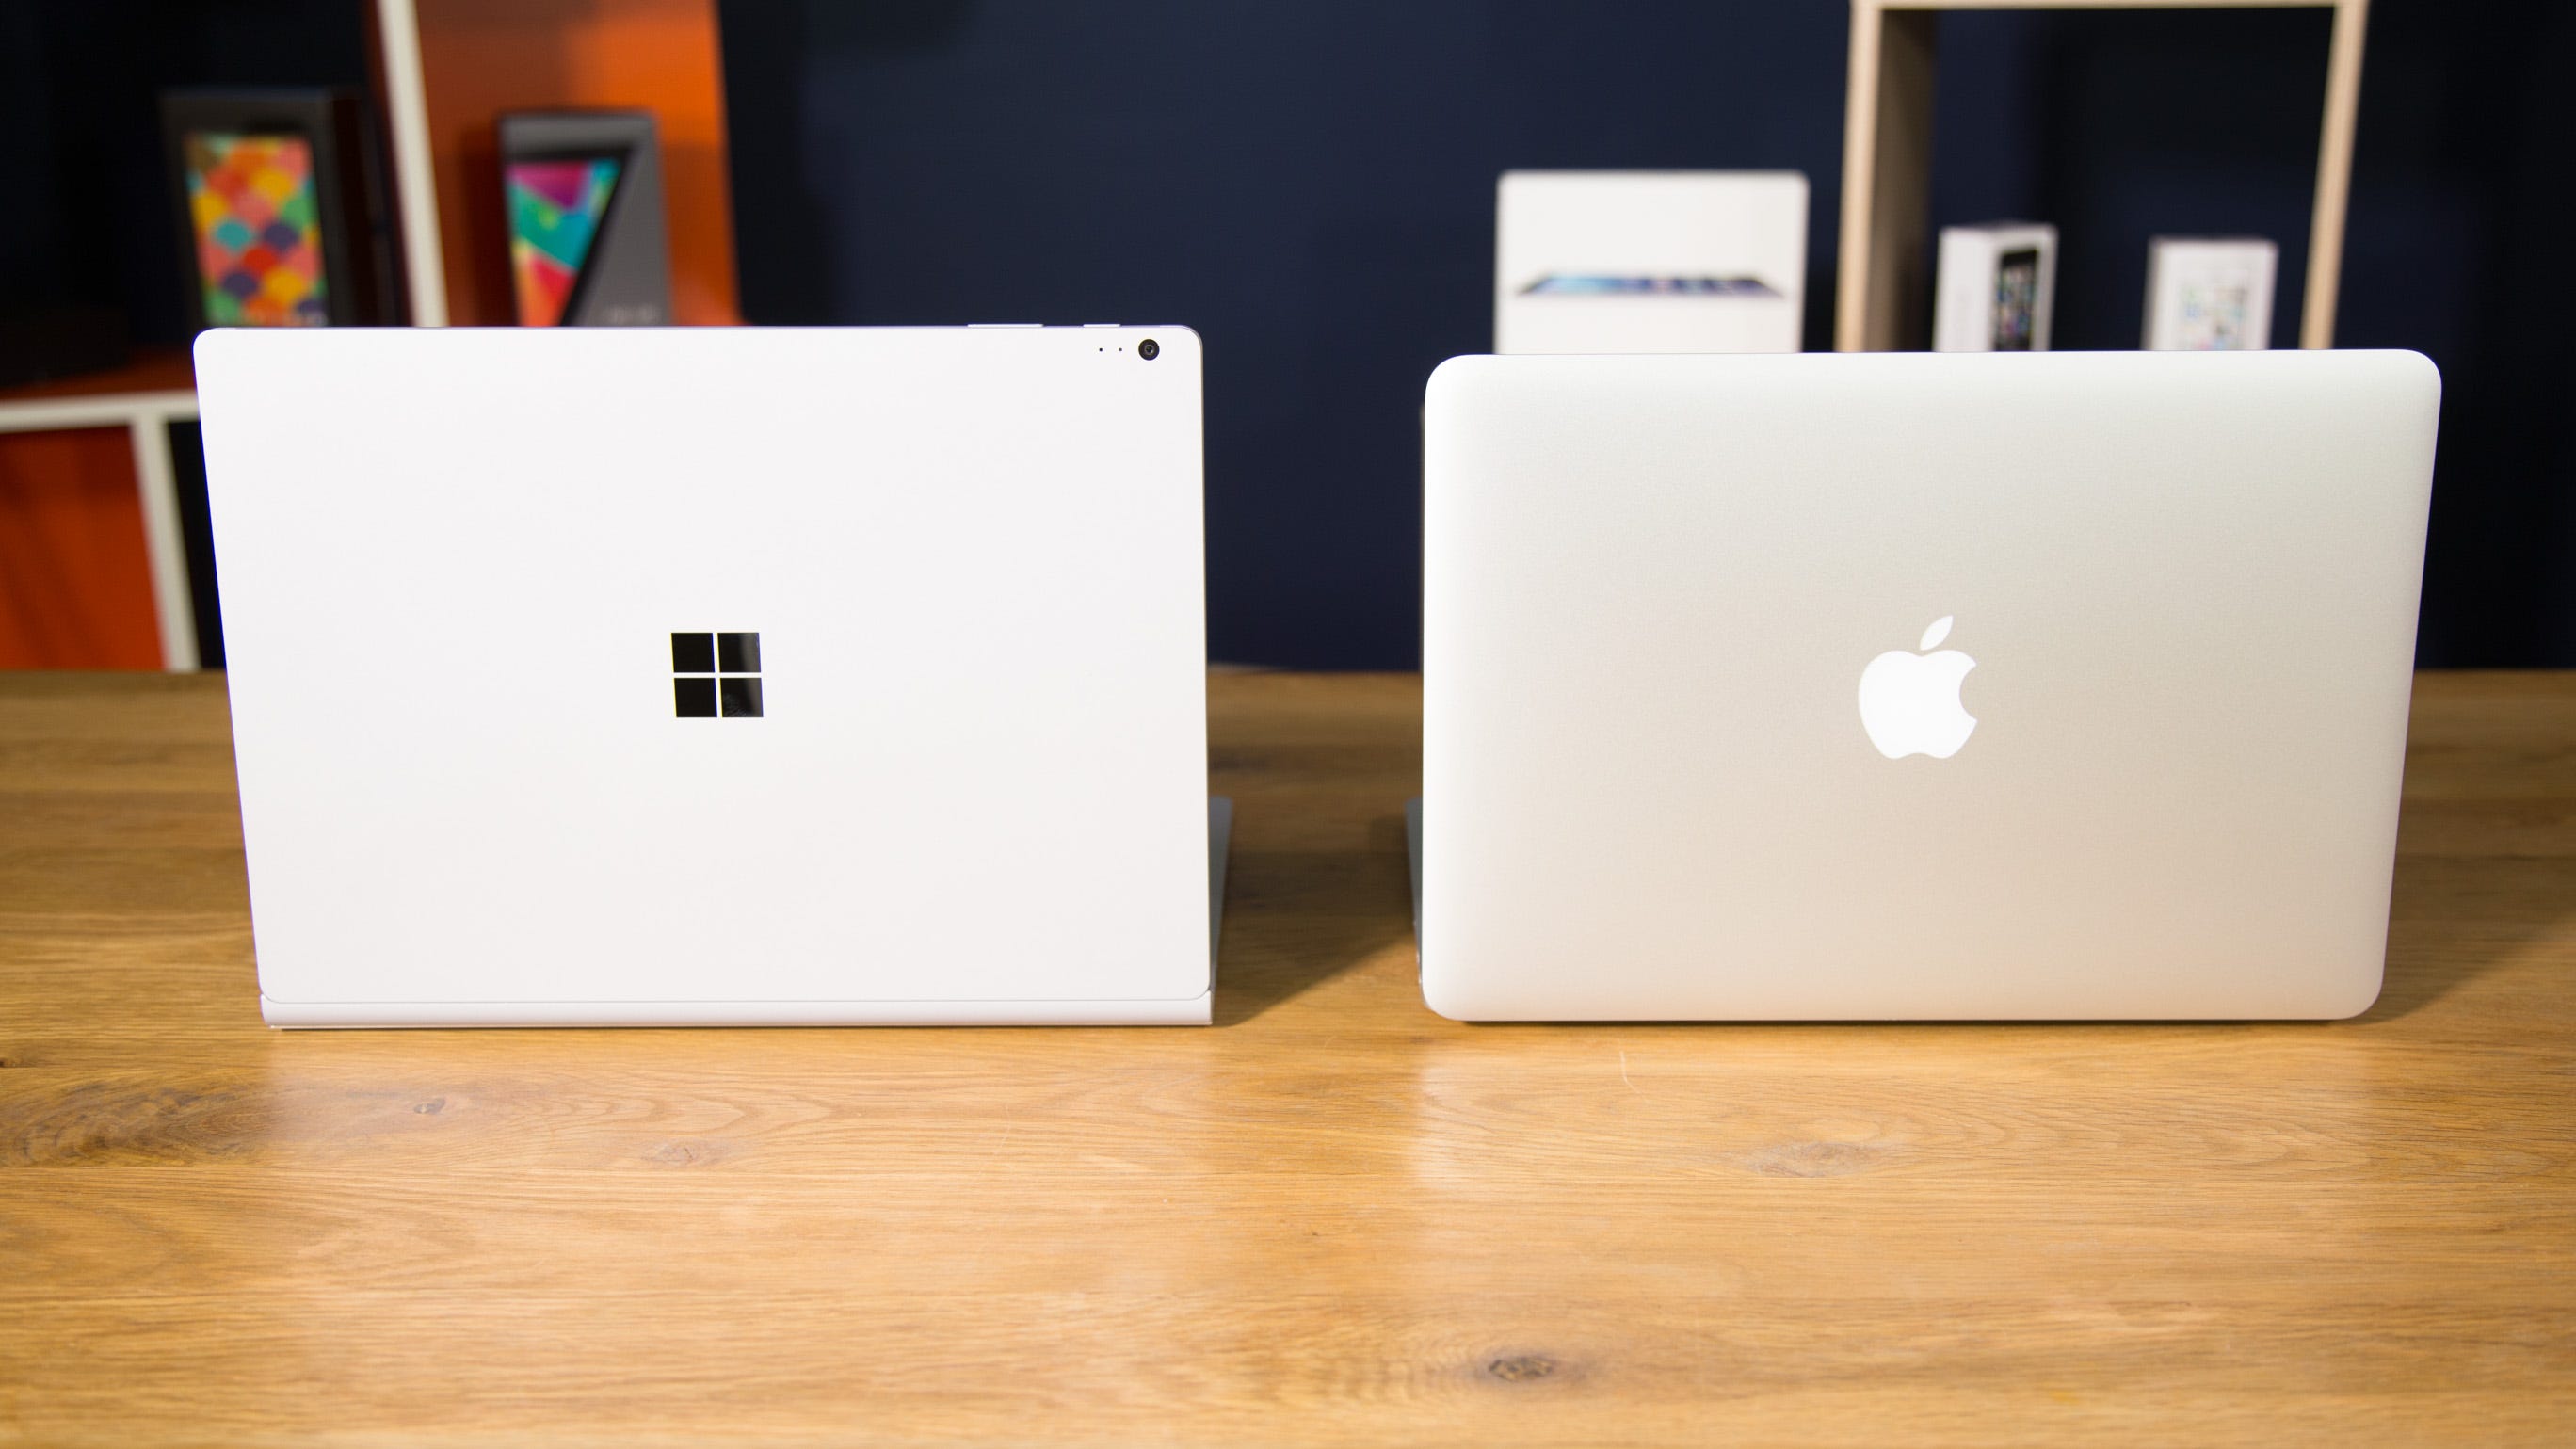
If you’ve read my latest blog about Must have MacBook apps for productivity , then you’ve noticed that I’ve recently switched from Windows to Mac.
So in all movies I’ve noticed that almost every developer have use MacBook b u t I’ve always stuck it out with Windows. For a long time I thought it was the best choice of Platform simply because purchasing a Mac seemed to be extortionately expensive compared with buying a PC desktop or laptop. I’ve been using MacBook nearly about two months and I’m going to share my experience of switching from Windows to Mac as a developer.
When you switched from Windows to Mac you can start noticing the differences just after booting up MacBook for the first time. You can see that there wasn’t a longwinded setup process, nor was there any pre-installed junk on the machine. No advertising links on the desktop, no “free” Norton antivirus and best of all no drivers to install. The machine was ready to go out of the box, which is a nice change from setting up a Windows PC.
All things apart, the features that make MacBook better than Windows which I personally found very useful and productive are mentioned below.
Power Management
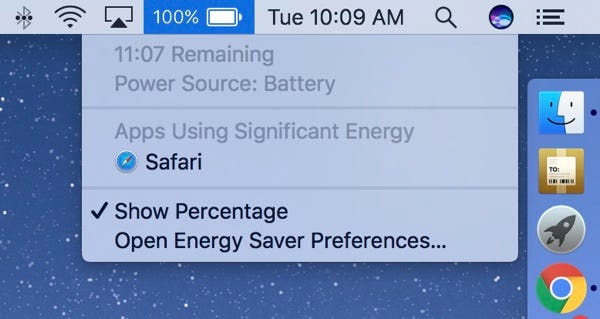
I’m extremely impressed with MacBook power management more than anything else. Apple says that the 13″ MacBook Air will last around twelve hours on battery and have found that Apple’s estimates are pretty accurate. I can get just over 10–12 hours backup when using Safari instead of Chrome for browsing the web and watching movies on VLC and some work stuff by avoiding heavy energy draining applications. I’ve never had a Windows laptop that’s managed to get such extreme battery life out of a single charge. It’s changed the way I work. One less thing to worry, Right?!
Gestures
Mac multi-touch gestures are unbeatable and super productive, it makes your work super easy. Like to open Launchpad you just have to pinch with thumb and three fingers or to swipe between full screen apps you just have to swipe left or right with four fingers or to show Desktop you just have to spread with thumb and three fingers and the list goes on and on. It’s super easy and addictive to use and once you got used to it then you’ll never be able to use another Windows laptop.
Installing Applications
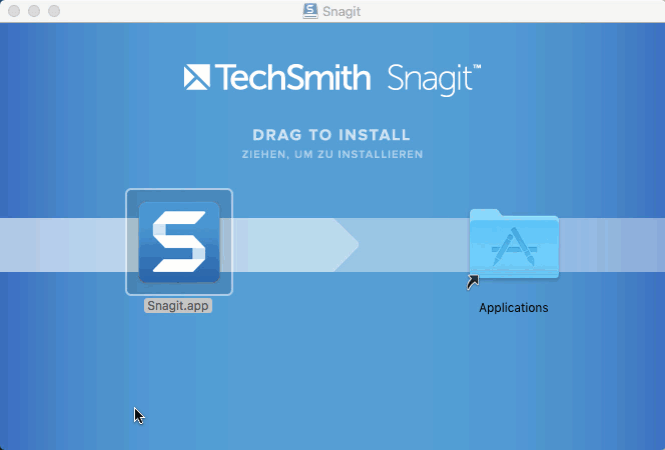
The other thing that I found really cool is the way that applications are installed. On Windows, everyone is accustomed to using a setup wizard but I’ve found it’s really cool to encounter those on Mac. Instead, you have this metaphor where you mount a fake drive (DMG files) and then drag the app to the applications folder and done. Yes it’s that simple. Only drag and drop the application in your application folder and your app is installed in your Mac. Applications that are installed using the Mac App Store simply install themselves without requiring any drag-ad-drop or DMG mounting. Obviously this is Apple’s preferred method.
Quicklook
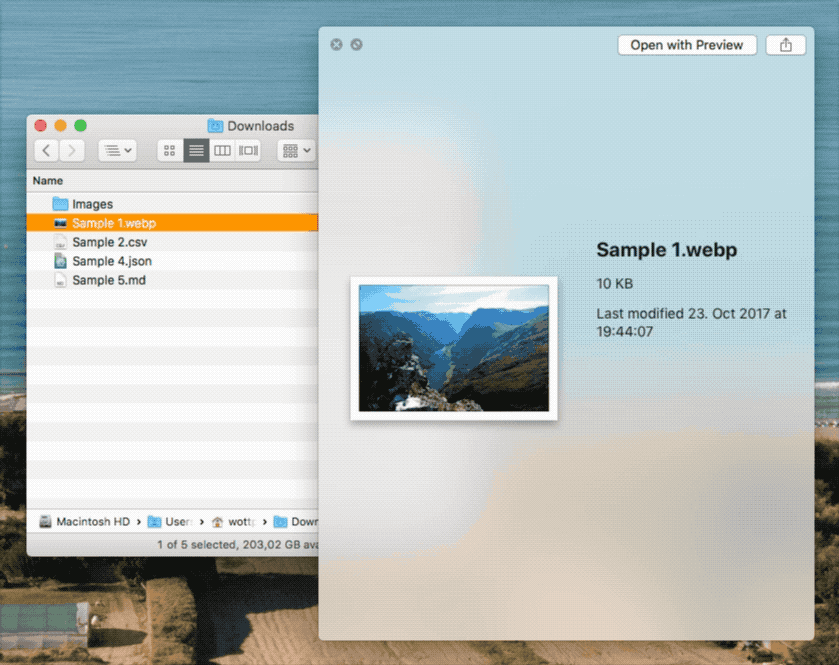
Another tiny feature that saves me a second-and-a-half, dozens and dozens of times a day. Just a tap the spacebar and you’ll see the contents of that file. Only gripe: I can’t copy from the quicklook panel. It’s work with any kind of file and even with folders. It’s a really handy tool and I’ve got completely used to it.
Spotlight
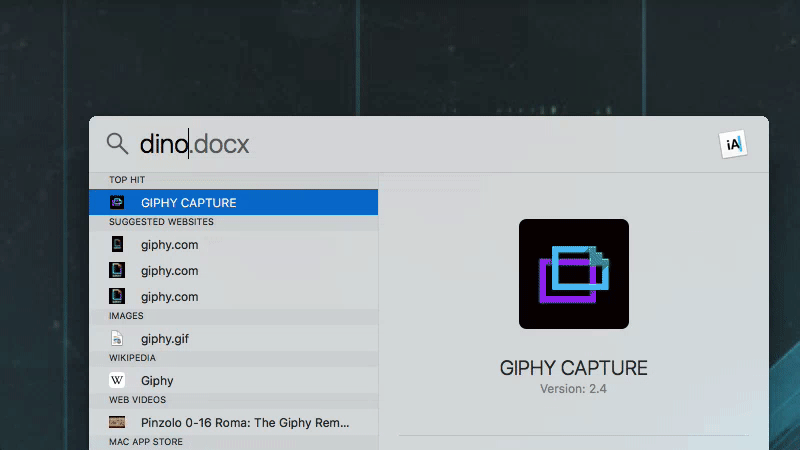
Spotlight search is extremely powerful and gives you access to everything on the computer in a second. It’s lightning fast, whereas I’ve found Windows’ search to be slow and generally disappointing (especially when searching large folders of documents).
Tagging Files with Color Codes

I discovered that files could be tagged with color dots. There are several colors to choose from. You can use different colors to represent various categories.
For example, I use red for those files that I need to work with on a high priority bases.
This is very productive and time saving thing once you get used to it. You can access all of your Tags from the Finder and do your work by just a Click.
The Bad: “Enter” doesn’t open the file/folder

There are some oddities that are painful at first. Like I struggled to figure out how to open a folder (after becoming accustomed to using Enter key in Windows to do it) and discovered after pressing the ⌘ key with Arrow down key to open a folder. If you pressed Enter key in Mac you’ll have the option to rename a folder or document just like pressing the F2 key on Windows.
Closing Windows / Programs
One of the biggest differences between Windows and Mac is what happens when you close a window. On Windows (and with a name like that, they should know how to deal with it) the program closes. But on Mac, the window closes but the program continues to run.
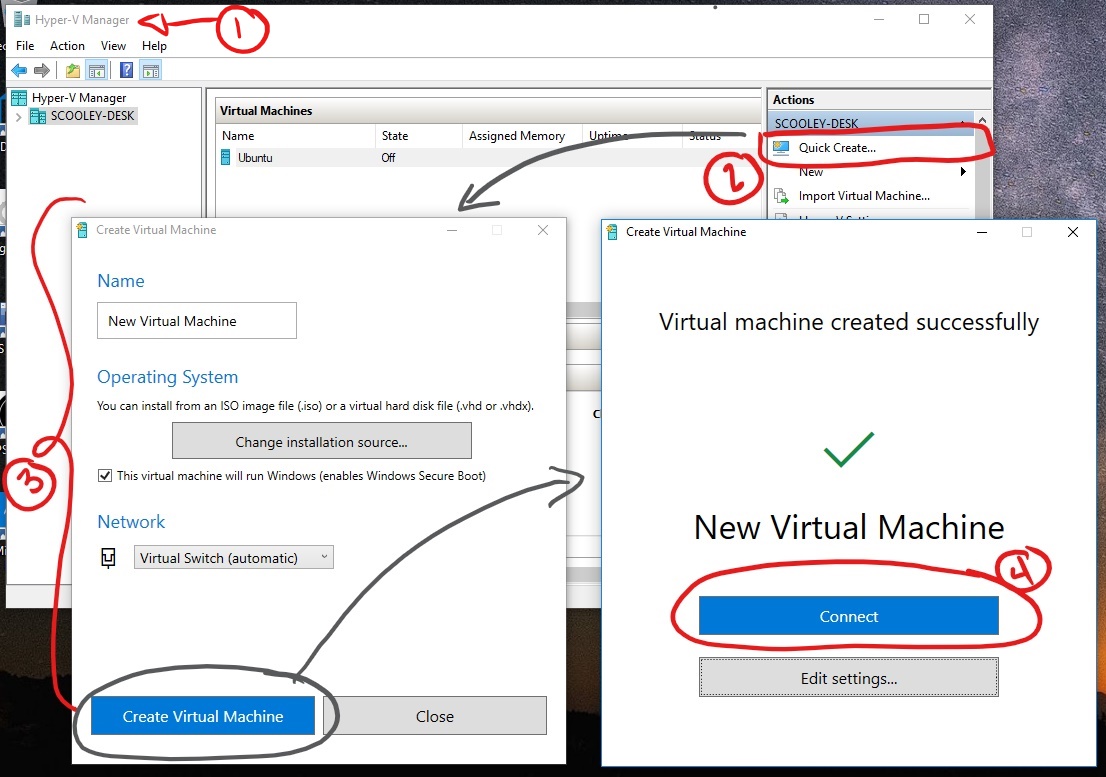
Create a Virtual Machine with Hyper-V
Create a virtual machine and install its operating system.
We’ve been building new tools for creating virtual machines so the instructions have changed significantly over the past three releases.
Pick your operating system for the right set of instructions:
Let’s get started.
Windows 10 Fall Creators Update (Windows 10 version 1709)
In Fall Creators Update, Quick Create expanded to include a virtual machine gallery that can be launched independently from Hyper-V Manager.
To create a new virtual machine in Fall Creators Update:
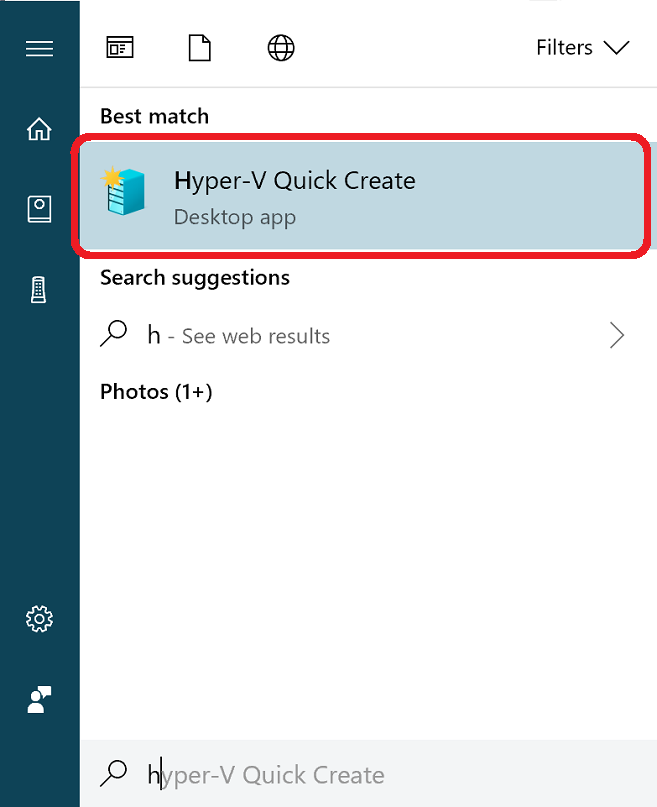
Open Hyper-V Quick Create from the start menu.
Select an operating system or choose your own by using a local installation source.

- If you want to use your own image to create the virtual machine, select Local Installation Source.
- Select Change Installation Source.

- Pick the .iso or .vhdx that you want to turn into a new virtual machine.
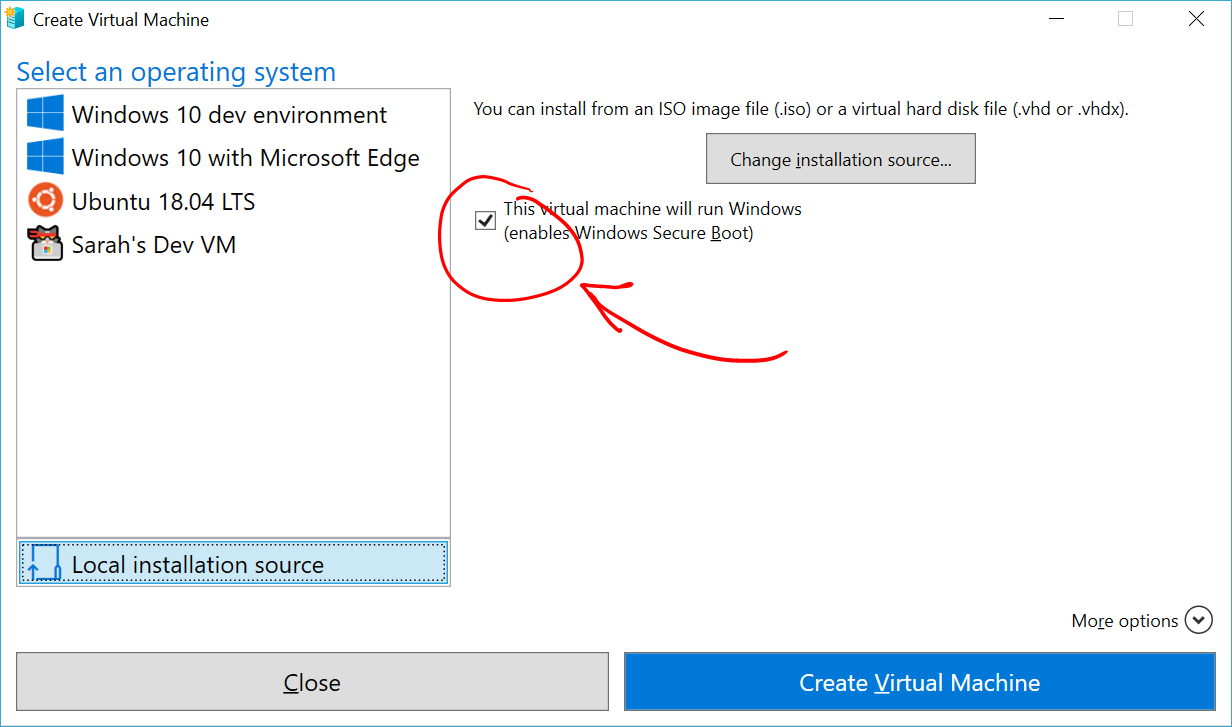
- If the image is a Linux image, deselect the Secure Boot option.
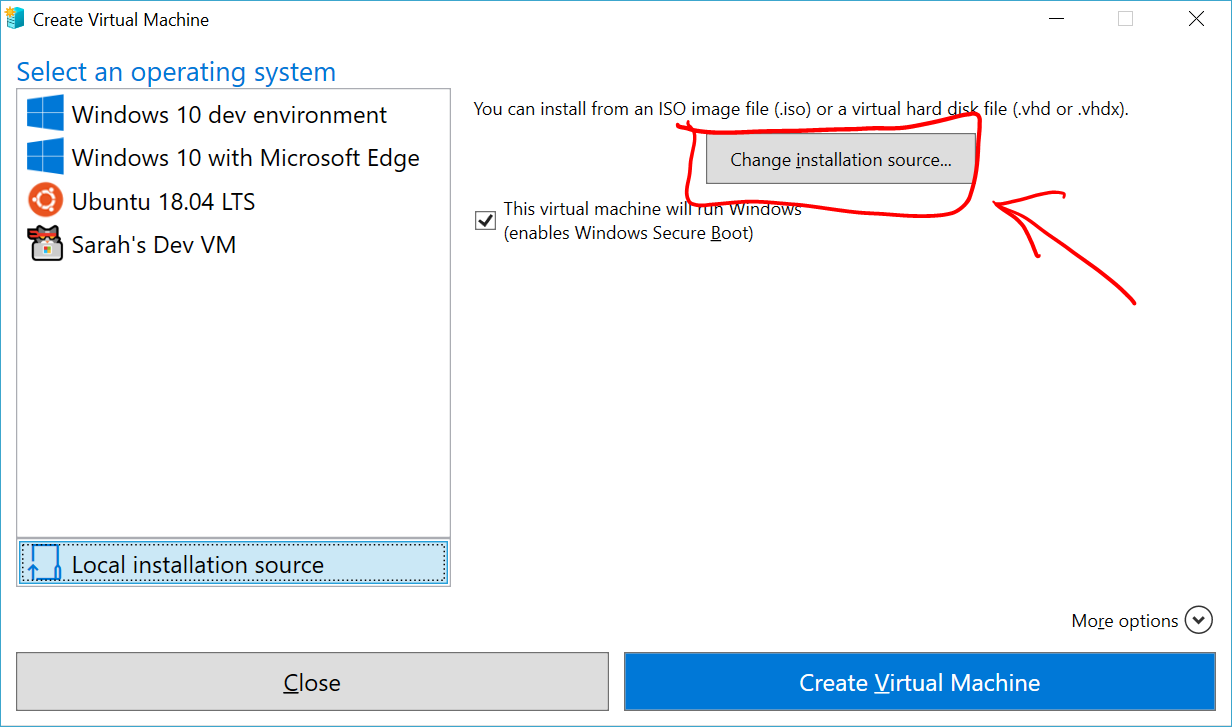
Select «Create Virtual Machine»
That’s it! Quick Create will take care of the rest.
Windows 10 Creators Update (Windows 10 version 1703)
Open Hyper-V Manager from the start menu.
In Hyper-V Manager, Find Quick Create in the right hand Actions menu.
Customize your virtual machine.
- (optional) Give the virtual machine a name.
- Select the installation media for the virtual machine. You can install from a .iso or .vhdx file. If you are installing Windows in the virtual machine, you can enable Windows Secure Boot. Otherwise leave it unselected.
- Set up network. If you have an existing virtual switch, you can select in the network dropdown. If you have no existing switch, you will see a button to set up an automatic network, which will automatically configure a virtual network.
Click Connect to start your virtual machine. Don’t worry about editing the settings, you can go back and change them any time.
You may be prompted to вЂPress any key to boot from CD or DVD’. Go ahead and do so. As far as it knows, you’re installing from a CD.
Congratulations, you have a new virtual machine. Now you’re ready to install the operating system.
Your virtual machine should look something like this:

Note: Unless you’re running a volume-licensed version of Windows, you need a separate license for Windows running inside a virtual machine. The virtual machine’s operating system is independent of the host operating system.
Before Windows 10 Creators Update (Windows 10 version 1607 and earlier)
If you aren’t running Windows 10 Creators Update or later, follow these instructions using New Virtual Machine Wizard instead:
The easy guide to switching from Windows to Mac
Long-term Windows users looking to dip their toe into the Mac ecosystem for the first time typically stick to applications they are familiar with on PC, but there is a wealth of other software that can do the job for the more ambitious switcher.
Productivity
Existing users of Microsoft’s Office suite of tools will immediately feel comfortable with the Office 365 subscription, as the apps offer almost identical functionality to the Windows versions. Many people who use the suite frequently may not want to move away from it, but for those who do, there are options.
The first alternative is in fact already installed on the Mac by Apple itself: iWork. Apple’s own collection of apps cover the core areas Office is typically used for, with Pages, Numbers and Keynote standing in for Word, Excel, and Powerpoint, respectively.
At face value, Pages is a powerful word processor that seasoned Word users will quickly understand and can immediately start working within. Once a piece is crafted, Pages shows off its true value by incorporating the text into dozens of fantastic templates that makes an article or letter stand out.
While many are wary of working in spreadsheets in the first place — Excel is simply a mass of black and white digits — Numbers goes to great lengths to change that image. The selection of templates are colorful and easy to understand, making them far less intimidating to start using, while the overall interface makes starting from even the basic pages simpler than most would expect.
Add in the ability to collaborate with others, cross-platform compatibility with PCs via iWork for iCloud, and iOS apps, and iWork becomes serious competition.
Almost everyone who has sat in an office has had to endure a Powerpoint presentation, inevitably poorly produced with too many transitions and little in the way of visual appeal. Keynote, on the other hand, helps users create appealing and more professional presentations, again with easy to use themes and transitions between slides.
Add in the ability to collaborate with others, cross-platform compatibility with PCs via iWork for iCloud, and the same tools being available as iOS apps, and iWork becomes serious competition.
If the switcher would rather have something that resembles Microsoft’s suite more in terms of appearance. , another way to go could be through OpenOffice and LibreOffice, the latter being a fork of the former open-source project. There is little difference between the two releases, as both are similar in terms of what they offer to users, including tools for word processing, spreadsheets, and databases, and while the OpenDocument Format is favored, they have no issue opening Office files.
These two are less of a recommendation based on their ability to be used on the Mac, and more one of overall ubiquity. The two projects are available to download for Mac, Windows, and for Linux, allowing for the exact same working environment to exist on multiple platforms. It also helps that OpenOffice and LibreOffice are free tools, unlike Office.
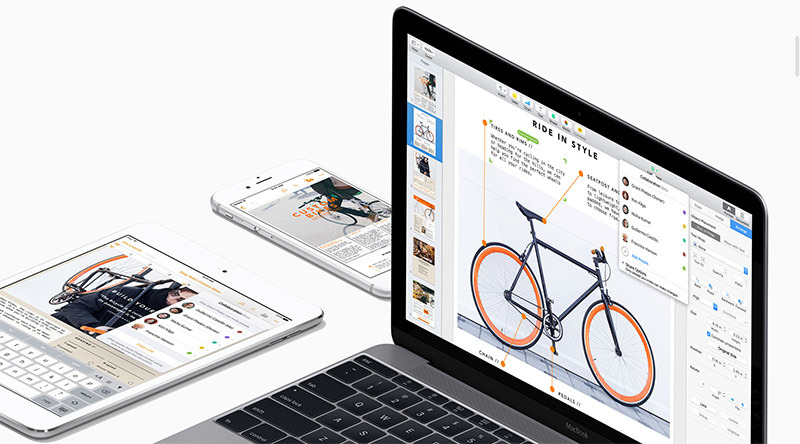
Image Editing
Adobe Creative Cloud could easily be considered the Microsoft Office for art, design, and video. Just like Office, Adobe makes its suite of apps available for the Mac, so there isn’t anything to worry creative professionals making the switch. Even so, there are still a few Mac alternatives to individual components for those wanting to go further afield.

Photographers can make use of the included Photos app to make changes to their photographs, with basic cropping of shots and automated adjustments available for those wanting to perform quick improvements to shots. For more experienced editors, Photos can dial up the number of potential options considerably, providing a lot of flexibility in getting the perfect image.
Outside of editing, Photos is a great cataloging tool for images, with collections of great photos in shareable Memories, People for facial recognition of subjects, and Places to show where images are taken. Owners of iPhones and iPads can also see their entire image collection across multiple devices in the app, powered by iCloud Photo Library, with edits synchronizing across devices and easy sharing of image groups with others on social media.
![]()
For design work or more involving editing jobs, one of the best-known replacements for Photoshop is the slick-looking Pixelmator. The interface is as finely polished as anyone would expect from a macOS app, making it a great example of what developers on the platform are capable of producing, and an advertisement for Mac in its own right.
Users needing simple edits or tweaks to an image are easily handled with a welcoming and easy to use interface, including a fantastic effects browser that shows what the option actually does to an image before the user applies it to their work. Those wanting to perform more advanced work are also covered, with Pixelmator easily able to handle the vast majority of tasks Photoshop can perform on an image. Where Pixelmator excels in is the price, costing just $29.99 compared to repeatedly paying Adobe a Creative Cloud subscription.
There are two other alternatives to suggest, which also happen to work off the same core code base. The GNU Image Manipulation Project (GIMP)is a powerful image editing tool that works on both Mac and PC, with the free open source software providing a similar feature set as Photoshop and Pixelmator, albeit with slightly less polish than the paid software packages.
The low cost does affect its usability, as unlike the paid apps, GIMP does suffer from having a steep learning curve making it harder for new users to do advanced edits. The GIMPshop project may be the answer for some, as it redesigns the interface of GIMP to make it more familiar to Photoshop users, relocating features and settings to where they would be in Adobe’s software, in turn making it easier to pick up.
Video Editing
On the PC, the dominant force for video editing is Adobe Premiere, along with After Effects, as part of the Creative Cloud. Adobe’s grip on the editing market extends to Mac as well. It’s popular software, and difficult to beat, but other options are still available.
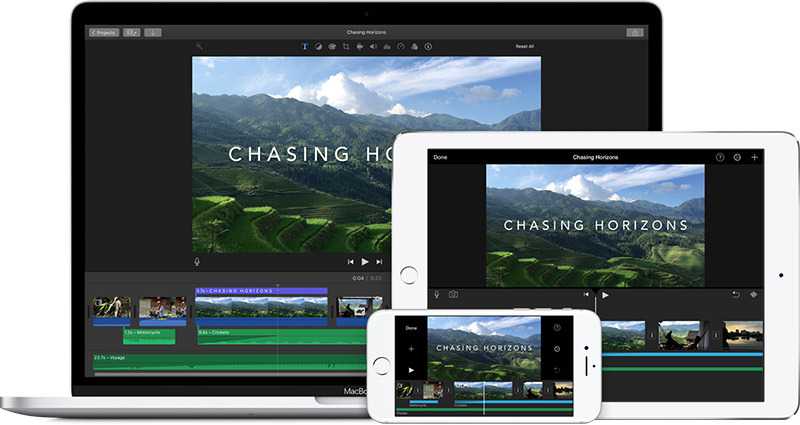
Many will have already heard of iMovie as a basic video editor, and considering it’s preinstalled and effectively free, it’s one of the immediately-available editing tools for switchers to try out. Unlike the underwhelming Windows Movie Maker many PC users will have toyed around with, iMovie is a polished product that is fairly simple to use, but is still capable of producing a decent video.
For anyone wanting to put together a vacation video or something similar, it is as simple as importing a few clips, putting them into an order, and adding a few filters or special effects. There are also a number of soundtracks and title sequences that could be added to a project, and even a feature to quickly create a mock Hollywood-style trailer.
If the switcher also happens to have an iOS device, they will also be able to benefit from being able to quickly make edits on the iOS version of the app, before transferring the video to the Mac for more fine tuning.
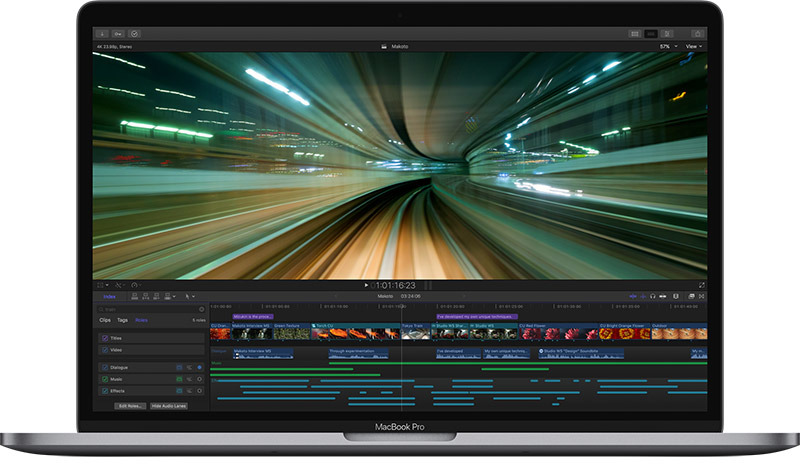
While iMovie probably covers most standard switcher’s needs, more professional users may want to consider paying for Final Cut Pro X. Where iMovie works to be as easy to use by anyone, Final Cut Pro X instead focuses on providing a vast amount of editing options, giving more ways to alter the audio, add transitions, and to change the image.
On the more advanced side, Final Cut Pro X adds in multi-camera editing, multi-channel audio, color grading, and support for industry standard formats including XAVC, AVCHD, and Redcode RAW. Media is also handled in a better fashion, with automatic analysis of source material performed in the background, range-based keywords for locating clips, intelligent search of libraries for tags, and easy access to items held within the user’s Photos and iTunes libraries.
Offering a vast amount of flexibility, Final Cut Pro X can be used to create polished content on a par with Premiere, making it a great choice for those working on YouTube videos or larger projects. Not only is it a serious contender to Adobe’s video-editing throne, but the $299.99 price tag attached to it could certainly convince some video editors to move away from Adobe’s subscription.
For students and educators, Apple just this week announced a new Pro Apps Bundle for Education that packs in Final Cut Pro X, Logic Pro X, Motion 5, Compressor 4, and MainStage 3 for only $199.99.
When you can’t take it with you.
While most essential app categories have their Mac equivalents, there are some rare instances where an alternative isn’t available, or the user doesn’t want to pay again for something they already have the license for in Windows. In the event that someone switching doesn’t want to move away from the Windows version at all, there’s a few workarounds.
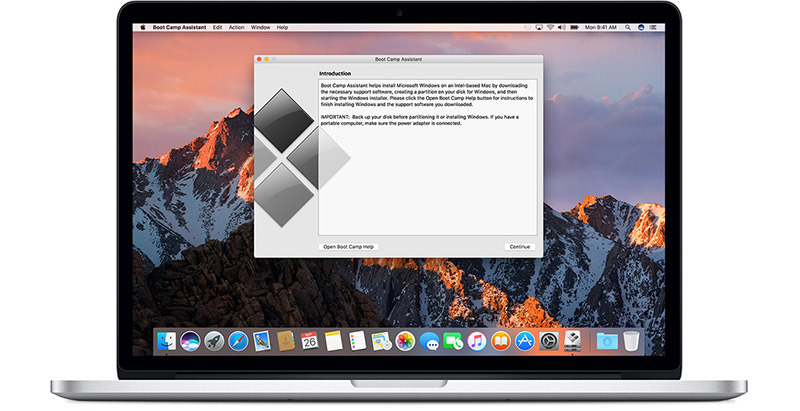
Boot Camp is a feature that allows a user to install Windows onto a Mac. By following the instructions of the Boot Camp assistant, a user can have a separate partition with Windows running in a short while, so long as they have the Windows installation media and a spare license available. While free, this option does mean that users have to effectively exit macOS in order to get into Windows, and vice versa.
Parallels Desktop is a paid alternative that allows Windows to run on a Mac, but in a different way. This time, Windows runs on top of macOS within a window, allowing for software running within Windows to be used alongside Mac apps. The downside is that it costs $80 to do this, on top of a Windows license.
If the PC is still going to be available to use, consider remotely connecting to it from the Mac. Chrome Remote Desktop is relatively simple to set up, and allows for remote control of a Windows desktop from within a window on the Mac. Other solutions are also available, such as LogMeIn and VNC, but considering it is free and easy to use, Chrome Remote Desktop may be the best route in many cases.
AppleInsider has affiliate partnerships and may earn commission on products purchased through affiliate links. These partnerships do not influence our editorial content.
Comments (76)
Äpfelundbirnen
I’d be much more interested in a description of the reverse switch since I just bought a used Dell workstation for video and photo editing. I maxed it out with components I’d not even be able to put in a Mac, with the exception of an outdated Mac Pro. This is after 25 years of exclusive Mac usage. Back in the day the Mac was a serious offer for people like me. Nowadays I’d pay a multitude for an inferior Apple machine. It’s probably my mistake to expect a smart phone company to deliver powerful stationary computers for creative professionals like I 😉
WildCottage
Under the photo editing section you should also mention Affinity Photo. It’s available for both Mac and Windows and is every bit as good as Photoshop. They also make Affinity Design, an alternative to Illustrator.
thedba
This is the AppleInsider forum. So I doubt they’ll ever tell you how to switch from a Mac to Windows.
As far as you being a Mac user for 25 years, well Apple was a very different company back then. The bulk of their users now are mainstream.
As far as you paying more for a Mac than a similar Windows machine, that’s an ancient myth.
Try speccing a similar windows laptop for example, with SSD onto PCIe with same amount of memory etc. And you’ll find out that Macs are very well priced. Tried it also with MS surfacebook and found it to be more expensive than a similar MBP.
You seem to be looking for a new Mac Pro. I understand your frustration but in the end you got to go with the tools that are available to you now.
Äpfelundbirnen
True, the Apple of today is not the Apple it used to be. Also true that a powerful PC notebook would be nearly as pricy as a MBP, but only if I would want it to be as absurdly slim as a MBP. To me Apple’s drive for slimness is a foolish obsession when it comes to advanced video and photo editing needs. As for the Mac Pro, no, I would have liked to purchase an update to the old Mac Pro design with modern components and the possibility to expand it with PCIe cards, something professionals usually do. I think Apple should change its product names. Mac Pop and MacBook Pop would be suiting. The pros can make the switch to Windows as I have done.
dysamoria
Fully agreed. It has functionality that Pixelmator does not have.


