- Some network stuff
- вторник, 21 мая 2019 г.
- Сервер strongswan ipsec + клиенты на Win10 и Ubuntu ч. 1: Настройка strongswan на сервере
- Описание стенда
- Настройка сервера
- Установка пакетов для работы
- Генерация ключевых пар и сертификатов УЦ и сервера:
- Настройка strongSwan
- Настройка firewall
- Запуск VPN сервера
- Добавление нового клиента со смарт-картой
- Настройка клиента
- Проверка доступности сервера
- Установка пакетов
- Настройка strongSwan
- Настройка модуля pkcs11
- Подключение к сети
- strongSwan
- Documentation
- Resources
- Windows Clients
- A) Authentication using X.509 Machine Certificates
- On the Windows Client
- On the strongSwan VPN Gateway
- B) Authentication using X.509 User Certificates
- On the Windows Client
- On the strongSwan VPN Gateway
- C) Authentication using EAP-MSCHAP v2
- On the Windows Client
- On the strongSwan VPN Gateway
- Rekeying behavior
- IKE_SA rekeying
- CHILD_SA rekeying
- Bugs & Features
- IKEv2 Fragmentation
- Split routing on Windows 10 and Windows 10 Mobile
- AES-256-CBC and MODP2048
- Serving different IDs/Domain names
- Accessing the VPN server via VPN
- Links
- Acknowledgements
Some network stuff
вторник, 21 мая 2019 г.
Сервер strongswan ipsec + клиенты на Win10 и Ubuntu ч. 1: Настройка strongswan на сервере
Авторизация виндовых клиентов будет происходить по EAP, клиентов на Убунту — с помощью PSK.
1. Устанавливаем необходимые пакеты:
apt-get install strongswan libcharon-extra-plugins dnsmasq
Дополнительно для debian9: apt-get install strongswan-pki
2. Генерируем сертификаты. Можно пойти правильным путем и получить «честные» сертификаты у центра сертификации, типа Comodo. В данном случае вариант бюджетный — самоподписанные сертификаты. В принципе, они ничем не хуже, кроме того, что каждую клиентскую машину нужно настраивать вручную, для того, чтобы она доверяла нашей CA.
2.1 Закрытый ключ для CA
mkdir cert
cd cert
ipsec pki —gen > caKey.der
2.2 Генерируем самоподписанный сертификат CA
ipsec pki —self —in caKey.der —dn «C=CH, O=MyVPN, CN=MyVPN CA» —ca > caCert.der
2.3 Генерируем закрытый ключ сервера
ipsec pki —gen > peerKey.der
2.4 Генерируем сертификат для сервера
ipsec pki —pub —in peerKey.der | ipsec pki —issue —flag serverAuth —san —cacert caCert.der —cakey caKey.der \
—dn «C=CH, O=MyVPN, CN=MyVPNServer» > peerCert.der
*для Windows обязательный аргумент —san , он должен совпадать с реальным IP адресом сервера, или его FQDN
2.5 Копируем сгенерированные файлы в соответствующие директории:
/etc/ipsec.d/private/peerKey.der
хранит закрытый ключ узла. Загрузку данного ключа следует настроить в ipsec.secrets
/etc/ipsec.d/certs/peerCert.der
хранит end-entity сертификат узла. Следует указать в ipsec.conf чтобы использовать.
/etc/ipsec.d/cacerts/caCert.der
хранит CA сертификат с помощь. которого были выпущены и подписаны клиентские сертификаы. Загружается автоматически.
3 Добавляем конфигурацию для клиентов на Windows:
3.1 В /etc/ipsec.conf:
conn win10
dpdaction=clear
dpddelay=35s
dpdtimeout=300s
fragmentation=yes
rekey=no
#left = server side
left=%any
leftsubnet=0.0.0.0/0
leftcert=peerCert.der
leftfirewall=yes
leftsendcert=always
right=%any
rightsourceip=10.1.1.2/32
rightdns=8.8.8.8
eap_identity=%identity
rightauth=eap-mschapv2
keyexchange=ikev2
auto=add
3.2 В /etc/ipsec.secrets
: RSA peerKey.der
test : EAP «abcd1234»
4 Добавляем конфиг для клиентов на Ubuntu:
4.1 В /etc/ipsec.conf:
conn ubnt
dpdaction=restart
dpddelay=35s
dpdtimeout=300s
rekey=no
rightdns=8.8.8.8
rightsourceip=10.1.1.3/32
ike=aes256-sha2_256-modp1024!
esp=aes256-sha2_256!
4.2 В /etc/ipsec.secrets
*в такой форме записи ключ указывается без кавычек!
-в моем сценарии клиент за NAT-ом поэтому в качестве аргумента ‘left’ используется его публичный адрес, в качестве ‘left id’ — серый адрес.
— leftfirewall=yes необходимо, если на сервере настроен NAT
— rightsourceip — виртуальный адрес, который будет выдаваться клиенту. Можно указать целую подсеть, если клиентов много.
Описание стенда
Операционная система сервера = Ubuntu 20.04
Доменное имя сервера = server.astradomain.ad
Операционная система клиента = Ubuntu 20.04
Имя VPN клиента = user
Настройка сервера
Установка пакетов для работы
За основу инструкции по настройке сервера была взята следующая инструкция.
В первую очередь поставим все необходимые пакеты для работы:
Генерация ключевых пар и сертификатов УЦ и сервера:
Настройка strongSwan
Сохраним предыдущую конфигурацию:
Откроем файл /etc/ipsec.conf и вставим туда следующее содержимое:
Укажем какой ключ использовать серверу для аутентификации себя клиенту /etc/ipsec.secrets:
Настройка firewall
Узнаем имя интерфейса, к которому подключен сервер. Данное имя нам потребуется при настройке firewall. Это можно сделать с помощью команды:
Добавим в файл настроек firewall /etc/ufw/before.rules следующие строки :
Добавим в файл /etc/ufw/sysctl.conf следующие строки :
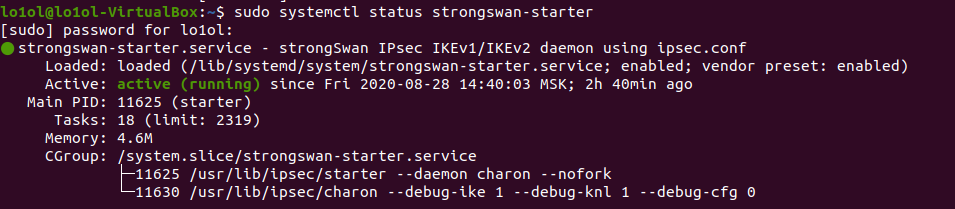
Запуск VPN сервера
Проверить, что сервер поднялся успешно, можно, например, с помощью команды:
Добавление нового клиента со смарт-картой
Модуль pkcs11 для работы со смарт-картами
Необходимо использовать модуль opensc-pkcs11.so из состава OpenSC.
Отформатируем смарт-карту, сгенерируем на ней ключи и получим сертификат.
Убедиться, что сертификат и ключи загружены на токен можно с помощью команды:
Теперь Рутокен готов к работе и его можно отдать клиенту.
Настройка клиента
Проверка доступности сервера
Проверим, что сервер доступен.
Установка пакетов
Установим необходимые пакеты для работы:
Настройка strongSwan
Корневой сертификат сервера положим в директорию /etc/ipsec.d/cacerts:
Настроим файл конфигурации strongSwan /etc/ipsec.conf:
Настроим файл паролей аутентфикации strongSwan /etc/ipsec.secrets и укажем, какой ключ нужно использовать для аутентификации по смарт-карте:
Более подробно о способах задания паролей смарт-карт можно почитать здесь.
Настройка модуля pkcs11
Настроим использование pkcs11 модулей в strongSwan. Для этого откроем файл конфигурации /etc/strongswan.d/charon/pkcs11.conf и отредактируем настройки модулей pkcs11:
Подключение к сети
Подключите смарт-карту и инициализируйте подключение c помощью команды:
Проверить, что соединение прошло успешно, можно, например, выведя список своих ip адресов С помощью команды:
strongSwan
Documentation
Resources
Windows Clients
Windows 7 and newer releases (including Windows Phone 8.1 and newer) support the IKEv2 and MOBIKE (RFC 4555) standards through Microsoft’s Agile VPN functionality and are therefore able to interoperate with a strongSwan VPN gateway using these protocols.
Windows does not currently support IKE redirection (RFC 5685).
strongSwan currently can authenticate Windows clients either on the basis of X.509 Machine Certificates using RSA signatures (case A), X.509 User Certificates using EAP-TLS (case B), or Username/Password using EAP-MSCHAPv2 (case C). The client does not support multiple authentication rounds (RFC 4739).
Make sure to fulfill the certificate requirements to successfully authenticate Windows clients.
A) Authentication using X.509 Machine Certificates
The strongSwan VPN gateway and each Windows client needs an X.509 certificate issued by a Certification Authority (CA). OpenSSL or pki can be used to generate these certificates.
On the Windows Client
On the strongSwan VPN Gateway
B) Authentication using X.509 User Certificates
This is very similar to case A, but certificates are stored in a user specific keystore (using smart cards is also possible in this case). The client authentication has to be done with EAP-TLS in this case. As an EAP identity exchange is needed, make sure to have the eap-identity plugin loaded.
On the Windows Client
- Storing the user certificate is basically the same as storing a machine certificate simply select My user account instead of Computer account in the Certificates MMC snap-in. Actually, since this keystore is used by default, you can simply double click the certificate to install it.
- Please note that the CA certificate used to authenticate the VPN gateway has still to be installed in the Computer account keystore.
- Configuring a Windows Agile VPN connection
On the strongSwan VPN Gateway
C) Authentication using EAP-MSCHAP v2
In order to prevent man-in-the-middle attacks the strongSwan VPN gateway always authenticates itself with an X.509 certificate using a strong RSA/ECDSA signature. After a secure communication channel has been set up by the IKEv2 protocol, the Windows clients authenticate themselves using the EAP-MSCHAPv2 protocol based on user name, optional windows domain and user password. As an EAP identity exchange is needed for this to work, make sure to have the eap-identity plugin loaded.
EAP-MSCHAPv2 requires MD4 to generate the NT-Hashes, so either the md4 plugin or one of the crypto library wrappers (OpenSSL, Gcrypt) is required. This is not needed if the authentication is delegated to an AAA server via eap-radius plugin.
Some Windows clients will always send a domain part in the user name field (e.g. Windows Phone\User ). Depending on the backend used to authenticate the users the domain part may have to be stripped away (see #612-3 for an example regarding FreeRADIUS), or be included when defining the credentials (e.g. in EAP secrets in ipsec.secrets).
Important: strongSwan releases before 4.3.1 are not compatible with Windows 7 RC (Build 7100) or later, because Microsoft’s EAP-MSCHAPv2 implementation changed from Beta to Release Candidate.
On the Windows Client
On the strongSwan VPN Gateway
Rekeying behavior
IKE_SA rekeying
The Windows 7 client supports IKE_SA rekeying, but can’t handle unsupported Diffie Hellman groups. If a strongSwan gateway initiates IKE_SA rekeying, it must use modp1024 as the DH group in the first attempt, otherwise rekeying fails. You can achieve this by setting modp1024 as the first (or only) DH group in the gateways ike proposal.
CHILD_SA rekeying
Rekeying CHILD_SAs is also supported by the Windows 7 client. For some reason, a client behind NAT does not accept a rekeying attempt and rejects it with a Microsoft specific notify 12345, containing an error code ERROR_IPSEC_IKE_INVALID_SITUATION.
To work around the issue, let the client initiate the rekeying (set rekey=no on the server). It will do so about every 58 minutes and 46 seconds, so set the gateway rekey time a little higher. There is no way known to change the rekey time (the netsh.ras.ikev2saexpiry options affect the Windows Server implementation only).
Another option is to set no rekey time, but only a hard lifetime to delete the CHILD_SA. The client will renegotiate the SA when required.
Bugs & Features
IKEv2 Fragmentation
IKEv2 fragmentation is supported since the v1803 release of Windows 10 and Windows Server. All versions of Windows also support the proprietary IKEv1 fragmentation.
Split routing on Windows 10 and Windows 10 Mobile
Microsoft changed Windows 10 Desktop and Mobile VPN routing behavior for new VPN connections. Option «Use default gateway on remote network option» in the Advanced TCP/IP settings of the VPN connection is now disabled by default. You can enable this option on Desktop but there is no way to do this on Mobile. Fortunately, Windows sends DHCP request upon connection and add routes supplied in option 249 of DHCP reply.
Sample configuration file for dnsmasq:
Where 192.168.103.0 is your (internal) network. It pushes 2 separate routes which cover entire IPv4 range. Gateway could be anything (set to 0.0.0.0 in an example) as it’s ignored by Windows.
Note that you can’t ignore DHCP routes in Windows.
Windows doesn’t add an IPv6 route by default. There are thee workarounds:
- Add a permanent default route manually using the following or a similar command:
Where 27 is your IKEv2 interface ID.
or
to avoid problems with interface ID change between reboots.
- Configure and use a router advertisement daemon (requires custom patch for strongSwan, see #817)
- on Windows 10, and presumably all future versions where PowerShell is available, you can use MS PowerShell Add-VpnConnectionRoute cmdlet.
This cmdlet will not allow you add default route 0::/0. However, in most cases you do not really need default route over VPN. Current (as of 2/2020) IANA IPv6 space assignment specifies only 2000::/3 block as Global Unicast, and adding this prefix is perfectly sufficient for routing all traffic over VPN interface. Cmdlet will will take care of adding route upon VPN connection and also removing it upon disconnection.
Also, unlike netsh, this usually does not require administrator privileges and is fully integrated with Windows GUI, saving you trouble with batch files.
AES-256-CBC and MODP2048
By default, the Windows Agile VPN Client only offers AES-128-CBC, AES-192-CBC, AES-256-CBC, 3DES, SHA-1,SHA-256, SHA-384 and MODP-1024.
By creating and setting the following registry key as a DWORD key, support for MODP2048 can be enabled, disabled or enforced.
The values that can be used are 0, 1 or 2. The table tells you what the values mean.
| value | meaning |
|---|---|
| 0 (default) | disable AES-256-CBC and MODP-2048 |
| 1 | Enable AES-256-CBC and MODP-2048 |
| 2 | Enforce the usage of AES-256-CBC and MODP-2048 |
By using the Set-VpnConnectionIPsecConfiguration PowerShell cmdlet it is possible to use even more algorithms like AES-GCM and ECP DH groups (at least on Windows 10). The VPN connection may be added in the GUI or via «Add-VpnConnection» cmdlet.
Serving different IDs/Domain names
The native Windows VPN Client does not send a responder identity (IDr) when initiating an IKE_SA, so two connection configurations can only be distinguished if their authentication type differs or the clients send different certificate for the different certificates’ root CAs.
Accessing the VPN server via VPN
Windows doesn’t seem to be able to reach the VPN server’s physical IP address (to which the IKE_SA was established) via VPN connection. To access the server via VPN, use any other IP address that is assigned to it and included in the traffic selector (if necessary, assign an IP address to any local interface and maybe adjust the traffic selector).
Links
- Windows OS product behavior in regards to IKE
- Adrian Dimcev’s blog provides valuable information on Agile VPN connections between Windows 7 Beta and Windows Server 2008 R2 Beta.
- MoPo users at the University of Freiburg can connect to a strongSwan VPN gateway using Windows 7 (in German).
- Microsoft Windows 8, Microsoft Windows Server 2012, Microsoft Windows RT Common Criteria Supplemental Admin Guidance for IPsec VPN Clients
Acknowledgements
Many thanks go to Edward Chang and Gleb Sechenov from the Information Security Institute (ISI) of the Queensland University of Technology (QUT) who provided the initial Windows 7 Beta and Ubuntu Linux test setup.


