- Fix: Right Click Not Working on Windows 10
- 1. Turn off the Tablet Mode
- Method 1: Turn off Tablet Mode in Action Center
- Method 2: Turn off Tablet mode Through Settings
- Method 3: Use System Registry Editor to Turn Off Tablet Mode (Advanced Users Only)
- 2. Use Shell Extension Manager Application for Windows
- 3. Executing DISM Commands
- 4. Run the SFC Scan
- 5. Remove Registry Items
- 6: Uninstall/Disable Conflicting Applications
- 7: Update Drivers
- Right click key windows
Fix: Right Click Not Working on Windows 10
In Windows 10, you may encounter an issue whereby the right click does not work (or rather, the context menu doesn’t appear). In some cases right-clicking on the mouse works erratically; sometimes responding and others just remain still.
 Mouse
Mouse
However, if you take a look at the WinX folder all the shortcuts in there will work seamlessly when directly clicked. You can even see the event viewer.
But before moving on with the solutions, make sure the mouse is properly working, to do so, plug the mouse into another system (laptop/ desktop) and check if the right-click is working. For a wireless mouse, replace its batteries and then try the undermentioned solutions. Moreover, disable any network drives/cards during the troubleshooting process. It will be a good idea to unplug all the USB devices except the Mouse. Make sure there is no disk in the CD/DVD ROM. To be sure if the problem is hardware or software related, boot the system in Safe Mode and check if right-click is working. If you are using the PC in a corporate environment, then check with your IT administrator if any group policy is restricting the right-click.
Repair Corrupt System Files
Download and run Restoro to scan and restore corrupt and missing files from here, once done proceed with the solutions below. It is important to ensure that all system files are intact and not corrupt before proceeding with the solutions below.
1. Turn off the Tablet Mode
The failure of the right-click function can be directly attributed to TABLET mode being activated on your computer. You cannot do most of the right-click operations while in this mode. There are many ways to turn off the tablet mode on your Windows 10 PC.
Method 1: Turn off Tablet Mode in Action Center
- For this option, press the combination keys WINDOWS + A, or click on the system icon for Action Center which is usually located in the taskbar notification zone.
- Navigate to the bottom of the Action Center and then click or tap on Tablet Mode. It is a two – way toggle between ON and OFF, so do it according to your preference. Once done, test to see if the right-click now works.
 Turn Off Tablet Mode in Action Center
Method 2: Turn off Tablet mode Through Settings
- Go to Settings and click on System.
- On the left-hand side, you will see the line Tablet Mode. Click on it.
- Now on the right side identify the phrase “Make Windows more touch-friendly when using your device as a tablet”. Turn it off.
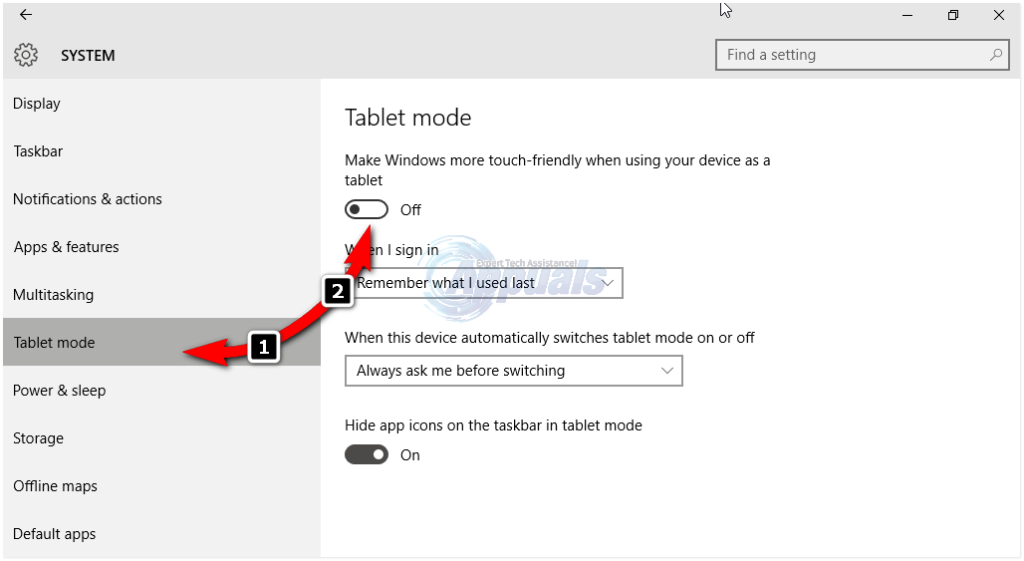 Turn Off Tablet Mode in Settings
In case you need to enable Tablet mode, just do the same thing as above but this time turn the button ON.
Take note of the options just under this instruction; they may come in handy for future interactions. There are options for the mode that initiates immediately after you sign in. You can let the system automatically switch to tablet mode on signing in, go to the desktop, or just use the last signing in mode. There are also some more options for how the system notifies you when tablet mode is on automatic mode.
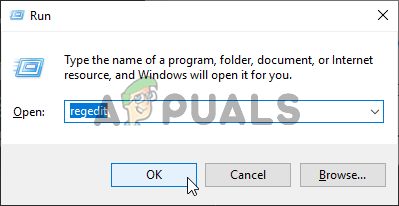
Method 3: Use System Registry Editor to Turn Off Tablet Mode (Advanced Users Only)
- Go to “Run”. In Run, key in the word Regedit.exe or just Regedit. The registry editor appears.
 Opening the Registry Editor
 - Navigate to the path
- When you click on the folder ImmersiveShell, on the right-hand side locate the DWORD/entry TabletMode. To turn off tablet mode, change its value to 0.
 Opening the Registry Editor
2. Use Shell Extension Manager Application for Windows
The right-click problem is sometimes also caused by third party extensions on context menus. There is a utility that can help you get rid of these extensions effectively without much struggle.
- DownloadShell Extension Manager.
- After completion of the download, launch the application using your keyboard (Shift+F10) and then select “run as administrator”. No installation is required here.
- On the menu that appears select Options. Click Filter by Extension Type and then opt for Context Menu.
- A list will be shown. Take note of the items having a pink background. They are the entries installed by 3 rd party software.
- Press and hold the CTRL key and then click on all the entries having a pink background. On the left corner, click the red button to disable them all.
- Again under Options, Restart Explorer.
- Right-click on your desktop now and see if the problem has been resolved. If so, start enabling the 3 rd party extensions one by one.
- If once again the right click problem occurs, it is most certainly the last 3 rd party extension you enabled. Disable it, or just completely uninstall its parent software or program if necessary.
3. Executing DISM Commands
The Disk health may be damaged due to which the right-click is not working on the computer. Therefore, in this step, we will be checking and repairing the Disk Health. For that:
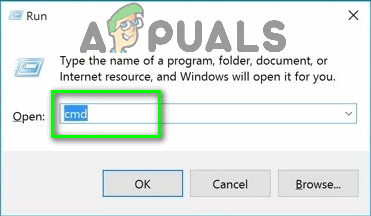
- Press “Windows” + “R” keys simultaneously and type in cmd. Type “cmd” into the Run dialog
- Press the “Shift” + “Ctrl” + “enter” keys simultaneously to open an elevated command prompt.
- Type in the following commands one by one and press “enter” after each
- After the process finishes, check to see if the issue persists.
 Type “cmd” into the Run dialog
4. Run the SFC Scan
It is possible that a certain driver or “.dll” file is missing or has been corrupted. Therefore, in this step, we will be initiating an SFC scan to check and repair this issue. For that:
- Press “Windows” + “R” keys simultaneously and type in cmd. Type “cmd” into the Run dialog
- Press the “Shift” + “Ctrl” + “enter” keys simultaneously to open an elevated command prompt.
- Type in the following command and press “Enter” to execute it Running SFC scan
- Wait while the system is being scanned and check to see if the issue persists after the scan is completed.
 Running SFC scan
5. Remove Registry Items
Sometimes, the error is fixed simply by deleting certain registry entries. If the registry configurations have been corrupted or are wrongly configured they can prevent certain elements of the operating system from functioning correctly. To fix that:
- Press “Windows” + “R” to open the run prompt. Opening Run Prompt
- Type in “Regedit” and press “Enter”.Running the Registry Editor
- Navigate to the following path Navigate to the indicated path
- Delete all the Folders in EXCEPT the following
- Right-click on any folder except for the ones indicated above and select “Delete” from the list to remove them. Delete Entries like these
 Opening Run Prompt
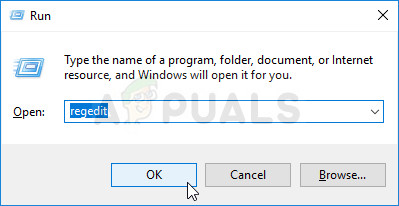 Running the Registry Editor
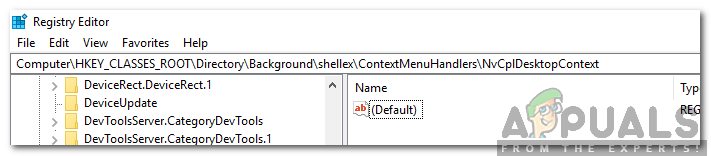 Navigate to the indicated path
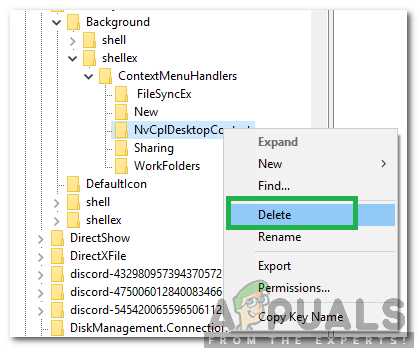 Delete Entries like these
WARNING: During the above steps, you may lose your desktop after disabling stuff and you will be left with nothing to work on for the rest of the processes. If this occurs, just press Ctrl-Alt-Del. In the task manager, select the file tab, run a new task and then key in explorer.exe. Your desktop will come up immediately.
6: Uninstall/Disable Conflicting Applications
There are known applications that cause the mouse error under discussion. These third-party applications usually take control of your HID and then sometimes, they go in an error state which causes the loss of functionality. In that case, uninstalling/disabling these applications may solve the problem. Following is a list of such applications:
- HP Display Control (PdiShellExt.dll )
- Symantec System Recovery
- 7zip
- WinZip
If you have installed any of these applications then either disable them or uninstall/reinstall them. This list might not be complete so keep a lookout for these type of applications. You can also consider starting your computer in safe mode to diagnose the problem.
7: Update Drivers
Drivers are the main components connecting your system hardware and operating system. If any of the drivers are corrupted or outdated, then updating to the latest version may solve the problem. Drivers get corrupt usually because of a bad Windows update and get outdated if they are not updated alongside a Windows update.
- Press Windows key and type Device Manager. Then in the results, click on Device Manager. Device Manager in Windows Search Box
- Now in the device Manager, expand your Display Adapters and right-click your Graphics Driver and then click on Update Driver. Update Graphics Driver
- Then select “Search Automatically For Updated Driver Software” Searching automatically for newer driver software
- You can also use your graphics card manufacturer website to update the driver. This is a known issue for Laptops with Dual GPU and Optimus technology. If you are using such a laptop, then download the official Intel driver to fix the issue.
- Also, Nvidia applications and drivers are known to create this issue. Uninstall all Nvidia applications/drivers and use Microsoft’s driver for your Graphics card to check if the problem is solved.
- Repeat the same process to update the driver of your mouse located under Mice and Other Pointing Devices.
- A good idea would be to update Windows, so that, all drivers are updated.
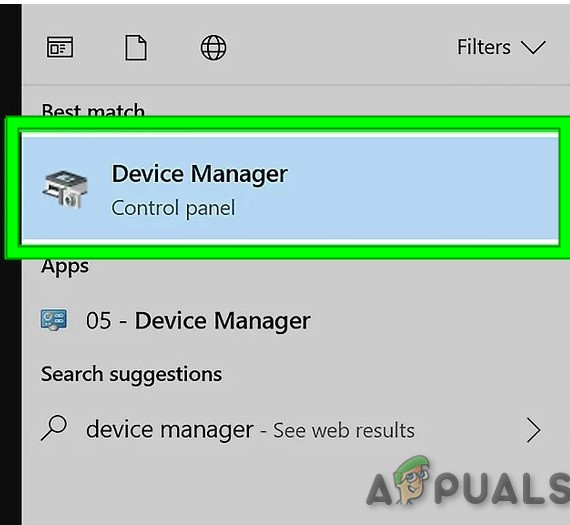 Device Manager in Windows Search Box
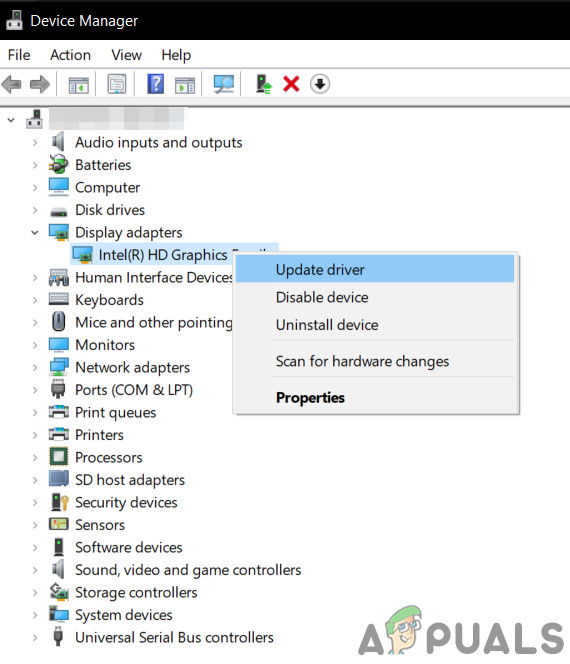 Update Graphics Driver
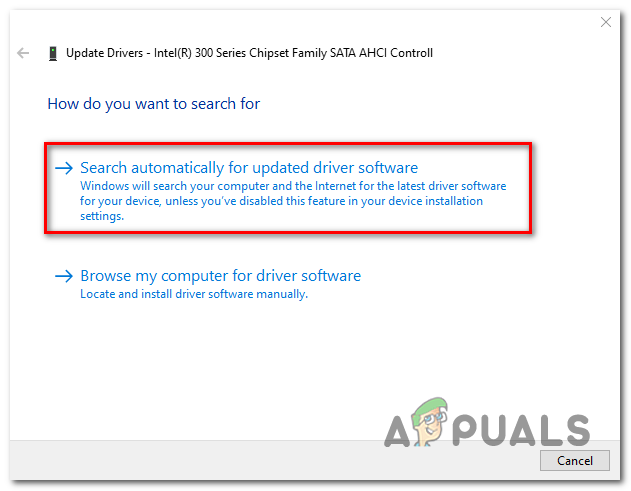 Searching automatically for newer driver software
If nothing has helped you so far, then either perform a system restore or reset Windows. But before doing any, make sure the mouse is not faulty.
Right click key windows


| 1,248 | уникальных посетителей |
| 4 | добавили в избранное |

If you have a problem where if your playing ARMA 3 or any other game for that matter and your windows key keeps bringing up your start menu this small little script will stop that from happening.
Now I have tested this only on King Of The Hill (KOTH), and it seems to work without any problems.
Just as a small disclaimer. I am not responsible for any Battleye, or VAC bans you get from using this method. While it is unlikely you would get a ban from doing this, I want to make it clear that I am not responsible and any changes that the guide shows you do at your own risk and I am not liable in any way.
Now that over let’s get started.
Before you do try using the fix or workaround you should try the following.
Try restarting ARMA 3. Most of the time this fixes many problems you may have with ARMA.
Verify integrity of game cache. If your game files have got a problem with them this should fix it. If you don’t know how to do this, right click ARMA 3 in steam and then go to the «Local Files» tab. Click on «Verify Integrity Of Game Files. «. Do note you will need to close ARMA 3 completely to do this.
Restart your PC. Seems really basic but this is another common solution to fixing the problem.
If you have razer synapse installed try running is as an administrator and also changing it so that if you have start at startup you have the program run as an administrator. — Suggested by Jockeyboy2_0
If you have razer synapse installed try uninstalling it. Even if you don’t use a razer keyboard. — Suggested by JellyBeanBurger
If none of these suggestions work then carry on reading.
We will try running steam in administrator mode and ARMA 3 to try fix the problem first. To do this you need to do the following.
1. Right click on a shortcut for your steam application. Click open file location or copy the directory to the steam.exe location.
2. Go right click now on steam.exe and go to properties
3. In the properties window go to compatibility and tick the box labelled «Run as administrator».
4. Close steam and reopen it now (if you have ARMA 3 open you will need to close it now as well).
5. After Steam has opened again you may get a warning saying windows is running steam in compatibility mode. You can ignore this and click continue.
Note: You can now start ARMA 3 again and for some this maybe all you need to do to fix the problem. If this does not fix the windows key issue then continue on reading.
6. Right click ARMA 3 and go into properties (this is within steam). Go to local files and click «Browse Local Files. «. This will open Windows Explorer.
7. Find your arma3launcher.exe and right click it and open the properties window.
8. In the properties window go to compatibility and tick the box labelled «Run as administrator».
Note: You should now restart Steam and close ARMA 3 as this may have fixed the issue for this may have now fixed the issue. If it hasn’t then carry on reading.
9. Repeat steps 7 and 8 for «arma3.exe», «arma3_x64.exe» and «arma3battleye.exe».
10. Now restart Steam and start ARMA 3 again.
This should in most cases fix the problem. If the problem still persists then read on and check the workarounds out.
So to fix this, we will need to download two things.
The first think is a program called AutoHotkey [autohotkey.com] (Click To Go To Site)
All you need to do is install AutoHotkey and just leave it. AutoHotkey can also be used to do other things and also run possible scripts that could be classed as cheating.
Now the second thing you will need to download is a small AutoHotkey file that contains 2 lines of code. <ССЫЛКА УДАЛЕНА>Click me to download it. Feel free to edit the code if you want, but the script will work fine as it is.
Now all you need to do is start ARMA 3 and start the AutoHotkey script.
When the script is started it will now turn all key pressed from your «Left Windows» key inputs to «F13 + Left Windows» and all «Right Windows» key inputs to «F14».
If you now go into ARMA 3 controls go and find any key, you want to bind your left or right windows to and just simply hit the key. It should work fine.
Now if you don’t want to bind left or right windows or your unable to bind a key to a certain function such as KOTH’s ability so when you hit «Left Windows» key to be able to view a player level and name in full. In the case of KOTH all, you need to do in just enter the game and press the key, and it will work.
Now I can say that this works fine on KOTH, but I can’t speak for other game modes, you will simply need to test this for yourself.
Now a big problem you will come across now will be, «Now how do I turn it off.»
Very simple. On the right-hand side of your windows taskbar you will find a small icon for AutoHotkey, right click it and click either «Suspend Hotkeys» to stop the script temporarily (Note: if you use this hit «Suspend Hotkeys» again to let the script carry on running again) or «Exit». This will stop the script completely, (Note: If you use this method to start the script again you need to double click the script to start it again).
As far as I am aware from spending nearly a whole day of searching the internet for a fix for the problem I was only able to find a few fixes that would involve messing around with the registry in Windows or some other methods that would disable the windows keys and not make them work.
I came up with the fix after remembering a video from Tom Scott about how he made an Emoji keyboard. If you want to view the video yourself just click here.


