- Восстановление GRUB
- Содержание
- Восстановление с помощью LiveCD/USB
- Первый способ
- Восстановление используя chroot
- Восстановление в rescue mode
- Ubuntu Boot Repair Tutorial
- Installing Boot Repair:
- Repair Boot Problems with Boot Repair:
- Backing Up Partition Table with Boot Repair:
- Repairing File Systems with Boot Repair:
- Changing GRUB Location with Boot Repair:
- Changing GRUB Options from Boot Repair:
- Ubuntu Documentation
- Getting Boot-Repair
- 1st option : get a disk including Boot-Repair
- 2nd option : install Boot-Repair in Ubuntu
- Using Boot-Repair
- Recommended repair
- Advanced options
- External Links
Восстановление GRUB
Содержание
GRUB — это основной загрузчик Ubuntu начиная с версии 9.10. Ранее он был известен как GRUB2 и пришёл он на смену старой версии GRUB, известной теперь как GRUB Legacy. Если вам необходимо восстановить GRUB Legacy, например поскольку у Вас стоит версия Ubuntu старше 9.10, то вам необходимо прочитать соответствующую статью.
На любом загрузочном винчестере есть так называемая Главная загрузочная запись (англ. master boot record, MBR), к которой обращается BIOS при загрузке компьютера. В эту область загрузчик системы и должен записать информацию об основных файлах, которые хранятся уже на разделах винчестера.
Восстановление с помощью LiveCD/USB
Первый способ
Запустите систему с LiveCD/USB и откройте терминал. Для этого можно нажать Alt + F2 и ввести команду:
Далее необходимо узнать Вашу таблицу разделов. Используйте команду:
На экран должна быть выведена примерно такая таблица:
Из таблицы видим, что Linux (загрузочный /-корень отмечен звёздочкой) стоит, в нашем случае, на разделе /dev/sdc1.
Теперь подключим этот раздел в /mnt следующей командой (следим за пропусками между кодами и порядковыми номерами разделов):
Затем, для записи grub в MBR, вводите следующую команду:
В случае, если нужно только восстановить MBR диска (например, после переустановки Windows), то этого достаточно, закрываем терминал и перезагружаем.
Если нужно обновить и меню grub (например, после установки Windows), то нужно сделать:
Восстановление используя chroot
Запустите систему с LiveCD/USB и откройте терминал. Для этого можно нажать Alt + F2 и ввести команду:
Далее необходимо узнать Вашу таблицу разделов. Используйте команду:
На экран должна быть выведена примерно такая таблица:
Теперь нужно примонтировать Ваш Linux раздел (здесь это sda1) и еще несколько важных директорий:
Теперь перейдем в окружающую среду chroot:
Теперь необходимо установить GRUB, используя команду:
Также в некоторых случаях может помочь вариант:
Если все прошло успешно, выходим из chroot командой:
Теперь необходимо отмонтировать разделы:
Если Вы монтировали раздел /boot воспользуйтесь командой:
Затем перезагрузим Ваш компьютер командой:
При необходимости Вы можете обновить меню загрузчика командой:
Восстановление в rescue mode
При отсутствии загрузочного диска, можно восстановить Grub из его консоли. Восстановление происходит следующим образом: сначала нужно подгрузить все модули, чтобы стала доступна вся функциональность Grub, а затем уже запуститься с нужного раздела. Как известно, Grub состоит из двух частей. Первая часть записана в MBR диска. Она содержит базовую функциональность, то есть в ней есть консоль в rescue mode и ничего больше. Вначале нужно определить, на каком разделе находится вторая часть груба (она лежит в каталоге /boot/grub), подгрузить недостающие модули. И только потом можно будет дать команду запуска с нужного раздела. В rescue mode доступно всего четыре команды:
Вначале следует дать команду:
В ответ она выведет, например, следующее:
Иногда Grub может неправильно опеределить, какие файловые системы находятся на разделах дисков. В данном случае определяет их как msdos. Нам нужно постараться угадать, какие диски мы видим. В данном случае видно два диска. Диск с индексом 0 содержит три раздела, диск с индексом 1 содержит два раздела. Зная структуру своих дисков несложно определить нужный диск.
Grub называет разделы в обратном порядке. И становится непонятно, что имеется в виду под (hd0,msdos3) — первый раздел или третий? Тут можно выкрутиться, использовав синтаксис (hd0,1). Нужно помнить, что в Grub счет дисков начинается с 0, а счет разделов — с 1. Предположим, что Линукс установлен на первый диск в первый раздел, то есть (hd0,1). Даем команду:
Этими командами мы указываем использовать диск (hd0,1) для дальнейших команд. После чего нужно проверить, действительно ли на этом разделе есть то, что нам нужно. Даем команду:
если в ответ получаем список всех файлов в этой директории, то диск и раздел выбраны правильно. Подгружаем модули:
После чего Grub перейдёт в полнофункциональный режим. Он автоматически найдет все операционки, которые можно подгружать, и покажет своё Grub-меню.
Дальнейшее восстановление сводится к тому, чтобы загрузить нужный нам Linux, и в нем от рута дать команду:
Где sdX, диск, на который нужно установить Grub.
Ubuntu Boot Repair Tutorial
Boot Repair is a tool to repair common boot issues on Ubuntu, Debian, Arch, Linux Mint, OpenSUSE, Fedora and other Linux distributions, Windows and Mac OS operating systems.
If you install Windows operating system after you’ve installed a Linux distribution such as Ubuntu, you won’t be able to boot into your Linux operating system. Boot Repair can help.
Anything can go wrong while multi-booting Linux operating systems. Boot Repair can help as well.
Boot Repair can
- Backup partition table
- Backup device boot sectors
- Install GRUB bootloader
- Configure GRUB bootloader
- Add kernel options
- Change the default OS in GRUB
- Restore a Windows compatible MBR
- Repair a broken filesystem
- And many more.
You can learn more about Boot Repair at https://sourceforge.net/p/boot-repair/home, the official website of Boot Repair.
In this article, I will show you how to use Boot Repair on Ubuntu. I will be using Ubuntu 18.04 LTS for the demonstration. Let’s get started.
Installing Boot Repair:
You usually install Boot Repair on an Ubuntu live boot as you may not be able to boot into your operating system installed on the hard drive at that time. So this is what I am going to focus on in this article.
You can make an Ubuntu bootable USB stick of any latest version of Ubuntu Live DVD ISO image. I have a dedicated article on that topic, which you can read at https://linuxhint.com/rufus_bootable_usb_install_ubuntu_18-04_lts/
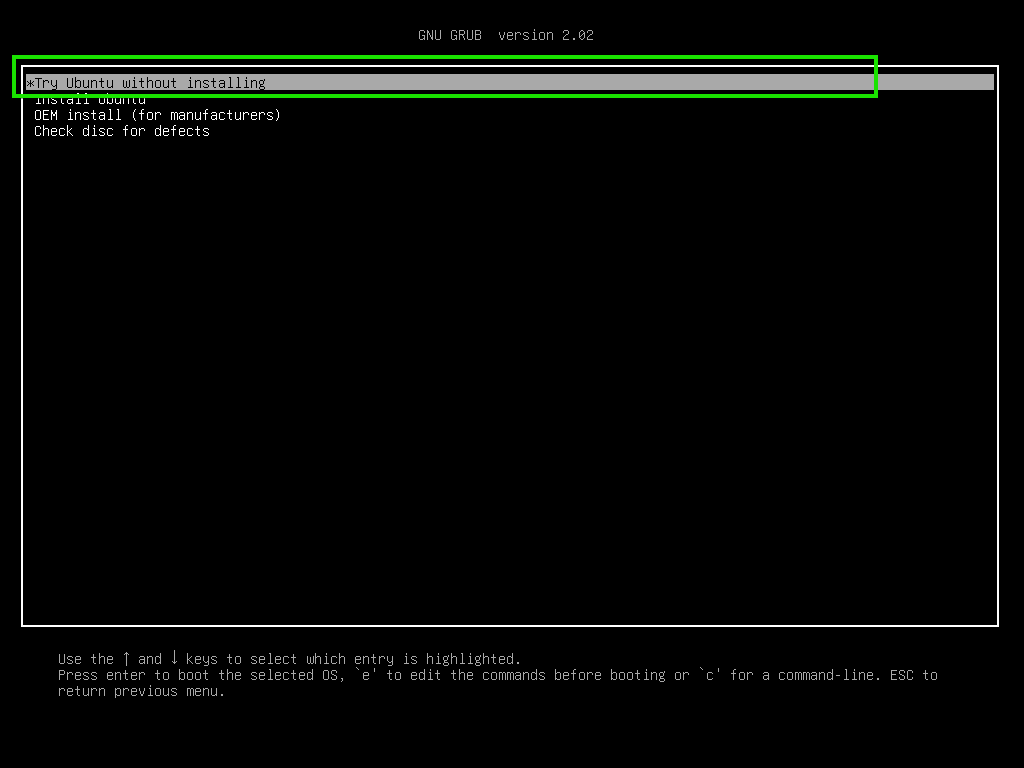
Once you’re done with making a bootable USB stick of Ubuntu Live DVD ISO image of your choice, boot from it and select Try Ubuntu without installing from the GRUB menu as shown in the screenshot below.
Now connect to your network and open a Terminal window (Press + + t)
Boot Repair is not available in the official package repository of Ubuntu. So you have to install it from the Boot Repair PPA.
Now add the PPA of Boot Repair with the following command:

Now press to continue.

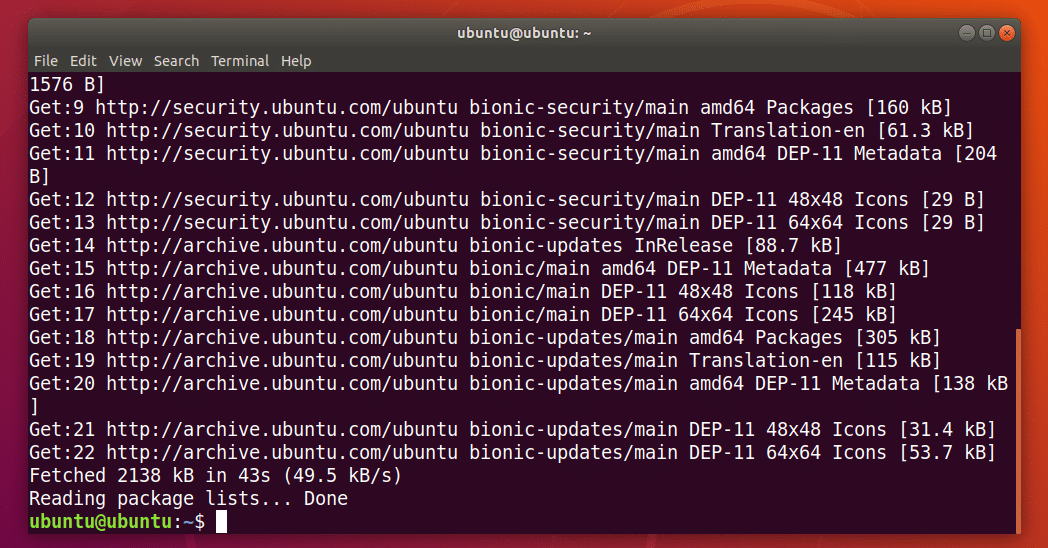
The Boot Repair PPA should be added and the APT package repository cache should be updated.
Now you can install Boot Repair with the following command:

Now press y and then press to continue.
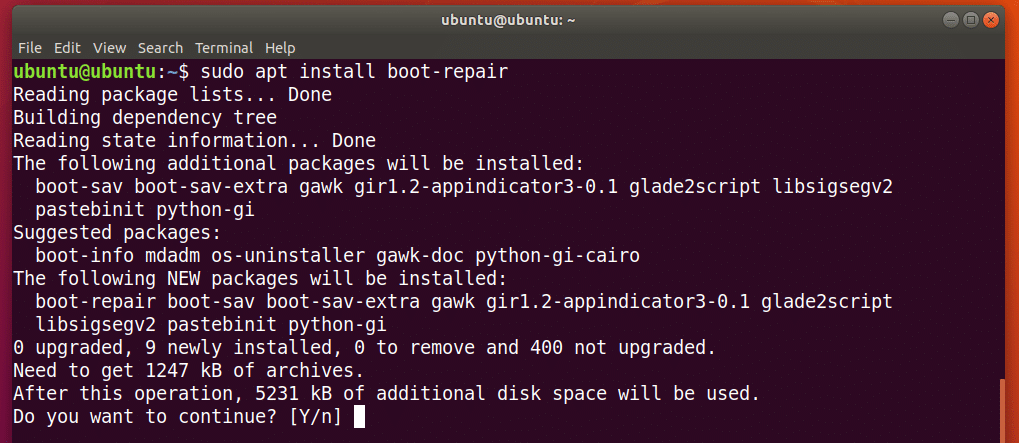
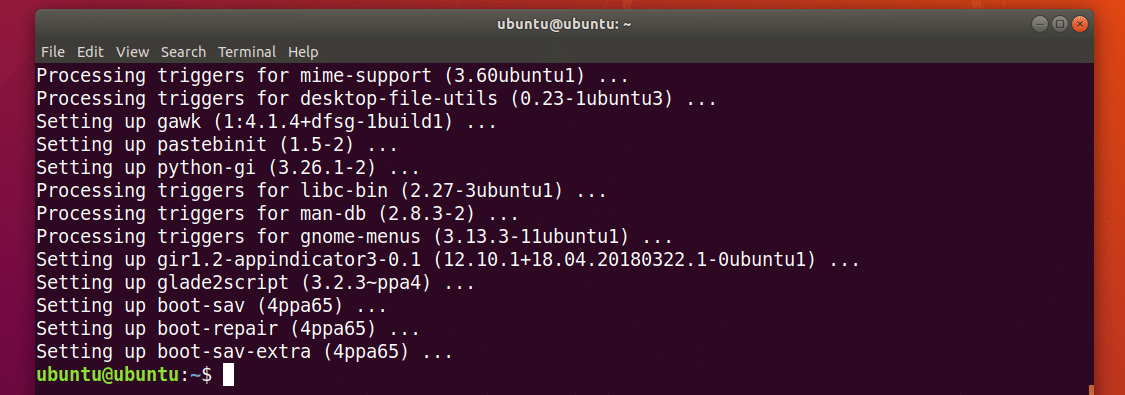
Boot Repair should be installed.
Now you can start Boot Repair Application Menu:
You can also start Boot Repair from the command line with the following command:

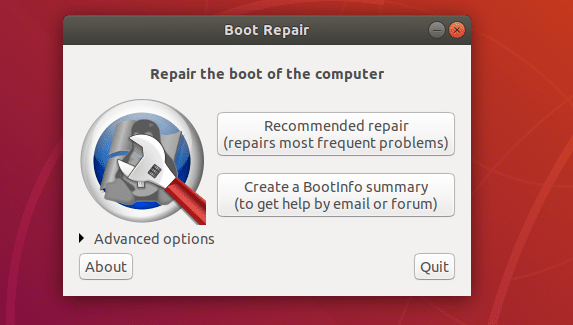
Boot Repair should start.
Repair Boot Problems with Boot Repair:
The most common repair option of Boot Repair is Recommended repair as marked in the screenshot below. It should repair most of the boot issues you may face.
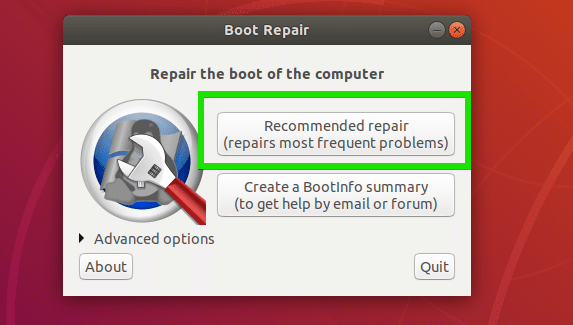
Once you click on it, it should find and fix boot problems for you.
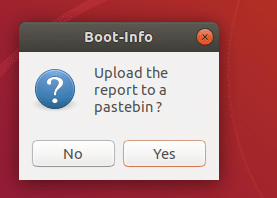
you will see the following option. You can upload the report to pastebin by clicking on Yes. If you don’t want that, just click on No.
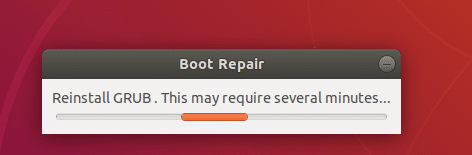
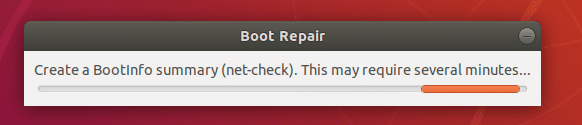
The repair process should continue.
Once the repair is complete, you should see the following window. Just click on OK.
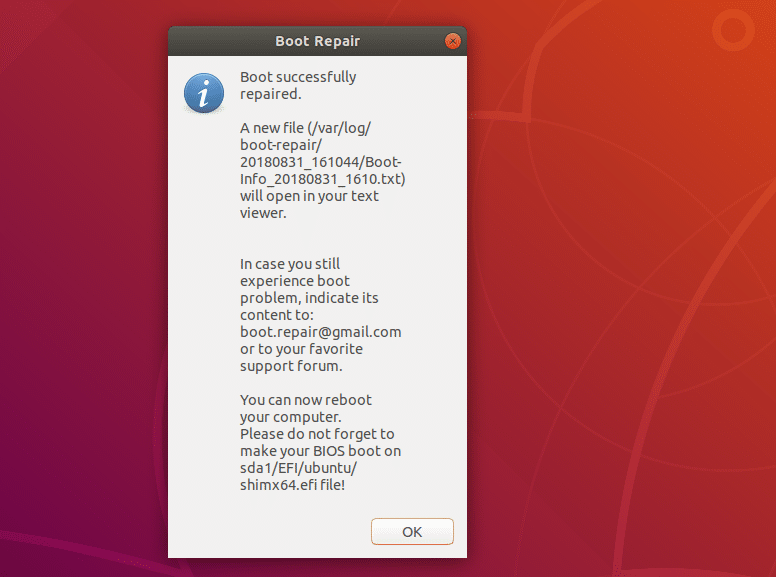
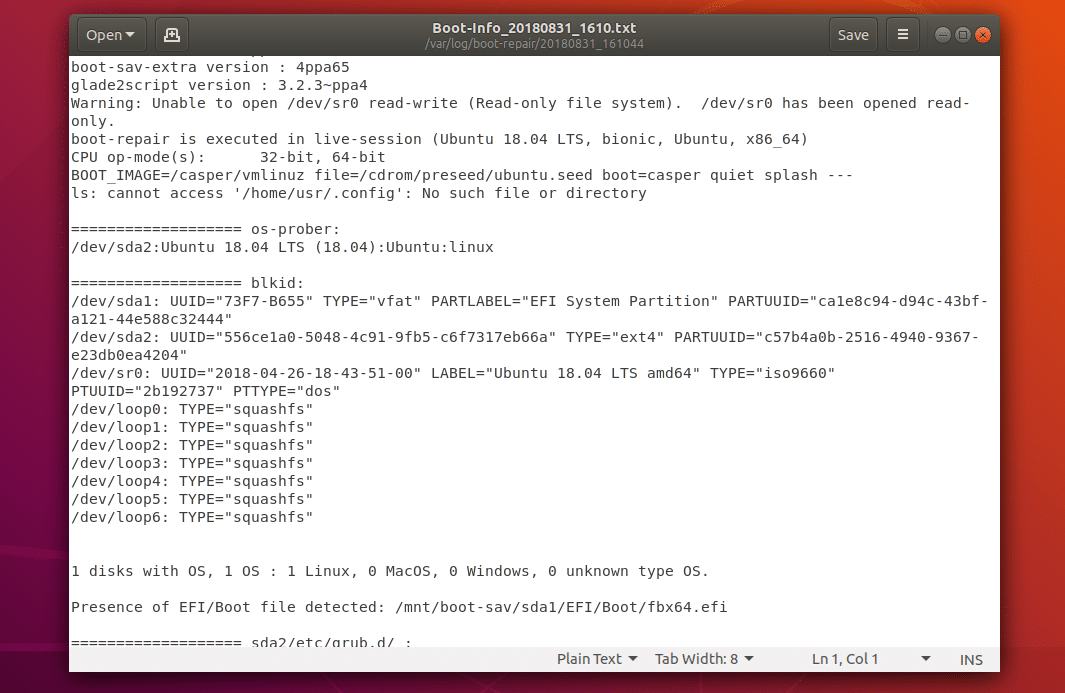
A text document should also open up. It contains information about your entire system and what Boot Repair did to it in order to repair boot problems.
Now you should be able to boot into your installed operating systems as usual.
There are many advanced repair options in Boot Repair. Just open Boot Repair and click on Advanced Options as marked in the screenshot below to reveal them.

As you can see, there are many advanced options in Boot Repair.

I will talk about these in the next sections of this article below.
Backing Up Partition Table with Boot Repair:
You can backup your partition table from Boot Repair. It is important as if your partition table gets corrupted somehow, you will be able to recover the partitions and get your data back. Otherwise, you may loose all your data.
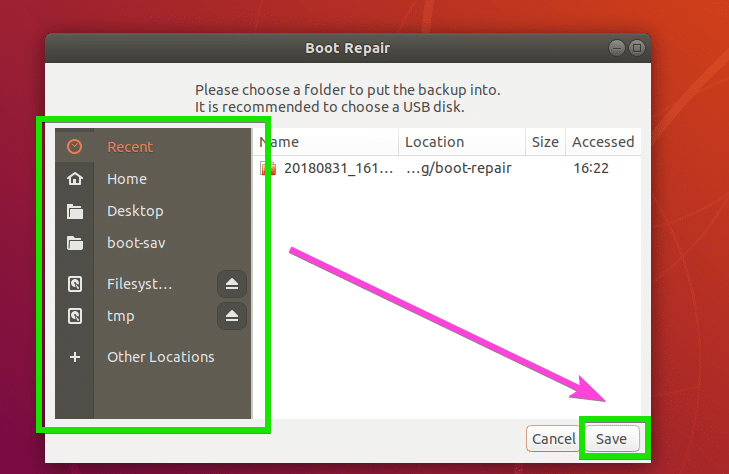
To backup your partition tables, just click on Backup partition tables, bootsectors and logs button as marked in the screenshot below.

Now select a location where you want to save the partition table data and click on Save.
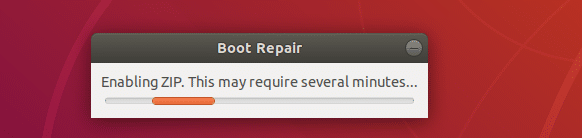
Saving partition table….
Once the partition table is saved, you should see the following message. Just click on OK.

Now you should be able to find a zip file in the directory that you selected earlier as you can see in the screenshot below.

Repairing File Systems with Boot Repair:
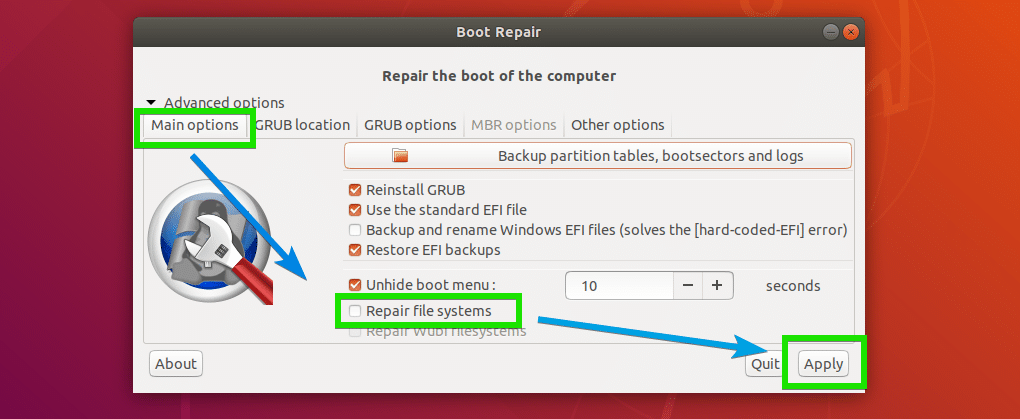
At times, your file systems may get corrupted and Ubuntu won’t be able to fix it automatically on boot. It may result in boot failure. You can fix the file system with Boot Repair. Just check the Repair file systems option from the Main options tab as marked in the screenshot below and click on Apply.
It should take a while to repair the filesystem and fix boot problems. Once it’s done, you should be able to boot into your installed operating systems as usual again.
Changing GRUB Location with Boot Repair:
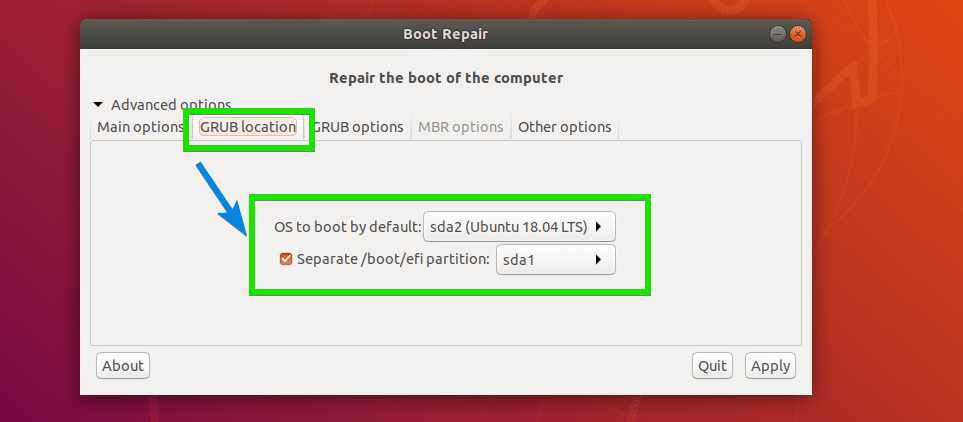
You can tell where GRUB is installed on your hard drive from the advanced options of Boot Repair. If you have multiple hard drives installed on your computer that has GRUB installed, then you may want to set which hard drives you want to repair here.
To change GRUB location, go to the GRUB location tab of Boot Repair. Now select the hard drive partition from the OS to boot by default drop down menu. If you’re using UEFI based motherboard, then also select the hard drive partition which is used as EFI System Partition from Separate /boot/efi partition drop down menu.
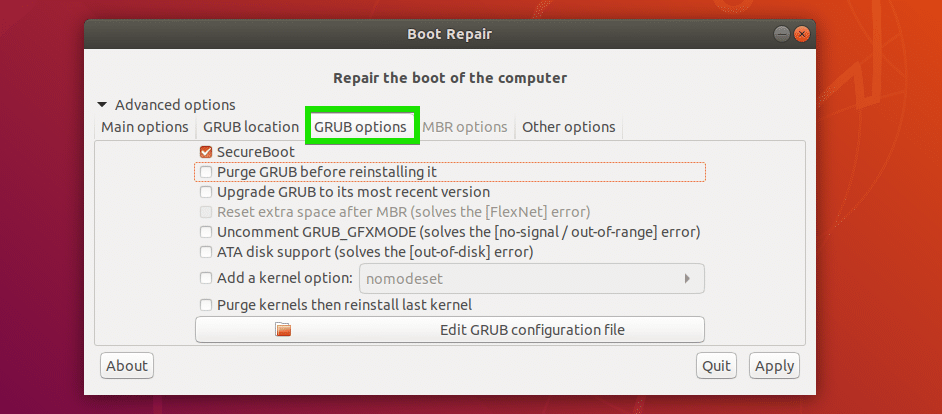
Changing GRUB Options from Boot Repair:
You can also change many of the GRUB options from the GRUB options tab of Boot Repair as you can see in the screenshot below.
That’s basically how you install and use Boot Repair on an Ubuntu Live System. Thanks for reading this article.
Ubuntu Documentation
Warning: This software is able to share information about your device for diagnostic purposes. You can chose to opt out in advanced settings. Please read this page fully. The log is quite helpful especially for the novice users.
Boot-Repair is a simple tool to repair frequent boot issues you may encounter in Ubuntu like when you can’t boot Ubuntu after installing Windows or another Linux distribution, or when you can’t boot Windows after installing Ubuntu, or when GRUB is not displayed anymore, some upgrade breaks GRUB, etc.
Boot-Repair lets you fix these issues with a simple click, which (generally reinstalls GRUB and) restores access to the operating systems you had installed before the issue.
Boot-Repair also has advanced options to back up table partitions, back up bootsectors, create a Boot-Info (to get help by email or forum), or change the default repair parameters: configure GRUB, add kernel options (acpi=off . ), purge GRUB, change the default OS, restore a Windows-compatible MBR, repair a broken filesystem, specify the disk where GRUB should be installed, etc.
For the purpose of helping the forum and IRC members help you diagnose issues with your boot setup, Boot-Repair (provided it has a network connection) will create a Ubuntu pastebin link for you to share that allows experienced members to see what’s wrong with your boot. Ubuntu’s Pastebin is not easily indexable or searchable, and purpose of the tool which creates this page (Boot-Info) is meant to be a very benign and helpful solution to the problem. The intention is not violate your privacy, nor is it meant to make you a target. This tool is aimed entirely at those new to Ubuntu who want to get past their booting issues and enjoy using Linux. If you’d like to, you may completely opt out of all internet usage including pastebin link generation by looking at the Advanced Options section below. Please do not use this software if this is a problem for you.
Boot-Repair is a free software, licensed under GNU-GPL.

Getting Boot-Repair
1st option : get a disk including Boot-Repair
The easiest way to use Boot-Repair is to create a disk containing the tool (eg Boot-Repair-Disk, a disk starting Boot-Repair automatically), and boot on it.
Remark : it is recommended to install the ISO on a live-USB (eg via UnetBootin or LiliUSB or Universal USB Installer). Do not burn it on a DVD if your computer has Windows8 pre-installed, or if your boot is in EFI mode.
2nd option : install Boot-Repair in Ubuntu
— either from an Ubuntu live-session (boot your computer on a Ubuntu live-CD or live-USB then choose «Try Ubuntu») or from your installed Ubuntu session (if you can access it)
— connect to the Internet
— open a new Terminal, then type the following commands (press Enter after each line):
Using Boot-Repair
Recommended repair
- launch Boot-Repair from either :
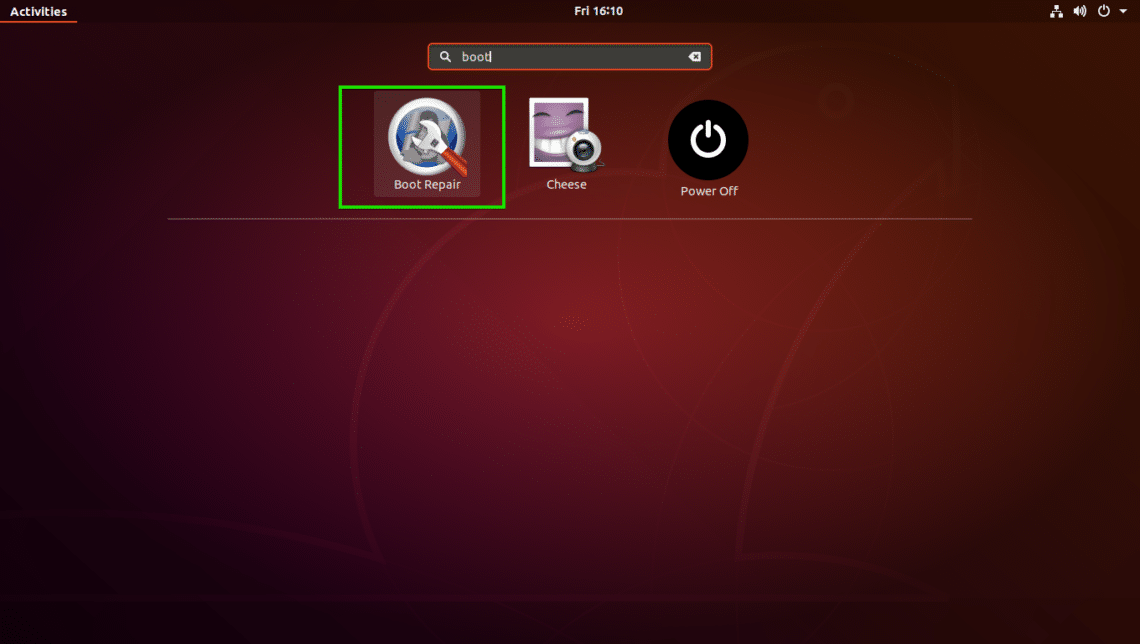
- the Dash (the Ubuntu logo at the top-left of the screen)
- or by typing ‘boot-repair’ in a terminal
-
Then click the «Recommended repair» button. When repair is finished, note the URL (paste.ubuntu.com/XXXXX) that appeared on a paper, then reboot and check if you recovered access to your OSs.
- If the repair did not succeed, indicate the URL to people who help you by email or forum.
Warning: the default settings are the ones used by the «Recommended Repair». Changing them may worsen your problem. Don’t modify them before creating a BootInfo URL, and asking for advice on Ubuntu Forums Absolute Beginners Section or in Installation and Upgrades.
Advanced options
* If you would like to opt-out of the paste.ubuntu.com link creation (Not recommended for inexperienced users who are seeking help from a forum or IRC member), you can. Simple click on the Advanced Options, and find the «Other Options» tab. Uncheck «Upload the report to a pastebin».
* The log may include UUIDs, LUKS headers, hex dump of your first sectors of your drives, device serial numbers, your username and more.

External Links
Boot-Repair (последним исправлял пользователь arunesh90 2015-12-03 20:42:26)
The material on this wiki is available under a free license, see Copyright / License for details
You can contribute to this wiki, see Wiki Guide for details


