- How to get old versions of macOS
- Check compatibility
- Download macOS using Safari on your Mac
- Installing or reinstalling macOS in Recovery Mode
- How to erase, install or reinstall macOS in Recovery Mode
- Requirements for reinstalling macOS in Recovery Mode
- Recovery Mode unavailable? Use Internet Recovery
- Things you can do in Recovery Mode
- Related tutorials
- How to reinstall macOS
- Start up from macOS Recovery
- Apple silicon
- Intel processor
- Reinstall macOS
- Other macOS installation options
- How to Reinstall Mac OS without Losing Any Data
- Is your Mac not functioning properly or you can’t seem to reinstall macOS? Read on and learn how to reinstall macOS without losing data in this extensive guide.
- When to Reinstall macOS?
- Preparations before Reinstalling macOS
- How to Reinstall Mac OS?
- Step 1: Backup Files on Mac
- 1. Backup Files Using Time Machine
- 2. Backup Files Using Cloud Storage
- 3. Backup files Using External Hard Drive
- Step 2: Boot Mac in the Recovery Mode
- Step 3: Erase the Mac Hard Disk
- Step 4: Reinstall Mac OS X without Losing Data
- Recover Erased Files after Reinstalling Mac OS
- Step 1: Select a Location
- Step 2: Scan the Location
- Step 3: Preview and Recover
How to get old versions of macOS
If your Mac isn’t compatible with the latest macOS, you might still be able to upgrade to an earlier macOS, such as macOS Catalina, Mojave, High Sierra, Sierra, or El Capitan.
To get the latest features and maintain the security, stability, compatibility, and performance of your Mac, it’s important to keep your software up to date. Apple recommends that you always use the latest macOS that is compatible with your Mac.
Check compatibility
The version of macOS that came with your Mac is the earliest version it can use. For example, if your Mac came with macOS Big Sur, it will not accept installation of macOS Catalina or earlier.
If a macOS can’t be used on your Mac, the App Store or installer will let you know. For example, it might say that it’s not compatible with this device or is too old to be opened on this version of macOS. To confirm compatibility before downloading, check the minimum hardware requirements:
Download macOS using Safari on your Mac
Safari uses these links to find the old installers in the App Store. After downloading from the App Store, the installer opens automatically.
- macOS Catalina 10.15 can upgrade Mojave, High Sierra, Sierra, El Capitan, Yosemite, Mavericks
- macOS Mojave 10.14 can upgrade High Sierra, Sierra, El Capitan, Yosemite, Mavericks, Mountain Lion
- macOS High Sierra 10.13 can upgrade Sierra, El Capitan, Yosemite, Mavericks, Mountain Lion
Safari downloads the following older installers as a disk image named InstallOS.dmg or InstallMacOSX.dmg. Open the disk image, then open the .pkg installer inside the disk image. It installs an app named Install [ Version Name ]. Open that app from your Applications folder to begin installing the operating system.
- macOS Sierra 10.12 can upgrade El Capitan, Yosemite, Mavericks, Mountain Lion, or Lion
- OS X El Capitan 10.11 can upgrade Yosemite, Mavericks, Mountain Lion, Lion, or Snow Leopard
- OS X Yosemite 10.10can upgrade Mavericks, Mountain Lion, Lion, or Snow Leopard
Источник
Installing or reinstalling macOS in Recovery Mode

Before selling your Mac, it’s always a good idea to wipe its startup disk clean and then erase your computer and reinstall macOS. And should your computer exhibit issues preventing it from starting up properly, reinstalling macOS will bring it to perfect working order.
Reinstalling macOS is a piece of cake provided you have created a USB install disk for El Capitan to begin with. As you may have guessed, not many people take that extra step.
In helping take the pain out of reinstalling macOS, Apple has included so-called Recovery Mode in macOS. Invoked at boot time, Recovery Mode helps you check your connected disks for errors, get help online and reinstall macOS.
This tutorial covers entering Recovery Mode and taking advantage of it to erase, install or reinstall the latest version of macOS that was previously found on your Mac.
The step-by-step instructions provided below will restore your computer to factory settings.
Before reinstalling the factory-preloaded version of macOS, you can decide to optionally erase your startup disk. Before proceeding, make sure you have backed up your essential files and documents to an external drive, a USB thumb drive or Time Machine.
How to erase, install or reinstall macOS in Recovery Mode
1) In the Apple menu choose Restart, or power on your Mac.
2) Hold down the Command (⌘) – R combination immediately upon hearing the startup chime. Hold these keys pressed until the Apple logo appears.

If you have a Mac notebook, press the keys on its built-in keyboard because the Recovery Mode keystroke may not necessarily register on external or wireless keyboards.
Tip: To reinstall macOS without deleting your files and settings intact, jump to step 7.
“Generally you don’t need to erase your startup disk to reinstall macOS,” explains Apple. “The macOS Installer is designed to allow you to perform an install in place over the same version or earlier versions of macOS.”
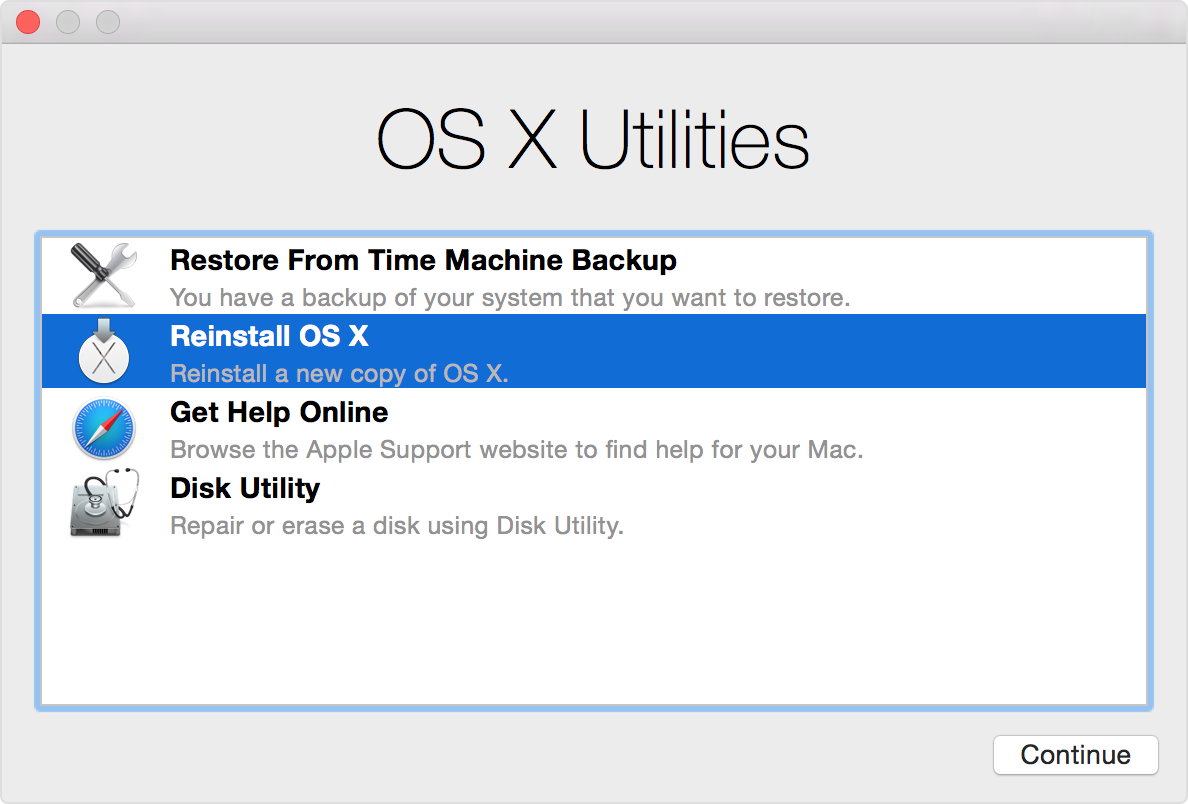
3) Select Disk Utility and click Continue.
4) Select the intended volume name from the left side and click the Erase tab.
Tip: To see additional disks, click the button Show All Drives.
5) In the Format pop-up menu, choose Mac OS Extended (Journaled), type a new name for your disk and click Erase. This will erase all the information from the disk, including your personal data.
Tip: Click Security Options to select options for securely erasing the disk.
6) After the disk has been erased, select Disk Utility → Quit Disk Utility.
7) Now choose Reinstall OS X and click Continue.
8) In the pane where you select a disk, select your newly formatted partition and follow the onscreen instructions. You may be prompted to authorize your Mac with an Apple ID.
Ensure your Mac is connected to the Internet via Wi-Fi (DHCP mode only) or Ethernet. If you have a Mac notebook, plug it into the power adapter.
Requirements for reinstalling macOS in Recovery Mode
If Recovery Mode is used to install macOS, your Wi-Fi or Ethernet network must use DHCP (only WPA/WPA2 Wi-Fi authentication is supported in Recovery Mode).
You cannot reinstall macOS in Recovery Mode if your Mac is connected to a Wi-Fi or Ethernet network that uses the following authentication methods:
- WEP
- WPA-Enterprise
- Certificate-based authentication / 802.1x
- Proxies (where specific proxy servers must be configured in network preferences)
- Captive Wi-Fi networks (where you click an “Agree” button to access the Internet)
- PPPoE (where there is no router handling the PPPoE connection)
If your Internet connection has requirements or settings that are not supported by macOS Recovery, try changing the settings on your router to a supported configuration for the duration of the macOS installation process.
Recovery Mode unavailable? Use Internet Recovery
Recovery Mode mounts a recovery system image with the recovery tools from a hidden recovery partition on your startup disk. If this partition, which also holds an image of the macOS installer, becomes damaged, you won’t be able to enter Recovery Mode.
Thankfully, 2012 or newer Macs with OS X Lion or later can be booted directly from Apple’s servers. This is known as Internet Recovery Mode.
Internet Recovery basically downloads a recovery system image from Apple’s servers, and then starts up your Mac from it. It’s your only option in case you cannot enter the normal Recovery Mode or your Mac’s startup disk has become corrupted, damaged or replaced.
It’s important to keep in mind that Internet Recovery Mode lets you install a version of macOS that came preloaded on your Mac at the time of purchase, not the most recent version that you may have upgraded to through the Mac App Store.
To enter Internet Recovery, restart your Mac and hold down the Command (⌘) – Option (⌥) – R after hearing the startup chime. You will be asked to connect to a Wi-Fi network if your Mac isn’t already connected to the Internet via Ethernet.
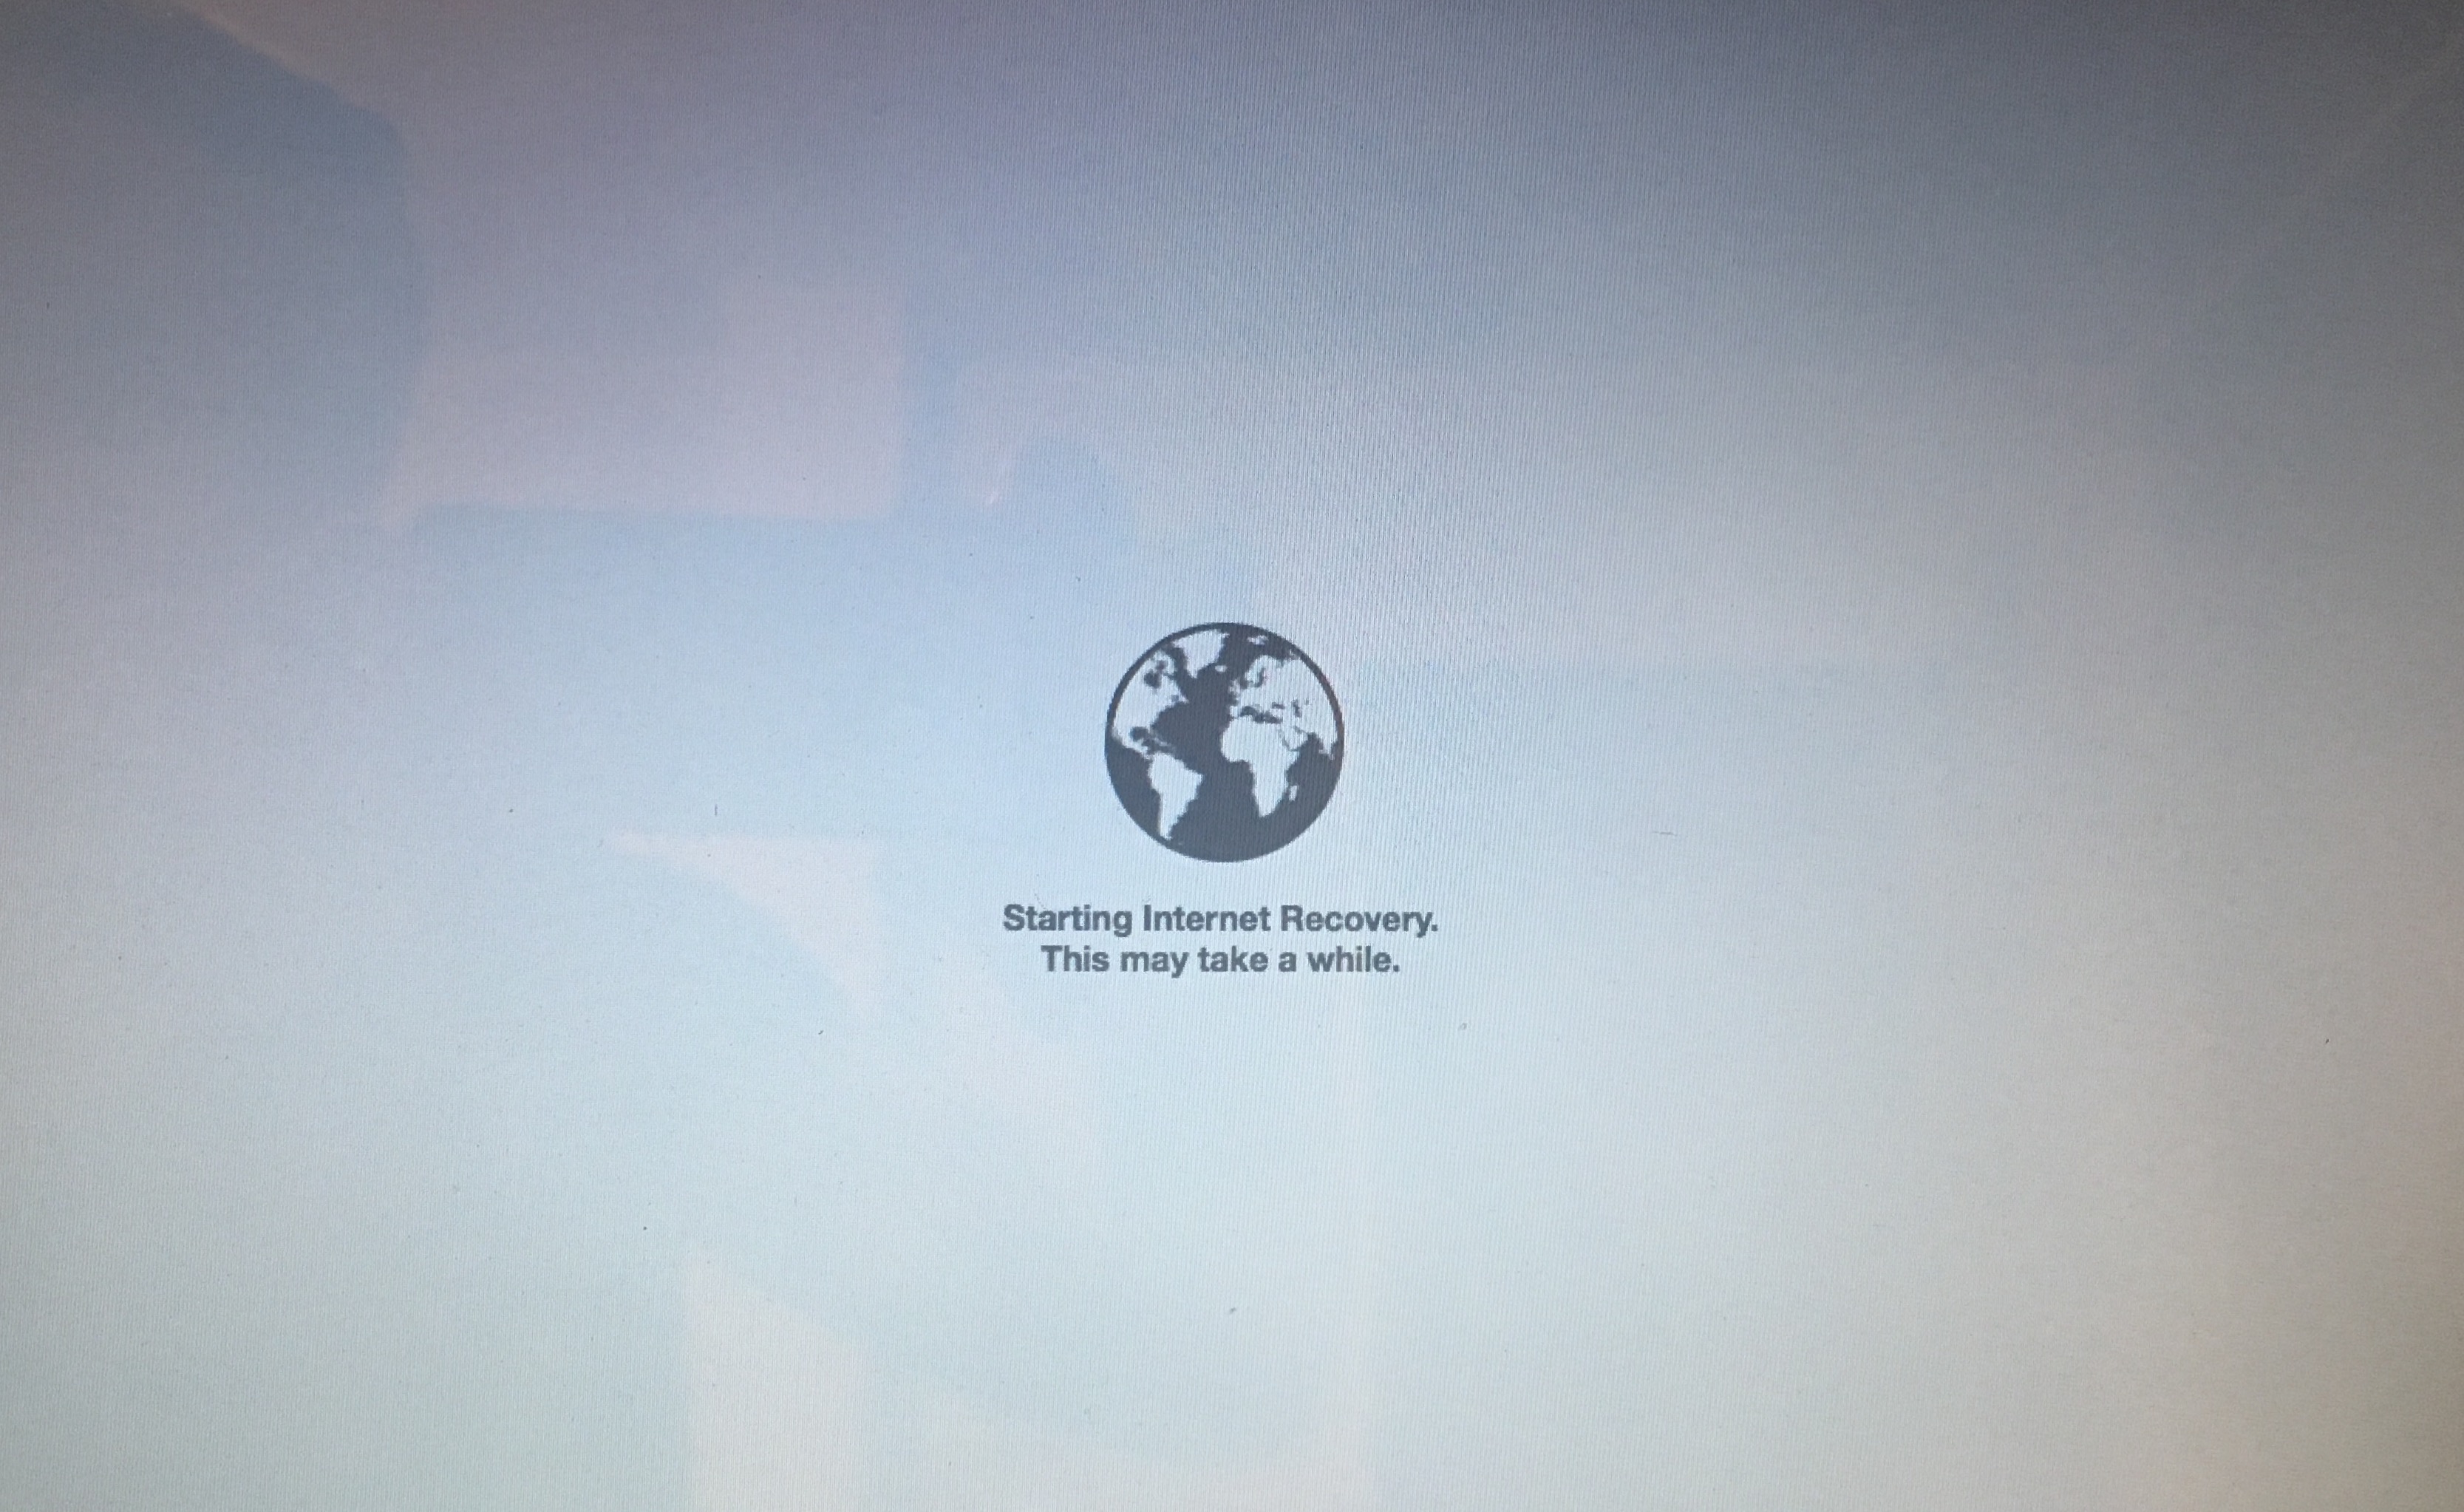
Depending on your Internet connection, booting into Internet Recovery Mode may take a while. After reinstalling macOS in Internet Recovery Mode, use the Mac App Store’s Updates tab to upgrade your operating system to the most recent macOS version available.
Some older Macs with OS X Snow Leopard may be able to use Internet Recovery Mode after installing OS X Lion or later, and a firmware update.
Things you can do in Recovery Mode
Recovery Mode and Internet Recovery Mode both provide the same recovery tools which permit you to perform the following maintenance tasks on your Mac:
If your Mac’s startup volume and its recovery partition are damaged or corrupted, the computer will automatically enter Internet Recovery Mode when powered on.
Related tutorials
Check out these resources that cover a myriad of ways you can start up your Mac:
Источник
How to reinstall macOS
Use macOS Recovery to reinstall the Mac operating system.
Start up from macOS Recovery
Apple silicon
Turn on your Mac and continue to press and hold the power button until you see the startup options window. Click the gear icon labeled Options, then click Continue.
Intel processor
Make sure that your Mac has a connection to the internet. Then turn on your Mac and immediately press and hold Command (⌘)-R until you see an Apple logo or other image.
If you’re asked to select a user you know the password for, select the user, click Next, then enter their administrator password.
Reinstall macOS
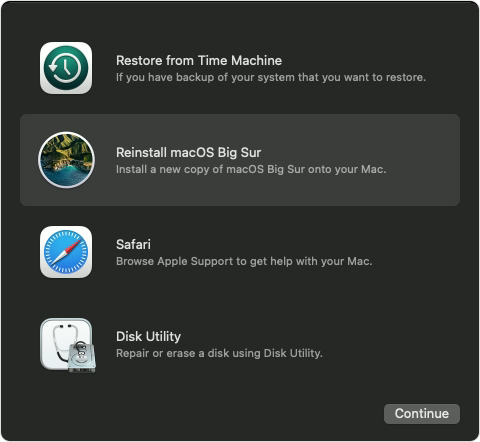
Select Reinstall macOS from the utilities window in macOS Recovery, then click Continue and follow the onscreen instructions.
Follow these guidelines during installation:
- If the installer asks to unlock your disk, enter the password you use to log in to your Mac.
- If the installer doesn’t see your disk, or it says that it can’t install on your computer or volume, you might need to erase your disk first.
- If the installer offers you the choice between installing on Macintosh HD or Macintosh HD — Data, choose Macintosh HD.
- Allow installation to complete without putting your Mac to sleep or closing its lid. Your Mac might restart and show a progress bar several times, and the screen might be empty for minutes at a time.
After installation is complete, your Mac might restart to a setup assistant. If you’re selling, trading in, or giving away your Mac, press Command-Q to quit the assistant without completing setup. Then click Shut Down. When the new owner starts up the Mac, they can use their own information to complete setup.
Other macOS installation options
When you install macOS from Recovery, you get the current version of the most recently installed macOS, with some exceptions:
- On an Intel-based Mac: If you use Shift-Option-Command-R during startup, you’re offered the macOS that came with your Mac, or the closest version still available. If you use Option-Command-R during startup, in most cases you’re offered the latest macOS that is compatible with your Mac. Otherwise you’re offered the macOS that came with your Mac, or the closest version still available.
- If the Mac logic board was just replaced, you may be offered only the latest macOS that is compatible with your Mac. If you just erased your entire startup disk, you may be offered only the macOS that came with your Mac, or the closest version still available.
You can also use these methods to install macOS, if the macOS is compatible with your Mac:
- Use the App Store to download and install the latest macOS.
- Use the App Store or a web browser to download and install an earlier macOS.
- Use a USB flash drive or other secondary volume to create a bootable installer.
Источник
How to Reinstall Mac OS without Losing Any Data
Is your Mac not functioning properly or you can’t seem to reinstall macOS? Read on and learn how to reinstall macOS without losing data in this extensive guide.

Sue Wayne
Sep 08, 2021 • Filed to: Solve Mac Problems • Proven solutions
If you have a similar question in mind, then we have got you covered. Just like any other computer, Mac systems can also suffer from unwanted issues at times.
In this guide, we will teach you how toВ boot Mac into recovery mode and reinstall macOS without losing your data. Let’s explore this macOS solution in detail.

When to Reinstall macOS?
There are all kinds of reasons for us to reinstall macOS on the system. The following are some of the common problems that force a complete reset on a Mac.
- Firmware issues – Mostly, a firmware issue related to macOS demands a reinstallation of the operating system. It can happen when macOS seems to malfunction and can’t complete the needed operations.
- Startup issues – Apart from the firmware, there would be a problem with your Mac’s startup or bootstrap program as well. Mostly, the issue is resolved by visiting the Mac recovery mode.
- Corrupt OS – Ideally, your macOS can get corrupt or compromised due to different reasons. In order to fix it or run troubleshooting, you would need to reinstall the OS.
- Malware attack – A virus or malware can also infect the core function of macOS and would demand a complete reinstallation of the tool.
- Other issues – There could be numerous other issues with your Mac as well that would demand a reinstallation. For instance, if your system has been upgraded to a corrupt macOS version or the update was halted in between, then you need to reinstall OS X.
Preparations before Reinstalling macOS
Before we teach you how to reinstall macOS X, there are certain vital things that you need to consider.
- Mostly, it takes 30 minutes to 3 hours to reinstall macOS (the exact time would vary among different OS and system models). Therefore, your Mac should be charged enough to complete the installation.
- Leave your Mac in a During the reinstallation process, your Mac might be overheated or restart multiple times. It is recommended to not keep it in direct sunlight or a hot place during the process.
- Back up your data at first. Chances are that your existing data on Mac might be deleted after the reinstallation. Thus, you can consider taking its backup if you don’t want to lose it.
- Disconnect all the attached units like USB drive, SD card, etc. from your Mac beforehand. Also, if you think your system has been infected by malware, then consider formatting it as well.
- Keep your Mac connected to a stable internetconnection for a seamless updating. Your system might download the needed patches and updates during the process.
- Leave at least 2GB of memory and 8.8 GB of storage space on your Mac.
- Update your Mac Apps to the latest versions
Once you are ready, simply take the following steps to reinstall macOS without losing its data.
How to Reinstall Mac OS?
Step 1: Backup Files on Mac
If you don’t want to suffer from an unexpected loss of your important files during the reinstallation, then you should take a backup of your data beforehand. There are different ways to backup data on Mac.
1. Backup Files Using Time Machine
Time Machine is the inbuilt solution to backup data on Mac and restores it afterward. If you do not want to let go of your important files during the reinstallation process, then consider taking their backup beforehand. You can use an external data source so that Mac can create a Time Machine on it. Mostly, Time Machine will detect a connected unit and would ask you to take its backup automatically. If not, then follow these steps to back up your Mac data using Time Machine.
- Simply connect a secure data storage to your Mac and launch Time Machine by visiting Menu > System Preferences > Time Machine.
- Here, click on the «Select Backup Disk» so that you can manually choose a location to save the backup content.

As a pop-up screen would appear, just select the available drive and confirm your choice. If you want, you can choose to encrypt your data as well.


2. Backup Files Using Cloud Storage
As you know, Time Machine will only take a manual backup of your Mac data to a dedicated storage unit. If you want to save your data on the cloud, then take the assistance of iCloud, Google Drive, Dropbox, OneDrive, or any other cloud-based service. Since iCloud is the native cloud storage solution from Apple and an inbuilt Mac app, it is widely recommended. You can easily backup files to iCloud from Mac by following these steps.
- Firstly, go to System Preferences and launch the iCloud app. If you are not logged in, then enter your Apple account details to sign-in.
- The iCloud app has options to sync various data types. Simply enable the features (by checking it) and turn on the backup feature.


3. Backup files Using External Hard Drive
If you are running short on time, then you can also take a manual backup using an external hard disk as well. Just connect the hard disk to your Mac and make sure that you are using a hard drive that is compatible with your macOS. Now, simply copy the content from your Mac’s storage that you wish to save and paste it to the external hard disk. In this way, you would be able to maintain a second copy of all the important data at a dedicated source.

Step 2: Boot Mac in the Recovery Mode
Once you have taken a backup of your Mac data, you need to restart in the recovery mode. The Mac Recovery Mode is a dedicated module in the operating system that provides all kinds of firmware and disk-related options. You can run disk utilities via the Recovery Mode on MacBook, reinstall macOS, recover Time Machine backup, and do so much more. In order to learn how to restore Mac in recovery mode, follow these steps:
- Firstly, go to the main menu by clicking on the Apple icon and choose to restart your system.


Please note that if you wish to upgrade your Mac instead, then press the Option + R keys instead of the Command + R key combination.
Step 3: Erase the Mac Hard Disk
This is an optional step during the reinstall macOS process as a lot of people would like to delete the existing data on their system. If you are reselling your Mac or your system has been infected by malware, then you can consider this option as well.
- When you get the macOS utility window, click on the «Disk Utility» option instead of reinstalling it. You can also go to the «Utilities» menu to get this option.


This will start the erasing process on the selected drive. You can also go to the Security Options here to further customize things.
Step 4: Reinstall Mac OS X without Losing Data
When you get the macOS utility window on the screen, you can just click on the «Reinstall macOS» option to proceed. Afterward, you simply need to follow this basic drill to reinstall macOS on your system.
- A confirmation message will appear, informing you about the reinstallation details. Just click on the «Continue» button to proceed.

Subsequently, you will be asked on which disk you wish to install macOS. Simply select the inbuilt disk on your Mac to start the process.

That’s it! Your system will reinstall macOS on it by performing all the needed tasks. You can just sit back and wait for the process to be completed and make sure that you don’t turn off Mac in between.

In the end, you can just choose to restore data from the Time Machine backup. You can get this option from the macOS Utilities or just launch the Time Machine application on your system as well.

Recover Erased Files after Reinstalling Mac OS
A lot of times, users are not able to maintain the backup of their data and end up losing their important files during the macOS reinstallation. If you have also lost your data on Mac due to this, then don’t worry – simply take the assistance of Recoverit Mac Data Recovery software. A highly advanced data recovery tool can retrieve all kinds of lost, deleted, and inaccessible content from your Mac storage. It is known to b yield positive results under all scenarios, including data loss caused by macOS reinstallation.
After installing Recoverit Data Recovery on your Mac, simply follow these basic steps to get your data back.
Step 1: Select a Location
Firstly, you need to install Recoverit Data Recovery on your Mac by downloading the application from its website. Launch it whenever you want to restore notes on Mac and select a source location to scan. That is, select the native source drive of Mac and click on the «Start» button.

Step 2: Scan the Location
As the application would start scanning your Mac for the lost notes, you can just wait for a while for the process to be completed. The interface will also display the progress of the entire process for your convenience.

Step 3: Preview and Recover
When the extraction process is completed, the application will notify you. Now, you can just preview and select the files you wish to get back. Click on the «Recover» button and make sure that you save your notes to a trusted location.

I’m sure that after following this guide, you would be able to reinstall macOS without losing data. Since working on Mac can be a bit tricky at times, it is recommended to always maintain a backup beforehand. Also, consider using a data recovery tool like Recoverit Data Recovery as well. In this way, you can take immediate measures as soon as you lose any information and get it back without much trouble. Recoverit also provides a data recovery solution for Windows as well and is considered a must-have application for both Mac and Windows users.
Источник


