- Создаём окружение для PyQt5 в Linux MInt (Ubuntu)
- Пути установки
- Настройка окружения
- Создание приложения
- Упаковка в исполняемый файл для Linux
- Упаковка в исполняемый файл для Windows
- pyqt6-tools 6.1.0.3.2
- Navigation
- Project links
- Statistics
- Maintainers
- Classifiers
- Project description
- Installation
- Usage
- Designer
- QML Plugin
- PyQt5Designer 5.14.1
- Navigation
- Project links
- Statistics
- Maintainers
- Project description
- Installation
- Binary
- Scripts
- Project details
- Project links
- Statistics
- Maintainers
- Release history Release notifications | RSS feed
- Download files
- ujjwal96 / Install PyQt5 on Ubuntu with python3 .md
- This comment has been minimized.
- umbe1987 commented Aug 9, 2018
- This comment has been minimized.
- ravi97garg commented Sep 4, 2018
- This comment has been minimized.
- ChrisVilches commented Sep 16, 2018
- This comment has been minimized.
- ujjwal96 commented Oct 2, 2018
- This comment has been minimized.
- mraehanakbar commented Mar 1, 2019
- This comment has been minimized.
- CyberSinister commented May 8, 2019
- This comment has been minimized.
- FangliangBai commented Jun 3, 2019
- This comment has been minimized.
- MrFlava commented Jul 18, 2019
- This comment has been minimized.
- madhuniha commented Jul 18, 2019
- This comment has been minimized.
- ujjwal96 commented Jul 18, 2019
- This comment has been minimized.
- ujjwal96 commented Jul 18, 2019
- This comment has been minimized.
- MrFlava commented Jul 18, 2019
- This comment has been minimized.
- Sokom141 commented Sep 26, 2019
- This comment has been minimized.
- Ahsanrao237 commented Dec 8, 2019
- This comment has been minimized.
- aanastasiou commented Jan 8, 2020
- This comment has been minimized.
- mohamadjalali commented Jan 17, 2020 •
- This comment has been minimized.
- carlos-antonio-dias commented Feb 5, 2020
- This comment has been minimized.
- sahilparekh commented Feb 16, 2020
- This comment has been minimized.
- wrishel commented Feb 26, 2020
Создаём окружение для PyQt5 в Linux MInt (Ubuntu)

Давно уже до пятой версии обновился Qt и вместе с ним PyQt, но найти информацию по ним в русскоязычном сегменте — задача не из простых. Под катом подробный туториал для тех, кто только начинает знакомиться со связкой Qt + python3.
Цель: собрать и настроить окружение, пройти путь от установки PyQt5 и создания формы в Qt Designer до запуска переносимого бинарника под Windows (да, всё верно, разрабатываем под Mint, собираем для linux и windows).
Пути установки
/dev/
Мы будем использовать виртуальные окружения для питона, и хранить их будем в директории envs, т.е.
/dev/envs/
Наши проекты будут храниться в директории src, т.е.
/dev/src/
Если у вас уже сложилась собственная иерархия размещения файлов, то придётся скорректировать пути в командах, приведённых ниже.
Настройка окружения
Создаём структуру директорий. Откройте консоль и выполните:
Ставим пакет, который потребуется нам для сборки в будущем:
Ставим pip и virtualenv:
Создаём виртуальное окружение, активируем его и обновляем пакеты:
Ставим Qt5. При выборе пути установки я оставил «по-умолчанию»
/Qt. Если Вы выберите другой, то необходимо менять пути в командах ниже:
Ставим SIP — модуль, необходимый для работы PyQt:
На этом всё. Окружение установлено и готово к работе. Для проверки выполните команду:
Ответ должен выглядеть следующим образом:
Для проверки, что всё действительно установилось в виртуальное окружение, откройте новое окно терминала и повторите команду проверки:
В ответ должна появиться ошибка ImportError. Новое окно терминала после этого можно закрыть.
Создание приложения
Перейдём в директорию с нашими исходниками и создадим директорию проекта:
Далее нам потребуется Qt Designer. Если Вы не меняли пусть установки Qt, то запустить его можно командой:
Вот так выглядит запущенный Qt Designer на моей системе:
В данном руководстве я не буду подробно останавливаться на описании интерфейса дизайнера, мы пройдём простейший путь до минимальной готовой формы. Если Вам необходима более подробная информация — Google It!
В диалоговом окне выбираем «Widget» (последний пункт в списке «templates/forms») и нажимаем кнопку «Создать». Откроется форма редактирования виджета:
Перетащите на форму кнопку из меню слева и сохраните полученную форму с именем test.ui в директорию
/dev/src/pyqt_test/:
Tips&Tricks: Нажав [Crtl + R] Вы можете запустить свою форму и «потрогать» её в режиме реального времени.
Конвертируем файл интерфейса из XML формы в понятную python форму:
Я не хочу редактировать что-либо в файле, созданном конвертером PyQt, поэтому наши слоты мы опишем в отдельном файле. Создайте файл test_slots.py и откройте его в любимом Вами редакторе. Наполнение файла должно выглядеть примерно так:
Затем, создайте ещё один файл с именем main.py, в котором мы опишем основную логику:
На этом наше приложение завершено. Выполнив из консоли
мы должны увидеть форму с кнопкой посередине, нажатие на которую меняет название кнопки на системную дату.
Упаковка в исполняемый файл для Linux
Упаковщик потребует некоторой магии при установке.
Скачиваем пакет, не устанавливая его и распаковываем:
Открываем любимым редактором файл cx_Freeze-4.3.4/setup.py. Я использую SublimeText:
Правим строку №84, чтобы она выглядела, как на картинке:
Tips&Tricks: А вы знали, что если запустить SublimeText из виртуального окружения, то интерпретатором по-умолчанию будет из виртуального окружения?
Сохраняем изменения, закрываем редактор, устанавливаем пакет, возвращаемся в папку с исходниками, запускаем упаковку:
После этого в директории с исходниками появится директория dist, в которой среди множества файлов можно заметить файл без расширения main — это и есть наш бинарник, готовый для запуска и переноски. Откровенно говоря, немного расстраивает размер дистрибьютива: на моей машине это — 70,1 Мб, но не стоит забывать, что туда упакованы: python, PyQt, Qt и некоторые общесистемные библиотеки. Сборочный скрипт cxfreeze достаточно гибко конфигурируется, но подбор оптимальных параметров я оставлю на совести читателя. Скажу только, что счастье кроется в сжатии, оптимизации и ручном ограничении зависимостей.
Упаковка в исполняемый файл для Windows
К сожалению, чуда не будет. Мне не известен способ собрать exe напрямую из-под Linux-системы. Поэтому, придётся потанцевать с wine.
Закрываем открытый в самом начале терминал:
Открываем новый, ставим последнюю версию wine:
После этого скачиваем windows-версии уже знакомых нам пакетов и запускаем установку из-под wine:
А дальше немного магии. Идём по ссылке:
Качаем актуальную версию cx_Freeze для нашего интерпретатора и ставим поверх официальной:
После этого остаётся проверить работоспособность. Переходим в каталог с исходником, открываем терминал wine, выполняем уже знакомую команду сборки:
Оказалось, что у меня в распоряжении нет windows-машины, поэтому смог протестировать результат только под wine. Выходим из терминала wine (команда exit), закрываем терминал. Идём раздавать нашу программу всем желающим.
Источник
pyqt6-tools 6.1.0.3.2
pip install pyqt6-tools Copy PIP instructions
Released: May 26, 2021
PyQt Designer and QML plugins
Navigation
Project links
Statistics
View statistics for this project via Libraries.io, or by using our public dataset on Google BigQuery
License: GNU General Public License v3 (GPLv3) (GPLv3)
Requires: Python >=3.5
Maintainers
Classifiers
- Development Status
- 4 — Beta
- Intended Audience
- Developers
- License
- OSI Approved :: GNU General Public License v3 (GPLv3)
- Operating System
- MacOS :: MacOS X
- Microsoft :: Windows
- POSIX :: Linux
- Programming Language
- Python :: 3
- Python :: 3.5
- Python :: 3.6
- Python :: 3.7
- Python :: 3.8
- Python :: 3.9
- Topic
- Software Development
- Utilities
Project description
The PyQt5 wheels do not provide tools such as Qt Designer that were included in the old binary installers. This package aims to provide those in a separate package which is useful for developers while the official PyQt5 wheels stay focused on fulfilling the dependencies of PyQt5 applications.
Both Windows and Linux are supported. Adjust paths etc accordingly if applying the explanations below in Linux rather than Windows. macOS support is incomplete but see issue #12 if you want to discuss it.
Installation
You will generally install pyqt5-tools using pip install. In most cases you should be using virtualenv or venv to create isolated environments to install your dependencies in. The above command assumes an env in the directory yourenv. The
=5.15 specifies a release compatible with 5.15 which will be the latest version of pyqt5-tools built for PyQt5 5.15. If you are using a different PyQt5 version, specify it instead of 5.15. PyPI keeps a list of all available versions.
Note: As of pyqt5-tools v3 the package has been broken down into four pieces. The wrappers remain here but the plugins are located in pyqt5-plugins, some Qt application helpers in qt5-tools, and the applications are in qt5-applications.
Usage
A program is provided available as Scripts/pyqt5-tools.exe . There are subcommands provided for each of Designer, QML Scene, and the QML Test Runner. These wrapper commands provide additional functionality related to launching the underlying programs. A larger set of Qt application are available as subcommands of the Scripts/qt5-tools.exe program. In both cases, passing --help will list the available subcommands.
Additionally, each pyqt5-tools subcommand listed below includes a parameter to run a basic example which can be used to see if the plugins are working. These examples are not intended to be used as examples of good code.
Each subcommand searches up the filesystem tree from your current working directory to find a .env file and loads it if found. If found, the environment variable DOT_ENV_DIRECTORY will be set to the directory containing the .env file. With this extra variable you can specify paths relative to the .env location.
Designer
There is a Scripts/pyqt5-tools.exe designer.exe entry point that will help fill out PYQTDESIGNERPATH from either command line arguments or a .env file. Unknown arguments are passed through to the original Qt Designer program.
If you want to view the generated code from within Designer, you can run Scripts/pyqt5-tools.exe installuic and it will copy pyuic5.exe such that Designer will use it and show you generated Python code. Note that this will enable viewing using the C++ menu item while the Python menu item will be broken. Without having made this adjustment, the C++ option shows C++ code while the Python option shows PySide2 code. pyqt5 must already be installed or this script will be unable to find the original pyuic5.exe to copy.
In addition to the standard features of the official Designer plugin, this provides an exception dialog for your widget’s Python code. Otherwise Designer in Windows silently crashes on Python exceptions.
QML Plugin
The QML plugin is also included. In the future a tool may be provided to handle copying of the plugin to each directory where it is needed. For now this must be done manually.
Источник
PyQt5Designer 5.14.1
pip install PyQt5Designer Copy PIP instructions
Released: Feb 3, 2020
Navigation
Project links
Statistics
View statistics for this project via Libraries.io, or by using our public dataset on Google BigQuery
License: GPL v3
Author: Irony
Tags PyQt, Qt, Designer
Maintainers
Project description
Installation
Wheels for the GPL version for 32 Windows can be installed from PyPI:
Binary
site-packages/QtDesigner/designer.exe site-packages/QtDesigner/linguist.exe site-packages/QtDesigner/qml.exe
Scripts
If Python.xxScripts in your PATH environment, you can run it directly, like: designer.exe, linguist.exe, qmlview.exe
Project details
Project links
Statistics
View statistics for this project via Libraries.io, or by using our public dataset on Google BigQuery
License: GPL v3
Author: Irony
Tags PyQt, Qt, Designer
Maintainers
Release history Release notifications | RSS feed


Download files
Download the file for your platform. If you’re not sure which to choose, learn more about installing packages.
Источник
ujjwal96 / Install PyQt5 on Ubuntu with python3 .md
Configuring to run from terminal
$ qtchooser -run-tool=designer -qt=5
OR
Write the following in /usr/lib/x86_64-linux-gnu/qt-default/qtchooser/default.conf
Create uic.py file.
Create a symlink:
$ sudo ln uic.py «/usr/lib/x86_64-linux-gnu/qt5/bin/uic»
/.local/share/application with .desktop extension
This comment has been minimized.
Copy link Quote reply
umbe1987 commented Aug 9, 2018
This helped me a lot setting the right qtdesigner! Thanks for sharing this gist! Kind regards, Umberto
This comment has been minimized.
Copy link Quote reply
ravi97garg commented Sep 4, 2018
Unable to launch /usr/lib/qt5/bin/uic. 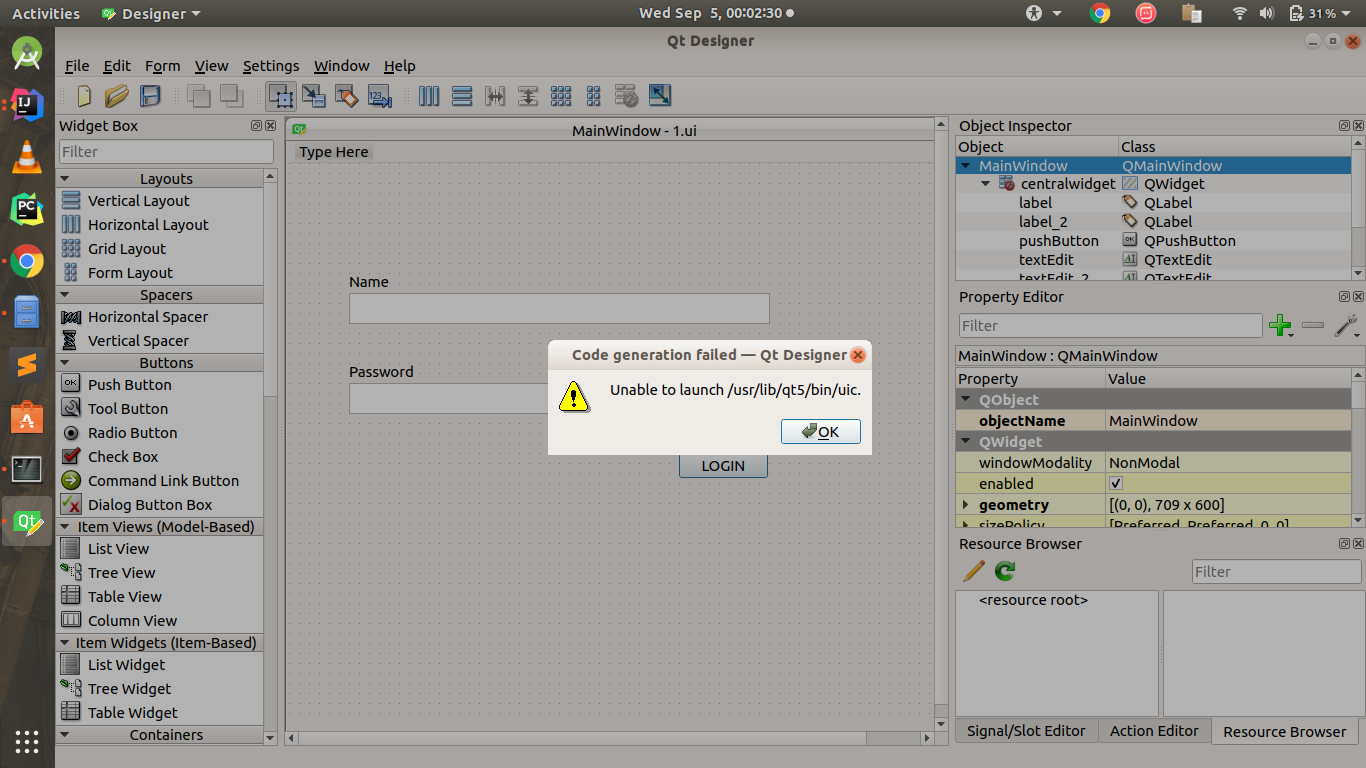
This comment has been minimized.
Copy link Quote reply
ChrisVilches commented Sep 16, 2018
I’m using Linux Mint and the first command pip3 install —user pyqt5 told me I need the SIP software/library. So I downloaded it from this page: http://pyqt.sourceforge.net/Docs/sip4/installation.html
By following the steps, I achieved the make step, and it also threw an error telling me Python.h wasn’t available, so I had to install sudo apt-get install python3-dev . Then ran make again and worked. Then the pip3 install —user pyqt5 command worked.
This comment has been minimized.
Copy link Quote reply
ujjwal96 commented Oct 2, 2018
@ravi97garg here write
sudo ln uic.py «/usr/lib/qt5/bin/uic»
This comment has been minimized.
Copy link Quote reply
mraehanakbar commented Mar 1, 2019
This comment has been minimized.
Copy link Quote reply
CyberSinister commented May 8, 2019
How do I add PyQt5 to Qt Creator? I’m lost. I’ve spent 4 hours on this and now I’ve given up. Any help?
This comment has been minimized.
Copy link Quote reply
FangliangBai commented Jun 3, 2019
How do I add PyQt5 to Qt Creator? I’m lost. I’ve spent 4 hours on this and now I’ve given up. Any help?
What do you mean by adding PyQt5 to Qt Creator?
They work separately.
Usually, You can use Qt Creator (or Qt Designer) to draw the UI and generate .ui file, e.g. window.ui . Then you use PyQt5 to convert the window.ui file to a window.py file. Then you should write your code based on the window.py and don’t need window.ui anymore, unless you modified it (you should redo the conversion).
This comment has been minimized.
Copy link Quote reply
MrFlava commented Jul 18, 2019
Help me! How to fix this problem? 
This comment has been minimized.
Copy link Quote reply
madhuniha commented Jul 18, 2019
when i run qtchooser -run-tool=designer -qt=5
i get
QXcbConnection: Could not connect to display
Aborted (core dumped)
What must have gone wrong? I created a new virtual environment and followed your steps.
This comment has been minimized.
Copy link Quote reply
ujjwal96 commented Jul 18, 2019
@MrFlava Looks like you either you don’t have python3 in /usr/bin or there’s some error in your uic.py file
This comment has been minimized.
Copy link Quote reply
ujjwal96 commented Jul 18, 2019
@madhuniha This seems like a bug. Try running
$ xvfb-run — qtchooser -run-tool=designer -qt=5
This comment has been minimized.
Copy link Quote reply
MrFlava commented Jul 18, 2019
@ujjwal96 you mean this? 
This comment has been minimized.
Copy link Quote reply
Sokom141 commented Sep 26, 2019
Thank you so much! This worked, as opposed to other methods.
This comment has been minimized.
Copy link Quote reply
Ahsanrao237 commented Dec 8, 2019
Q: how to convert .ui file into .py file?
Ans: Open terminal in the folder where your ui file present, then write this command.
pyuic -x [FILENAME].ui -o [FILENAME].py
This comment has been minimized.
Copy link Quote reply
aanastasiou commented Jan 8, 2020
So, from the point of view of running python within a virtual environment, it is very likely that all steps to get pyqt5 will work, except the bit that used to bring qt-designer in. If the system has Qt5 installed, it seems to have all the libraries required for it installed too and even if you don’t have pyqt5 installed on the base system, the qtchooser way of launching qtdesigner from above will work.
Therefore, a key component here is qtchooser.
The compiler will become available immediately within the virtualenv once you install pyqt5 there.
It would be great if the settings to launch the designer (in terms of setting up environment variables) where applied by one of the pip packages :/
This comment has been minimized.
Copy link Quote reply
mohamadjalali commented Jan 17, 2020 •
Which path do I choose to save the uic.py file.
After creating the uic.py file by entering this command
$ sudo ln uic.py «/usr/lib/x86_64-linux-gnu/qt5/bin/uic»
I have the following error .
ln: failed to create hard link ‘/usr/lib/x86_64-linux-gnu/qt5/bin/uic’: File exists
This comment has been minimized.
Copy link Quote reply
carlos-antonio-dias commented Feb 5, 2020
Hi everyone I got stuck right at the first command(pip3 install —user pyqt5) which show there error:
Command «python setup.py egg_info» failed with error code 1 in /tmp/pip-build-cvndyrvb/pyqt5/
I went through:
facebook/prophet#418
https://superuser.com/questions/241865/updating-python-on-ubuntu-system
And none of it helped. Any ideas?
This comment has been minimized.
Copy link Quote reply
sahilparekh commented Feb 16, 2020
Hi everyone I got stuck right at the first command(pip3 install —user pyqt5) which show there error:
Command «python setup.py egg_info» failed with error code 1 in /tmp/pip-build-cvndyrvb/pyqt5/
I went through:
facebook/prophet#418
https://superuser.com/questions/241865/updating-python-on-ubuntu-system
And none of it helped. Any ideas?
use pip3 install —user pyqt5==5.14
This comment has been minimized.
Copy link Quote reply
wrishel commented Feb 26, 2020
Top-notch tutorial in that it works without a lot of knowledge about Ubuntu! I think it’s possible that the Desktop Entry section is no longer needed. If you decide to keep it, it needs a minor update.
When I have finished the tutorial and Show Application in Ubu 18, I see two for designer. One has a generic icon and the other has an icon specific to Qt. 
The .desktop file with is in /usr/share/applications/designer-qt5.desktop with a modification date in 2018 so I suppose it was installed along with Qt. The .desktop file for the the item with the generic logo is in the one I created following the tutorial.
- if the desktop files are installed with QT do we really need the Desktop Entry section in the tutorial?
- if you do keep that section I suggest changing «Icon=designer» to «Icon=designer-qt» since this creates the desktop entry with Qt’s icon.
Источник


