- How to Install PuTTY on Linux
- How to Install PuTTY on Linux
- Install PuTTy on Ubuntu
- Install PuTTy on Debian
- Install PuTTy on Arch Linux
- Install PuTTy on CentOS, Red Hat & Fedora
- Install PuTTy from Source Code in Linux
- If You Appreciate What We Do Here On TecMint, You Should Consider:
- Как установить Putty в Ubuntu и других дистрибутивах Linux
- Установка Putty в Ubuntu Linux
- Установка Putty на другие дистрибутивы Linux
- Installing PuTTY on Ubuntu 16.04 | 17.10 | 18.04
- Step 1: Installing PuTTY
- Step 2: Using PuTTY
- Установка PuTTY в Linux
- Установка PuTTy в Linux
- How to Install Putty SSH Client on Ubuntu 20.04 LTS
- Prerequisites
- Install Putty on Ubuntu
- Step 1: Enable Universe repository
- Step 2: Install Putty
- Step 3: Launch Putty
- Remove Putty
- Karim Buzdar
How to Install PuTTY on Linux
PuTTY is a free and open-source cross-platform SSH and telnet client that even after being around for over 20 years remains one of the most popular SSH clients being used especially on the Windows platform.
Linux distros ship with SSH capabilities built into their terminal but in real-world environments, I have seen PuTTY being used instead of the default Linux systems more time than I cared to count.
The quickest reasons that come to mind for such scenarios include:
- Familiarity: users are more comfortable using an SSH client they got familiar with while using Windows.
- Debug mode: Connection to serial pots and raw sockets is more user-friendly with PuTTY.
- Convenience: PuTTY has a GUI that undeniably makes it easier to use especially by SSH and/or terminal newbies.
It is possible for your own reasons for wanting to use PuTTY on GNU/Linux is different. It doesn’t really matter. Here are the steps to take in order to install PuTTY on Linux distro of your choice.
How to Install PuTTY on Linux
PuTTY is available to install from the default official repositories in most Linux distributions. For instance, you can install PuTTY on Ubuntu and its derivative distros via the universe repository.
Install PuTTy on Ubuntu
First, you’ll have to enable the universe repository so that you can access its packages, update your system to recognize its new access rights, and then run the install command.
Launch PuTTY to see that its UI mirrors that of the windows version. Happy you 🙂
![]() Putty on Ubuntu
Putty on Ubuntu
Install PuTTy on Debian
Just like for Ubuntu, PuTTY is available for Debian and all its distros via aptitude (i.e. using apt-get) as shown.
Install PuTTy on Arch Linux
Arch Linux and its derivatives can also install PuTTY from the default repositories.
Install PuTTy on CentOS, Red Hat & Fedora
PuTTY is available to install via the distro’s default package manager.
Install PuTTy from Source Code in Linux
It’s possible that you want to get your hands ‘dirty‘ and build the SSH client from scratch yourself. You’re in luck because it is open-source and the source code is available for free here.
That’s all folks! You’re now equipped with the knowledge to install PuTTY on any Linux distro, in any environment. Now learn how to use putty with this useful putty tips and tricks.
Do you use a different SSH or telnet client? Tell us about it in the comments section below.
If You Appreciate What We Do Here On TecMint, You Should Consider:
TecMint is the fastest growing and most trusted community site for any kind of Linux Articles, Guides and Books on the web. Millions of people visit TecMint! to search or browse the thousands of published articles available FREELY to all.
If you like what you are reading, please consider buying us a coffee ( or 2 ) as a token of appreciation.

We are thankful for your never ending support.
Источник
Как установить Putty в Ubuntu и других дистрибутивах Linux
Если я не ошибаюсь, Putty, пожалуй, самый популярный SSH-клиент для Windows.
В ИТ-компаниях среда разработки обычно находится в удаленной системе Linux, в то время как разработчики используют Windows в качестве своей локальной системы.
Putty используется для подключения к удаленной системе Linux с компьютера Windows.
Putty не ограничивается только Windows.
Вы также можете использовать это программное обеспечение с открытым исходным кодом на Linux и MacOS.
Зачем вам использовать отдельный SSH-клиент в Linux, если у вас уже есть «настоящий» Linux-терминал?
Есть несколько причин, по которым вы захотите использовать Putty в Linux.
- Вы так долго использовали Putty в Windows, что вам удобнее.
- Вам трудно вручную редактировать конфигурационный файл SSH, чтобы сохранить различные сеансы SSH. Вы предпочитаете графический вариант Putty для хранения SSH-соединения.
- Вы хотите отладить, подключившись к необработанным сокетам и последовательным портам.
Какой бы ни была причина, если вы хотите использовать Putty в Ubuntu или любом другом Linux, вы, безусловно, можете это сделать.
Позвольте мне показать вам, как это сделать.
Установка Putty в Ubuntu Linux
Хорошей новостью для пользователей Ubuntu является то, что Putty доступна в репозитории Ubuntu universe.
Чтобы установить Putty в Ubuntu, сначала убедитесь, что репозиторий universe включен.
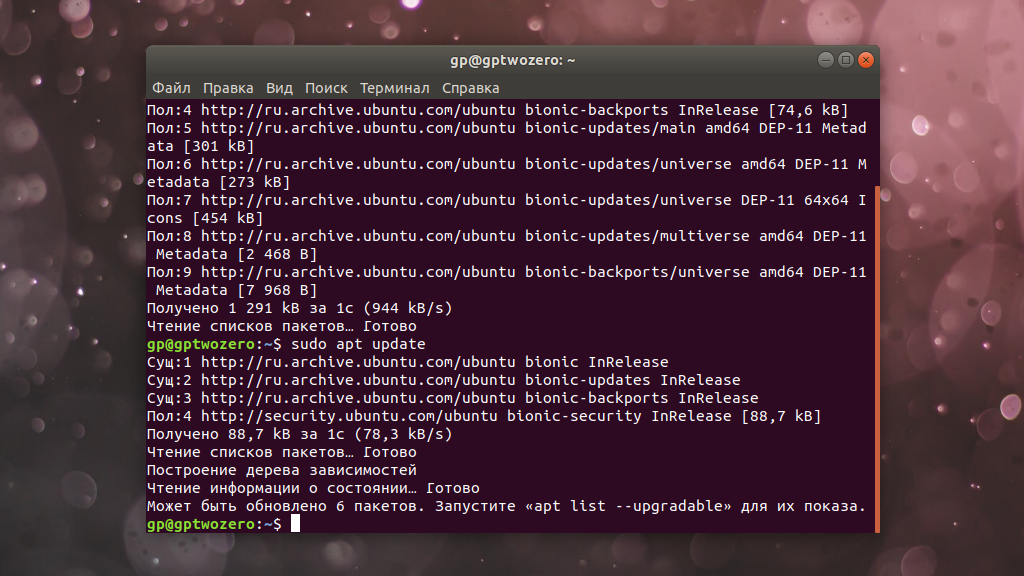
Как только у вас будет включено хранилище universe, вы должны обновить Ubuntu с помощью этой команды:
После этого вы можете установить Putty с помощью этой команды:
После установки вы можете запустить Putty, найдя его в меню.
Как вы можете видеть на скриншоте ниже, версия Putty для Linux выглядит так же, как версия для Windows.
Это облегчение, потому что вам не придется возиться в интерфейсе, пытаясь найти выход из новых и измененных настроек.
Когда вы вводите имя хоста или IP-адрес удаленной системы и подключаетесь к нему, Putty будет использовать уже сохраненные ключи SSH в вашем домашнем каталоге.
Установка Putty на другие дистрибутивы Linux
Putty доступен для Debian, поэтому вам просто нужно использовать apt-get или aptitude для его установки.
Putty также доступен для Fedora / Red Hat и может быть установлен с помощью менеджера пакетов по умолчанию.
Вы также можете легко установить Putty в дистрибутивах на основе Arch Linux.
Помните, что Putty – это программное обеспечение с открытым исходным кодом.
Вы также можете установить его с помощью исходного кода, если вы действительно этого хотите.
Вы можете получить исходный код Putty по ссылке ниже.
Источник
Installing PuTTY on Ubuntu 16.04 | 17.10 | 18.04

Do you like PuTTY? Want to run it on Linux systems, including Ubuntu? Well, you can install and use PuTTY on Ubuntu and the steps below will show you how to get it working.
PuTTY, a lightweight SSH client developed for Windows systems is also available to use on Linux machines, including Ubuntu. Developed by Simon Tatham, it has become probably the most popular SSH client in use today, although may not be as popular as it once was.
The things most people like about PuTTY are, it’s lightweight, readily available to download, efficient, compatible with most operating systems, and gets the jobs done. In fact on Windows systems, no need to install. Download PuTTY executable and run it. It’s that simple!
I’m not saying PuTTY is the best SSH client out there. Nope. PuTTY can’t complete with many of the well maintained SSH clients. But PuTTY has many advantages that the others done have and that’s why people still go to PuTTY when they need to quickly connect to a system via SSH.
This brief tutorial is going to show you how to install and use PuTTY on Ubuntu machines.
Step 1: Installing PuTTY
To install PuTTY, open logon to Ubuntu and open the command line terminal by pressing Ctrl — Alt — T keys on your keyboard. When the terminal opens, run the commands below to install PuTTY.
Step 2: Using PuTTY
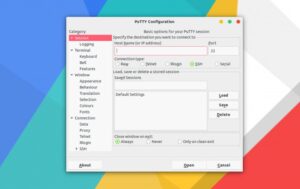
After installing, go to Unity Dash or the application menu and find the application. When you open, you’ll get the same interface you’ll have on Windows systems. Just like how you’d use it on Windows systems, this app functions the same way on Linux operating systems.
The layout looks the same, but with Ubuntu color and themes.

To connect to a SSH server, type the IP address of the server and port number, then click Open.
Not just SSH, PuTTY can be used to establish Telnet, Serial and Rlogin connections. SSH is mostly used because of its security and how it handles data being transferred between two network systems.
Well, this is how you install and use PuTTY on Ubuntu systems.
Источник
Установка PuTTY в Linux
Утилита PuTTY заметно выделяется среди огромного количества существующих на рынке SSH-клиентов. В данный момент это бесспорно самый популярный клиент для подключения к удалённому компьютерному узлу и управления ним.
PuTTy станет незаменимым помощником в случае, когда необходимо выполнять администрирование Linux удалённо либо просто подключиться из среды Windows к ОС семейства Unix. В этой статье мы рассмотрим как выполняется установка PuTTy Linux.
Обратим внимание на несколько особенностей:
- Простая установка во всех наиболее распространённых ОС.
- Удалённое администрирование из под Windows или Linux.
- Работа через последовательный порт.
- Поддержка работы с VPN.
- Поддержка IPv6.
- Использование клиентов SCP-SFTP.
- Перенаправление портов.
- Разные варианты аутентификации (в том числе и с открытым ключом).
- Сжатие данных, применяемое до окончания процесса аутентификации.
Разработчики программ используют PuTTy для создания локальной среды, а администраторы сетей — для удалённой настройки маршрутизаторов и управления Linux.
Кроме открытого исходного кода у PuTTy есть ряд других преимуществ перед другими клиентами SSH. Пакет программы состоит только из исполняемых файлов, что исключает привязку к DLL, версии ОС и другим приложениям.
PuTTy ориентирован не только на удобство использования, но и на безопасность. Технология реализует только клиентскую сторону соединения, остальная работа производится на сервере.
Установка PuTTy в Linux
Установка PuTTy в Ubuntu проста и не вызовет сложностей даже у начинающих пользователей Linux. Запустите терминал (сочетание клавиш для быстрого запуска приложения: Ctrl+Alt+T):
Убедитесь, что репозиторий universe активен. Выполните следующую команду:
sudo add-apt-repository universe

Убедившись, что репозиторий включён, обновите Ubuntu, используя команду:
sudo apt update
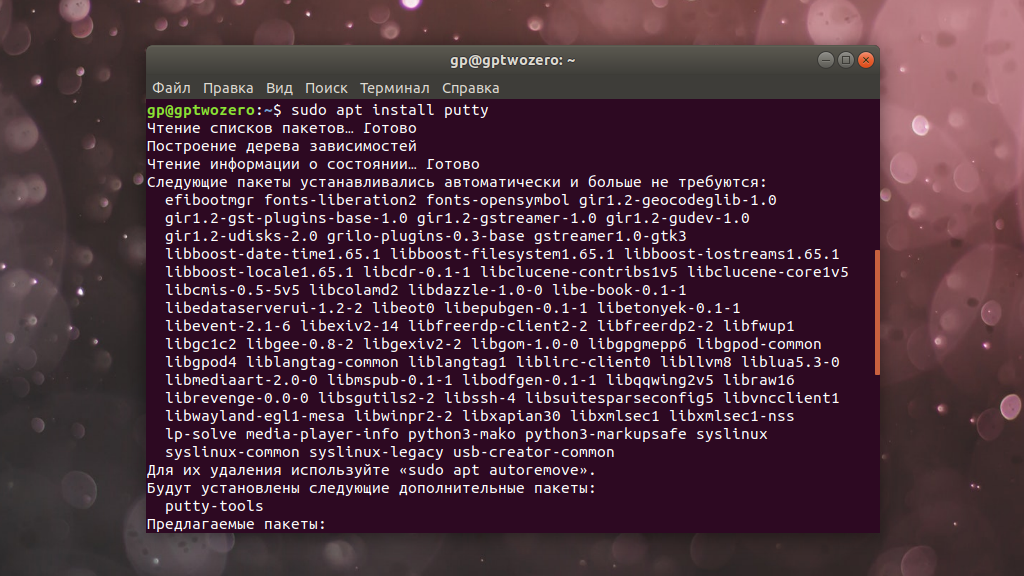
Далее установите PuTTy:
sudo apt install putty
После этого утилиту можно найти в главном меню и запустить:

Для других операционных систем установка утилиты не очень сильно отличается. Все операции выполняются с помощью команды sudo.
sudo apt-get install putty
sudo dnf install putty
sudo pacman -S putty
Интерфейс PuTTy практически идентичен в любой операционной системе.
Источник
How to Install Putty SSH Client on Ubuntu 20.04 LTS
Putty is the most widely used SSH and telnet client for Microsoft Windows operating systems. It is used to remotely access and configure devices such as servers, switches, and routers. Putty, being a free and open-source utility, is also popular among Linux users. Another reason for its popularity is its features which include session management, proxy sessions, session logging, and language settings. It also supports various network protocols which include SSH, telnet, SCP, rlogin, etc.
In this article, we will explain how to install Putty on Ubuntu 20.04 LTS system. The same procedure can be used for Debian, Mint, and previous Ubuntu releases.
Prerequisites
- Ubuntu 20.04 system
- User with sudo privileges
Note:
Use the Ctrl+Alt+T keyboard shortcut to open the command line Terminal.
Install Putty on Ubuntu
Follow the below steps in order to install Putty on Ubuntu:
Step 1: Enable Universe repository
In order to install Putty, you will need to ensure that the Universe repository is enabled on your Ubuntu system. If it is not already enabled, you can enable it by using the following command in Terminal:
When prompted for the password, enter the sudo password.

Step 2: Install Putty
After enabling the Universe repository, now you can install Putty on your system. Issue the following command in Terminal in order to do so:
When prompted for the password, enter the sudo password.

When you run the above command, the system prompts for confirmation that if you want to continue the installation or not. Press y to continue, after that, the installation of Putty will be started on your system.
Once completed, you can verify the installation through the following command in Terminal: Advertisement
You should see a similar output:

Step 3: Launch Putty
Once installed, you are ready to launch and use Putty on your Ubuntu system. You can launch Putty either via the command line Terminal application or via GUI.
In order to launch Putty via command line, use the following command in Terminal:
In order to launch Putty via GUI, hit the super key on your keyboard and type putty in the search bar. Once the icon of the Putty appears, click on it to launch it.

Here is the Putty for Linux looks like. It looks the same as its Windows version but with Ubuntu theme and colors.

Now in order to connect to a remote server, simply type its IP address or host name and enter the port number. Then click Open to initiate the connection.

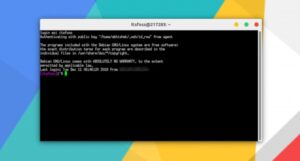
When connecting a remote system for the first time, you will see the following PuTTY Security Alert dialog box. Click the Accept button to connect to the remote server.

Now the following Terminal window will appear prompting you for the user name and password for the remote system. Type user name and password and press Enter after which you will be logged in to the remote system.

Remove Putty
In case, you want to remove Putty from your system, you can do so through the following command in Terminal:

After running the above command, the system might ask for confirmation that if you want to continue the process or not. Hit y to continue, after that, the Putty application will be removed from your system.
That is all there is to it! In this article, you have learned how to install Putty on Ubuntu 20.04 LTS system. Now you can easily administer and manage the remote systems using a GUI utility. All the commands and procedures described in this article are also valid for Debian, Mint, and previous Ubuntu releases.
Karim Buzdar
About the Author: Karim Buzdar holds a degree in telecommunication engineering and holds several sysadmin certifications. As an IT engineer and technical author, he writes for various web sites. You can reach Karim on LinkedIn
Источник


