- OVMF/UEFI Boot Entries
- Contents
- Introduction
- Add a Boot Option
- Short How-To
- Detailed How-To
- Vova1234.com
- Проблемы и их решение
- Прямой эфир
- Блоги
- Установка Windows на ProxMox
- OVMF (UEFI BIOS) improvments
- ghusson
- spirit
- ghusson
- Jonas S.
- OVMF (UEFI) Windows 10 Boot Option won’t stick
- b1ackplague
- Installing Proxmox with UEFI BIOS Setting On and Secure Boot Off
- Lonnie
- dietmar
- badji
- Allen15
- badji
- Allen15
- Allen15
- Allen15
OVMF/UEFI Boot Entries
Contents
Introduction
If a VM boots via OVMF (UEFI [1] ), the firmware has to know which bootloader it has to start from the ESP [2] . When no boot entries exist in the EFIVARS store, it tries to load the fallback $ESP/EFI/BOOT/BOOTX64.efi loader. Should that also fail, the VM gets booted into the EFI Shell
Add a Boot Option
Short How-To
- Start-up the VM and press ESC to get into the OVMF menu.
- Then «Boot Maintenance Manager» -> «Boot Options» -> «Add Boot Option» -> choose Disk with the Efi System Partition.
- Now find the EFI executable, for example for Debian: EFI/debian/grubx64.efi or for Fedora: EFI/fedora/shimx64-fedora.efi .
- Name it («Input the description») and «Commit Change»
- Use «Change Boot Order» to order the new entry to the top.
Detailed How-To
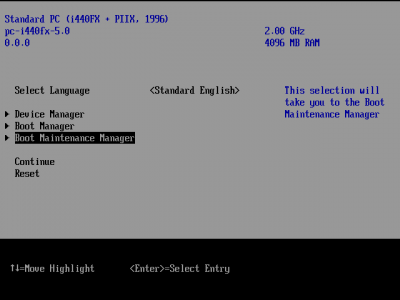
To add an entry of an existing bootloader go into the OVMF Menu by pressing ‘ESC’ during boot. Then select ‘Boot Maintenance Manager’:
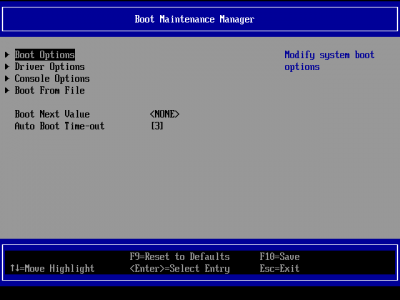
Select ‘Boot Options’:
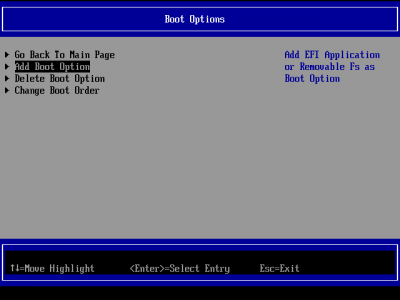
Select ‘Add Boot Option’:
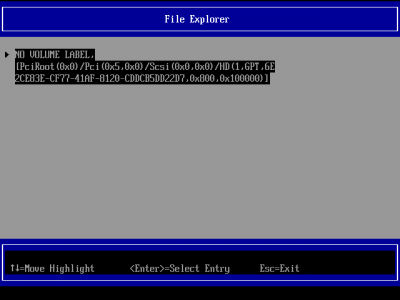
Choose the Hard Drive with the ESP:
Navigate the folder structure to your bootloader (EFI/debian/shimx64.efi in this example)
After that, enter a name and commit:
To make it the default boot entry, you now have to change the boot order:
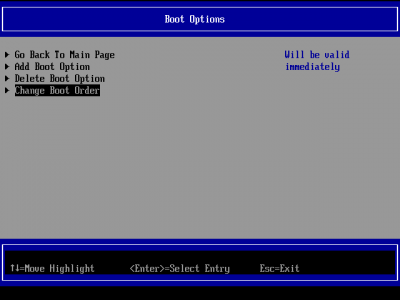
Press enter, select the boot entry with the arrow keys and move it up and down with ‘+’ and ‘-‘ respectively. Then press enter again and commit your changes:
The last step is to reset the VM via OVMF, after that it should boot using the just configured boot entry.
Vova1234.com
Проблемы и их решение
Прямой эфир
Блоги
- Интернет и сайты178
- Steam85
- Проблемы и их решение54
- Заметки35
- Сделал я19
- Почта15
- Блог проектов ABCVG12
- BILLmanager 510
- Товары с других стран8
- Хостинг6
- Блог сайта 8Gamers.NET4
- Игровые сервера4
- Домены4
- Все о DNS3
- Все о SSL3
- Блог сайта 8Next.com3
- Хочу халявную игру3
- Комиксы2
- Продукты ISP2
- Новости2
Установка Windows на ProxMox
Установка была сделана на сервере: Intel® Core(TM) i3-2130 CPU @ 3.40GHz, 2000GB SATA HDD, 8192 MB RAM.
VPS Proxmox VE 5 — эта версия пашет по мануалу.
VPS Proxmox VE 5 (ZFS) (BETA) (64bits) — эта версия не пашет по мануалу.
Готовые ISO образы:
ОС на сервере Debian.
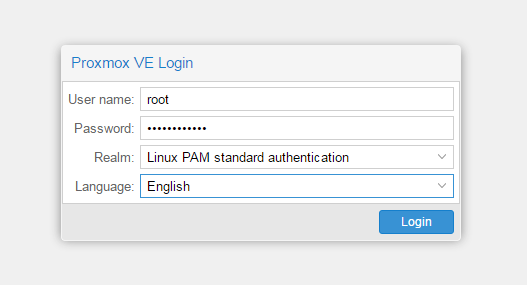
Идем на адрес: https:// ваш ip:8006. Вводим и заходим.
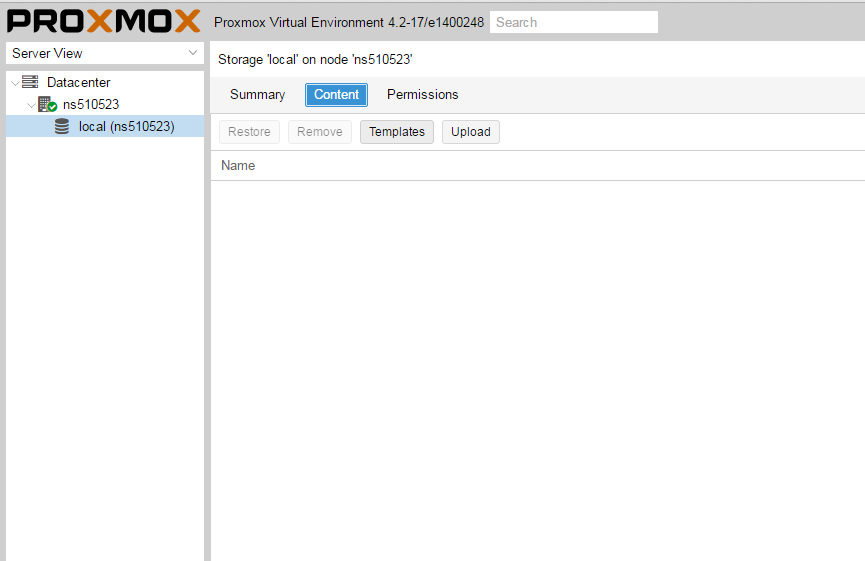
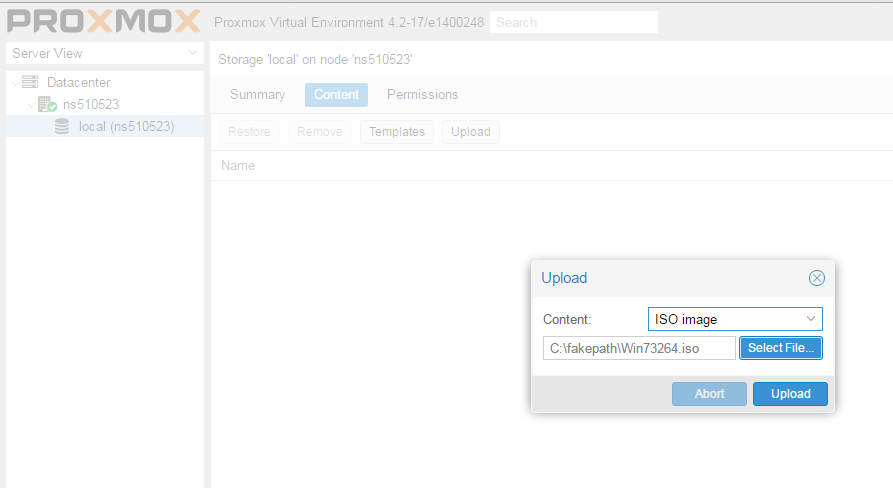
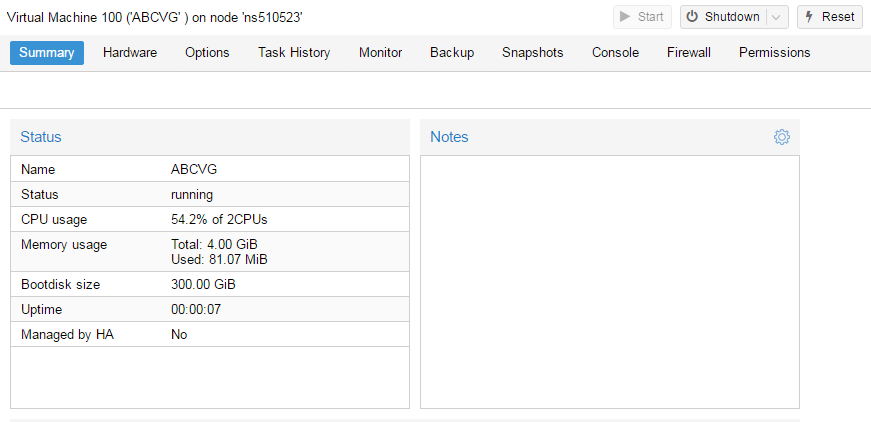
Открываем NS, далее local как на скриншоте внизу:
Жмем Upload. И грузим свой ISO образ Windows какой скачали по ссылке выше.
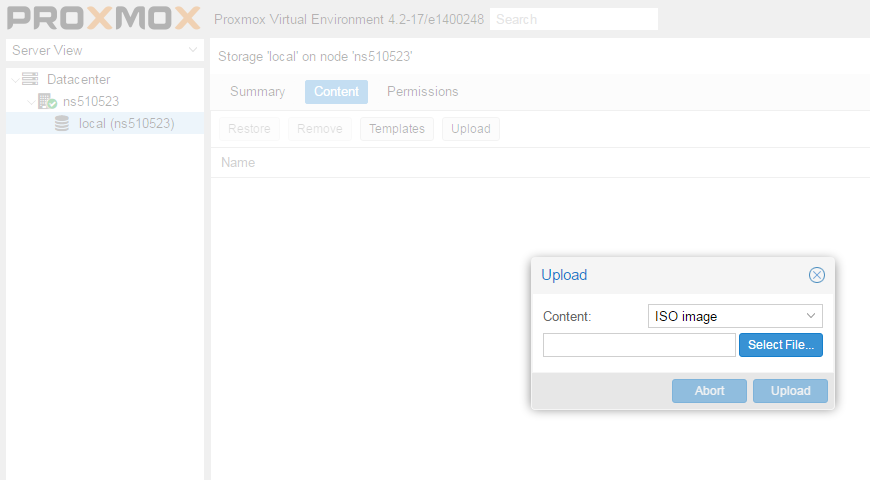
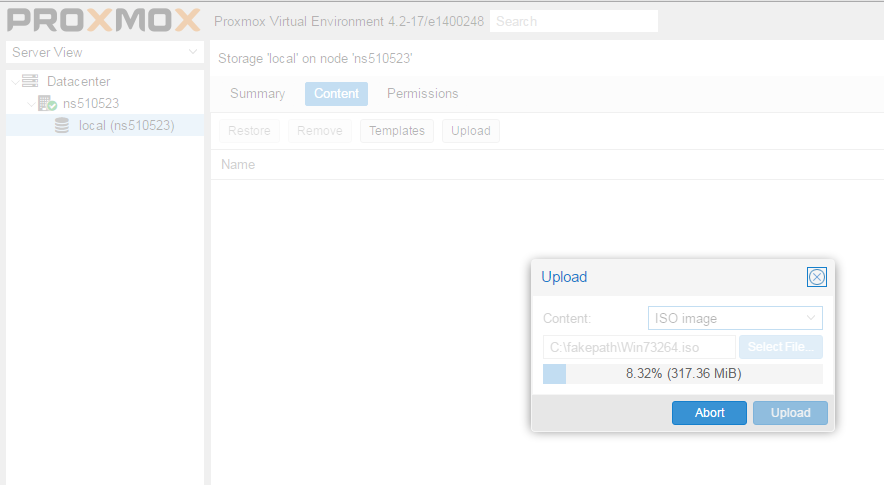
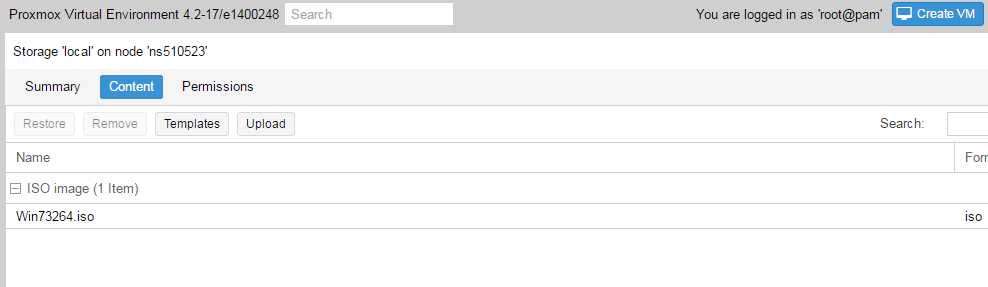
Ну и грузим его:
У меня 100 мегабит интернет по этому 3ГБ быстро загружается.
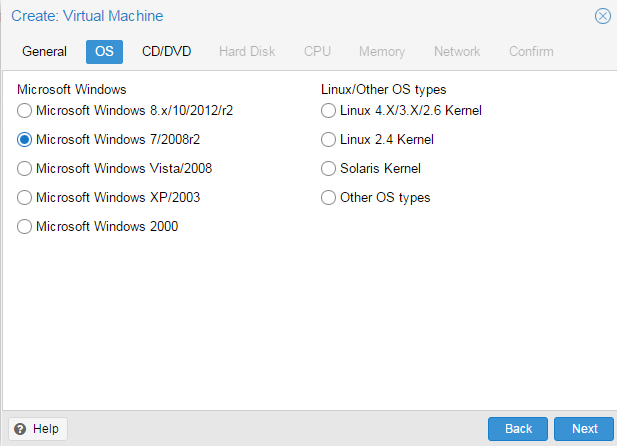
Нажимаем Create VM. Можем вписать свое имя виртуальной машины.
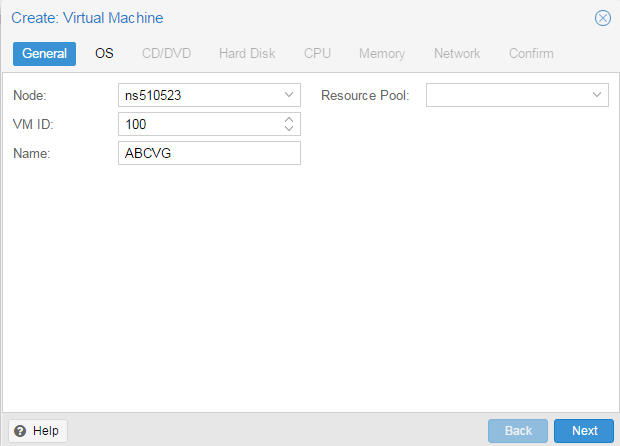
Я не вшарил зачем это выбирать если мы и так с образа устанавливаем.
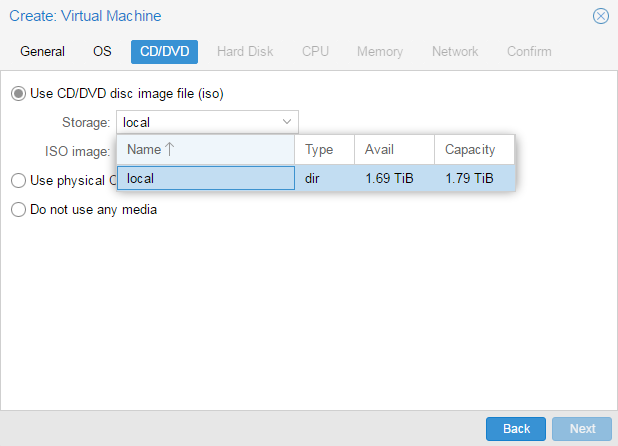
Выбираем хранилище образов.
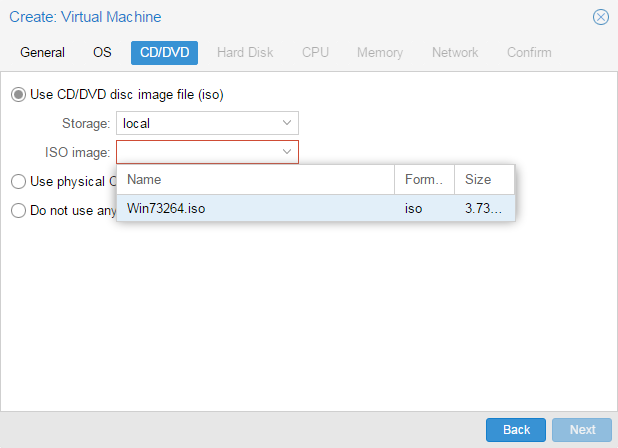
Выбираем образ наш загруженный.
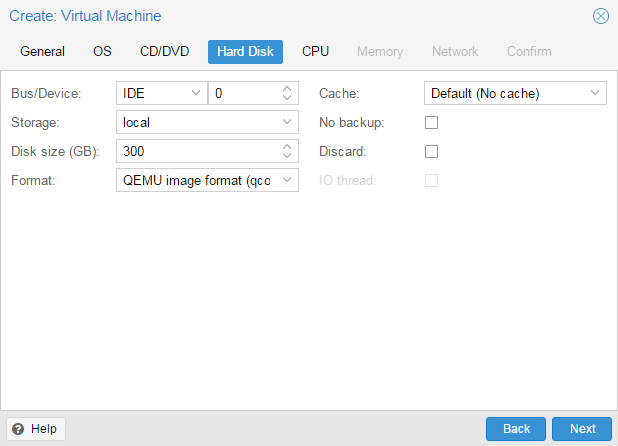
Указываем сколько места надо, 300 ГБ я выбрал.
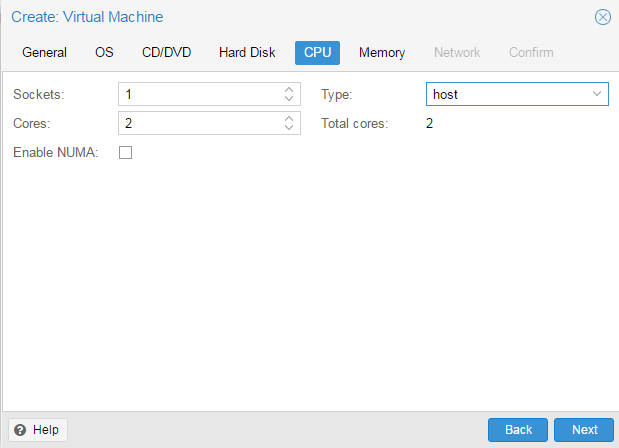
I3 имеет два ядра. Лучше ставить как есть.
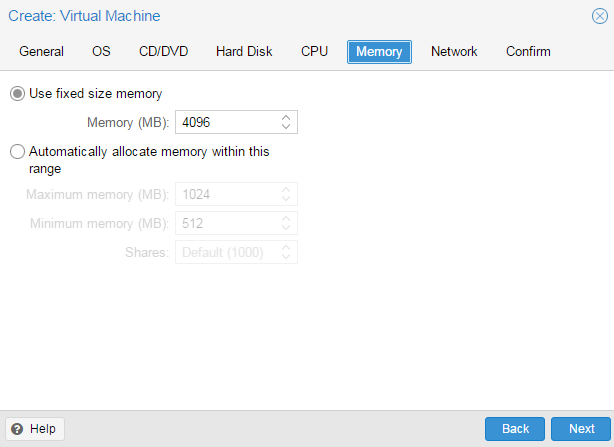
Половину доступной памяти поставил я. ProxMox резервирует оперативную под всю виртуальную машину.
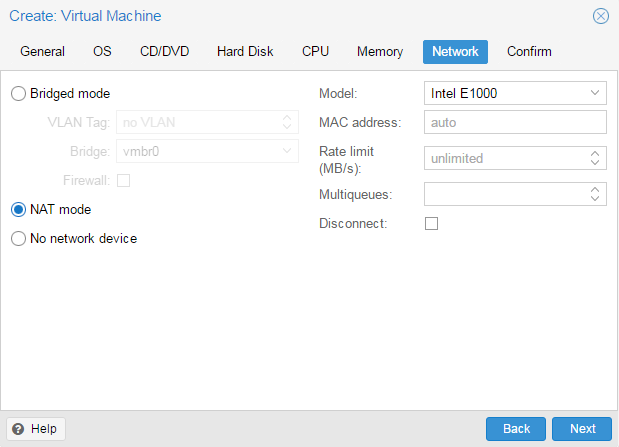
NAT mode ставить надо по дефолту.

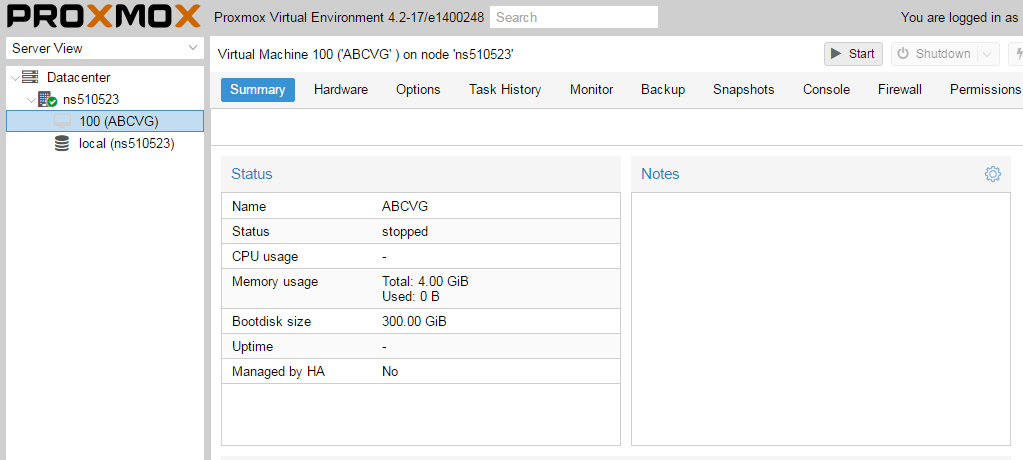
Запускаем. И видим что все ок, запустилось.
Переходим в консоль и видим как идет установка Windows.


Как настроить удаленный рабочий стол на ProxMox, статья здесь: клац
OVMF (UEFI BIOS) improvments

ghusson
Active Member
I installed debian-8.2.0-amd64-netinst.iso on a KVM guest with UEFI boot (OVMF BIOS).
When the guest starts, the BIOS doesn’t boot over the EFI partition (Debien doesn’t start, the BIOS comes to the falback EFI command line).
In the BIOS, I can start Debian when I use «boot from file».
Adding a boot entry doen’t help.
I think there are four improvments to work on :
1) the BIOS should boot on the EFI on the disk by default (in my case disk is RAW over LVM over iSCSI) : maybe I am missing something in the settings of a conf file in the EFI partition ?
2) the BIOS should boot on the new boot entry when set (maybe it is a OVMF bug or it is a problem of storing the BIOS settings)
3) PVE should store modifications made to the BIOS in a dedicated virtual device (file). For the moment is seems that it is a temporary file.
4) PVE should be able to propose a user interface in order to configure boot settings (ie : not waiting to be in the BIOS for settings things up)
spirit
Famous Member
AFAIK, ovmf respect disk boot order from proxmox vm options, excepting for virtio-blk.
(ide,sata, virtio-scsi are working fine)
«Are you looking for a French Proxmox training center?
ghusson
Active Member
Jonas S.
Member
As this is still a recent thread I will reply here instead of sharing my solution in an extra thread.
I had the following Problem which is related/the same as the thread opener, I think:
- using OVMF Bios and virtio-scsi Controller + SCSI Disk, I installed Debian 8.6.0 (be careful here, as far as I know all live CD images of Debian dont support UEFI, so use a standard image)
- the result was that I couldn´t boot after installation, the error was «Boot Failed. EFI SCSI Device» or something along those lines
I was quite stumped as the cd is also booted in UEFI mode and that works flawlessly. After some digging I found the following post on Stackexchange:
http://unix.stackexchange.com/questions/52996/how-to-boot-efi-kernel-using-qemu-kvm
In the answer post: «. EFI firmware saves boot options in NVRAM. QEMU currently does not preserve NVRAM, so boot options are lost once you close QEMU. Without boot options, the firmare tries to find \EFI\BOOT\BOOTX64.EFI to execute but it’s not here, so it does not know what to boot and leaves control to you. . «
That was spot on, after booting with «Boot from File . » (thanks @ghusson) I looked what the path looks like in the boot folder of the Debian installation.
After installation Debian uses:
After that the bios can boot Debian without any intervention. I think that this may also apply to other distributions like e.g. Fedora.
The only thing I am not sure about is what happens if the grubx64.efi gets updated. Maybe some script which copies grubx64.efi to BOOTX64.EFI every time a shutdown/reboot is triggered would be a solution.
I know this isnt and ideal solution but at least it gets things working as long as OVMF is not configurable.
OVMF (UEFI) Windows 10 Boot Option won’t stick
b1ackplague
New Member
Proxmox 4.2
- After it restarts it acts as if there is no virtual disk.
- Enter BIOS configuration > Boot Maintenance Manager > Boot Options > Add Boot Option > select the disk, browse to efi > boot > select bootx64.efi.
- Change Boot order
- Save all changes.
- Boots fine.
The problem is I have to add the disk and change boot order every time I restart or power off the VM.
How I setup the VM
- Set up VM.
- Select Windows 10
- Add a new vDisk using Virtio Bus (iothread + Write back Cache) as Virtio0
- add Qemu agent -> yes
- Add windows 10 Iso as First DVD on Sata0
- Add Virtio-win-0.1.117 as secondary DVD on Sata1
- Select Virtio Controller via Options Tab (afaik best practice is to use SCSI ontop of Virtio controller for Windows on SSDs)
- Verify your boot Orders. —> Disk then CD-Rom
- Install windows 10
- Start Windows VM
- Boot from Windows ISO (press any key to start from DVD/CD . . .)
- select “Install Now”
- select windows 10 pro x64
- custom install
- “load Driver” option
- Select Virtio-DVD > Viostor > w8.1 > amd64
- Install Red Hat VirtIO SCSI controller (driver for your virtio0)
- “load Driver” option
- Select Virtio-DVD > VioSCSI > w8.1 > amd64
- uncheck the checkbox
- Install Red Hat VirtIO SCSI pass-through controller (in case you need it later)
- “load Driver” option
- Select Virtio-DVD > netKVM > w8.1 > amd64
- uncheck the checkbox
- Install Red Hat VirtIO Ethernet Adapter (you will need this later)
- “load Driver” option
- Install windows regularly (like you’d normally do)
Installing Proxmox with UEFI BIOS Setting On and Secure Boot Off
Lonnie
Active Member
Does Proxmox install on a UEFI enabled BIOS (with or without secure boot — my motherboard has the ability to enable UEFI while also disabling secure boot)?
Because my previous attempts to install Proxmox 3.2 on a server with the UEFI bios-setting enabled have failed, I recently disabled that setting and installed Proxmox 3.3 successfully. Specifically, the 3.2 failures would indeed install Proxmox, but after reboot it would not boot Proxmox.
However, now I’m considering reinstalling Proxmox with UEFI enabled (if that’s possible), because of its support for larger than 2TB partitions.
You see, we have a Dell T620 with eight 900GB (10,000 RPM) hard drives. I configured its H710 RAID controller with RAID 10 and created only one virtual volume spanning all 8 drives.
That should produce 3600GB of usable space, but unfortunately I’m just now noticing that Proxmox is only showing 1.65TB of space under the local storage for this node. This is likely due to bios limitations caused by not having UEFI enabled. Or, it could be that I don’t have the latest drivers for my H710 RAID controller. I honestly can’t remember how much space it reported at the time I created the RAID (going to check that tomorrow).
I hate to do it, but I’m going to miagrate all virtual machines to another node in the cluster and take this machine down for the 2nd time (the first time was to add additional hard drives to the RAID 10).
Man I wish I would have realized this earlier. But, please save me some time if UEFI is a known issue with Proxmox, because my Google searches aren’t producing much certainty or guidance. Please testify if you’ve installed on top of UEFI successfully, and any tips would be greatly appreciated.

dietmar
Proxmox Staff Member
Best regards,
Dietmar
Do you already have a Commercial Support Subscription? — If not, Buy now and read the documentation
badji
Active Member
I have the same pb with my Asus motherboard.
The solution is to install first debian wheezy, Reboot and install over pve at the second time.
Allen15
New Member
I have the same pb with my Asus motherboard.
The solution is to install first debian wheezy, Reboot and install over pve at the second time.
I can testify that at least on a Lenovo T420s Thinkpad, THIS didn’t work at all.
Installing Debian worked wonderfully, and as expected, but installing Proxmox VE 3.3 over it got me right back to the same problem of the laptop not recognizing the hard drive as being bootable, so it takes me to an endless boot device menu, which won’t work when the primary and only hard drive is chosen.
I’ve updated the bios to the latest version, but there has never been an option in this bios to turn off a «Secure Boot» feature, only whether or not to boot UEFI or Legacy, or both. The symptoms don’t change no matter which choice is selected for a Proxmox install, but it does work just fine when I install a clean Debian 7.7 from DVD1.
I used to like this laptop (it isn’t mine, it’s for someone else I’m trying to introduce to Proxmox), but the more I mess with it, the more I think I’d rather avoid owning one myself.
badji
Active Member
I can testify that at least on a Lenovo T420s Thinkpad, THIS didn’t work at all.
Installing Debian worked wonderfully, and as expected, but installing Proxmox VE 3.3 over it got me right back to the same problem of the laptop not recognizing the hard drive as being bootable, so it takes me to an endless boot device menu, which won’t work when the primary and only hard drive is chosen.
I’ve updated the bios to the latest version, but there has never been an option in this bios to turn off a «Secure Boot» feature, only whether or not to boot UEFI or Legacy, or both. The symptoms don’t change no matter which choice is selected for a Proxmox install, but it does work just fine when I install a clean Debian 7.7 from DVD1.
I used to like this laptop (it isn’t mine, it’s for someone else I’m trying to introduce to Proxmox), but the more I mess with it, the more I think I’d rather avoid owning one myself.
For me, I install debian, I reboot it and I install proxmove with this method:
If not, expect the new iso proxmoxve 3.3, which will be available in December that fixes this bug.
Merci.
Allen15
New Member
For me, I install debian, I reboot it and I install proxmove with this method:
If not, expect the new iso proxmoxve 3.3, which will be available in December that fixes this bug.
Merci.
Allen15
New Member
Well, that one didn’t quite work as written, but the updated version shows more promise!
Allen15
New Member
Does anyone know how & if it is even possible, to edit the /etc/apt/sources.list file to point to a CD or USB drive for the install when following the installation over a running Debian system?
I have limited internet access at relatives for the weekend, & the laptop that I need to install this on has a wireless adapter that isn’t directly supported by Proxmox or Debian without the iwifi firmware (which it doesn’t seem to like, or at least the copy that I put on a flash drive).
IIRC, I’ve been able to install Proxmox VE 3.3 on other systems with just a bootable CD or USB stick, and everything just worked, so I’m guessing that all of the needed sources are on the install media. That being the case, is there any way to point instead of to an internet repository, but to an optical drive or USB drive to continue the installation?
I’m comfortable using nano to edit the file, I just don’t know what to put there.
*Update: Although I’d still like to know how to add a local CDROM/DVD-ROM/USB drive as a local source, I was able to get a wire to this laptop, to bypass the iwlwifi firmware requirement that I didn’t figure out how to install from USB flash drive (yet), and I was able to install Proxmox using the instructions at http://pve.proxmox.com/wiki/Install_Proxmox_VE_on_Debian_Wheezy.
There are some caveats, though — one MUST insure that both the hostname is correct, AND that the hosts file correctly resolves that hostname to a valid IP address. The instructions mention about the hosts file, but the hostname was set during the Debian NetInstall, and one might not have remembered it or changed it from the default of «debian», which won’t work if you don’t keep that hostname during the proxmox installation too.
That set of instructions will get you a running copy of Proxmox VE 3.1 OK, and you will need to edit both your /etc/apt/sources.d/pve-enterprise.list to comment out that source (only if you don’t have a subscription) and also edit your /etc/apt/sources.list file to replace pve with pve-no-subscription, per this page: http://pve.proxmox.com/wiki/Package_repositories
Do an apt-get update && apt-get dist-upgrade to get to the latest version, and reboot, and VOILA! Log in at the web address on the screen from another system on the same network, and the version is up to date
It would still REALLY be nice to be able to do a direct install (that actually booted to the completed installation directly from the install media, like a CD or USB stick, though I don’t know if that part could possibly be worked around by just installing grub from a Debian 7.7 disc. I’d be far more inclined to buy a subscription if the downloadable media would actually work on the hardware that I have available to demo to the folks that sign the checks. (Like this Thinkpad T420s?)


