- Preference ��� mac os
- Change Security & Privacy General preferences on Mac
- Change Finder preferences on Mac
- General
- Sidebar
- Advanced
- Customise your Mac with System Preferences
- Explore system preferences
- Set options in a preference pane
- Find options in System Preferences
- Customise System Preferences
- What are Mac System Preferences, and How Do I Fix Them?
- Before we start
- How to Fix System Preferences on Mac OS X | The Easy Way
- How to Delete System Preference Files on Mac OS X | The Hard Way
Preference ��� mac os
Открыть окно System Preferences можно десятками способов. Большинство предпочитает выбрать это название в меню  или щелкнуть по пиктограмме в Dock, но можно также воспользоваться клавишами Option-громкость (одна из клавиш настройки звука в верхнем ряду клавиатуры) или Option-яркость. (Эти комбинации открывают панели Sound (Звук) и Displays (Мониторы) соответственно, но затем можно щелкнуть по кнопке Show All (Показать все) или нажать клавиши
  L и увидеть все настройки.)
Совет Если вы знаете название нужной панели, быстрее добраться до нее поможет Spotlight. Например, чтобы открыть панель Energy Saver, нажмите -пробел, напечатайте ener, а потом нажмите -Enter. Подробнее способы управления Spotlight с клавиатуры описаны в главе 3.
 | Рис. 9.1. Можно просматривать пиктограммы System Preferences (Системные настройки) в алфавитном порядке (вверху), а не рядами по категориям (внизу): выберите View (Вид) > Organize Alphabetically (Расположить по алфавиту). Этот подход не только экономит пространство, но и облегчает поиск определенной панели, т. к. вам не приходится думать, к какой категории она отнесена. |
Изначально ряды пиктограмм сгруппированы по функциям: Personal (Личные), Hardware (Аппаратное обеспечение) и т. д. (см. рис. 9.1, вверху). Но их можно просматривать и в алфавитном порядке, как показано на рис. 9.1 внизу. Это может избавить от утомительного поиска пиктограммы определенной панели, название которой вам известно. (А ну-ка, не подсматривая: в каком ряду находится пиктограмма Date & Time (Дата и время)?) В этой главе панели описаны в алфавитном порядке.
В любом случае, если щелкнуть по одной из этих пиктограмм, соответствующая панель появится в окне System Preferences (Системные настройки). Перейти к другому пульту можно одним из нескольких способов:
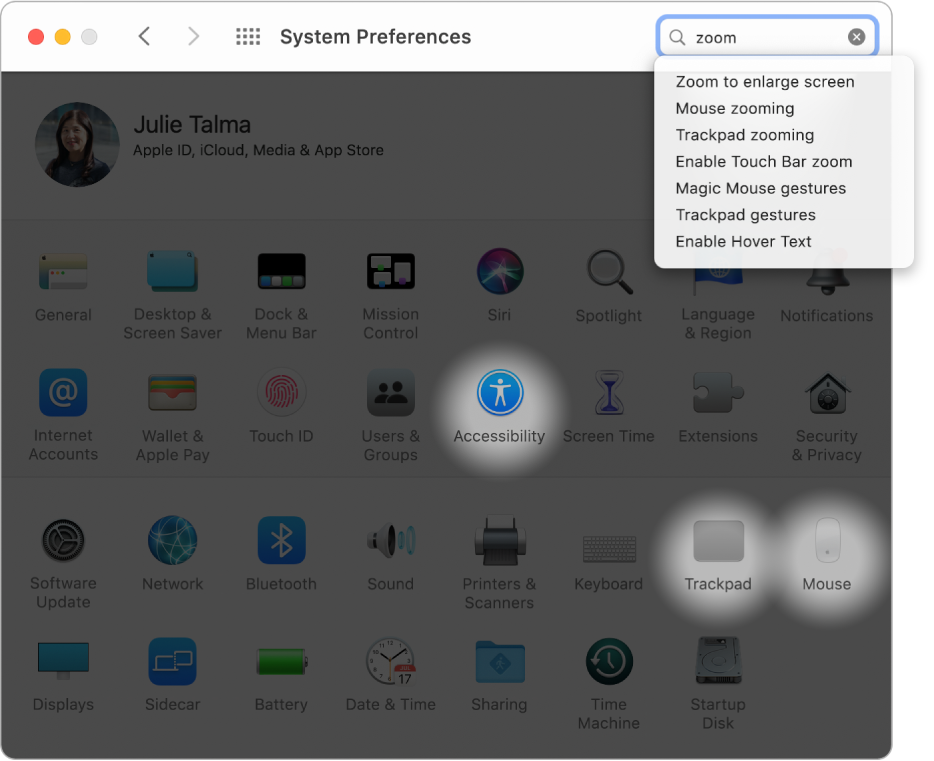
• Быстро: Сразу после открытия окна System Preferences точка ввода мерцает в поле поиска (если ее там нет, нажмите -F). Введите несколько начальных букв слова volume (уровень звука), resolution (разрешение), wallpaper (заставка), wireless (беспроводное соединение), т. е. функции, которую вы хотите настроить. Spot light покажет свою мощь: окно System Preferences потемнеет, за исключением тех пиктограмм, где есть подходящие элементы управления (рис. 9.2). Щелкните по пиктограмме, которая выглядит наиболее подходящей.
• Быстро: Щелкните по кнопке Show All (Показать все) в левом верхнем углу окна (или нажмите клавиши -L – сочетание, которое стоит запомнить). Затем щелк ните по пиктограмме требуемого пульта.
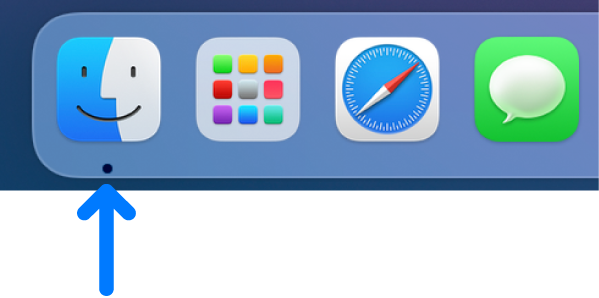
• Быстрее: Выберите имя любой панели в меню View (Вид) или, если окно System Preferences открыто, щелкните в нем по значку Dock.
• Самый быстрый способ: Выделите первую пиктограмму в окне System Preferences, нажав клавишу Tab. (Выделение очень слабое, но все же есть.) Затем начните вво дить первые буквы нужной пиктограммы – p для Print & Fax (Печать и Факс), di для Displays (Мониторы) и т. п. – и нажмите клавишу пробел, чтобы открыть этот пульт.
Источник
Change Security & Privacy General preferences on Mac
Use the General pane of Security & Privacy preferences to protect your Mac from malware and tampering.
To change these preferences on your Mac, choose Apple menu

> System Preferences, click Security & Privacy, then click General.
Note: If the lock at the bottom left of the pane is locked  , click it to unlock the preference pane.
Click to change the login password for the current user.
Require password. after sleep or screen saver begins
Use this setting to lock your Mac when it’s left in an idle state. When the Mac wakes, a user login password must be entered before the Mac can be used. You can select the amount of time after the screen saver or sleep begins before a password is required.
Show a message when the screen is locked
Select to display a short message in the login window when your Mac is locked. The message is shown to any users who attempt to log in. It can also be used to provide contact information for a lost Mac.
Disable automatic login
Select to require users to log in with a password after restarting the Mac. This feature isn’t available if FileVault is turned on.
Allow your Apple Watch to unlock apps and your Mac
Use your Apple Watch (instead of entering your password) to unlock apps when they require a password and unlock your Mac when you wake it from an idle state. See Unlock your Mac and approve requests with Apple Watch.
This option is available only if your Mac supports Auto Unlock.
Allow apps downloaded from
You can protect your Mac from malware by only allowing apps that come from the App Store or from identified developers.
App Store: Select to allow only apps that have been downloaded from the App Store.
App Store and identified developers: Select to allow apps only from the App Store, and from developers identified by Apple.
System software blocked
If you recently installed new software, it may attempt to load system extensions. Click Allow to load system extensions from the developer of the software.
Click to increase the security on your Mac by adjusting settings in Change Advanced preferences.
Источник
Change Finder preferences on Mac
On your Mac, use Finder preferences to set options for Finder windows, file extensions and the Bin. Learn how to organise your files in the Finder.
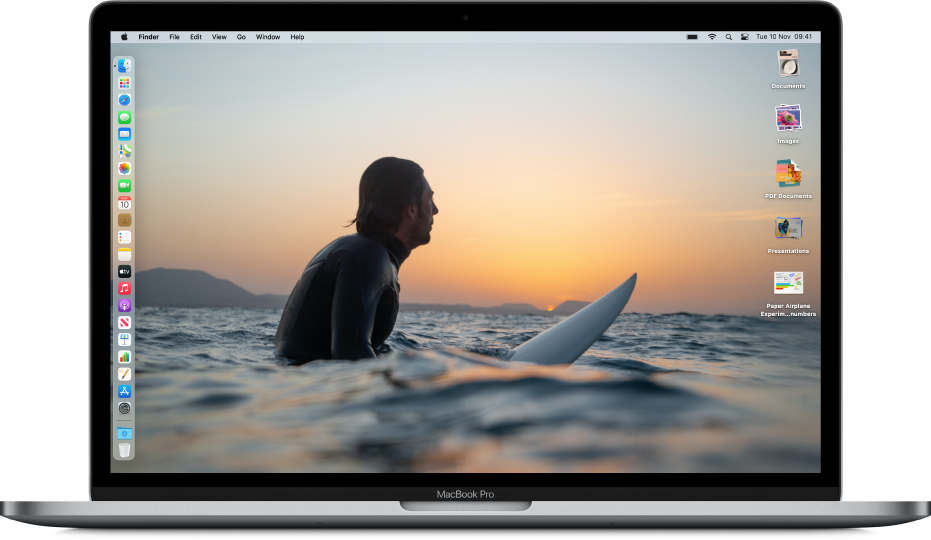
To change these preferences, click the Finder icon in the Dock, then choose Finder > Preferences.
General
Show these items on the desktop
Select any items you want to see on the desktop.
New Finder windows show
Choose which folder is displayed when you open a new Finder window.
Open folders in tabs instead of new windows
Select what happens when you press and hold the Command key and double-click a folder.
When selected: Folders open in tabs.
When deselected: Folders open in windows.
Show these tags in the sidebar
Customise the tags you see in the Finder sidebar.
See a tag in the sidebar: Select the tickbox to the right of the tag.
Change a tag colour: Click the colour next to the tag  , then choose a new colour.
Change a tag name: Click the tag, click the tag’s name, then enter a new name.
Create a new tag: Click the Add button  .
.
Delete a tag: Select the tag, then click the Remove button  .
.
Customise the tags you see in the shortcut menu that appears when you Control-click a file.
Add a tag: Select it in the list above the Favourite Tags section, then drag it over the tag you want to replace. You can have up to seven tags in the shortcut menu.
Remove a tag: Drag it out of the Favourite Tags section until you see the remove sign  .
.
Sidebar
Show these items in the sidebar
Select the items you want to see in the Finder sidebar.
These items also appear in Open and Save dialogues. See Customise the Finder toolbars.
Advanced
Show all filename extensions
A filename extension — a full stop followed by a few letters or words that you see at the end of some filenames (for example .jpg) — identifies the type of file. This option affects most, but not all, filenames.
When selected: All file extensions are shown, even for files that have “Hide extension” selected.
When deselected: File extensions are shown or hidden based on their individual “Hide extension” settings.
Show warning before changing an extension
Display a warning if you accidentally try to change an extension. As a rule, you shouldn’t change filename extensions.
Show warning before removing from iCloud Drive
Display a warning so you don’t accidentally delete items from iCloud Drive.
Show warning before emptying the Trash
Display a warning so you don’t accidentally delete items in the Trash. See Delete files and folders.
Remove items from the Trash after 30 days
Remove items permanently 30 days after being moved to the Trash.
Keep folders on top: In windows when sorting by name
In a Finder window, folders appear in alphabetical order first, and files appear alphabetically after folders when sorting by name. See Sort and arrange items in the Finder.
Keep folders on top: On Desktop
On the desktop, folders appear in alphabetical order first; files appear alphabetically after folders.
When performing a search
Choose what you want to search by default when you use the search field in Finder windows. You can search your entire Mac, the folder that’s currently open, or the scope you specified the last time you searched in a Finder window.
Источник
Customise your Mac with System Preferences
You can change system settings to customise your Mac. For example, you can change the size and location of the Dock, choose a light or dark appearance, change the desktop picture and more.
To change System Preferences on your Mac, click the System Preferences icon  in the Dock or choose Apple menu
Explore system preferences
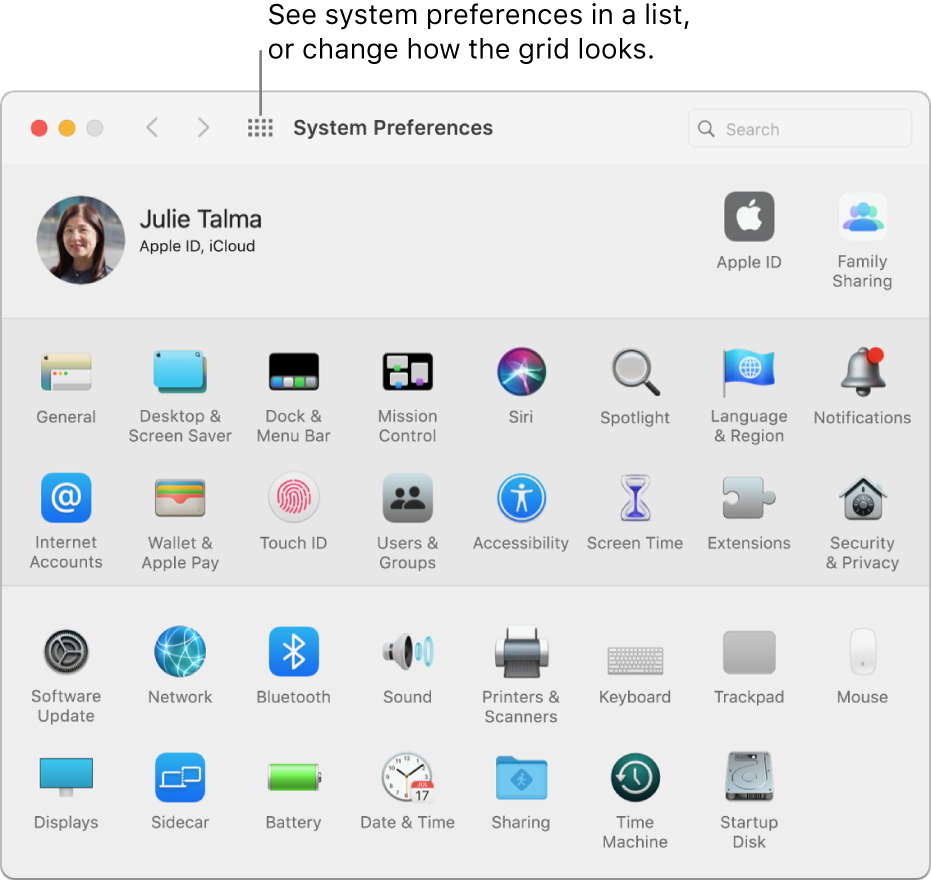
Options for your Mac are organised into preferences. For example, options you can set for Spotlight are located in Spotlight preferences.
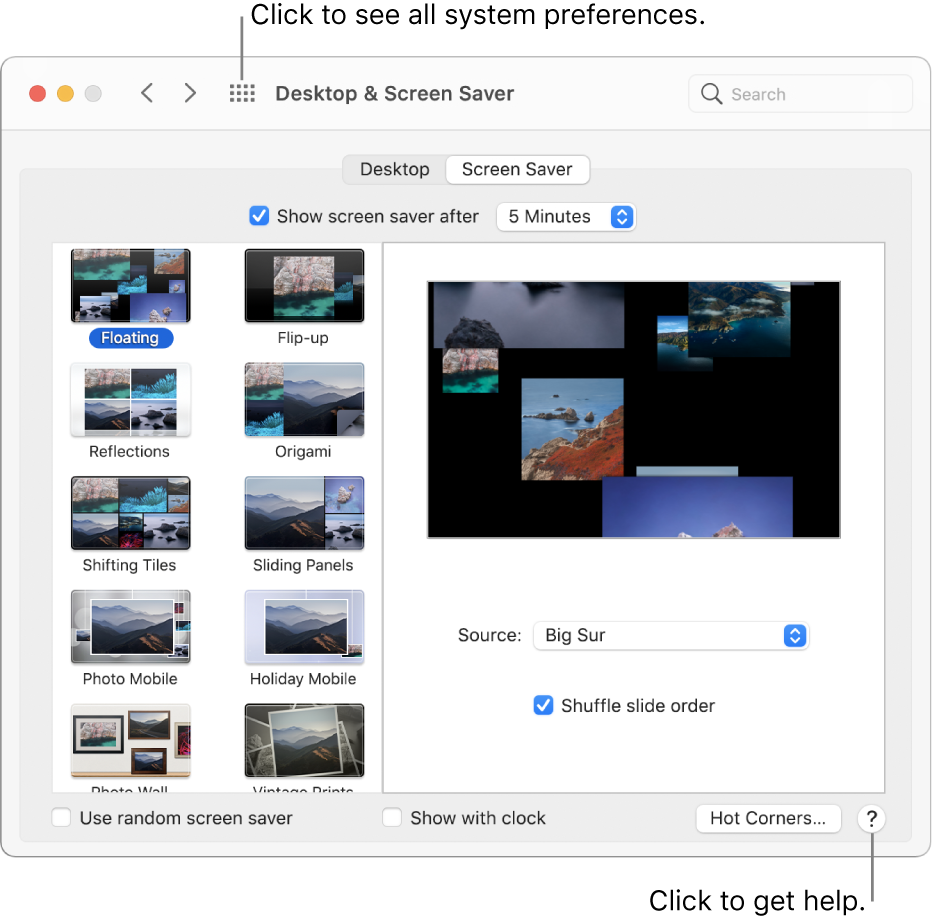
Preferences appear as a grid of icons; the icons shown may vary depending on your Mac and the apps you have installed. Click an icon to open a preference pane and see the options.
Set options in a preference pane
Each preference pane contains options you can set. Most panes include a Help button  to click for more information about the options.
Some preference panes are locked to protect your Mac. If the lock at the bottom left of a pane is locked , click it to unlock the preference pane.
Find options in System Preferences
If you don’t know where to find an option in System Preferences, use the search field at the top of the window. Options that match your search text are listed, and the preference panes where they’re located are highlighted.
Customise System Preferences
Hide a preference: Choose View > Customise, deselect the tick box of the preference, then click Done at the top of the window.
Show a hidden preference: Choose View > Customise, select the tick box of the hidden preference, then click Done at the top of the window.
Reorganise preferences: Choose View > Organise by Categories or Organise Alphabetically.
If you see a red badge on the System Preferences icon in the Dock, you need to take one or more actions. For example, if you didn’t fully set up iCloud, the badge appears on the icon in the Dock; when you click the icon, the preferences are displayed so you can complete setup.
To change options for an app such as Mail or Safari, open the app, click the app’s name in the menu bar, then choose Preferences. Some apps don’t offer preferences.
Источник
What are Mac System Preferences, and How Do I Fix Them?

Before we start
Having spent some years coding applications for macOS we’ve created a tool that everybody can use. The all-round problem fixer for Mac.

So here’s a tip for you: Download CleanMyMac to quickly solve some of the issues mentioned in this article. But to help you do it all by yourself, we’ve gathered our best ideas and solutions below.
Features described in this article refer to the MacPaw site version of CleanMyMac X.
What are system preference files on Mac OS X?
Your Mac’s system preference files are files that store the rules (or parameters) that tell your apps how they should work. And you can find these preference files within each applications’ contents.
And what about broken preferences?
Well, with time, these preference files can be corrupted (or broken) due to things like: an app crash, a sudden blackout, or even hard drive corruption.
Now, to fix them, we must delete them — Clean up these Mac preference files makes the app create a new, default preference file. This can help your app(s) operate correctly again. So, today, we’ll go over two ways on how to remove system preference files: the easy way (with a utility), and the hard way (manually).
How to Fix System Preferences on Mac OS X | The Easy Way
Deleting preference files (well, refreshing them) on your Mac is incredibly easy with a Mac utility like CleanMyMac X. It scans your Mac for preference files that are broken and removes them with just a click of a button. CleanMyMac X contains a few cleaning modules responsible for cleaning your Mac in the most efficient manner. The System Junk module looks through your system and application folders to find different kinds of unneeded files, including broken application and system preferences.
To fix preference files on your Mac with CleanMyMac X, just:
- Download CleanMyMac X (click here to download it).
- Launch CleanMyMac X and select System Junk on the left.
- Click Scan.
- And then click Clean.

In a few seconds, your Mac will be cleaned of unneeded system data, including broken preference files. If you’d only like to remove the broken preferences, before you click Clean, select «Review Details,» only checkmark the box that says «Broken Preferences,» and then click Clean. CleanMyMac X makes reseting system preference files on Mac incredibly simple. And it does a ton more, too. You can read more about it here.
However, if you’d prefer to remove Mac system preference files yourself, check out the section below.
How to Delete System Preference Files on Mac OS X | The Hard Way
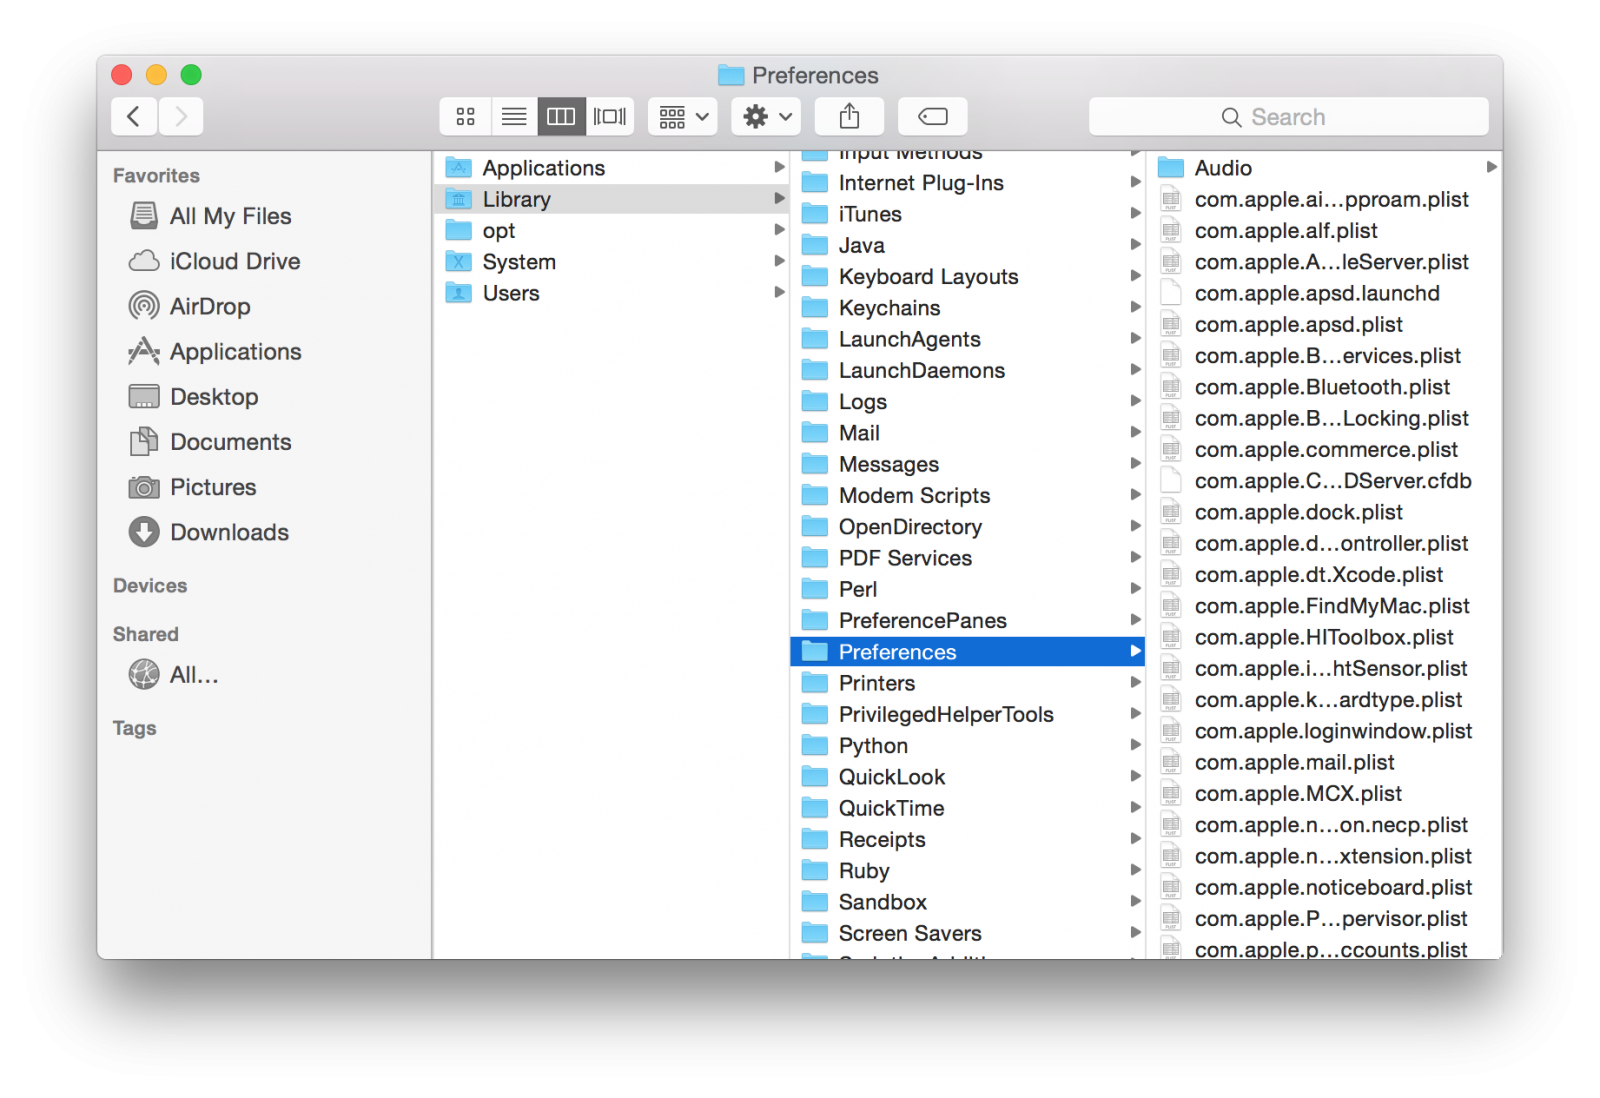
How to find system preferences on a Mac? All preference files are stored in [Your Home Folder]/Library/Preferences. Usually they named in this manner:
com.[name of the software vendor].[name of the application].plist
Now, if you have an application that works incorrectly, you can find the corresponding preference file in the above-mentioned folder and remove it from there. On the next launch of the application, it will recreate a default version of that file and then begin working properly. However, if this doesn’t happen, that it may be a good decision to put the broken preference file back — They can be a bit temperamental. It’s highly advised that you make a copy of the preference file before you delete it, just in case something goes wrong.
So, to remove unnecessary system preferences (or preference files that are bugging your your application), check the:
/Library/Preferences
…system folder. To do this, open a Finder window, press Cmd+Shift+G and type the above in. However, be aware that items stored in that location could be incredibly important to your system and how it functions, so you should be 100% sure about the files you’re going to delete.
But again, we’d recommend looking into CleanMyMac X — it makes fixing and removing broken preference files on your Mac easy as can be.
We hope this article has helped you understand what Mac system preferences are, and how to delete system preference files on Mac.
Источник


