- Configure security policy settings
- To configure a setting using the Local Security Policy console
- To configure a security policy setting using the Local Group Policy Editor console
- To configure a setting for a domain controller
- Fake Windows 10 Desktop Used in New Police Browser Lock Scam
- Overlaying a full-screen Windows 10 Desktop image
- This tactic makes the scam more convincing
- Remove Windows Police Pro (Removal Guide)
- What is Windows Police Pro?
- Windows Police Pro Removal Options
- Self Help Guide
- This is a self-help guide. Use at your own risk.
Configure security policy settings
Applies to
Describes steps to configure a security policy setting on the local device, on a domain-joined device, and on a domain controller.
You must have Administrators rights on the local device, or you must have the appropriate permissions to update a Group Policy Object (GPO) on the domain controller to perform these procedures.
When a local setting is inaccessible, it indicates that a GPO currently controls that setting.
To configure a setting using the Local Security Policy console
To open Local Security Policy, on the Start screen, type secpol.msc, and then press ENTER.
Under Security Settings of the console tree, do one of the following:
- Click Account Policies to edit the Password Policy or Account Lockout Policy.
- Click Local Policies to edit an Audit Policy, a User Rights Assignment, or Security Options.
When you find the policy setting in the details pane, double-click the security policy that you want to modify.
Modify the security policy setting, and then click OK.
- Some security policy settings require that the device be restarted before the setting takes effect.
- Any change to the user rights assignment for an account becomes effective the next time the owner of the account logs on.
To configure a security policy setting using the Local Group Policy Editor console
You must have the appropriate permissions to install and use the Microsoft Management Console (MMC), and to update a Group Policy Object (GPO) on the domain controller to perform these procedures.
Open the Local Group Policy Editor (gpedit.msc).
In the console tree, click Computer Configuration, click Windows Settings, and then click Security Settings.
Do one of the following:
- Click Account Policies to edit the Password Policy or Account Lockout Policy.
- Click Local Policies to edit an Audit Policy, a User Rights Assignment, or Security Options.
In the details pane, double-click the security policy setting that you want to modify.
В If this security policy has not yet been defined, select the Define these policy settings check box.
Modify the security policy setting, and then click OK.
If you want to configure security settings for many devices on your network, you can use the Group Policy Management Console.
To configure a setting for a domain controller
The following procedure describes how to configure a security policy setting for only a domain controller (from the domain controller).
To open the domain controller security policy, in the console tree, locate GroupPolicyObject [ComputerName] Policy, click Computer Configuration, click Windows Settings, and then click Security Settings.
Do one of the following:
- Double-click Account Policies to edit the Password Policy, Account Lockout Policy, or Kerberos Policy.
- Click Local Policies to edit the Audit Policy, a User Rights Assignment, or Security Options.
In the details pane, double-click the security policy that you want to modify.
В If this security policy has not yet been defined, select the Define these policy settings check box.
Modify the security policy setting, and then click OK.
- Always test a newly created policy in a test organizational unit before you apply it to your network.
- When you change a security setting through a GPO and click OK, that setting will take effect the next time you refresh the settings.
Fake Windows 10 Desktop Used in New Police Browser Lock Scam
Lawrence Abrams
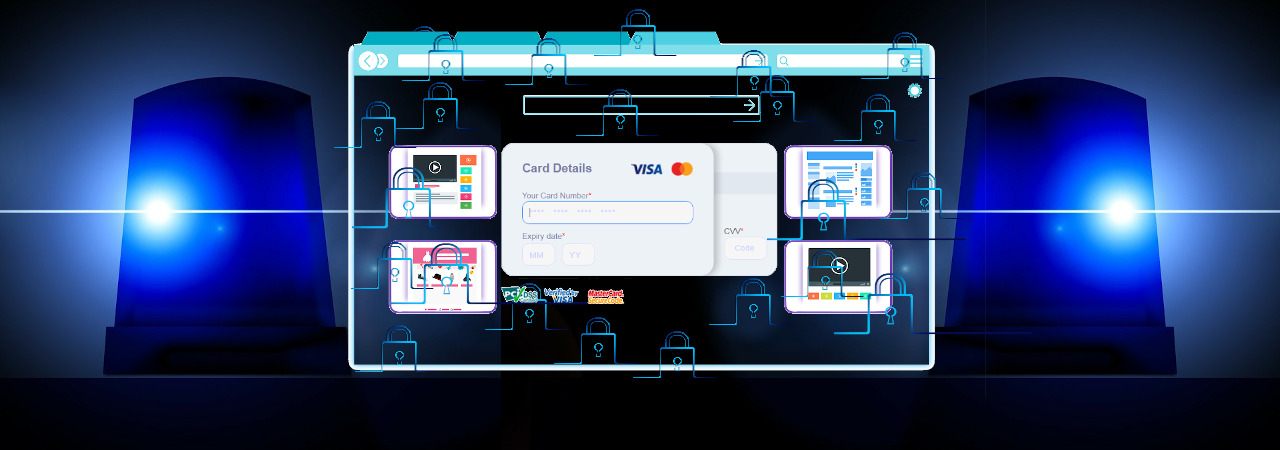
Scammers have taken an old browser scam and invigorated it using a clever and new tactic that takes advantage of your web browser’s full-screen mode to show a fake Windows 10 desktop stating your computer is locked.
This type of scam is called a police browser locker. which pretends to be law enforcement locking your browser because due to illegal activity. These scams then state that if you pay a fine via a credit card, it will unlock your computer so you can use it again.
These types of scams are normally easy to detect as they utilize fake and suspicious URLs and allow you to use other apps on your computer even if the browser is locked.
Overlaying a full-screen Windows 10 Desktop image
To make it harder for users to identify these types of scams, attackers are tricking web users into visiting fake sites that display a full-screen image of a Windows 10 desktop with the Chrome browser open.
These fake Windows 10 desktop images will fill up the entire screen and pretend to display the web site for the country’s local police force. As the attackers are just displaying an image, they can also display the legitimate government URL to make it more convincing.
These fake web sites state that the police locked the user’s computer for conducting illegal activities such as viewing and disseminating pornographic images of children, zoophilia, and rape. Victims are then prompted to enter their credit card details to pay a fine of approximately $800.
When displaying these screens, the scam will show different law enforcement web sites and languages depending on the URL visited or possibly what country you’re from.
Malwarebytes who first posted about this new technique saw this scam targeting web users from Qatar, UAE, Oman, Kuwait, and France.
For example, below is some of the text shown in the UAE variant of this scam.
«Your browser has been locked due to viewing and dissemination of materials forbidden by law of [country], namely pornography with pedophilia, rape and zoophilia.
In order to unlocking you should a [amount] [currency] fine with Visa or MasterCard.
Your browser will be unlocked automatically after the fine payment.
Attention! In case of non-payment of the fine, or your attempts to unlock the device independently, case materials will be transferred to [police_force_name] for the institution of criminal proceedings against you due to commitment a crime.»
If you enter your credit card details into this form, the attackers will automatically steal the payment information, which will then be sold online at underground criminal forums or used by the attackers for fraudulent purchases.
This tactic makes the scam more convincing
What makes this new variant of the police browser locker so clever is that when the image is shown by the browser in full-screen mode it overlays the entire screen, including the normal Windows 10 desktop.
This could cause users to think that the fake Windows 10 desktop image is their normal desktop. The difference, though, is that clicking on the Start Menu, closing apps, or starting new ones will not work.
What will be usable is an overlaid credit card form, which could make some users think that law enforcement has locked their computer until a fine is paid.
It is important to know that law enforcement will never lock your browser like this and then demand a fine be paid online.
If you ever see a message on your screen like this, press Alt+Tab to see if you can get back to your normal desktop or press Ctrl+Alt+Delete to open the Task Manager and terminate any browser processes.
Remove Windows Police Pro (Removal Guide)
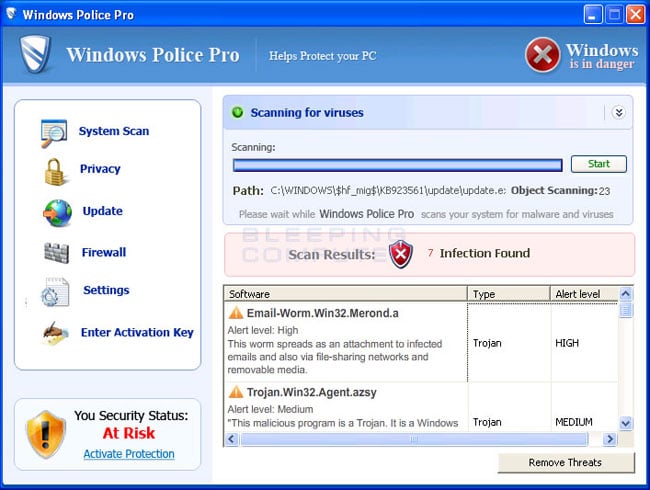
What is Windows Police Pro?
Windows Police Pro is a rogue anti-spyware and ransomware program from the same family as Windows Antivirus Pro. Like its predecessor, Windows Police Pro will be configured to scan your computer every time that you login to Windows. When the scan has finished it will state that your computer is infected with a variety of infections and will not remove these infections until you purchase the program. The infections it states reside on your computer, though, do not actually exist and you are just being shown false information to scare you into thinking you are infected.
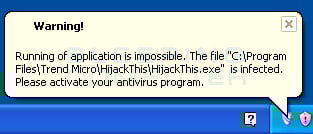
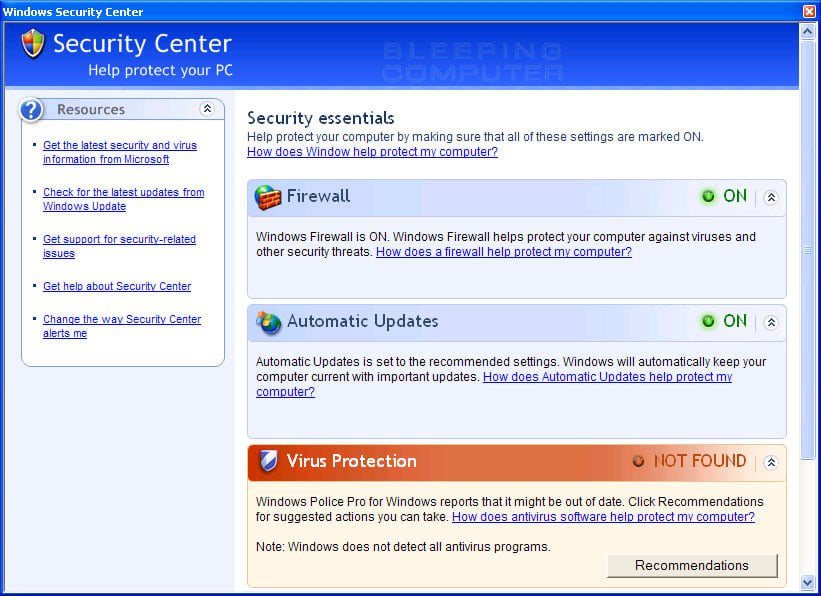
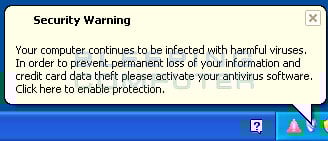

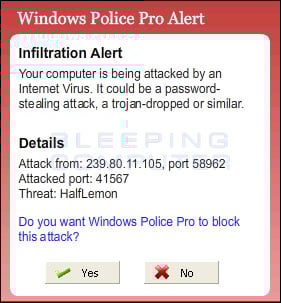
This program also acts as ransomware as it will make it so that you cannot run numerous security programs on your computer. When you attempt to run one of these programs it will state that the program is infected and that Windows Police Pro has blocked you from using it. It will then prompt you to purchase the program to clean the infected program. Last, but not least, Windows Police Pro will display fake security alerts and a fake Windows Security Center that state your computer is under attack and that you should purchase Windows Police to protect yourself. Like the fake scan results, these tactics are just being performed to persuade you to buy the program.
If you find that Windows Police Pro is on your computer, then please do not purchase it. Instead, you should use the removal guide below to remove this program and any associated malware for free.
Windows Police Pro Removal Options
Self Help Guide
This guide contains advanced information, but has been written in such a way so that anyone can follow it. Please ensure your data is backed up before proceeding.
If you are uncomfortable making changes to your computer or following these steps, do not worry! Instead you can get free one-on-one help by asking in the forums.
- Print out these instructions as we may need to close every window that is open later in the fix.
Before we can do anything we must first end the Windows Police Pro process so that it does not interfere with the cleaning process. To do this, please download RKill to your desktop from the following link.
Rkill Download Link — (Download page will open in a new tab or browser window.)
When at the download page, click on the Download Now button labeled iExplore.exe download link. When you are prompted where to save it, please save it on your desktop.
Once it is downloaded, double-click on the iExplore.exe icon in order to automatically attempt to stop any processes associated with Windows Police Pro and other Rogue programs. Please be patient while the programs looks for various programs and closes them. When it has finished, the black window will automatically close. Do not reboot your computer at this point, or the infections will start again.
Now we need to end the two processes associated with Windows Police Pro as they do not allow you to run any applications that we will need to remove this program. To do this we need to launch the Windows Task Manager by right-clicking on the time in the Windows task bar and then selecting Task Manager. The menu showing the Task Manager option is shown below.
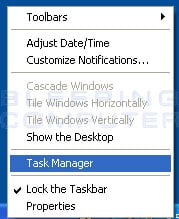
When Task Manager is started you will be in the Applications section as shown below.
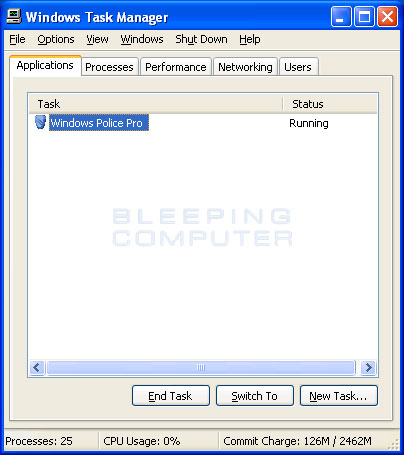
At this point you should click on the Processes tab.
You will now be at a screen that shows the running processes on your computer. First put a checkmark in the checkbox labeled Show processes from all users as shown in the image below.
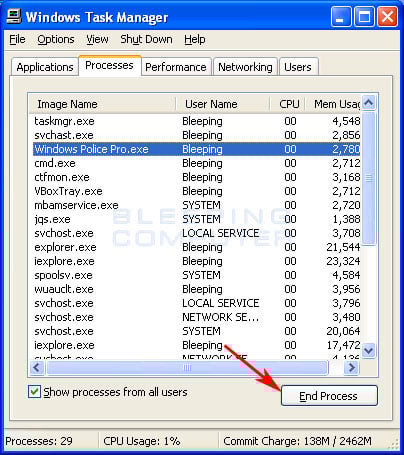
Then scroll through the list till you see the process called Windows Police Pro.exe and left-click on it once so it becomes highlighted. Then click on the End Process button as shown by the red arrow in the picture above. If the processes do not exist, then please proceed to step 8.
When you click on the End Process button, Task Manager will ask you to confirm if you are sure you want to terminate it as shown in the image below.
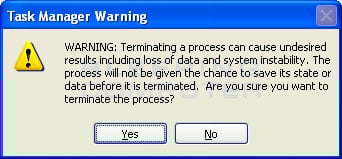
At this point you should press the Yes button in order to kill the process.
After you have ended the Windows Police Pro.exe process, scroll through the list of processes until you find the svchast.exe, svchasts.exe, or svohost.exe processes. Then end this process as well by clicking on the End Process button and confirming that you want to end it. Please note that in Windows there is a legitimate program called svchost.exe, so please be careful to only end the process with the spellings svchast.exe, svchasts.exe, or svohost.exe. If these processes do not exist, please continue to step 9.
Now you should download Malwarebytes Anti-Malware, or MBAM, from the following location and save it to your desktop:
Malwarebytes Anti-Malware Download Link (Download page will open in a new window)
Once downloaded, close all programs and Windows on your computer, including this one.
Double-click on the icon on your desktop named mb3-setup-1878.1878-3.0.6.1469.exe. This will start the installation of MBAM onto your computer.
When the installation begins, keep following the prompts in order to continue with the installation process. Do not make any changes to default settings and when the program has finished installing, make sure you leave both the Update Malwarebytes Anti-Malware and Launch Malwarebytes Anti-Malware checked. Then click on the Finish button. If MalwareBytes’ prompts you to reboot, please do not do so.
MBAM will now automatically start and you will see a message stating that you should update the program before performing a scan. As MBAM will automatically update itself after the install, you can press the OK button to close that box and you will now be at the main program as shown below.
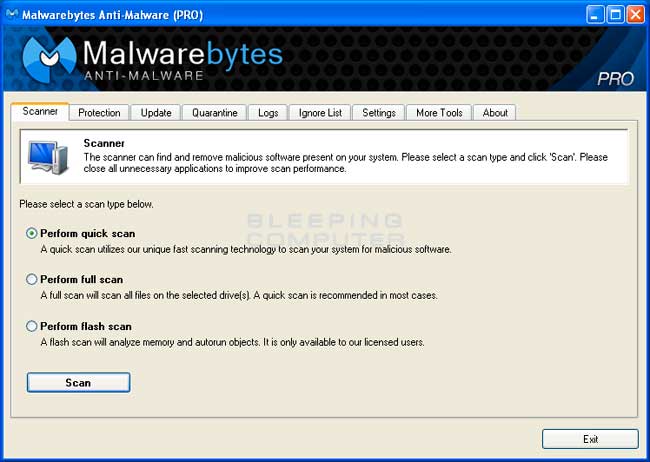
On the Scanner tab, make sure the the Perform quick scan option is selected and then click on the Scan button to start scanning your computer for Windows Police Pro related files.
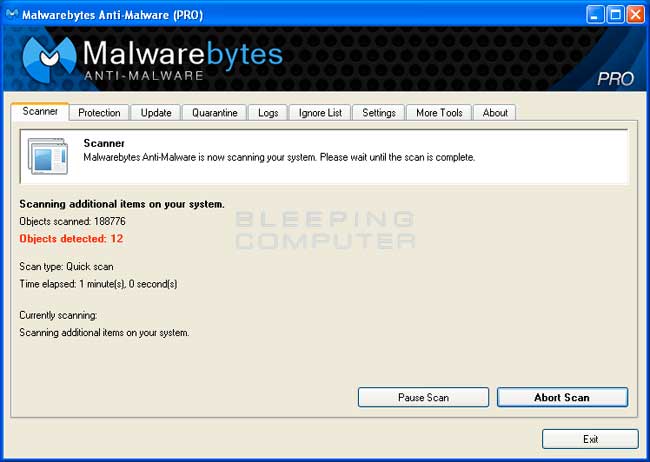
MBAM will now start scanning your computer for malware. This process can take quite a while, so we suggest you go and do something else and periodically check on the status of the scan. When MBAM is scanning it will look like the image below.
When the scan is finished a message box will appear as shown in the image below.
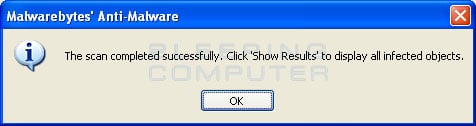
You should click on the OK button to close the message box and continue with the Windows Police Pro removal process.
You will now be back at the main Scanner screen. At this point you should click on the Show Results button.
A screen displaying all the malware that the program found will be shown as seen in the image below. Please note that the infections found may be different than what is shown in the image.
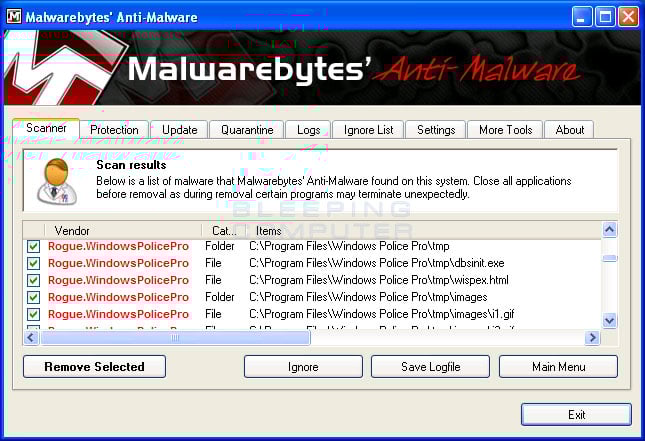
You should now click on the Remove Selected button to remove all the listed malware. MBAM will now delete all of the files and registry keys and add them to the programs quarantine. When removing the files, MBAM may require a reboot in order to remove some of them. If it displays a message stating that it needs to reboot, please allow it to do so. Once your computer has rebooted, and you are logged in, please continue with the rest of the steps.
When MBAM has finished removing the malware, it will open the scan log and display it in Notepad. Review the log as desired, and then close the Notepad window.
Your computer should now be free of the Windows Police Pro program. If your current anti-virus solution let this infection through, you may want to consider purchasing the PRO version of Malwarebytes Anti-Malware to protect against these types of threats in the future.
c:\Program Files\Windows Police Pro\ANTI_files.exe c:\Program Files\Windows Police Pro\msvcm80.dll c:\Program Files\Windows Police Pro\svcm80.dll c:\Program Files\Windows Police Pro\msvcp80.dll c:\Program Files\Windows Police Pro\msvcr80.dll c:\Program Files\Windows Police Pro\windows Police Pro.exe c:\Program Files\Windows Police Pro\tmp\ c:\Program Files\Windows Police Pro\tmp\dbsinit.exe c:\Program Files\Windows Police Pro\tmp\wispex.html c:\Program Files\Windows Police Pro\tmp\images\ c:\Program Files\Windows Police Pro\tmp\images\i1.gif c:\Program Files\Windows Police Pro\tmp\images\i2.gif c:\Program Files\Windows Police Pro\tmp\images\i3.gif c:\Program Files\Windows Police Pro\tmp\images\j1.gif c:\Program Files\Windows Police Pro\tmp\images\j2.gif c:\Program Files\Windows Police Pro\tmp\images\j3.gif c:\Program Files\Windows Police Pro\tmp\images\jj1.gif c:\Program Files\Windows Police Pro\tmp\images\jj2.gif c:\Program Files\Windows Police Pro\tmp\images\jj3.gif c:\Program Files\Windows Police Pro\tmp\images\l1.gif c:\Program Files\Windows Police Pro\tmp\images\l2.gif c:\Program Files\Windows Police Pro\tmp\images\l3.gif c:\Program Files\Windows Police Pro\tmp\images\pix.gif c:\Program Files\Windows Police Pro\tmp\images\t1.gif c:\Program Files\Windows Police Pro\tmp\images\t2.gif c:\Program Files\Windows Police Pro\tmp\images\up1.gif c:\Program Files\Windows Police Pro\tmp\images\up2.gif c:\Program Files\Windows Police Pro\tmp\images\w11.gif c:\Program Files\Windows Police Pro\tmp\images\w2.gif c:\Program Files\Windows Police Pro\tmp\images\w3.gif c:\Program Files\Windows Police Pro\tmp\images\w3.jpg c:\Program Files\Windows Police Pro\tmp\images\wt1.gif c:\Program Files\Windows Police Pro\tmp\images\wt2.gif c:\Program Files\Windows Police Pro\tmp\images\wt3.gif C:\Windows\svchast.exe C:\Windows\svchasts.exe C:\Windows\svohost.exe c:\WINDOWS\wf3.dat c:\WINDOWS\wf4.dat c:\WINDOWS\system32\minix32.exe C:\WINDOWS\system32\dddesot.dll c:\WINDOWS\system32\nuar.old c:\WINDOWS\system32\plugie.dll c:\WINDOWS\system32\pump.exe c:\WINDOWS\system32\skynet.dat
HKEY_CURRENT_USER\Software\Softimer HKEY_CURRENT_USER\Software\Windows Police Pro HKEY_CLASSES_ROOT\CLSID\ <425882b0-b0bf-11ce-b59f-00aa006cb37d>HKEY_CLASSES_ROOT\CLSID\ <77dc0b63-1535-4ba9-8be8-d59eb676fa02>HKEY_LOCAL_MACHINE\SOFTWARE\Microsoft\Windows\CurrentVersion\Explorer\Browser Helper Objects\ <77dc0b63-1535-4ba9-8be8-d59eb676fa02>HKEY_LOCAL_MACHINE\SYSTEM\CurrentControlSet\Enum\Root\LEGACY_ANTIPOL HKEY_LOCAL_MACHINE\SYSTEM\CurrentControlSet\Services\AntiPol HKEY_LOCAL_MACHINE\SYSTEM\CurrentControlSet\Services\WDefend HKEY_LOCAL_MACHINE\SYSTEM\CurrentControlSet\Services\AntipPro2009_100 HKEY_CURRENT_USER\Software\Microsoft\Windows\CurrentVersion\Run «minix32» HKEY_CURRENT_USER\Software\Microsoft\Windows\CurrentVersion\Run «inixs»
This is a self-help guide. Use at your own risk.
BleepingComputer.com can not be held responsible for problems that may occur by using this information. If you would like help with any of these fixes, you can ask for malware removal assistance in our Virus,Trojan,Spyware, and Malware Removal Logs forum.
If you have any questions about this self-help guide then please post those questions in our Am I infected? What do I do? and someone will help you.


