- Palo Alto GlobalProtect VPN Client Installation (Debian/Ubuntu Linux)
- Action
- Instructions
- Verify compatibility
- Debian & Non-Official Ubuntu Derivative Users
- Install GlobalProtect on Linux (Debian/Ubuntu)
- Connect to GlobalProtect on Linux (Debian/Ubuntu)
- Disconnect from GlobalProtect on Linux (Debian/Ubuntu)
- Example Screenshots
- How to connect to a GlobalProtect VPN
- Option #1: OpenConnect client
- Installation
- Connection
- Option #2: GlobalProtect official client
- Connecting to a Palo Alto Network GlobalProtect Gateway from Linux
- Installing GlobalProtect VPN – Mac/Linux
- Mac GlobalProtect Client Install
- MFA GlobalProtect VPN Login Steps
- Mac Uninstall
- Linux Install
- Linux Operation
- Linux Uninstall
- Troubleshooting
Palo Alto GlobalProtect VPN Client Installation (Debian/Ubuntu Linux)
Action
To connect to UAlbany’s VPN service using a Debian or Ubuntu Linux device, follow the steps below.
Instructions
Verify compatibility
At this time, only official flavors of Ubuntu (listed via https://ubuntu.com/download/flavours) are officially supported out of the box. To verify, please make sure of the following:
- You have a file /etc/lsb-release available on your system
Within that file, there is a line DISTRIB_DESCRIPTION that contains «Ubuntu» in it. For example: DISTRIB_DESCRIPTION=»Ubuntu 19.04″
Debian & Non-Official Ubuntu Derivative Users
If you’re running a derivative of Debian/Ubuntu and either do not have an /etc/lsb-release file, or the contents of that file do not contain «Ubuntu» in the DISTRIB_DESCRIPTION section, you may receive a certificate error. While not officially supported, the GlobalProtect client can be made to work by creating/modifying /etc/lsb-release with DISTRIB_DESCRIPTION=»Ubuntu»
Install GlobalProtect on Linux (Debian/Ubuntu)
- The official Linux client is distributed differently than the Windows/Mac clients.
You can access the latest client by following this link (authentication required): GlobalProtect Linux - Download the latest .tgz file to a location on your Ubuntu machine (as of this writing, PanGPLinux-5.3.0-c32.tgz)
Launch a Terminal application and navigate to the directory in which you saved the .tgz file.
Run the following command to extract the file:
Run the following command to install the client, entering your workstation’s user password if prompted:
Connect to GlobalProtect on Linux (Debian/Ubuntu)
Run the following command to connect to GlobalProtect:
Enter your UAlbany NetID and password when prompted.
After entering your UAlbany NetID and password, you will receive an automatic push or phone callback (depending on your default Duo settings). Refer to your device and authorize the Duo prompt.
Optionally, you may add a comma («,») to the end of your password and append a Duo 2-step method option:
| 2-Step Method | Instructions |
|---|---|
| push | Perform a Duo push authentication to your Duo Mobile app on your mobile device |
| phone | Perform phone callback authentication |
| sms | Send an SMS passcode. The initial authentication will fail (see next row) |
| A numeric passcode | Log in using an SMS passcode previously sent by Duo (see above row), generated by the Duo Mobile app, or generated via a hardware token. Examples: «123456» or «2345678» |
For example, if you wanted to use an SMS passcode to authenticate (instead of Duo Push or a phone call, you would enter:
| username: yournetid password: yourpassword,sms |
(this authentication step would fail, but you would receive an SMS message from Duo. You’d then repeat the operation, entering the passcode (example with 123456 sent by duo)
| username: yournetid password: yourpassword,123456 |
Disconnect from GlobalProtect on Linux (Debian/Ubuntu)
Run the following command to connect to GlobalProtect:
Example Screenshots
- Installation


These instructions have been tested on Xubuntu 19.04
Need more help? Contact the ITS Service Desk.
Источник
How to connect to a GlobalProtect VPN
Have you seen the ad that should be here?

GlobalProtect is the name of the virtual private network (VPN) provided by the Palo Alto Networks firewalls. Are you going to work remotely for a company that requires you to use this VPN? Here’s how to install the necessary software and connect on openSUSE Leap and Tumbleweed and also on Linux Kamarada (a novel Linux distro based on openSUSE Leap).
VPNs are used by organizations (such as companies and universities) to allow people (employees and students) to remotely connect to their networks. A VPN provides an encrypted connection (a tunnel) between your home computer and the organization network. If you want to know more about VPNs, read the beginning of this post:
On that occasion, we talked about OpenVPN, another VPN technology.
Today, we are going to talk about GlobalProtect.
Linux users have two options for connecting to GlobalProtect VPNs:
- the OpenConnect client, which is a free software, thus provided by the Linux distributions themselves; or
- the official (proprietary) GlobalProtect client, provided by Palo Alto Networks.
I advance that I was not able to make the official client work on openSUSE. So, I mention it here just to let you know that it exists.
Option #1: OpenConnect client
OpenConnect is a VPN client initially created to support Cisco’s AnyConnect VPN. It has since been ported to support the Pulse Connect Secure VPN and the PAN GlobalProtect VPN. Support for the latter came with version 8.00, released on January 4, 2019.
Installation
openSUSE Tumbleweed, the rolling release version of openSUSE, has OpenConnect version 8.05 available on its official repositories. If you use this distribution, to install OpenConnect, you just need to run:
openSUSE Leap 15.1, the (traditional) regular release version of openSUSE, offers OpenConnect version 7.08 on its official repositories.
That is the same version that comes installed out-of-the-box on Linux Kamarada 15.1.
If you are an user of either of these distros, you need to update OpenConnect to version 8.05, which can be retrieved from the network repository. To do this, first add the network repo:
Then, install the OpenConnect package (explicitly stating that you want to download it from the network repo):
Up-to-date OpenConnect installed, everyone on the same page, let’s see how to use it.
Connection
To connect to a GlobalProtect VPN, have the following information ready:
- GlobalProtect server, you need either its IP address or its full qualified domain name (FQDN);
- user name (login); and
- user password.
If you don’t know them, ask your organization’s network administrator or IT staff.
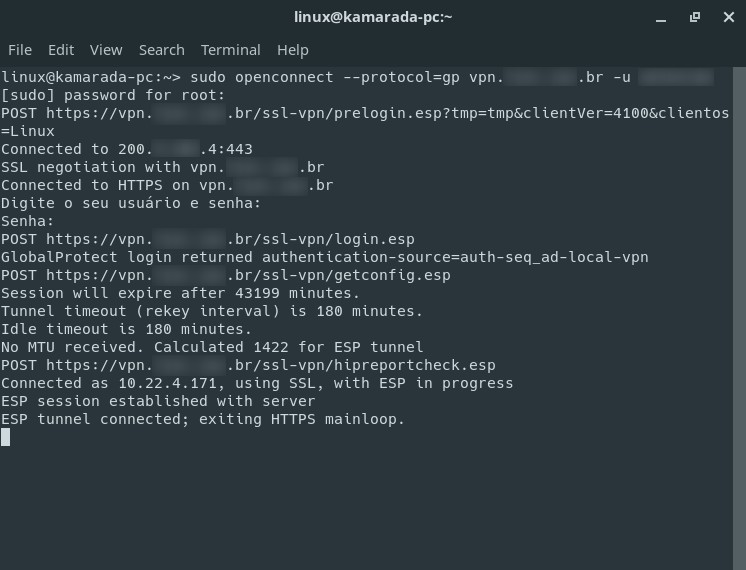
Open a terminal window (reserve a terminal window just for connecting) and run the following command, making the appropriate replacements:
Type the administrator (root user) password and hit Enter:
Then, when prompted, enter your user password to access the VPN:
Connection is established and the IP address you obtained from the VPN is informed:
In this example, 10.22.4.171 .
The OpenConnect command does not end immediately. Instead, it runs indefinitely. You remain connected to the VPN as long as you keep that program running (that’s why I advised to reserve a terminal window just for it).
During this time, you can access the organization’s internal systems from your home computer as if you were there (phisically speaking).
When you no longer need the VPN and want to disconnect, press Ctrl + C to stop OpenConnect (and close the connection):
Option #2: GlobalProtect official client
Palo Alto Networks provides a GlobalProtect app for Linux in two versions: a command line interface (CLI) version and a graphical user interface (GUI) version. Ideally, the package or installer should be provided to you by the organization’s network administrator or IT staff.
Unfortunately, there are organizations that do not support Linux. Searching the Internet, I found a link to download the GlobalProtect app on this page of the Kansas State University:
Also unfortunately, I was unable to make it work on Linux Kamarada 15.1, neither the CLI version, nor the GUI version. The GlobalProtect compatibility matrix shows that the Linux distributions officially supported by Palo Alto Networks are CentOS, Red Hat Enterprise Linux (RHEL) and Ubuntu. openSUSE distributions are not officially supported.
Источник
Connecting to a Palo Alto Network GlobalProtect Gateway from Linux

Please note: this software has only been officially tested on Ubuntu and CentOS distributions. The VPN software uses community based vpnc software, please direct support questions about the actual client to your distribution’s support channels.
The following documentation is based on Ubuntu 12.04 LTS
– Install the following packages on your system:
* network-manager-vpnc
* network-manager-vpnc-gnome
* vpnc
The above mentioned packages are all available via synaptic package manager:
– Right click on the network manager icon on the top right corner of the screen and select the “Networks Settings” option
– Click the + icon to add a new connection.
– Select the VPN interface type and click on create

– Choose the cisco compatible vpn option
– Enter the following details:
An appropriate connection name
Gateway: public IP of the GlobalProtect Portal
User: username
Password: password
For the following two settings, you need to enable IPSec and XAUTH on the Palo Alto Gateway settings for this to be enabled, as can be seen below (Network > GlobalProtect > Gateways)

Group Name: group name
Group Password: password
The VPN will now be available as an option when clicking on the network manager icon. Once the option is selected, the network manager icon will turn into a padlock, indicating a successful connection
Known Issues and troubleshooting tips
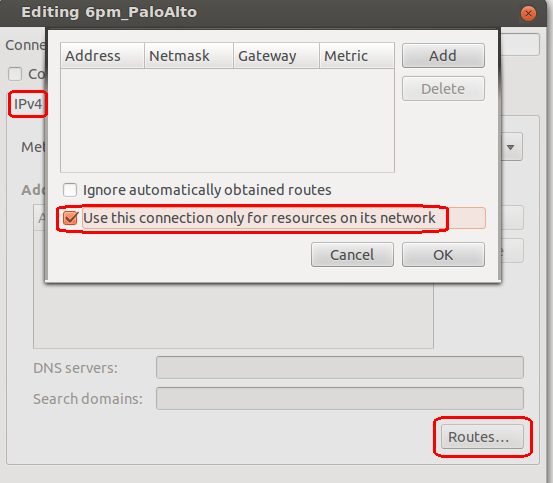
- By default the VPN client tunnels all traffic through the firewall. This is not under the firewall administrator’s control, and is purely a client issue. We have allowed internet browsing through the VPN tunnel, but you may notice a marked increase in your browsing latency. The client does allow you to “split-tunnel” and send only the required routes through the tunnel. This can be done by editing the properties of the VPN connection, browsing to the IPv4 tab and selecting the routes button. Make sure to select the option Use this connection only for resources on it’s network. You may also need to enter the routes manually in the table.
- You may notice periodic disconnects or loss of connectivity. This seems to be due to a bug in current VPNC versions that have issues with rekeying. Research on google should turn up some suggestions
- Generally all errors and debug messages are logged to /var/log/syslog. Check this location if you run into problems.
Источник
Installing GlobalProtect VPN – Mac/Linux
Starting in September, ITS will be adding Multi-factor Authentication (MFA) to its general VPN portals. This will change the way that users log in to the VPN. Here is what to expect when the change occurs.
Mac GlobalProtect Client Install
On the Mac, The latest client is available from the VPN portal. Use https with a web browser to connect to https://vpn.wsu.edu.
- Login with WSU AD credentials
- No need for additional prefixes or suffixes
- Example: john.smith@wsu.edu will only need username john.smith
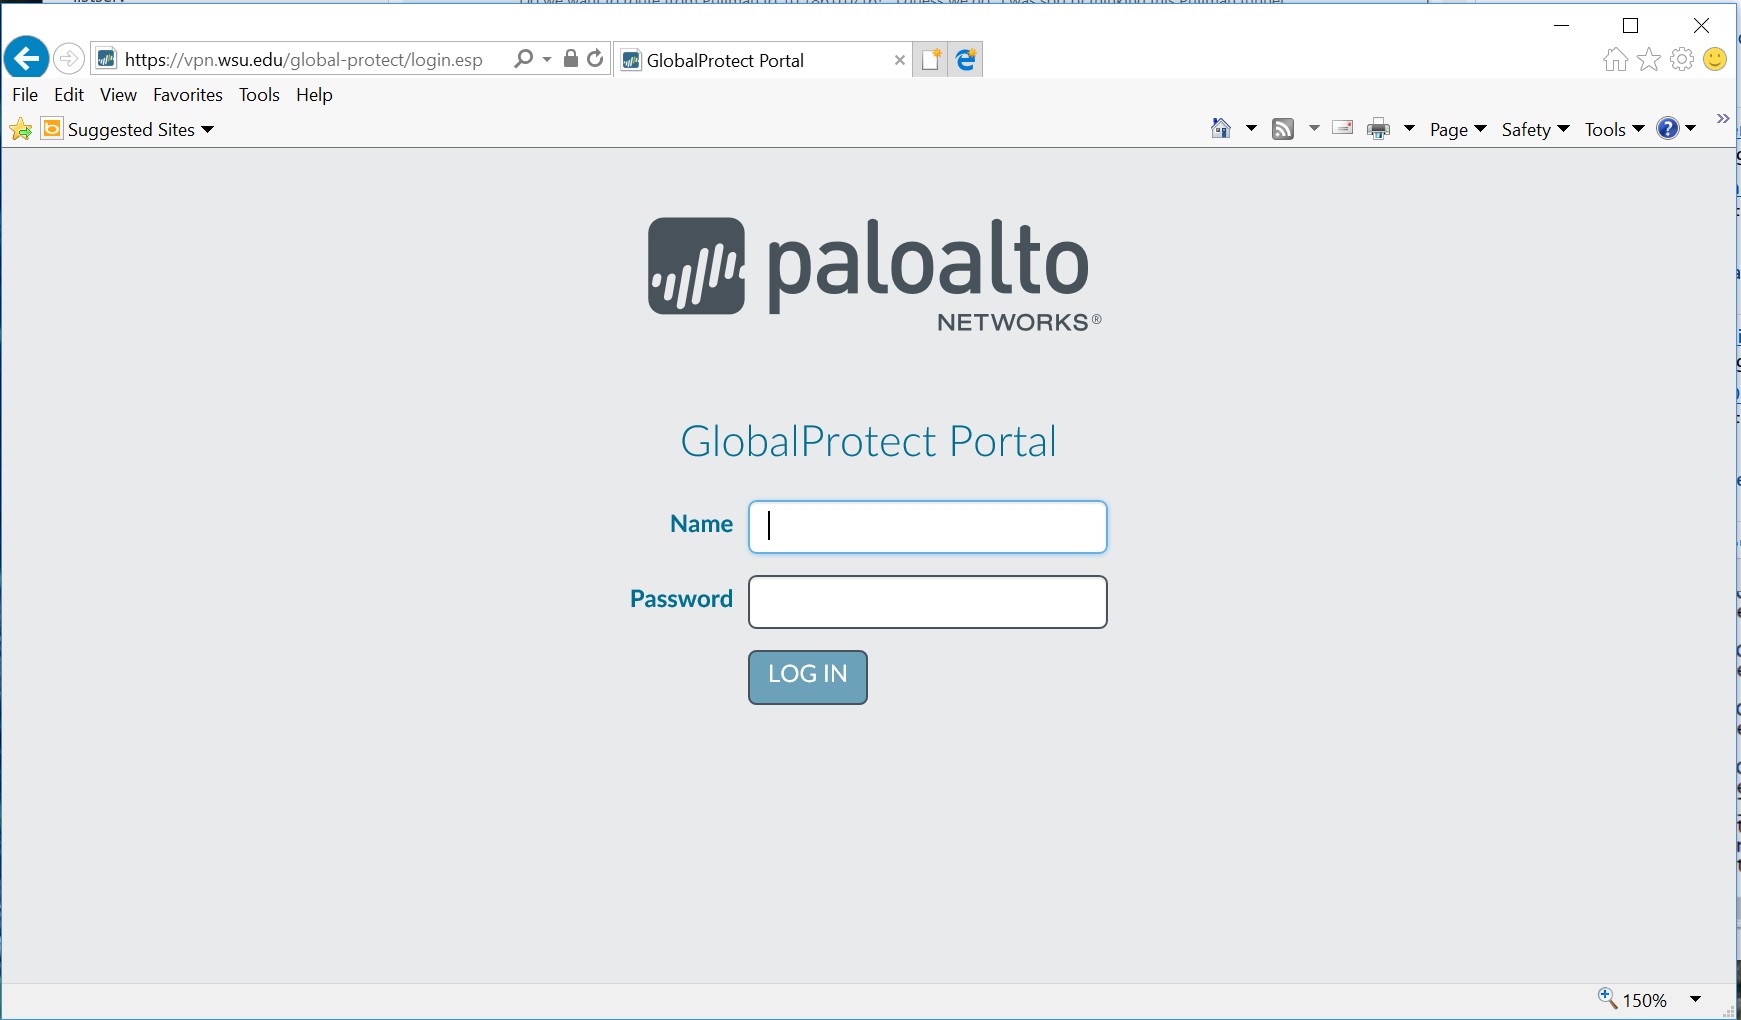
- After logging in, download the Mac OS agent.

- When prompted, run the software.
- When prompted again, run the GlobalProtect Installer.

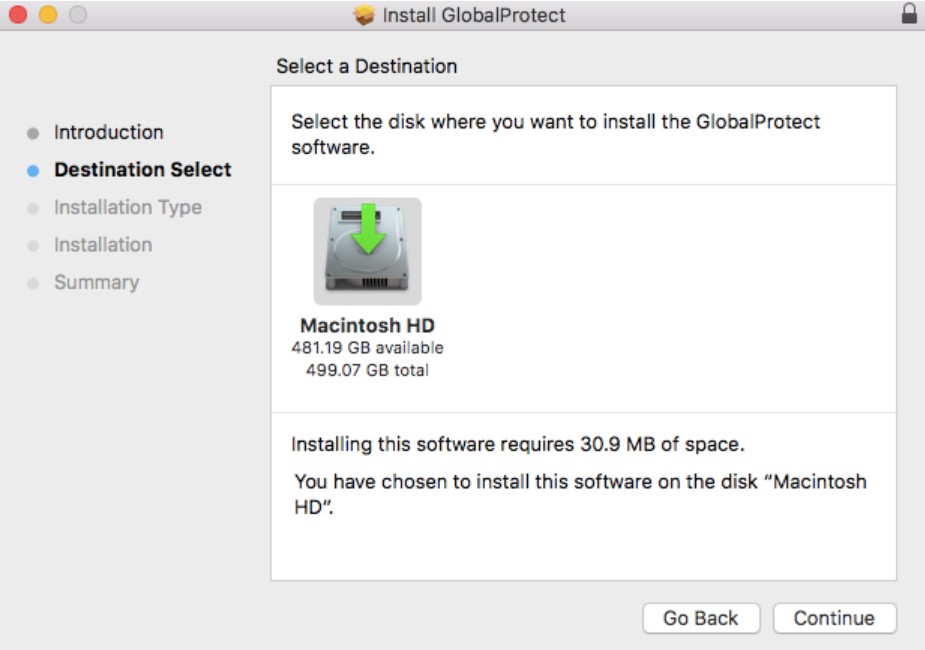
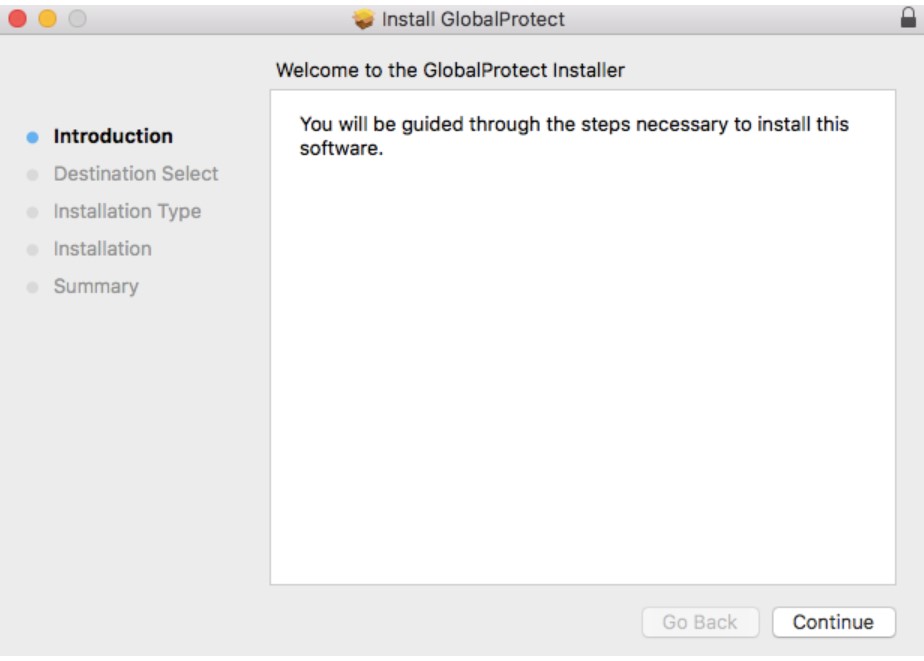
- From the GlobalProtect Installer, click continue.
- On the destination select screen, select the install folder and then click continue.
- On the Installation Type screen, select the GlobalProtect installation package check box, and then click continue.
- Click install to confirm that you want to install GlobalProtect.
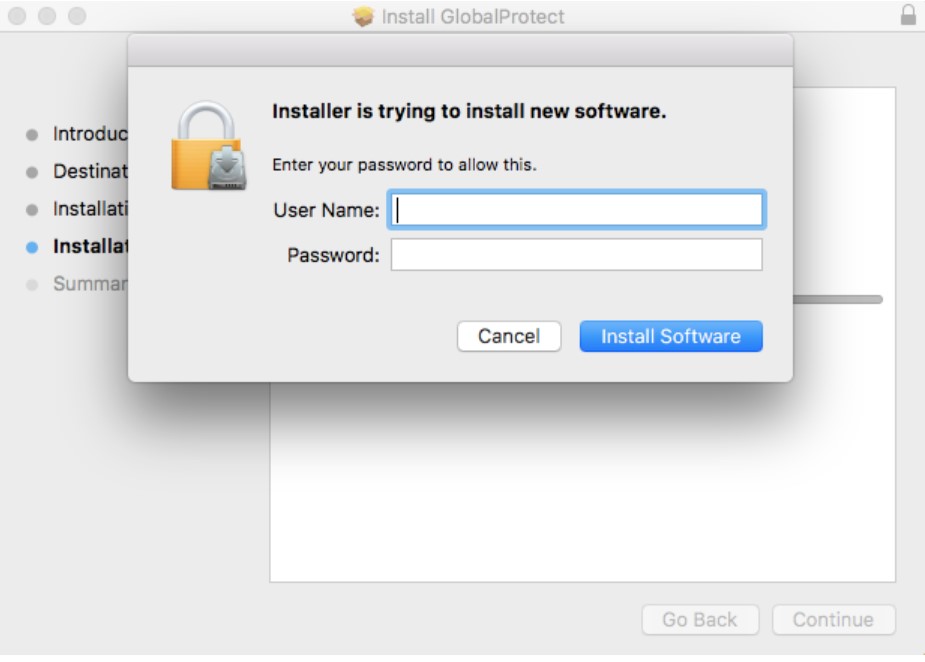
- When prompted, enter your Username and Password, and then click install software to begin the installation.
- When this security box appears, users MUST click the “Open Security Preferences” Button (NOT the OK Button).

- Click the “Allow” button at the bottom of the “Security & Privacy” box to allow the Palo Alto Extension.

- After installation is complete, close the installer.
MFA GlobalProtect VPN Login Steps
Once the VPN portal has been updated to require MFA the user experience will change. When the user connects to the VPN, they will instead receive an Okta login page.


On this page, enter your username and password. If you scroll down on this page, you will see a ‘Remember me’ option. Check this option to have your username saved for future logins. This is recommended.

Once a valid credential pair is entered, you will receive a prompt to choose your MFA option. You can use any MFA option that is supported by Okta, including SMS, App Push, Google Authenticator, Security Key, etc. Push notifications with the Okta Verify App are recommended.


When selecting Okta Verify Push notifications, it is recommended to select the option ‘Send push automatically’

While the option ‘Do not challenge me on this device for the next 24 hours’ option may be checked, this option will not have any effect. You will continue to be prompted for multi-factor authentication for every VPN login.
At this point, you should receive a multifactor prompt on your device or be ready to enter a code from a separate multi-factor app.
IOS Prompt


OKTA MFA Factor Enrollment
To set up your Okta MFA options, visit https://account.wsu.edu.
For technical assistance: Please contact Crimson Service Desk via email, by phone at (509) 335-4357, or online.
Mac Uninstall
Download the installer from the portal page at https://vpn.wsu.edu (same process as the previous Mac GP Client install).
From the GlobalProtect installer, click continue.
On the destination select screen, click continue.
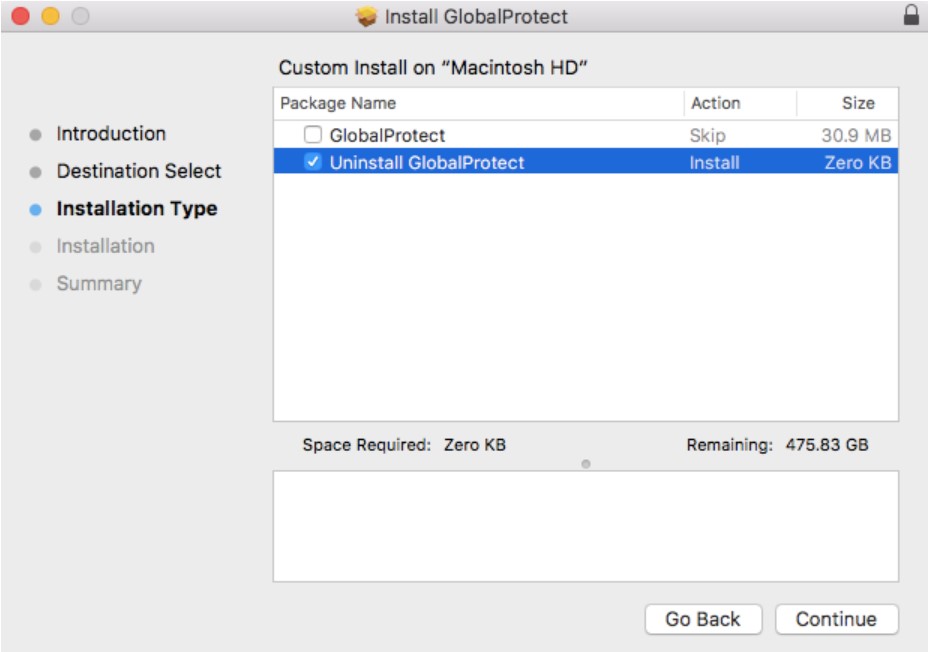
On the Installation Type screen, select the Uninstall GlobalProtect package check box, and then click continue:
Click Install to confirm that you want to remove the GlobalProtect app.
When prompted, enter your Username and Password, and then click Install Software to uninstall GlobalProtect.
A message will pop up that will confirm that the Uninstall GlobalProtect package was successfully installed and that the GlobalProtect app has been removed from the computer.
Linux Install
On Linux, the latest GlobalProtect client can be downloaded from:
There are two clients – download the rpm file for RedHat/CentOS.
For Ubuntu, download the deb file. Open a terminal window to install the client
Ubuntu/Debian –
sudo dpkg – i GlobalProtect_deb-5.0.8.deb
Redhat/CentOS –
sudo yum localinstall GlobalProtect_rpm-5.0.8.rpm
Linux Operation
Using a terminal window, type globalprotect. At the >> prompt, use the connect command to connect to portal vpn.wsu.edu.
$ globalprotect
Current GlobalProtect status: OnDemand mode.
>> connect –portal vpn.wsu.edu
Retrieving configuration…
vpn.wsu.edu – Authentication Failed. Enter login credentials
username(user):user
Password:
Discovering network…
Connecting…
Connected
Other commands of note at the >> prompt include –
>> quit
(exits out of GlobalProtect which continues to run in the background)
>> disconnect
>> show –version
>> show –status
>> show –details
Linux Uninstall
- Uninstall the GlobalProtect app for Linux using dpkg.
$ sudo dpkg -P globalprotect
(Reading database … 209181 files and directories currently installed.)
Removing globalprotect (5.0.8) …
gp service is running and we need to stop it…
Disable service…
Removing gp service…
gp service has been removed successfully
Removing configuration…
Uninstall the GlobalProtect app for Linux using apt-get.
$ sudo apt-get remove GlobalProtect_deb-5.0.8.deb
Reading package lists… Done
Building dependency tree
Reading state information… Done
Troubleshooting
7.1.1. Mac
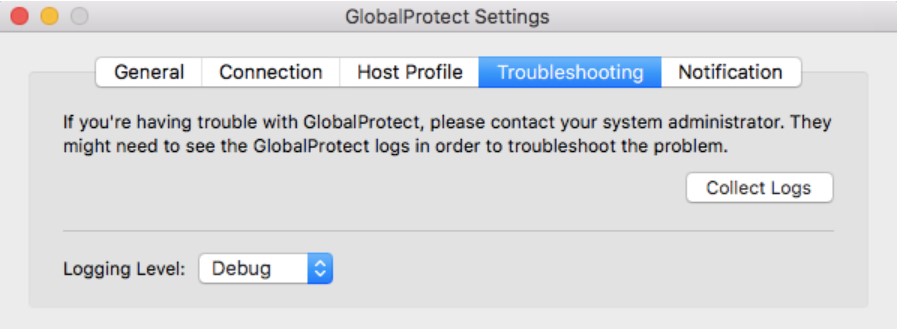
- Open GlobalProtect and click on the Troubleshooting tab. An option to collect logs will create a support file that can be used for analysis.
7.1.2. Linux
Using the terminal window and in globalprotect mode, run the collect-log command to create the support file.
Источник


