- How to Enable USB in VirtualBox
- How to Install the VirtualBox Extension Pack
- Enabling USB Access to User
- Enabling USB Support in VirtualBox
- If You Appreciate What We Do Here On TecMint, You Should Consider:
- How to Access USB from VirtualBox Guest OS
- Step 1: Install Virtualbox Extension Pack
- Step 2: Add Your User to vboxusers Group
- Step 3: Enable USB Controller and Add New USB filter
- Step 4: Access USB from VirtualBox
- How to Boot VM From USB Stick
- Wrapping Up
- Oracle virtualbox usb support linux
- 3.11.2.В Implementation Notes for Windows and Linux Hosts
How to Enable USB in VirtualBox
If your data center depends on VirtualBox and your virtual machines depend on the USB device, you’ve perhaps noticed that USB doesn’t support by default unless you’ve manually enabled it.
In this article, we will explain to you how to enable USB support on Virtualbox. The current version of VirtualBox 6.0 comes with support for USB 3.0, and to take advantage of it, you need to install the latest version of VirtualBox Extension Pack.
This tutorial presumes that you already installed VirtualBox on your Linux and VirtualBox guest additions on your virtual machines. If you haven’t, you can install it using the following articles.
How to Install the VirtualBox Extension Pack
To install the latest version of Extension Pack, head over to the Virtualbox Downloads page and grab the file for All supported platforms.
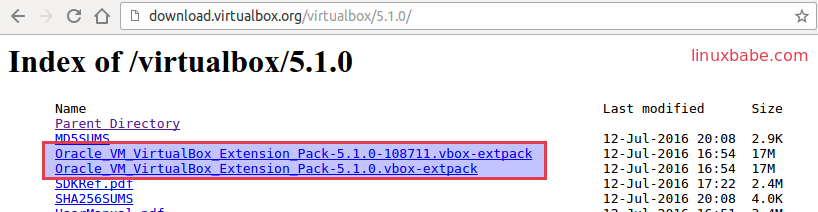
1. Once you’ve downloaded, open up VirtualBox –> Click File –> Preferences in the Menu.
![]() VirtualBox Preferences
VirtualBox Preferences
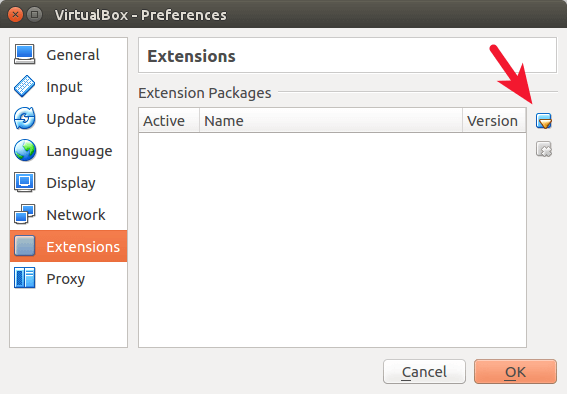
2. Next, click on the Extension tab and then click the + sign.
![]() Virtualbox Extension
Virtualbox Extension
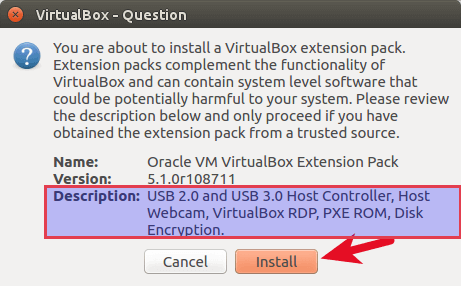
3. Select the downloaded Extension Pack and install it as shown.
![]() Install Virtualbox Extension Pack
Install Virtualbox Extension Pack
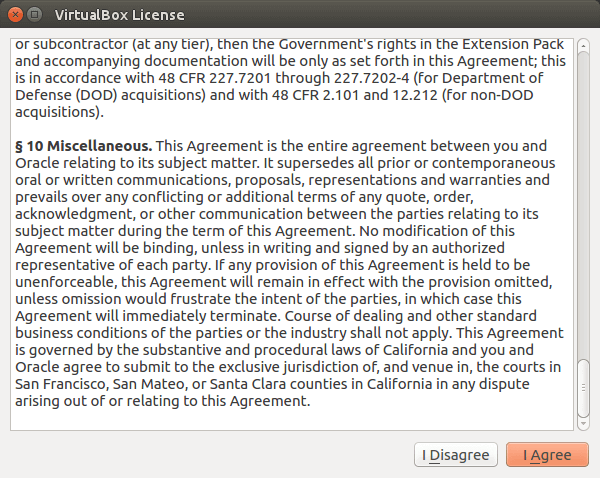
4. Scroll through the Virtualbox License and then click I Agree button to install it.
![]() Virtualbox License Agreement
Virtualbox License Agreement
5. Enter your sudo password and allow the installation to finish.
![]() Installing Virtualbox Extension Pack
Installing Virtualbox Extension Pack ![]() Installed Virtualbox Extension Pack
Installed Virtualbox Extension Pack
Enabling USB Access to User
To allow a user to access the USB subsystem, you need to add the user (running VirtualBox) to the vboxusers group using the following command.
Where USERNAME is the name of the user running the VirtualBox.
![]() Add User to vboxusers Group
Add User to vboxusers Group
Once the command runs successfully, logout and log back into the system.
Enabling USB Support in VirtualBox
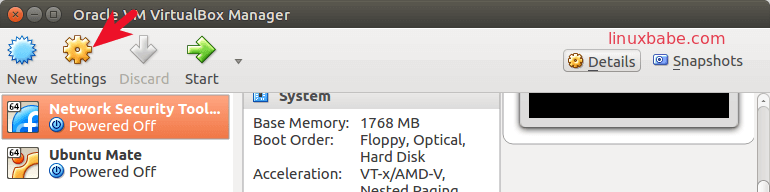
Start up VirtualBox, right-click on the virtual machine that needs access to a USB device, and click Settings.
![]() VirtualBox VM Settings
VirtualBox VM Settings
In the virtual machine’s Setting tab, click on USB to see the available USB devices. Click on the + sign to add a new device.
![]() Enable USB Support in VM
Enable USB Support in VM
Once USB device added, start up the virtual machine to have access to the data on the USB device. If you want to enable more USB devices, go back into the Settings –> USB and add the devices.
If You Appreciate What We Do Here On TecMint, You Should Consider:
TecMint is the fastest growing and most trusted community site for any kind of Linux Articles, Guides and Books on the web. Millions of people visit TecMint! to search or browse the thousands of published articles available FREELY to all.
If you like what you are reading, please consider buying us a coffee ( or 2 ) as a token of appreciation.

We are thankful for your never ending support.
Источник
How to Access USB from VirtualBox Guest OS
There are times when you need to access USB from VirtualBox. For instance, you installed Kali Linux in VirtualBox and a USB wireless network adapter is required to do penetration testing. This simple tutorial will show you how to easily access your USB thumb drive, USB hard disk, or USB wireless network adapter in your Virtualbox guest OS.
It’s assumed that you have already set up VirtualBox on your host OS.
Step 1: Install Virtualbox Extension Pack
Shut down your guest OS.
VirtualBox by default only supports USB 1.x devices. VirtualBox extension pack includes support for USB 2.0 and USB 3.0 devices, VirtualBox RDP and PXE boot for Intel cards. You must install the extension pack with the same version as your installed version of VirtualBox.
To check the version of your VirtualBox, open VirtualBox manager, then go to Help > About VirtualBox . Once you know the version number, go to http://download.virtualbox.org/virtualbox/ in your web browser to download VirtualBox extension pack which ends with .vbox-extpack extension.
Once downloaded, in VirtualBox manager go to File > Preferences > Extensions. Click the add button to add VirtualBox extensions pack from your hard disk.
Once you choose the extension pack, click Install button to install it. You can see what functionalities it adds to your virtual machine in the description.
Then click Agree to accept VirtualBox license.
So now Virtualbox USB support is enhanced.
Step 2: Add Your User to vboxusers Group
In order for VirtualBox to see your USB devices, your user must be in the vboxusers group. Open up a terminal window (Ctrl+Alt+T), then run this command. Replace your-username with your real username. (I assume your host OS is a Linux distro such as Ubuntu, instead of Windows).
Now log out and log back in so the changes can take effect. To check which groups your user account belongs to, run:
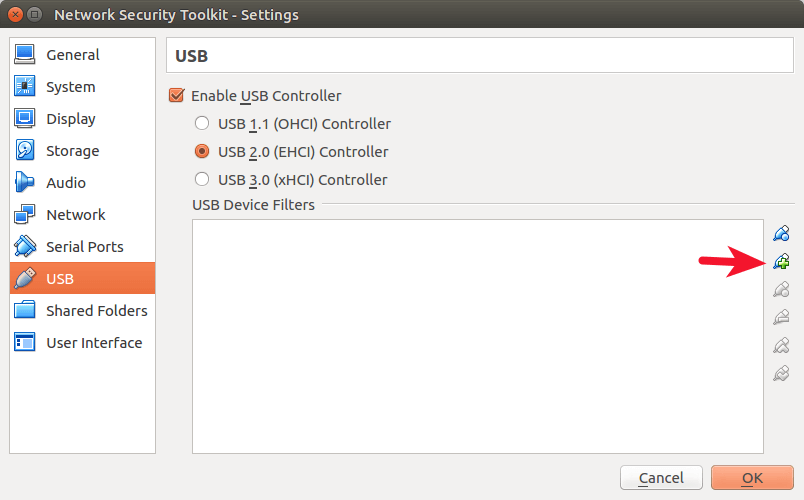
Step 3: Enable USB Controller and Add New USB filter
Click settings for your virtual machine.
Select USB on the left pane. Then choose USB 2.0 controller or USB 3.0 controller. Note that you can only enable one type of controller. Next, insert your USB device to your host machine and click the add button to add new USB filter.
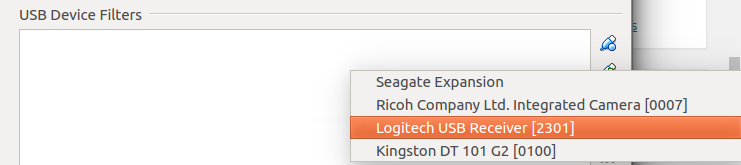
Choose your USB device and Click OK.
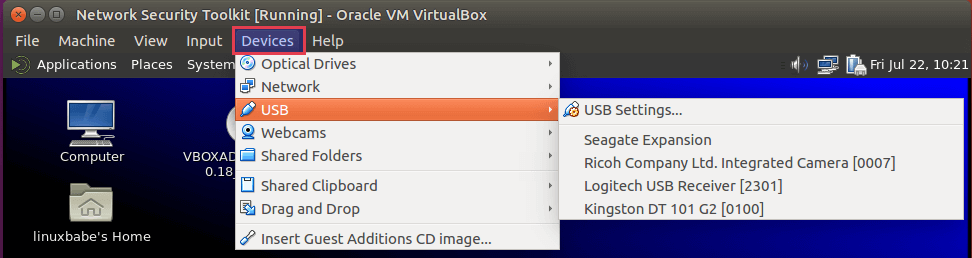
Step 4: Access USB from VirtualBox
Now boot up your virtual machine and you will see your USB device in the guest OS. It should be noted that your host OS won’t be able to see the USB device while it’s being used by VirtualBox.
To unmount USB device from guest OS, select devices > USB and uncheck your USB device.
To mount USB in VirtualBox again, simply select your USB drive in the list.
How to Boot VM From USB Stick
Let’s say you created a bootable USB stick and you want to boot your VirtualBox VM from the USB stick. Virtualbox allows your VM to access raw hard disk, by creating a special VMDK image. I assume your host OS is Linux.
First, find the device name of your USB stick.
Mine is /dev/sdb . Then run the following command to create a VMDK image file /tmp/usb.vmdk .
Change the ownership of this file. Replace username with your real username.
Then add your user account to the disk group, so you can access raw hard disk.
Log out and log back in for the changes to take effect. Then open Virtualbox and attach the raw disk ( /tmp/usb.vmdk ) to your VM.
Wrapping Up
Does this post helped you access USB drive in VirtualBox guest OS? Let me know in the comments section below. As always, if you found this post useful, subscribe to our free newsletter or follow us on Google+, Twitter or like our Facebook page.
Источник
Oracle virtualbox usb support linux
The USB section in a virtual machine’s Settings window enables you to configure Oracle VM VirtualBox’s sophisticated USB support.
Oracle VM VirtualBox can enable virtual machines to access the USB devices on your host directly. To achieve this, Oracle VM VirtualBox presents the guest OS with a virtual USB controller. As soon as the guest system starts using a USB device, it will appear as unavailable on the host.
Be careful with USB devices that are currently in use on the host. For example, if you allow your guest to connect to your USB hard disk that is currently mounted on the host, when the guest is activated, it will be disconnected from the host without a proper shutdown. This may cause data loss.
Oracle Solaris hosts have a few known limitations regarding USB support. See Known Limitations.
In addition to allowing a guest access to your local USB devices, Oracle VM VirtualBox even enables your guests to connect to remote USB devices by use of the VirtualBox Remote Desktop Extension (VRDE). See Remote USB.
To enable USB for a VM, select the Enable USB Controller check box. The following settings are available:
USB Controller: Selects a controller with the specified level of USB support, as follows:
OHCI for USB 1.1
EHCI for USB 2.0. This also enables OHCI.
xHCI for USB 3.0. This supports all USB speeds.
The xHCI and EHCI controllers are shipped as an Oracle VM VirtualBox extension package, which must be installed separately. See Section 1.5, “Installing Oracle VM VirtualBox and Extension Packs”.
USB Device Filters: When USB support is enabled for a VM, you can determine in detail which devices will be automatically attached to the guest. For this, you can create filters by specifying certain properties of the USB device. USB devices with a matching filter will be automatically passed to the guest once they are attached to the host. USB devices without a matching filter can be passed manually to the guest, for example by using the Devices , USB menu.
Clicking on the + button to the right of the USB Device Filters window creates a new filter. You can give the filter a name, for later reference, and specify the filter criteria. The more criteria you specify, the more precisely devices will be selected. For instance, if you specify only a vendor ID of 046d, all devices produced by Logitech will be available to the guest. If you fill in all fields, on the other hand, the filter will only apply to a particular device model from a particular vendor, and not even to other devices of the same type with a different revision and serial number.
In detail, the following criteria are available:
Vendor and Product ID. With USB, each vendor of USB products carries an identification number that is unique world-wide, called the vendor ID . Similarly, each line of products is assigned a product ID number. Both numbers are commonly written in hexadecimal, and a colon separates the vendor from the product ID. For example, 046d:c016 stands for Logitech as a vendor, and the M-UV69a Optical Wheel Mouse product.
Alternatively, you can also specify Manufacturer and Product by name.
To list all the USB devices that are connected to your host machine with their respective vendor IDs and product IDs, use the following command:
On Windows, you can also see all USB devices that are attached to your system in the Device Manager. On Linux, you can use the lsusb command.
Serial Number. While vendor ID and product ID are quite specific to identify USB devices, if you have two identical devices of the same brand and product line, you will also need their serial numbers to filter them out correctly.
Remote. This setting specifies whether the device will be local only, remote only, such as over VRDP, or either.
On a Windows host, you will need to unplug and reconnect a USB device to use it after creating a filter for it.
As an example, you could create a new USB filter and specify a vendor ID of 046d for Logitech, Inc, a manufacturer index of 1, and «not remote». Then any USB devices on the host system produced by Logitech, Inc with a manufacturer index of 1 will be visible to the guest system.
Several filters can select a single device. For example, a filter which selects all Logitech devices, and one which selects a particular webcam.
You can deactivate filters without deleting them by deselecting the check box next to the filter name.
3.11.2.В Implementation Notes for Windows and Linux Hosts
On Windows hosts, a kernel mode device driver provides USB proxy support. It implements both a USB monitor, which enables Oracle VM VirtualBox to capture devices when they are plugged in, and a USB device driver to claim USB devices for a particular virtual machine. System reboots are not necessary after installing the driver. Also, you do not need to replug devices for Oracle VM VirtualBox to claim them.
On supported Linux hosts, Oracle VM VirtualBox accesses USB devices through special files in the file system. When Oracle VM VirtualBox is installed, these are made available to all users in the vboxusers system group. In order to be able to access USB from guest systems, make sure that you are a member of this group.
On some legacy Linux hosts, USB devices are accessed using the usbfs file system. Therefore, the user executing Oracle VM VirtualBox needs read and write permission to the USB file system. Most distributions provide a group, such as usbusers , which the Oracle VM VirtualBox user needs to be added to. Also, Oracle VM VirtualBox can only proxy to virtual machines USB devices which are not claimed by a Linux host USB driver. The Driver= entry in /proc/bus/usb/devices will show you which devices are currently claimed. See also USB Not Working for details about usbfs .
Copyright В© 2004, 2020 Oracle and/or its affiliates. All rights reserved. Legal Notices
Источник


