- Офисный пакет Windows Office
- Windows Office – бесплатно решит «Офисные» проблемы!
- Windows Office — что это за программа?
- Зачем покупать? Скачивайте офис бесплатно!
- Офис — это неотъемлемая часть Windows!
- Лучший офисный пакет для работы и учебы!
- Панель Microsoft Office
- Помогите пользователям установить Office на устройствах с Windows 10 Help your users install Office on Windows 10 devices
- Управление развертываниями Office Manage Office deployments
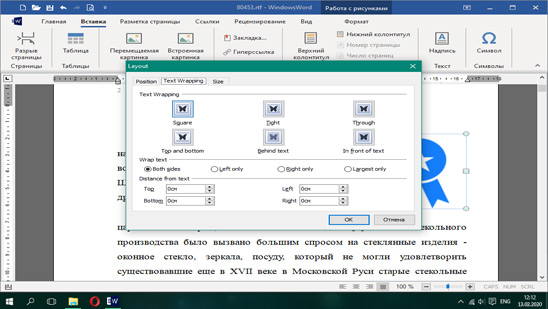
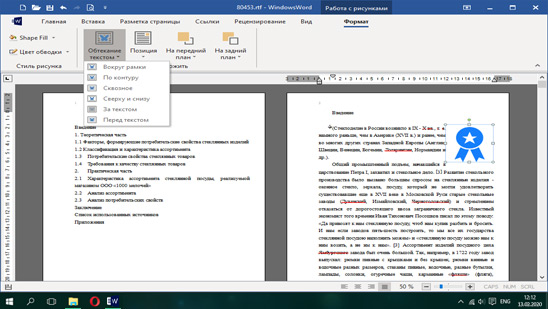
- Layout panels
- Examples
- Panel properties
- Panel attached properties
- Panel borders
- RelativePanel
- StackPanel
- VariableSizedWrapGrid
- Canvas
Офисный пакет Windows Office
Универсальное решение для персонального компьютера и планшета
- Бесплатный офис для Windows
- Небольшой вес офисного пакета с быстрой установкой
- Загрузка и редактирование документов без зависаний
- Работа со всеми известными форматами документов
- Лучший аналог Word и Excel бесплатно
Скачать
Бесплатно Windows Office
Windows 7 / 8 / 10 Версия: 2020.9 25.09.2020
Размер файла: 16 Мб.
Windows Office – бесплатно решит «Офисные» проблемы!
Наверняка вам довольно часто приходится работать с офисными документами. Для этого существует множество программ, которые чаще всего распространяются платно. Такие программы имеют довольно большой вес, медленно работают и могут требовать постоянной «докачки» каких-либо файлов для своей корректной работы. Проблема, можете подумать вы. Как же выбрать хорошую программу для обработки документов? На самом деле, решение есть!
Мощный текстовый редактор с крутыми фишками
Таблицы любого размера не проблема для него!
Windows Office — что это за программа?
Windows Office — это бесплатный офисный пакет, позволяющий работать с любыми форматами компьютерных документов. Документы Word, Excel и не только – всё это теперь доступно для работы совершенно бесплатно! Фактически, можно сказать, что вышеописанная программа – это полноценный офис для Windows, абсолютно не отличающийся (а кое-в чём даже и превосходящий) от своего платного аналога. Скачать его можно совершенно свободно!
Зачем покупать? Скачивайте офис бесплатно!
Виндовс Офис — полностью бесплатен, но многие пользователи считают, что платная программа должна работать лучше, чем свободно распространяемая. Наша программа для работы со всеми текстовыми форматами имеет все необходимые функции, и обладает рядом положительных качеств. Одно из них – это малый вес. Часто офисные пакеты занимают довольно много места, из-за чего качать их становится довольно неудобно. Но это не касается Нашего софта!
Скачать наш офис можно максимально быстро, ведь его вес в разы меньше, чем вес его аналогов! Также данная программа обладает большой скоростью работы и очень быстро «откликается» на действия пользователя. Очень многие редакторы «страдают» тем, что очень медленно обрабатывают информацию и в процессе обработки зависают. Это является большой проблемой, ведь если вы не успели сохранить документ, то вполне можете его потерять и потом переделывать заново. Но в Windows Office это проблема решена полностью! Вы сможете без труда обработать даже самые длинные и тяжёлые документы, обработка которых раньше могла вызвать затруднения.
Бесплатно Windows Office
Windows XP / Vista / 7 / 8 / 10 Версия: 1.0 04.12.2015
Размер файла: 45,2 МБ.
Офис — это неотъемлемая часть Windows!
Офисный пакет для Виндовс – зачем он вам? На самом деле – всё довольно просто. Вы не сможете открыть ни документ без данной программы. Большим плюсом нашего Windows Office является то, что он распространяется бесплатно. Программы на самом деле – это дорогое удовольствие. Современные технологии предлагают к услугам пользователей множество различных программ, но те из них, которые распространяются платно, на самом деле могут себе позволить далеко не все потенциальные пользователи. Да и зачем, когда есть возможность скачать наш офис, программу, ничуть не уступающую другим!
Все плюсы Windows Office уже были перечислены в этой статье в предыдущих абзацах. Так что вы наверняка уже прочли их и точно знаете, почему выберете для своей работы именно её.
Лучший офисный пакет для работы и учебы!
Скачать Windows Office – значит больше не знать никаких проблем с обработкой электронных документов! Тексты и таблицы теперь можно будет всегда редактировать максимально быстро и качественно. Работа с текстовыми документами для многих стала уже привычной необходимостью. Компьютерные технологии, а значит, и документы, проникли во все сферы человеческой жизни. С текстовыми документами и таблицами имеют дело даже врачи и аптекари, продавцы, учителя, преподаватели в ВУЗах – многим представителям этих профессий необходимо время от времени заполнять или составлять какие-либо документы на компьютере. Виндовс офис станет идеальным решением! Простой в использовании, с понятным интерфейсом, лёгкий и функциональный – он станет вашим надёжным помощником в работе и учебе. Скачивайте его и работайте с удовольствием!
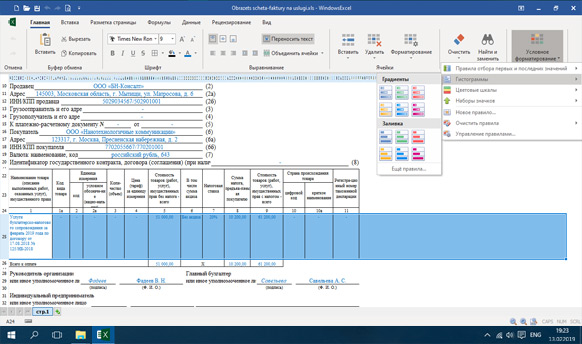
Панель Microsoft Office
Панель задач
Панель задач размещается, обычно, внизу рабочего стола, но может быть установлена пользователем в любое положение. В левой части панели задач расположена кнопка ПУСК, справа – панель индикации. На панель задач могут выводиться также и другие панели. Например, в Windows 98 на панель задач могут выводиться Панель быстрого запуска, Панель адресов, Панель каналов.
Кнопка ПУСК открывает доступ к командам Главного меню. Чтобы изучить возможности Windows, достаточно просмотреть внимательно пункты меню:
Программы – позволяет найти и запустить любую программу. Запуск программ осуществляется двойным щелчком мыши по соответствующему пункту меню;
Документы — хранит список 15 документов, обрабатывавшихся на компьютере в последнее время;
Настройка — открывает доступ к программам настройки компьютера: Панель управления, Принтеры, Панель задач и меню ПУСК, свойства папки и рабочий стол;
Найти – позволяет осуществлять поиск на компьютере файлов, папок, людей;
Справка — открывает доступ к справочной системе Windows.
Выполнить – запуск программ через строку ввода.
Панель индикации.служит для отображения текущего времени, раскладки клавиатуры, регулятора громкости, настройки разрешающей способности экрана монитора и др. Если подвести указатель мыши к значку в панели индикации и задержать его на некоторое время (зависнуть), то высвечивается либо дополнительная информация, либо открывается меню настройки свойств выделенного объекта.
Чтобы узнать назначение любого объекта в Windows зависните на нем мышью. Через некоторое время появится всплывающая подсказка.
Панель быстрого запуска – используется для размещения наиболее часто используемых программ.
Панель каналов – служит для размещения узлов Интернета, на которые можно осуществить «подписку» на услуги канала. Тогда в установленное время на компьютер будет сбрасываться новая информация.
Панель адресов — сюда можно помещать значки узлов Интернета, к которым приходится обращаться наиболее часто, чтобы они были всегда под рукой.
Одним из самых эффективных способов управления программами является использование контекстного меню. Для вызова контекстного меню щелкните правой кнопкой мыши по объекту. В контекстном меню отображаются все задачи, которые можно выполнить с данным объектом.
Панель Microsoft Office – специальная программа, предназначенная для облегчения запуска офисных приложений Windows: редактора текста Word, электронной таблицы Excel, системы управления базой данных Access, системы подготовки презентаций Power Point и др. При запуске программы Microsoft Office на экран выводится панель с аналогичным названием. Панель может размещаться в любом месте по периметру рабочего стола. Запуск приложений осуществляется одним щелчком мыши по значку программы. На панель можно добавлять кнопки или удалять их. В принципе на панель Microsoft Office можно поместить значок любой программы.
Нам важно ваше мнение! Был ли полезен опубликованный материал? Да | Нет
Помогите пользователям установить Office на устройствах с Windows 10 Help your users install Office on Windows 10 devices

Вы можете быстро и легко установить Office на ПК с Windows 10 из центра администрирования Microsoft 365. You can quickly and easily install Office on Windows 10 PCs from the Microsoft 365 admin center.
Прежде чем начать, прочитайте статью Подготовка к установке Office для клиентов, чтобы понять, как это работает с ранее установленными приложениями Office. To understand how this works with previously installed Office apps, read Prepare for Office client installation before you get started.
Просмотрите короткое видео об установке приложений Office. Watch a short video about installing Office apps.
Управление развертываниями Office Manage Office deployments
Перейдите в центр администрирования и https://admin.microsoft.com войдите с глобальными учетными данными администратора. Go to the admin center at https://admin.microsoft.com, and sign in with global admin credentials.
Перейдите к установке в левой области навигации, а на странице Настройка прокрутите в приложения и обновления. Go to Setup in the left navigation pane, and on the Setup page, scroll to Apps and updates.
Вы можете не увидеть эту карту, если все пользователи установили приложения Office. You might not see this card if all of your users have installed Office apps.
На службе справки пользователи устанавливают карточки приложений Office, выберите Просмотр и начало работы. On the Help users install their Office apps card, choose View, and then Get started.
На электронной почте пользователей ссылку для загрузки панели Office, выберите пользователей, которые вы хотите по электронной почте, а затем электронной почты выбранных пользователей. On the Email users a link to download Office panel, select the users you want to email, and then Email selected users.
Layout panels
Layout panels are containers that allow you to arrange and group UI elements in your app. The built-in XAML layout panels include RelativePanel, StackPanel, Grid, VariableSizedWrapGrid, and Canvas. Here, we describe each panel and show how to use it to layout XAML UI elements.
There are several things to consider when choosing a layout panel:
- How the panel positions its child elements.
- How the panel sizes its child elements.
- How overlapping child elements are layered on top of each other (z-order).
- The number and complexity of nested panel elements needed to create your desired layout.
Examples
| XAML Controls Gallery | ||||||||||||||||||||||||||||||||||||
|---|---|---|---|---|---|---|---|---|---|---|---|---|---|---|---|---|---|---|---|---|---|---|---|---|---|---|---|---|---|---|---|---|---|---|---|---|
 |

| Panel alignment | Sibling alignment | Sibling position |
|---|---|---|
| AlignTopWithPanel | AlignTopWith | Above |
| AlignBottomWithPanel | AlignBottomWith | Below |
| AlignLeftWithPanel | AlignLeftWith | LeftOf |
| AlignRightWithPanel | AlignRightWith | RightOf |
| AlignHorizontalCenterWithPanel | AlignHorizontalCenterWith | В |
| AlignVerticalCenterWithPanel | AlignVerticalCenterWith | В |
This XAML shows how to arrange elements in a RelativePanel.
The result looks like this.
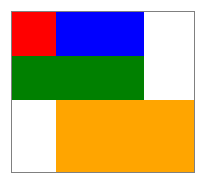
Here are a few things to note about the sizing of the rectangles:
- The red rectangle is given an explicit size of 44×44. It’s placed in the upper left corner of the panel, which is the default position.
- The green rectangle is given an explicit height of 44. Its left side is aligned with the red rectangle, and its right side is aligned with the blue rectangle, which determines its width.
- The orange rectangle isn’t given an explicit size. Its left side is aligned with the blue rectangle. Its right and bottom edges are aligned with the edge of the panel. Its size is determined by these alignments and it will resize as the panel resizes.
StackPanel
StackPanel arranges its child elements into a single line that can be oriented horizontally or vertically. StackPanel is typically used to arrange a small subsection of the UI on a page.
You can use the Orientation property to specify the direction of the child elements. The default orientation is Vertical.
The following XAML shows how to create a vertical StackPanel of items.
The result looks like this.

In a StackPanel, if a child element’s size is not set explicitly, it stretches to fill the available width (or height if the Orientation is Horizontal). In this example, the width of the rectangles is not set. The rectangles expand to fill the entire width of the StackPanel.
The Grid panel supports fluid layouts and allows you to arrange controls in multi-row and multi-column layouts. You specify a Grid’s rows and columns by using the RowDefinitions and ColumnDefinitions properties.
To position objects in specific cells of the Grid, use the Grid.Column and Grid.Row attached properties.
To make content span across multiple rows and columns, use the Grid.RowSpan and Grid.ColumnSpan attached properties.
This XAML example shows how to create a Grid with two rows and two columns.
The result looks like this.

In this example, the sizing works like this:
- The second row has an explicit height of 44 effective pixels. By default, the height of the first row fills whatever space is left over.
- The width of the first column is set to Auto, so it’s as wide as needed for its children. In this case, it’s 44 effective pixels wide to accommodate the width of the red rectangle.
- There are no other size constraints on the rectangles, so each one stretches to fill the grid cell it’s in.
You can distribute space within a column or a row by using Auto or star sizing. You use auto sizing to let UI elements resize to fit their content or parent container. You can also use auto sizing with the rows and columns of a grid. To use auto sizing, set the Height and/or Width of UI elements to Auto.
You use proportional sizing, also called star sizing, to distribute available space among the rows and columns of a grid by weighted proportions. In XAML, star values are expressed as * (or n* for weighted star sizing). For example, to specify that one column is 5 times wider than the second column in a 2-column layout, use «5*» and «*» for the Width properties in the ColumnDefinition elements.
This example combines fixed, auto, and proportional sizing in a Grid with 4 columns.
| Column | Sizing | Description |
|---|---|---|
| Column_1 | Auto | The column will size to fit its content. |
| Column_2 | * | After the Auto columns are calculated, the column gets part of the remaining width. Column_2 will be one-half as wide as Column_4. |
| Column_3 | 44 | The column will be 44 pixels wide. |
| Column_4 | 2* | After the Auto columns are calculated, the column gets part of the remaining width. Column_4 will be twice as wide as Column_2. |
The default column width is «*», so you don’t need to explicitly set this value for the second column.
In the Visual Studio XAML designer, the result looks like this.

VariableSizedWrapGrid
VariableSizedWrapGrid is a Grid-style layout panel where rows or columns automatically wrap to a new row or column when the MaximumRowsOrColumns value is reached.
The Orientation property specifies whether the grid adds its items in rows or columns before wrapping. The default orientation is Vertical, which means the grid adds items from top to bottom until a column is full, then wraps to a new column. When the value is Horizontal, the grid adds items from left to right, then wraps to a new row.
Cell dimensions are specified by the ItemHeight and ItemWidth. Each cell is the same size. If ItemHeight or ItemWidth is not specified, then the first cell sizes to fit its content, and every other cell is the size of the first cell.
You can use the VariableSizedWrapGrid.ColumnSpan and VariableSizedWrapGrid.RowSpan attached properties to specify how many adjacent cells a child element should fill.
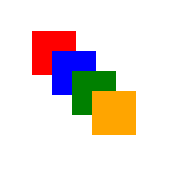
Here’s how to use a VariableSizedWrapGrid in XAML.
The result looks like this.

In this example, the maximum number of rows in each column is 3. The first column contains only 2 items (the red and blue rectangles) because the blue rectangle spans 2 rows. The green rectangle then wraps to the top of the next column.
Canvas
The Canvas panel positions its child elements using fixed coordinate points and does not support fluid layouts. You specify the points on individual child elements by setting the Canvas.Left and Canvas.Top attached properties on each element. The parent Canvas reads these attached property values from its children during the Arrange pass of layout.
Objects in a Canvas can overlap, where one object is drawn on top of another object. By default, the Canvas renders child objects in the order in which they’re declared, so the last child is rendered on top (each element has a default z-index of 0). This is the same as other built-in panels. However, Canvas also supports the Canvas.ZIndex attached property that you can set on each of the child elements. You can set this property in code to change the draw order of elements during run time. The element with the highest Canvas.ZIndex value draws last and therefore draws over any other elements that share the same space or overlap in any way. Note that alpha value (transparency) is respected, so even if elements overlap, the contents shown in overlap areas might be blended if the top one has a non-maximum alpha value.
The Canvas does not do any sizing of its children. Each element must specify its size.
Here’s an example of a Canvas in XAML.
The result looks like this.
Use the Canvas panel with discretion. While it’s convenient to be able to precisely control positions of elements in UI for some scenarios, a fixed positioned layout panel causes that area of your UI to be less adaptive to overall app window size changes. App window resize might come from device orientation changes, split app windows, changing monitors, and a number of other user scenarios.


