- Как изменить экран приветствия в Windows 7
- Изменение экрана приветствия в Виндовс 7
- Способ 1: Windows 7 Logon Background Changer
- Способ 2: Средства Windows
- Logon Screen для Windows
- Отзывы о программе Logon Screen
- Windows Logon Scenarios
- Interactive logon
- Local and domain logon
- Remote logon
- Network logon
- Smart card logon
- Biometric logon
- Additional resources
Как изменить экран приветствия в Windows 7
Одним из способов кастомизировать свою операционную систему является изменение экрана приветствия. Пользователи путем нехитрых действий могут поставить на заставку любую картинку, которая им по нраву, и в любой момент вернуть все обратно.
Изменение экрана приветствия в Виндовс 7
Любители подстраивать операционную систему под себя не упустят возможности заменить стандартный приветственный фон на более интересное изображение. Это можно сделать в любой современной и относительно современной версии Виндовс, включая «семерку». Это можно сделать как при помощи специальных утилит, так и вручную. Первый вариант зачастую быстрее и удобнее, а второй подойдет более уверенным пользователям, не желающим пользоваться сторонним ПО.
Перед выбором способа настоятельно рекомендуем позаботиться о создании точки восстановления системы и/или загрузочной флешки.
Способ 1: Windows 7 Logon Background Changer
Как понятно из названия, эта программа предназначена специально для пользователей «семерки», желающих изменить приветственный фон. Этот софт имеет очень простой, приятный и современный интерфейс и наделен небольшой галереей собственных фонов.
- Зайдите на официальный сайт программы и кликните по кнопке «Download».
На новой странице нажмите на ссылку «Please click here to start the download».
Скачанный файл ZIP остается извлечь и запустить EXE-файл. Программа не требует установки и работает как portable-версия.
Внизу находится набор обоев, которыми вы можете заменить стандартное изображение. При желании можно просмотреть этот список, прокручивая ее колесом вниз (вперед) и вверх (назад).
Если необходимо, нажмите на кнопку «Full Screen» — это позволит просмотреть изображение на весь экран.
Применить свой выбор можно кнопкой «Apply».
Если вы хотите установить собственное изображение, а не предложенное программой, нажмите на кнопку «Choose a folder».
Откроется проводник, где нужно указать путь к файлу.
Выбранный файл устанавливается по умолчанию так же кнопкой «Apply».
Обратите внимание, что вы всегда можете вернуть стандартную картинку обратно. Для этого нажмите на «Windows 7 Default wallpaper» и сохраните результат на «Apply».
В настройках программы можно выполнить сброс папки по умолчанию, отключить изменение заставки для других учетных записей и добавить тень к тексту на экране загрузки.
Никаких дополнительных возможностей по кастомизации у программы нет, поэтому если вы хотите изменить в системе что-нибудь еще, используйте многофункциональные твикеры для Виндовс 7, в состав которых входит возможность изменения фона загрузки.
Способ 2: Средства Windows
Через инструмент «Персонализация» и какие-либо другие редакторы поменять фон приветствия нельзя, однако заменить изображение можно через редактирование реестра и замену картинки в системной папке. Минус такого способа — невозможно увидеть результат до перезагрузки компьютера.
Для такого способа есть пара ограничений: файл должен быть в формате JPG и иметь вес до 256 КБ. Кроме этого, старайтесь подобрать картинку в соответствии с размером и разрешением своего экрана, чтобы она выглядела качественно и уместно.
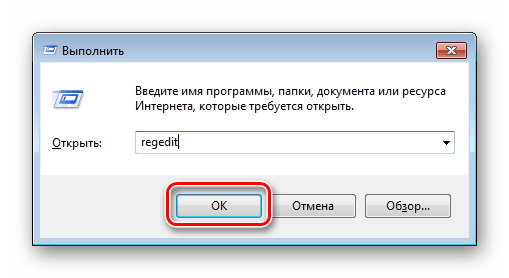
- Откройте редактор реестра сочетанием клавиш Win + R и командой regedit .
Перейдите по пути, указанном ниже:
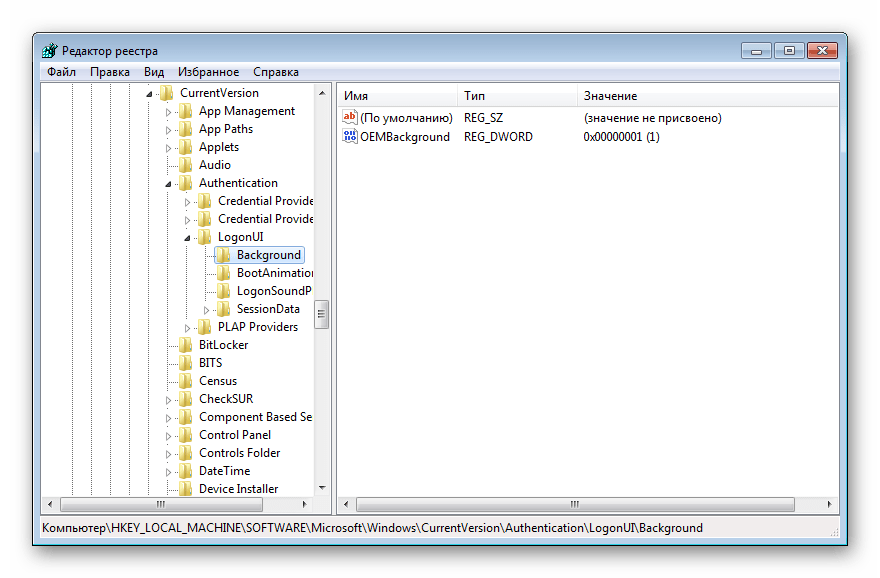
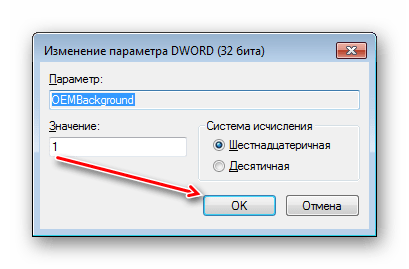
Дважды щелкните по параметру «OEMBackground», поставьте значение 1 и нажмите «ОК».
Если оно уже стоит, просто переходите к следующему пункту.
При отсутствии создайте этот параметр вручную. Находясь по вышеуказанному пути, кликните ПКМ по пустому месту в правой части экрана и выберите «Создать» > «Параметр DWORD (32 бита)».
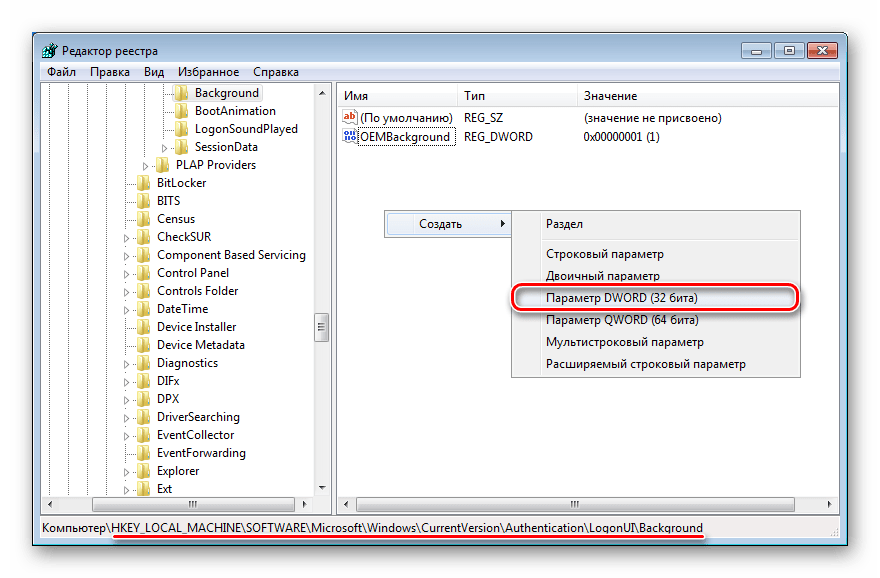
Задайте ему имя OEMBackground, выставьте значение 1 и сохраните результат на «ОК».
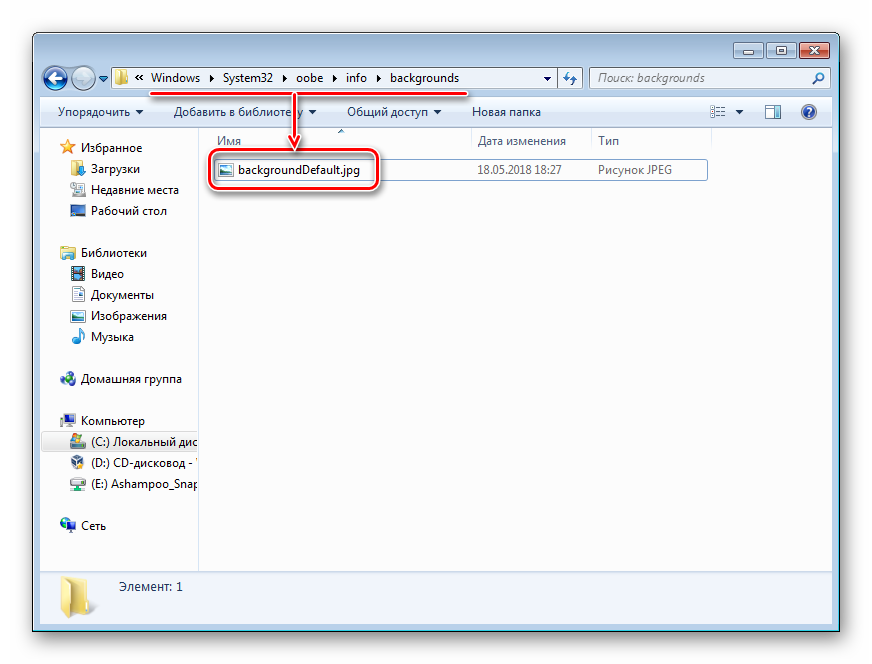
Откройте проводник и перейдите в папку backgrounds, располагающуюся здесь:
В некоторых случаях backgrounds может отсутствовать, как и папка info. В таком случае вам потребуется создать и переименовать 2 папки вручную обычным способом.

Сперва внутри oobe создайте папку и назовите ее info, внутри которой создайте папку backgrounds.
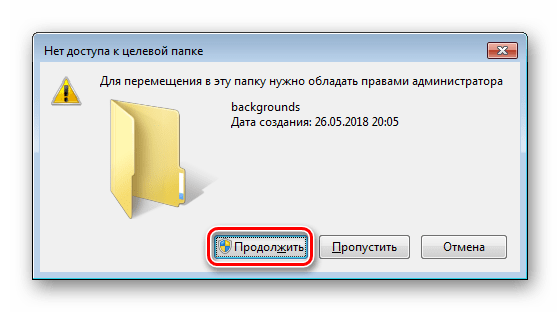
Подберите подходящую картинку с учетом советов выше, переименуйте ее в backgroundDefault и скопируйте в папку backgrounds. Может потребоваться разрешение от учетной записи администратора – нажмите «Продолжить».
Успешно скопированное изображение должно появиться в папке.
Чтобы увидеть измененный фон, перезагрузите ПК.
Теперь вы знаете два несложных метода изменения экрана приветствия в Виндовс 7. Используйте первый, если не уверены в своих силах и не хотите редактировать реестр и системную папку. Второй же удобен тем, кто не желает использовать либо не доверяет стороннему ПО, обладая достаточными навыками для установки фона вручную.
Logon Screen для Windows
| Оценка: |
5.00 /5 голосов — 6 |
| Лицензия: | Бесплатная |
| Версия: | 1.0 | Сообщить о новой версии |
| Обновлено: | 08.01.2014 |
| ОС: | Windows 7 |
| Интерфейс: | Русский |
| Разработчик: | Neal Software |
| Категория: | Украшательства |
| Загрузок (сегодня/всего): | 2 / 5 338 | Статистика |
| Размер: | 65 Кб |
| СКАЧАТЬ | |

Logon Screen — небольшая утилита для изменения фона экрана приветствия в системе Windows 7.
Winstep Nexus — компактная панель для быстрого запуска наиболее часто используемых программ и.
8GadgetPack — инструмент для установки и использования набора гаджетов для операционных систем Windows 8, 8.1 и 10.
Простой и удобный сервис позволяющий разнообразить и оживить Ваш рабочий стол! Забудьте о.
MiniBin — небольшая утилита, которая дополнит Вашу панель уведомлений (системный трей) иконкой Корзины.
Start Menu 10 — альтернативное решение для возвращенной кнопки «Пуск» в операционную систему.
Start10 — очередная реализация меню «Пуск», адаптированная для новейшей операционной системы Windows 10.
Отзывы о программе Logon Screen
 Admin
Admin
Отзывов о программе Logon Screen 1.0 пока нет, можете добавить.
Windows Logon Scenarios
Applies To: Windows Server (Semi-Annual Channel), Windows Server 2016
This reference topic for the IT professional summarizes common Windows logon and sign-in scenarios.
The Windows operating systems require all users to log on to the computer with a valid account to access local and network resources. Windows-based computers secure resources by implementing the logon process, in which users are authenticated. After a user is authenticated, authorization and access control technologies implement the second phase of protecting resources: determining if the authenticated user is authorized to access a resource.
The contents of this topic apply to versions of Windows designated in the Applies to list at the beginning of this topic.
In addition, applications and services can require users to sign in to access those resources that are offered by the application or service. The sign-in process is similar to the logon process, in that a valid account and correct credentials are required, but logon information is stored in the Security Account Manager (SAM) database on the local computer and in Active Directory where applicable. Sign-in account and credential information is managed by the application or service, and optionally can be stored locally in Credential Locker.
To understand how authentication works, see Windows Authentication Concepts.
This topic describes the following scenarios:
Interactive logon
The logon process begins either when a user enters credentials in the credentials entry dialog box, or when the user inserts a smart card into the smart card reader, or when the user interacts with a biometric device. Users can perform an interactive logon by using a local user account or a domain account to log on to a computer.
The following diagram shows the interactive logon elements and logon process.
Windows Client Authentication Architecture
Local and domain logon
Credentials that the user presents for a domain logon contain all the elements necessary for a local logon, such as account name and password or certificate, and Active Directory domain information. The process confirms the user’s identification to the security database on the user’s local computer or to an Active Directory domain. This mandatory logon process cannot be turned off for users in a domain.
Users can perform an interactive logon to a computer in either of two ways:
Locally, when the user has direct physical access to the computer, or when the computer is part of a network of computers.
A local logon grants a user permission to access Windows resources on the local computer. A local logon requires that the user has a user account in the Security Accounts Manager (SAM) on the local computer. The SAM protects and manages user and group information in the form of security accounts stored in the local computer registry. The computer can have network access, but it is not required. Local user account and group membership information is used to manage access to local resources.
A network logon grants a user permission to access Windows resources on the local computer in addition to any resources on networked computers as defined by the credential’s access token. Both a local logon and a network logon require that the user has a user account in the Security Accounts Manager (SAM) on the local computer. Local user account and group membership information is used to manage access to local resources, and the access token for the user defines what resources can be accessed on networked computers.
A local logon and a network logon are not sufficient to grant the user and computer permission to access and to use domain resources.
Remotely, through Terminal Services or Remote Desktop Services (RDS), in which case the logon is further qualified as remote interactive.
After an interactive logon, Windows runs applications on behalf of the user, and the user can interact with those applications.
A local logon grants a user permission to access resources on the local computer or resources on networked computers. If the computer is joined to a domain, then the Winlogon functionality attempts to log on to that domain.
A domain logon grants a user permission to access local and domain resources. A domain logon requires that the user has a user account in Active Directory. The computer must have an account in the Active Directory domain and be physically connected to the network. Users must also have the user rights to log on to a local computer or a domain. Domain user account information and group membership information are used to manage access to domain and local resources.
Remote logon
In Windows, accessing another computer through remote logon relies on the Remote Desktop Protocol (RDP). Because the user must already have successfully logged on to the client computer before attempting a remote connection, interactive logon processes have successfully finished.
RDP manages the credentials that the user enters by using the Remote Desktop Client. Those credentials are intended for the target computer, and the user must have an account on that target computer. In addition, the target computer must be configured to accept a remote connection. The target computer credentials are sent to attempt to perform the authentication process. If authentication is successful, the user is connected to local and network resources that are accessible by using the supplied credentials.
Network logon
A network logon can only be used after user, service, or computer authentication has taken place. During network logon, the process does not use the credentials entry dialog boxes to collect data. Instead, previously established credentials or another method to collect credentials is used. This process confirms the user’s identity to any network service that the user is attempting to access. This process is typically invisible to the user unless alternate credentials have to be provided.
To provide this type of authentication, the security system includes these authentication mechanisms:
Kerberos version 5 protocol
Public key certificates
Secure Sockets Layer/Transport Layer Security (SSL/TLS)
NTLM, for compatibility with Microsoft Windows NT 4.0-based systems
For information about the elements and processes, see the interactive logon diagram above.
Smart card logon
Smart cards can be used to log on only to domain accounts, not local accounts. Smart card authentication requires the use of the Kerberos authentication protocol. Introduced in Windows 2000 Server, in Windows-based operating systems a public key extension to the Kerberos protocol’s initial authentication request is implemented. In contrast to shared secret key cryptography, public key cryptography is asymmetric, that is, two different keys are needed: one to encrypt, another to decrypt. Together, the keys that are required to perform both operations make up a private/public key pair.
To initiate a typical logon session, a user must prove his or her identity by providing information known only to the user and the underlying Kerberos protocol infrastructure. The secret information is a cryptographic shared key derived from the user’s password. A shared secret key is symmetric, which means that the same key is used for both encryption and decryption.
The following diagram shows the elements and processes required for smart card logon.
Smart Card credential provider architecture
When a smart card is used instead of a password, a private/public key pair stored on the user’s smart card is substituted for the shared secret key, which is derived from the user’s password. The private key is stored only on the smart card. The public key can be made available to anyone with whom the owner wants to exchange confidential information.
For more information about the smart card logon process in Windows, see How smart card sign-in works in Windows.
Biometric logon
A device is used to capture and build a digital characteristic of an artifact, such as a fingerprint. This digital representation is then compared to a sample of the same artifact, and when the two are successfully compared, authentication can occur. Computers running any of the operating systems designated in the Applies to list at the beginning of this topic can be configured to accept this form of logon. However, if biometric logon is only configured for local logon, the user needs to present domain credentials when accessing an Active Directory domain.
Additional resources
For information about how Windows manages credentials submitted during the logon process, see Credentials Management in Windows Authentication.


