- Use Any Font in the Mac OS X Terminal
- How to change the Terminal font in Mac OS X
- Change Profiles Text preferences in Terminal on Mac
- The Best Mac OS X Terminal Font: Glass TTY VT220
- Question: Q: Terminal font settings
- Helpful answers
- Как настроить Терминал в Mac (macOS) и сделать его более полезным
- Терминал – Основы
- Как изменить размеры окна Терминала по умолчанию
- Как изменить фон в окне Терминала
- Как изменить текст в Терминале
- Атрибуты окна Терминала
- Атрибуты оболочки (Shell)
- Работа с группами окон в Терминале
- Настройка оболочки по умолчанию
Use Any Font in the Mac OS X Terminal
 The Terminal in modern versions of Mac OS X enforces a new monospacing character width standard, which in laymen terms means you no longer have to use monospace fonts in the Terminal. That means you can now use any font you want, even Comic Sans like the screenshot shows down below (hooray?).
How to change the Terminal font in Mac OS X
You can pick any font you want to become the new default in Terminal, or you can assign the font change to specific profiles. You’ll obviously want to use something that is readable:
- Open “Preferences” from the Terminal app menu
- Choose Settings, then select a theme and go to the Text tab
- Choose “Font” and make the change to the terminal font as desired
As long as you are actively using the theme you are adjusting, the changes take effect immediately in a live fashion.
Perhaps more helpful than changing the font is the ability to adjust font and line spacing. While you’re in a Terminal themes settings, you can change the background picture of Terminal windows too, which is a nice effect.
I’m a big fan of Menlo Regular 11 and 12, but the world of ugly fonts is now open to you, including Dingbats and Emoji characters if you really want to get stupid. While only marginally useful, this does allow for an additional degree of user experience customization, which is always a plus in our book.
This works in all modern versions of OS X, from OS X Lion to Mountain Lion, Mavericks, OS X Yosemite, you name it, it’s supported post-Lion.
Thanks for sending in the tip from McaWorld, Greg
Источник
Change Profiles Text preferences in Terminal on Mac
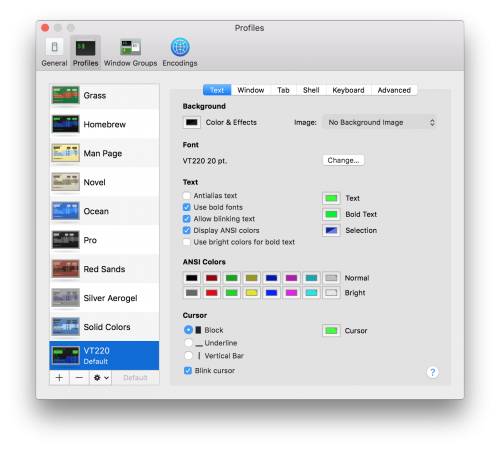
Use Text preferences in Terminal to change the font, text, colour, and cursor options for a Terminal window profile.
To change these preferences in the Terminal app  on your Mac, choose Terminal > Preferences, click Profiles, select a profile, then click Text.
Note: The options you choose in this preference pane apply only to the profile you select. They don’t apply to the Terminal app in general.
Change background options.
Colour & Effects: Click the colour well, then select a colour. To make the Terminal window translucent or transparent, use the sliders to adjust the opacity and blur.
To set the opacity and blur for background windows, select Inactive Windows, then use the corresponding sliders to make adjustments.
Image: Click the Image pop-up menu, choose Choose, then select an image.
To change the font used, click Change in the Font section, then select the font, typeface, and size.
Change the way text appears.
Antialias text: Applies text smoothing.
Use bold fonts: Uses bold for emphasis.
Allow blinking text: Allows text to flash on and off.
Display ANSI colours: Displays text using the colours embedded in some terminal emulator standards.
Use bold fonts: Adds emphasis to bold text with colour.
Text: Change the colour of the text. Click the colour well, then select a colour.
Bold Text: Change the colour of bold text. Click the colour well, then select a colour.
Selection: Change the colour of the selected text. Click the colour well, then select a colour.
To customise an ANSI colour, click the colour well, then select a colour.
Change how the cursor appears.
Block, Underline, Vertical Bar: Set the shape of the cursor.
Blink cursor: Makes the cursor blink.
Cursor: Set the colour of the cursor. Click the colour well, then select a colour.
Источник
The Best Mac OS X Terminal Font: Glass TTY VT220
More than five years ago, I blogged about a “stupidly cool” terminal font. Now that Mac OS X isn’t a big cat anymore, I figured it was time to repeat that: If you’re an old-school computer nerd like me, Glass TTY VT220 is the coolest terminal font for Mac OS X!
 If this doesn’t bring back memories of gweeping at DEC terminals, nothing will!
For people of a certain age, nothing beats a green screen and a blinking block cursor. I can almost taste the Jolt Cola and Cool Ranch Doritos! Back at my alma mater, those terminals were so important that the sound they made became synonymous with hacking (in the true sense): Gweep!
Even with today’s “retina” displays, with all their astonishing color depth and TFT technology, gweeps like me spend much of our time gweeping in a terminal window. And there’s nothing that Terminal needs more than a sweet monospaced font!
Therefore, for your consideration, I present the ultimate Terminal font: Glass TTY VT220! That guy, bless him, transposed the original DEC fonts into a TrueType font file, complete with Cyrillic characters that were missing in the ROMs. Seriously – this is as accurate as you can get!
Back in the low-resolution dark ages (2010), I lamented that the font had to be used at an insane 20 points to be pixel-perfect. But today’s Retina MacBooks make a 20 point font downright desirable!
 Create a Terminal profile with this font at 20 points
I did a little tweaking of the Terminal setup to get it how I liked it, but it’s pretty straightforward to have the ultimate Terminal font:
- Download the TrueType font: Glass TTY VT220
- Open it in Finder to launch FontBook and install it
- Open Terminal preferences and create a new default profile with this font at 20 points and a proper green/black color scheme
- Settle back with a Moxie or Zima and get on with the gweeping!
Источник
Question: Q: Terminal font settings
Does anyone know how to get the text appereance found in the terminal app system wide?
Here is a screenshot showing the same text in terminal and textedit, same font, same size. At leas for me, the terminal text is much more clearer — easier to read.
I’m using mountain lion.
MacBook Pro, OS X Mountain Lion (10.8.4)
Posted on Jun 30, 2013 9:45 PM
You can turn off font smoothing for small fonts in System Preferences > General.
Posted on Jul 1, 2013 9:14 AM
Helpful answers
This is because unlike the Terminal, in TextEdit and many other programs, text is anti-aliased. This will smooth out the view and prevent the blocky look that is in the Terminal. Unfortunately TextEdit does not have any options for this, so you are stuck with an anti-aliased view, or will have to find another text editor that will give you this feature.
Jun 30, 2013 11:17 PM
There’s more to the conversation
Loading page content
Page content loaded
This is because unlike the Terminal, in TextEdit and many other programs, text is anti-aliased. This will smooth out the view and prevent the blocky look that is in the Terminal. Unfortunately TextEdit does not have any options for this, so you are stuck with an anti-aliased view, or will have to find another text editor that will give you this feature.
Jun 30, 2013 11:17 PM
too bad there is not an option for this, I will have to get used to the blurry text 😟
Jul 1, 2013 8:33 AM
One popular text editor that does prevent anti-aliasing is TextWrangler ( http://www.barebones.com/products/textwrangler/ ).
With this program, you can set its default font to Monaco 10pt (the same that’s used in the Terminal), and it should appear without being smoothed. Again, this is not going to happen in all applications, but if you are simply viewing and creating text files then you can use TextWrangler to do this and get the view you want.
Jul 1, 2013 8:39 AM
You can turn off font smoothing for small fonts in System Preferences > General.
Источник
Как настроить Терминал в Mac (macOS) и сделать его более полезным
Приложение Терминал – ваш верный друг в мире командной строки macOS. Он предлагает интерфейс с оболочкой, которая интерпретирует ваши команды и затем воплощает их в жизнь.

Терминал – Основы
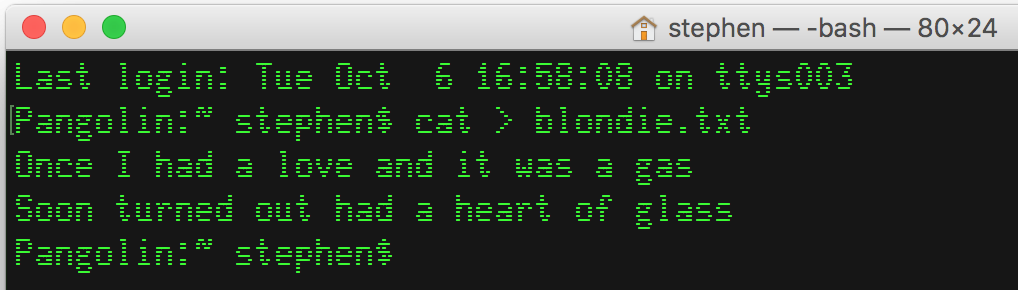
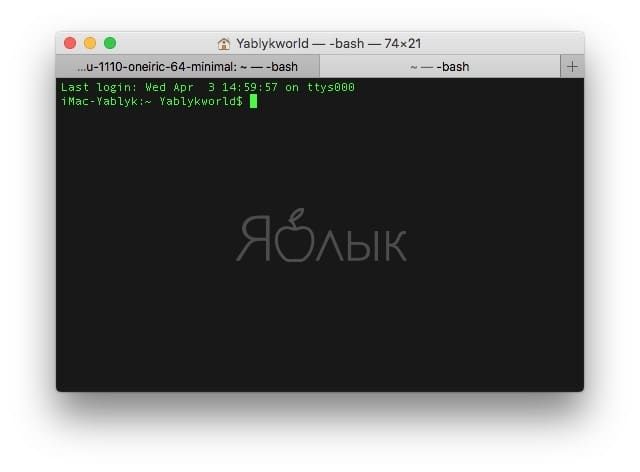
Когда вы открываете на Mac приложение Терминал, то видите практически пустое окно с двумя строчками текста. Первая содержит в себе дату и время вашего последнего логина.
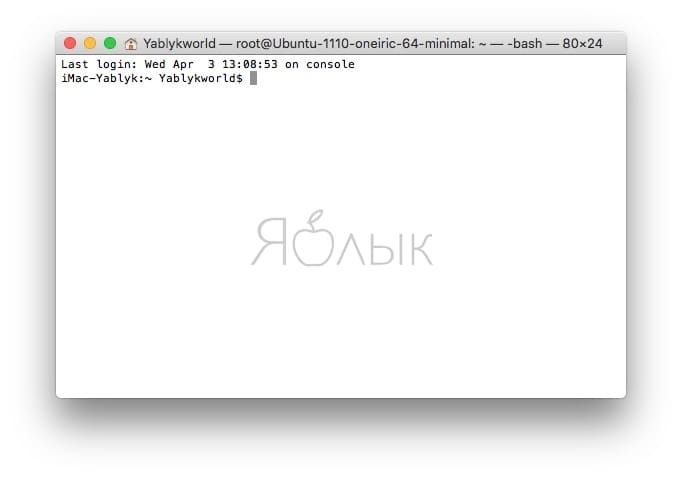
Last login: Wed Apr 3 13:08:53 on console
Вторая строчка – это, собственно, и есть командная строка для работы. Прямоугольный бокс в конце – ваш курсор.
Вводить в Терминал команды нужно сразу после второй строчки, которая имеет вид:
Вот что означают эти элементы:
Первая часть (до двоеточия) – это имя вашего Mac. Двоеточие – просто визуальный разделитель.
Вторая часть начинается с тильды (
). Она указывает на то, что вы находитесь в домашней директории, и использует краткое имя пользователя.
Наконец, знак доллара уведомляет о том, что вы вошли в систему как пользователь без рут-прав.
Как изменить размеры окна Терминала по умолчанию
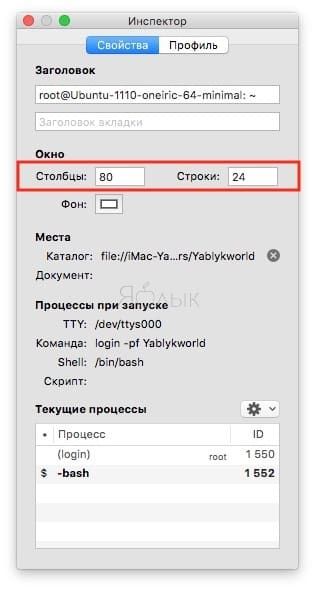
Терминал не идеален. Текст команд набирается мелким шрифтом, его трудно анализировать, а курсор порой нелегко найти. Да, размер окна можно увеличить – но macOS «забудет» ваши настройки сразу после того, как вы закроете приложение.
Для того, чтобы сделать окно Терминала более удобным, нажмите ⌘Cmd + I – откроется Инспектор (или в строке меню вверху при открытом терминале выберите Shell → Показать Инспектор). В секции Свойства укажите более удобные для вас значения в пунктах Столбцы и Строки, а затем подтвердите выбор клавишей Return (Enter).
Как изменить фон в окне Терминала
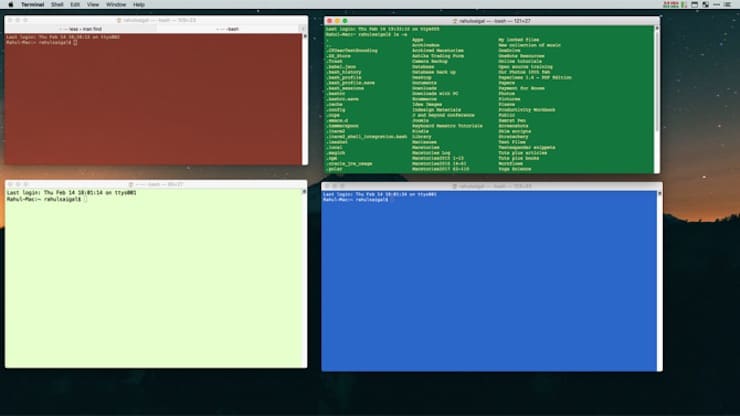
В том же Инспекторе, во вкладке Профиль будут указаны доступные темы оформления – ими можно изменить внешний вид Терминала до неузнаваемости.
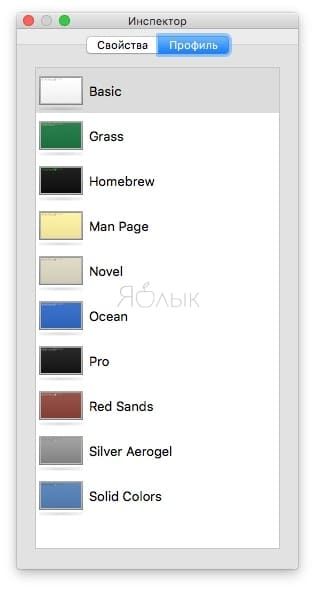
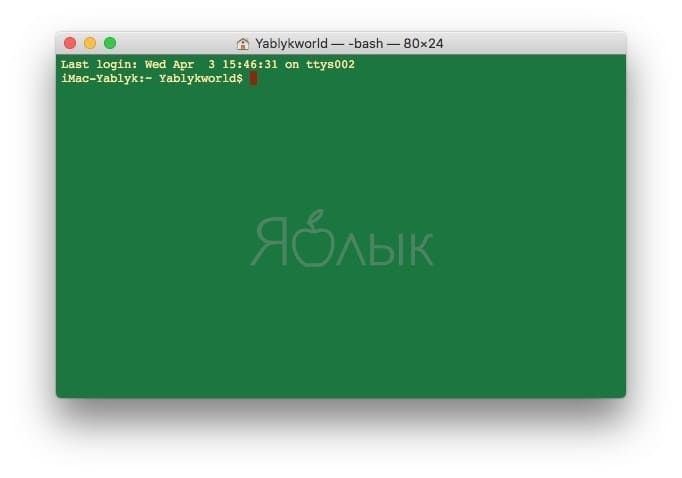
Например, попробуйте вариант Homebrew – и почувствуйте себя Windows-хакером! :).
Предпросмотр всех тем оформления есть в настройках. Для перехода к ним выберите в строке меню Терминал → Настройки → Профили.
Как изменить текст в Терминале
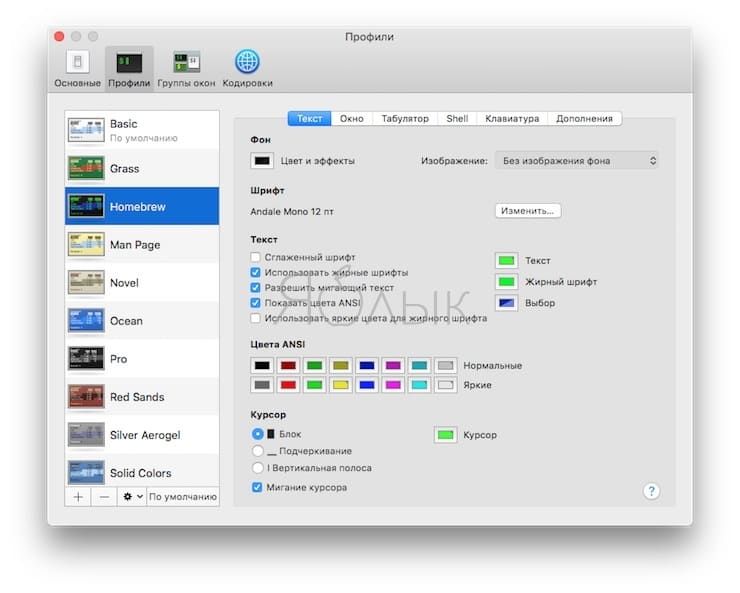
Создатели Терминала встроили в приложение необходимые инструменты для настройки системного текста «под себя».
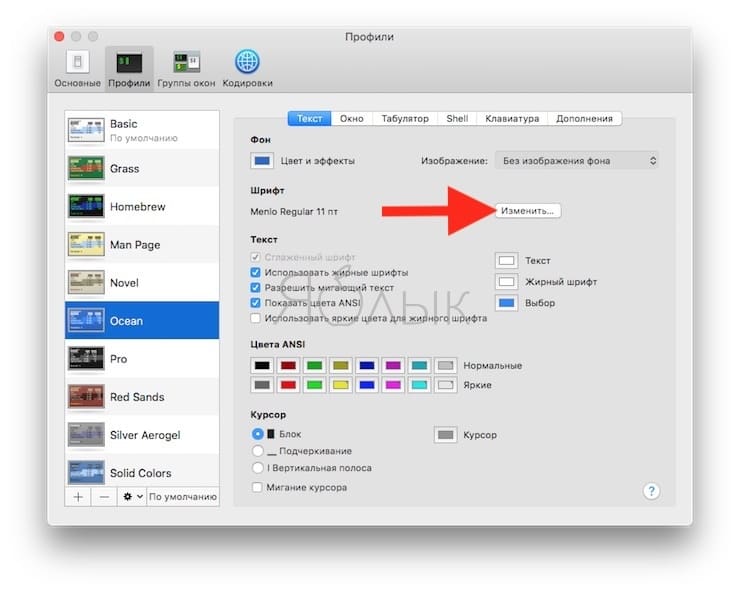
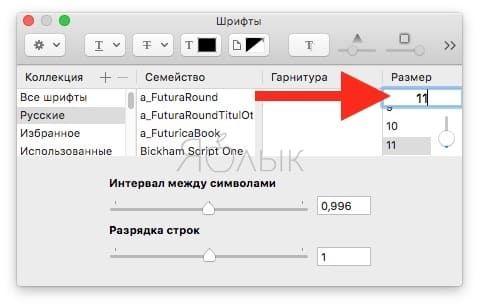
Например, для смены шрифта и – что самое главное! – его размера достаточно нажать кнопку Изменить в разделе настроек Текст.
Есть и опции для того, чтобы включить или выключить жирный шрифт, использовать сглаженные шрифты, сменить цвет (!) текста.
Да что там – можно изменить даже курсор! Доступные варианты – блок, подчеркивание или вертикальная полоса. Также в вашей власти – решить, должен ли мигать курсор, и какого цвета ему быть.
Наконец, при желании меняется и прозрачность окна Терминала. В результате очень легко «повесить» прозрачное окно прямо над веб-страницей и вводить команды по мере того, как вы читаете какую-нибудь инструкцию.
Атрибуты окна Терминала
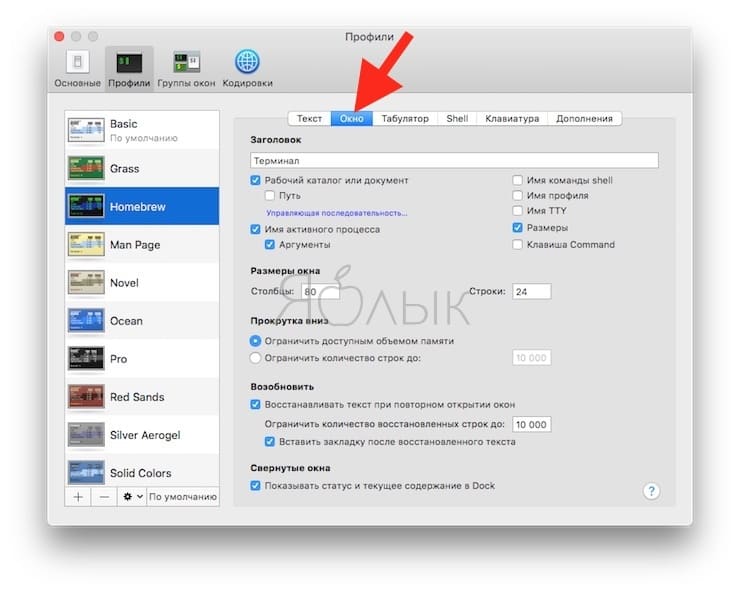
Они включают в себя название, размер, лимит на скроллинг и тому подобные параметры. Помните о том, что выбранные вами настройки применяются только к профилю, а не ко всему Терминалу в целом. Для того, чтобы изменить название окна, просто введите нужный текст в соответствующей строке (Настройки → Окно → Заголовок).
Атрибуты оболочки (Shell)
Здесь происходит тонкая настройка Терминала. Вы можете выбрать команду для запуска сразу после старта (например, запускать «автоматом» стороннюю оболочку).
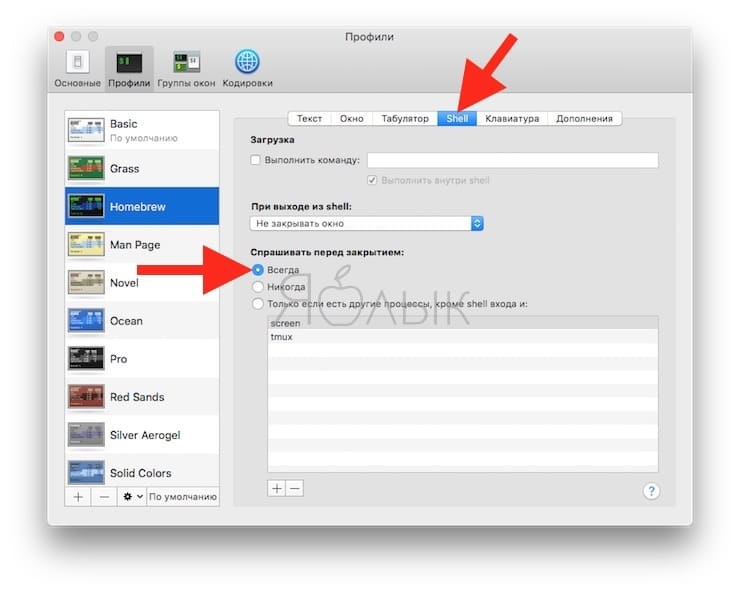
Полезная опция – попросить Терминал выдавать предупреждения перед закрытием. Для этого откройте Профили → Shell, и в пункте Спрашивать перед закрытием выберите вариант Всегда.
Работа с группами окон в Терминале
А вы знали, что в Терминале можно открывать сразу несколько рабочих окон, размещать их на десктопе так, как вам удобно, а затем никогда не терять эту сессию? За это отвечает специальная функция Группы окон. С её помощью каждое «окошко» получает свой собственный процесс, атрибуты и позицию на рабочем столе.
Перед тем, как создать группу окон, потребуется:
- Расставить нужные окна на рабочем столе так, как вам хочется.
- Настроить «под себя» атрибуты, размер и форму каждого окна.
- Запустить все нужные команды.
Всё готово? Теперь открывайте Окно → Сохранить окна как группу. Далее введите название новой группы, поставьте галочку напротив надписи Использ. группу окон при запуске Терминала и нажмите Сохранить.
Для восстановления вашей группы выберите всё тот же раздел Окно → Открывать группу окон. Чтобы импортировать или экспортировать такие группы, выберите Настройки → Группы окон и нажмите на иконку-шестеренку в нижней части экрана.
Настройка оболочки по умолчанию
Изначально в macOS работает bash. Но есть и другие – bin/bash, /bin/csh, /bin/zsh, /bin/ksh и т.п.
Unix-энтузиасты любят работать с zsh (или Z), т.к. в ней есть много функций и поддержка десятков самых разных плагинов.
Если вы новичок, установленной по умолчанию оболочку bash будет более чем достаточно.
Источник


