Mac os qemu github
QEMU/KVM setup with GPU passthrough for MacOS on an Arch Linux host
The script should make it comfortable and easy to launch a VM with QEMU/KVM with common and configurable parameters.
If you want to use your GPU inside the VM with PCI passthrough, it cares about driver loading/unloading with no reboot required, so if you are using the GPU on the host OS, you only have to save your work and stop the xserver and when you shutdown the VM, you can continue using the GPU on the host by restarting the xserver. If you have a secondary GPU, you can additionally start another xserver for the host OS while the VM is running.
If you take the cost of partitioning your hard disks, it has the advantage that you can use one single OS installation to natively boot into it (dual-boot) with full performance and use that installation also for the VM. For the VM, it additionally results in having much better IO performance compared with having large file system images on your host linux partition.
| Mainboard | ASRock H87 Pro4 |
| CPU | Intel(R) Core(TM) i5-4570 |
| GPU | GeForce GTX 760 |
| OS | Arch Linux |
In the BIOS settings of the mainboard, enable VT-d and set the primary GPU to Onboard .
Install QEMU and OVMF UEFI firmware files:
Add intel_iommu=on to the linux command line. If your bootloader is GRUB, edit /etc/default/grub and add it to GRUB_CMDLINE_LINUX and regenerate grub.cfg :
The script loads some configuration parameters from the config file.
The DRIVES parameter contains the paths of file-systems that should be available inside the VM. It can contain file-system images or physical drives, e.g.:
Mouse and keyboard are passed via evdev , which allows you to easily switch between host and guest by pressing both control keys. The INPUTS parameter contains the paths of input devices, e.g.:
A SMB share is accessible from within the VM via \\10.0.2.4\qemu and allows access to the path defined in SHARE on your host OS.
The default mode uses the virtual GPU qxl on the guest. The VM is accessible via the QEMU window, can be maximized and scaled to fit the screen size and performs great for non intensive rendering tasks, as showing desktop and some UI applications.
Since it is the default, run the VM with:
The primary GPU is passed to the guest OS and gives native rendering performance. If the GPU is used by the host, e.g. by a running xserver, the session must be closed before using any of the following modes and can be restarted when the VM is shut down.
If you have a second GPU (including Intel Integrated Graphics), you can restart the xserver with an alternate xorg.conf.
To use Intel Integrated Graphics, it could look like this:
Источник
Mac os qemu github
A guide to macOS virtualization and PCI Passthrough on Ubuntu Server 18.04+ and Debian 10+, done completely through the command line. The libvirt library is used, which provides clean syntax and provides features such as autostart. Finally, unlike other guides, this guide attaches the vfio_pci driver to PCI devices at the earliest hook possible ( initramfs ), thus preventing bugs with early GPU initialization.

macOS Catalina Booting on a Debian 10 Host
Virtualization technology has matured a lot in the past few years. The two biggest features are KVM (Kernel-based Virtual Machine) and PCIe-Passthrough. KVM allows near-native usage of the CPU, while PCIe-Passthrough allows native usage of the PCI device by the guest. If you passthrough a graphics card, it will even allow you to do gaming, HDMI/DisplayPort audio, etc at full speed. Furthermore, you can even passthrough ethernet cards and USB controllers.
Table of Contents
You will need a Mac in order to download and create an install image. You should also use a Mac if you are using Clover Configurator to edit the Clover config.
There are two PCIe devices I wish to passthrough:
Ethernet (Intel I219-LM) There is poor support in macOS for the Intel I210, so I chose the Intel I219-LM. The I210 will be used for the host.
Graphics Card (AMD Radeon RX 560) Allows me to run a display off of macOS, as well as accelerate the rendering of macOS desktop. Furthermore, the RX 560 works out of the box in macOS 10.14.
Creating the install image
Let’s begin with the step that requires a Mac.
- Follow the instructions in https://support.apple.com/en-us/HT201372 to download the desired installer.
- Now create a virtual USB Drive. Open Disk Utility, then navigate to File, New Image, Blank Image. . For the Image Format select sparse disk image . For Format choose Mac OS Extended (Journaled) . For Size, type in 12 GB . Save it, and it should auto-mount in the left sidebar of Disk Utility. Click it, and note the path of the volume under Mount Point: .
- Follow the rest of the Apple Support Document, except replace MyVolume with the volume above.
- Now, convert the virtual drive back into an .img file. Type diskutil list to find out the name of your virtual drive (the 12 GB drive), and replace /dev/disk3 in the following command:
We need to install qemu (the hypervisor), libvirt (the VM daemon), and virtinst (the VM manager).
If you have Ubuntu >= 19.10 or Debian >= 10, then run the following:
If you have Ubuntu Server 18.04 to 19.04, then run the following:
Enabling Kernel Support for Passthrough
These are the two kernel flags required: intel_iommu=on (allows PCIe passthrough), and iommu=pt (speeds up the PCIe passthrough, optional — remove if something doesn’t work)
- Open the grub configuration:
Creating the macOS Bootloader
We need to install libguestfs-tools in order to create a Clover bootloader.
Download the script for making the bootloader:
Download the latest Clover Bootloader with filename CloverISO-XXXX.tar.lzma from the following webpage: https://github.com/Dids/clover-builder/releases
Lastly, download config.plist from this repository. (Later, in order to get iMessage/iCloud working, we will have to edit this config.plist using Clover Configurator)
Now we can run the script, which results in a file called clover.raw being created in your current directory:
Creating a virtual disk for installation
We need to use qemu-img to create a virtual disk to install macOS to.
- Run the command, and change 90G , to however big or small you want your virtual machine’s drive size to be.
Configuring the virtual machine
Download the macos.xml file from the git directory. This file defines the virtual machine. Edit the file to fit your needs
Disks and Install Media
Change all the file paths in the following section to match your system. Make sure to use full paths.
Note that the Clover bootloader occupies the sda slot, i.e the first boot device.
Later, we will delete the lines for the 10.15.0.img install media.
Also, delete the line if you used a -f raw image from earlier.
For those who are connecting to this VM outside of their home network, you can change listen to ‘127.0.0.1’ and use a SSH tunnel to connect to it.
- To create a SSH tunnel run:
Next we need to install a UEFI implementation for QEMU.
Simply download the two OVMF files from the repository and place them in the same folder as your VM. Then change the macos.xml file such that the following two paths point to the full paths of the corresponding OVMF files. Then change the last path to point to the directory of the files.
- First add yourself as a user of libvirt and/or kvm:
Connecting to the virtual machine
Start the virtual machine:
If you get an error about how network default is not active, then run:
Download a VNC viewer on another computer, such as RealVNC Viewer (https://www.realvnc.com/en/connect/download/viewer/) or gvncviewer, and connect to the server. (In order to fix the Left Command Key not working in RealVNC Viewer, go to Preferences -> Expert -> LeftCmdKey and set it to Super_L )
Quickly press Esc to enter the setup screen. If you missed it you can stop the virtual machine and try again:
It’s important to enter the setup screen so we can change the resolution of the UEFI to match that of macOS, since we are using a QEMU display. Go to Device Manager -> OVMF Platform Configuration -> Change Preferred and select 1024×768 .
Hit ESC , Y , ESC . Finally, select Reset , otherwise the settings will not be applied to the boot.
- Once the Clover bootloader is displayed, hit enter on the Install image. The Installer will take several minutes to boot up, and may look frozen most of the time. I would say give it
10 minutes before giving up.
90 GB), and click Erase. Name your drive Macintosh HD . Use the options Mac OS Extended (Journaled) and GUID Partition Map .
Setting Up macOS for the First Time and Networking
Clover should automatically boot up macOS from now on. While setting up your macOS installation in the initial bootup, definitely do not login to iCloud/iMessage/iAnything yet. Logging in now may break things. Only set up user accounts, time zone, etc. While configuring the network, it may fail (or crash). That is fine.
Cleaning Up the macOS XML configuration file
We are almost done.
- Shutdown the macOS machine safely
- Edit the macos.xml file and remove the following block to get rid of the installation media:
iCloud and iMessage
This section requires macOS.
- Download Clover Configurator, and open the config.plist file
- Edit it using the following methods: http://www.fitzweekly.com/2016/02/hackintosh-imessage-tutorial.html
- Copy the file back to your server. Go to the «Troubleshooting» section of this guide and recreate your Clover bootloader.
- Start the VM, open a Terminal window, and run sudo nvram -c , then sudo reboot .
PCI Passthrough for Networking
The networking bug above annoyed me so much, and because I was too lazy to set up tap networking, I ended up spending multiple hours setting up the PCI passthrough of one of my ethernet jacks :).
After running the script, you should get something like this:
I chose to passthrough the I219-LM ethernet controller, and thankfully there are no other devices in IOMMU Group 9.
We need to load the kernel modules/drivers that will attach to our PCI devices during the boot process. We will modify the kernel image that is loaded into the RAM on bootup. Note that vfio-pci is an alias for vfio_pci , and that vfio_pci depends on vfio and vfio_virqfd .
Stop the host (Linux) from loading the ethernet driver. You can find the name of the currently loaded driver by running the command lspci -v . The filename should start with the name of the driver you want to blacklist.
Update your boot image
Now, within the macOS VM, install KextBeast, and then install the ethernet driver called MausiEthernet.kext . Shutdown the VM.
Add the ethernet PCIe device to the macos.xml file. You can find the PCIe address of the device by running lspci -v . The following is the XML definition:
Lastly, start the VM. If any network interface names are numbered oddly on the macOS VM, open /Library/Preferences/SystemConfiguration in Finder and delete preferences.plist and NetworkInterfaces.plist . Reboot the VM.
PCI Passthrough for Graphics Card
Same as above, except we need to attach the vfio_pci driver to multiple PCI-e addresses. Below, I also passthrough my entire USB 3.0 controller!
For the graphics card definition, check the commented-out block in macos.xml .
Note, you cannot passthrough a PCI bridge to a VM.
Autostart the VM
Please star this guide if it is useful!
There are a few annoying bugs with macOS virtualization and I wouldn’t recommend the VM as a desktop replacement. For example, the mouse cursor jumps around when hovering over hyperlinks. Dropdown menus sometimes appear in the bottom left corner. iMovie crashes regularly when importing videos into the timeline. Preview has bugs when using the magnifier. Airplay audio has synchronization bugs with video. The volume control in the menubar keeps glitching. With all this said, however, it is extremely useful as a server, so I recommend the following tutorial to those who want it simply as a VM.
About
A macOS Virtualization Journey with GPU Passthrough
Источник
cellularmitosis / README.md
QEMU PowerPC G4 OS X Tiger (10.4) setup
Here are some notes on how I set up an installation of OS X Tiger (10.4) on an emulated PowerPC G4 using QEMU, on a modern x86_64 Mac.
This setup was performed using QEMU 5.0.0 (obtained via brew install qemu ).
Note: at some point during this process -cdrom /dev/cdrom seems to have stopped working, but -cdrom /dev/disk2 works.
Step 1: Initial installation
In this step we will format the disk and perform the initial OS X installation.
Download a copy of the 2Z691-5305-A OS X Tiger installation DVD and burn it to a physical DVD.
Note: for some reason qemu does not seem to be able to boot .iso files of the OS X installation DVD (using -cdrom tiger.iso ), but if you burn that .iso to a physical DVD and then use -cdrom /dev/disk2 , it works.
Boot the DVD to verify it works:
If you see the grey Apple logo, the DVD is working correctly with QEMU:

Quit QEMU and create a 127GB QEMU disk:
Boot the install DVD with the disk attached and being the installation. QEMU will exit when the installer reboots.
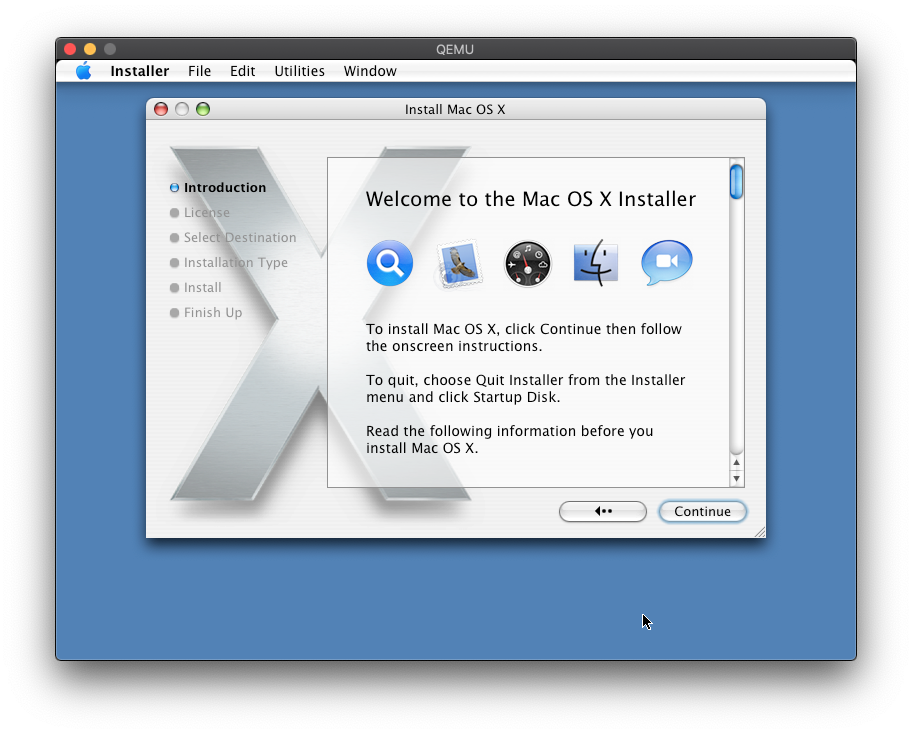
When the installer reaches the disk selection screen, there will be no disks to choose from, because the disk has not been partitioned yet:

Start up Disk Utility:

«Erase» the disk to partition and format it:

Quit Disk Utility and the installer should now see the newly formatted partition:

The install will take quite some time (over an hour). When it completes, it will reboot, which will cause QEMU to exit (due to the -no-reboot flag).

At this point you may (physically) eject the installation DVD (from your host Mac).
Mark the disk as read-only to prevent any accidental writes to it (which would cause any snapshots based on this disk to become corrupt):
Step 2: User account creation, system updates
In this step we will create a user account and install all of the system updates.
Create a snapshot of the disk (think of this as forking the hard drive):
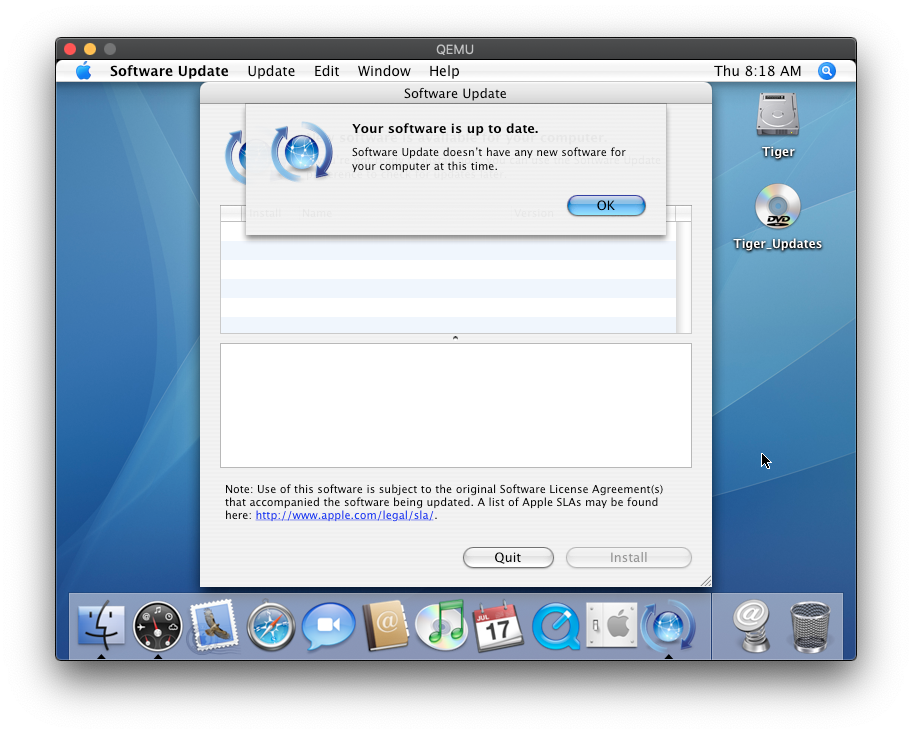
The system updates can either be installed using the Software Update utility (iteratively repeated across many reboots), or you can download and install them manually.
The manual route is quicker because some of the updates are bundled, and you don’t have to wait on Software Update to detect which updates have / haven’t been installed yet.
To install the updates manually, download (on your host Mac) item #29 (Tiger_Updates.dmg_.zip) from the «Mac OS X for PPC» page of macintoshgarden.org.
Unzip that file and convert the dmg to a DVD image:
We can now use tiger-updates.cdr as a virtual DVD with QEMU.
Boot the G4 and create a user account:
Note: if you plan on using Software Update rather than tiger-updates.cdr, you man omit the -cdrom tiger-updates.cdr line from the above command.
Note: this boot may take several minutes to get started.
This install was set up with user macuser and password macuser :


This installation was set up with the Central timezone:

Disable the screen saver and power-saving features:
Open up System Preferences and:
- Display & Screen Saver -> Screensaver -> Start screen saver -> Never
- Energy Saver
- Put the computer to sleep when it is inactive for -> Never
- Put the display to sleep when the computer is inactive for -> Never

If you did not use Software Update, open up the Tiger_Updates «DVD» and install all of the updates:


If you go with the updates DVD route, make sure you run Software Update at the end just to be sure you’ve covered everything.
Mark the snapshot read-only to prevent accidental writes to it:
Step 3: Web browser, video player, text editor
In this step we will install TenFourFox, VLC and TextWrangler.
Create a snapshot of the disk:
TenFourFox is a fork of the Firefox web browser which is currently supported on Tiger/PPC. Their website links to the latest version, FPR22.
The latest version of VLC for Tiger/PPC is 0.9.10, which is still available from their downloads page.
The latest version of TextWrangler for Tiger/PPC is 3.1, available via Bare Bones or macintoshgarden.org.
Strangely, no combination of using Disk Utility and hdiutil to create .dmg or .cdr images of TenFourFox.app seemed to work with Tiger:
Note: in retrospect, perhaps this was an APFS vs. HFS+ issue?

I resorted to burning TenFourFox, VLC, and TextWrangler to a physical DVD and passing it through to QEMU.
Note: even burning to a physical CD-ROM didn’t work — it had to be a DVD.
Drag the applications into /Applications .
Shutdown the G4 and mark the disk read-only:
Step 4: Xcode, Tigerbrew
In this step we will set up a development environment for building modern Unix software.
Create a snapshot of the disk:
The latest version of Xcode Tools for Tiger/PPC is 2.5, which is still available via Apple (search for «xcode 2.5» at https://developer.apple.com/download/more/, requires login), or via macintoshgarden.org from their Xcode page.
Again, I had to burn this to a physical DVD in order to use it with QEMU.
Boot the G4 and install the Xcode Tools:


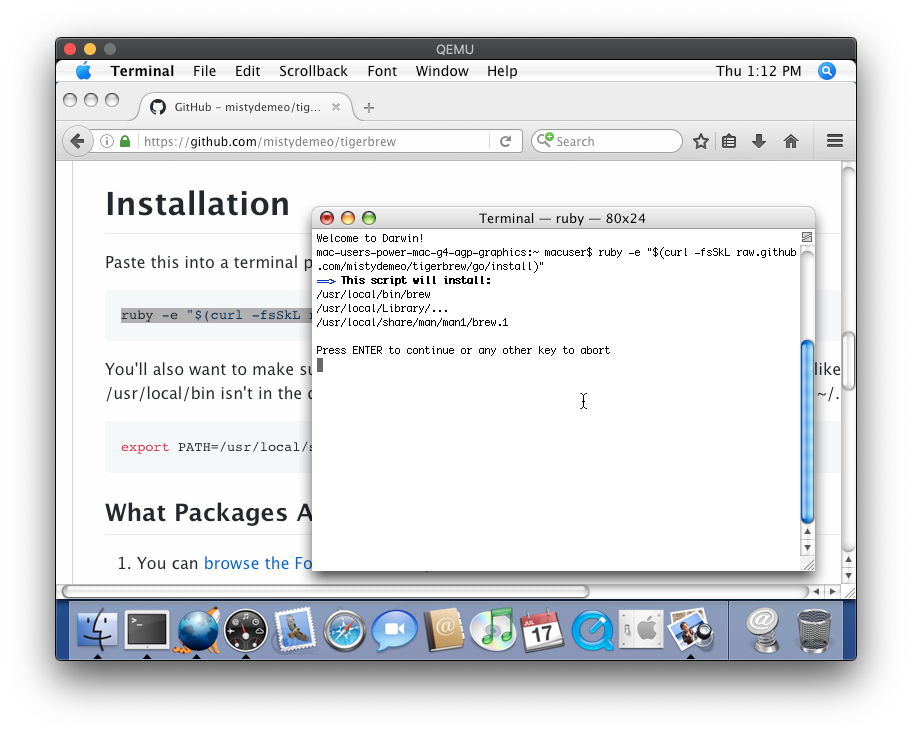
Tigerbrew is a fork of Homebrew for PowerPC Macs running Tiger or Leopard.
Open up a terminal on the emulated G4 and use the following commands to install Tigerbrew:
Also, change Terminal.app to spawn a «login» bash shell:
- Terminal -> Preferences -> Execute this command -> /bin/bash -l

Don’t forget to mark the disk image read-only:
Using these QEMU hard drive images
At this point we’ve created a series of four chained hard drive images:
We can squash these images into a single, combined, stand-alone hard drive image:
We can then boot using that combined image directly, without the use of any snapshots. This is analogous to having a real Mac with a physical hard drive:
Or, we could treat combined.qcow2 as a «golden master» and create snapshots based off of it, perhaps to try out some experimental tigerbrew packages:
Perhaps in experiment-1.qcow2 we try out gcc-7 , and in experiment-2.qcow2 we try out llvm , etc.
Each of these snapshots can be used with the above command line as the -hda argument:
- qemu-system-ppc . -hda experiment-2.qcow2
We could even create further branches off of e.g. experiment-2.qcow2 :
Perhaps we decide that experiment-2B.qcow2 was the keeper and the rest can be gotten rid of?
combined.qcow2 now contains the changes from experiment-2.qcow2 and experiment-2B.qcow2 .
Thus far we’ve been branching off of the ‘tip’, but we could just as easily branch off several points in the snapshot tree. For example, if we hadn’t merged the images into combined.qcow2 , we could make a «daily driver» snapshot for web browsing based off of 3-browser.qcow2 , and a «dev box» for doing development work based off of 4-tigerbrew.qcow2 :
Let’s say we accidentally hosed our dev box with a careless rm -rf / . Starting over with a new dev box is trivial:
Источник


