- Как устанавливать bin файлы в Linux
- Установка bin файлов в Linux
- Консольный вариант
- Графический вариант
- Как установить файл BIN в Ubuntu Linux — Вокруг-Дом — 2021
- Table of Contents:
- Терминальная установка
- Шаг 1
- Шаг 2
- Шаг 3
- Шаг 4
- Шаг 5
- Шаг 6
- Установка GUI
- Шаг 1
- Шаг 2
- Шаг 3
- Как установить ISO-файл Rosetta Stone
- Как установить файл DMG в Ubuntu
- Как установить игру в Zip-файл
- How to install .bin file in linux/ubuntu (Октябрь 2021).
- How to Install or Execute a .bin File in Ubuntu Linux
- What is Bin file?
- Install Or Execute Bin File
- Conclusion
- 4 Installing the Software
- Running the Installation Program
- Additional Installation Features
- Starting the Installation Program on Windows
- Starting .bin Installation Programs on Linux or UNIX
- Starting JAR File Installation Programs for UNIX and Windows
- Installing JAR File Installation Programs for 64-Bit Platforms Using a 64-bit JDK
- Responding to the Oracle Installer Screens
Как устанавливать bin файлы в Linux
Не смотря, на то, что большинство программ в операционной системе Linux (в моем случае Ubuntu) можно установить из Центра приложений, тем самым обеспечивая совместимость с системой, иногда вам может понадобится установить новую версию программы или наоборот, старую, которой может не оказаться в списке.
Такие программы чаще всего распространяются, в формате .bin также известные как бинарные файлы. Бывает, что они запакованы в архив, а иногда как исполняемые файлы. Установка bin linux, может быть произведена через терминал либо же через графический интерфейс. Рассмотрим оба варианта.
Установка bin файлов в Linux
Консольный вариант
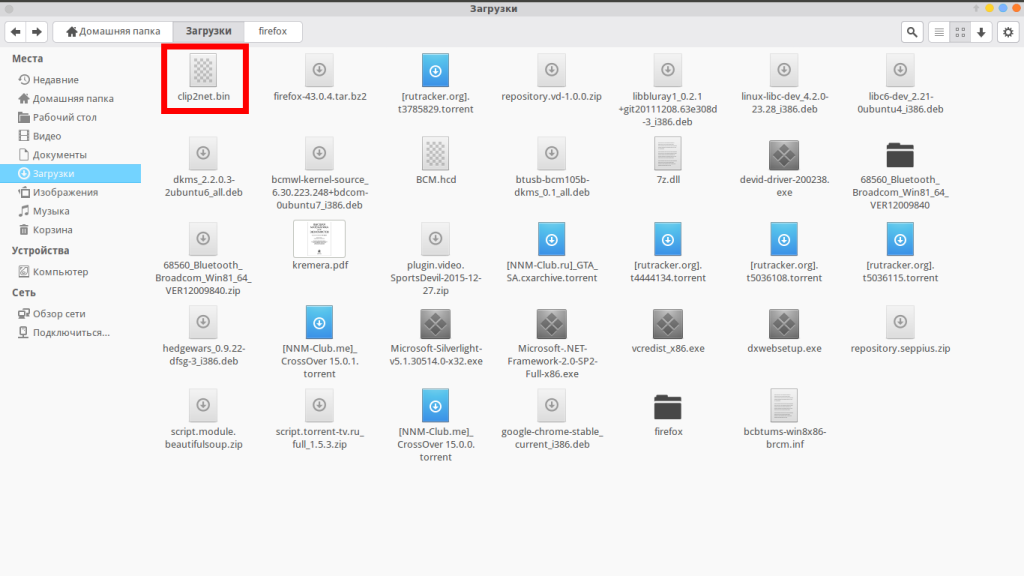
1. Для начала в файловом менеджере, нужно найти наш бинарник.
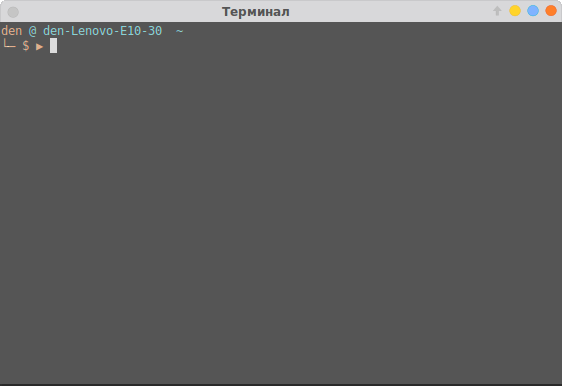
2. Откроем терминал, сочетанием клавиш Ctrl+Alt+T.
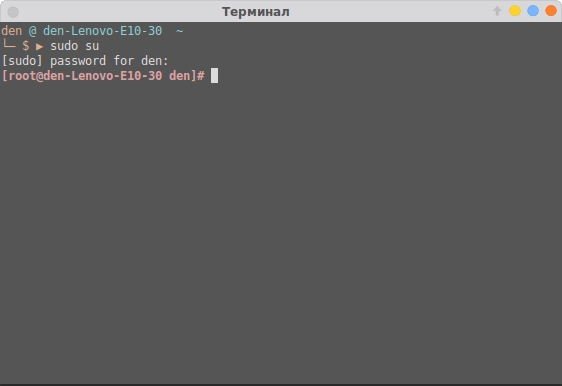
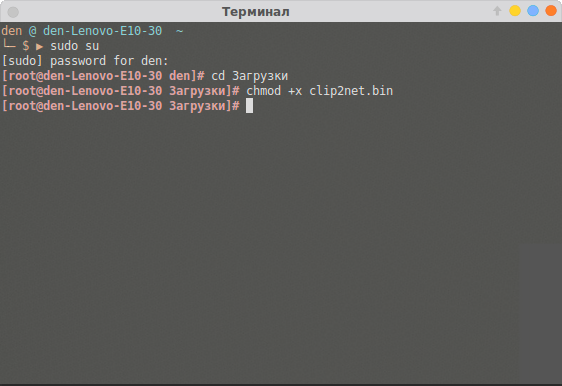
3. Зайдем в режим суперпользователя (под рутом). Для этого введем следующую команду в терминале:
Затем нужно ввести пароль.
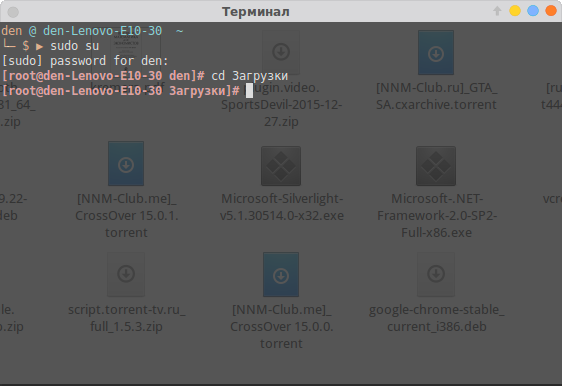
4. Теперь, в терминале нам нужно зайти в ту директорию, где расположен наш бинарник. В моем случае это будет так:
5. Дайте права на выполнение файла .bin, командой:
chmod +x thefile.bin
В моем случае это выглядит так:
chmod +x clip2net.bin
6. Теперь выполните его. Для этого находясь уже в той директории, где находится бинарный файл введем точку и слэш, затем имя файла. В случае со мной это выглядит так:
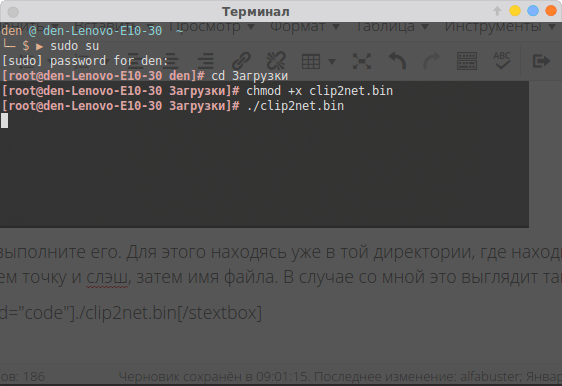
7. После этой команды, установщик программы запустился и спрашивает меня на каком языке я хотел бы установить bin файл в linux.
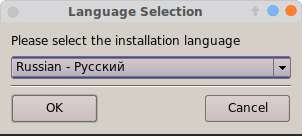
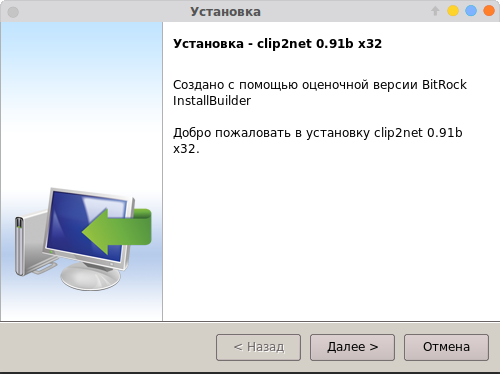
8. Далее устанавливаем программу как обычно это делается в ОС Windows.
Графический вариант
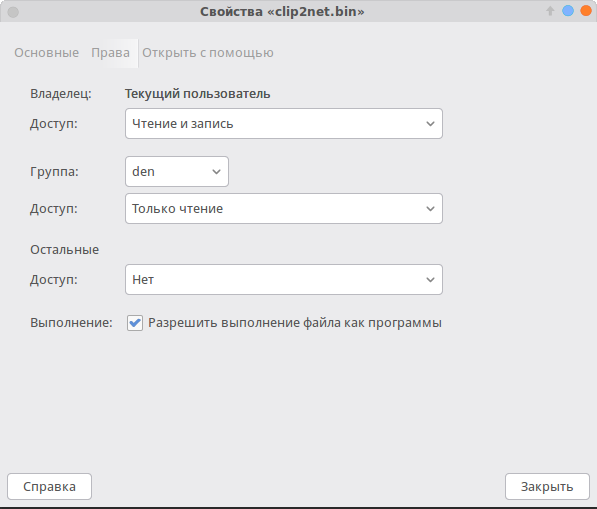
Он ненамного проще, но для новичков, которые недавно перешли с Windows будет понятнее. Первые 3 пункта из консольного варианта все же придется выполнить. Затем нужно выбрать файл, нажать правой кнопкой мыши, выбрать пункт «свойства». На вкладке права, нужно поставить галочку напротив пункта «Разрешить выполнение файла как программы».
Закрываем окно. И перетаскиваем этот файл в терминал, запущенный от суперпользователя, имя файла и путь уже впишутся автоматически, остается лишь нажать на кнопку «Enter». Далее, вы можете установить bin файл, как и в первом варианте. На этом все.
Источник
Как установить файл BIN в Ubuntu Linux — Вокруг-Дом — 2021
Table of Contents:
Хотя большинство программного обеспечения, доступного для Ubuntu, можно легко установить с помощью Ubuntu Software Center, обеспечивая совместимость с вашей системой, иногда вам может потребоваться программа, которой нет в списке, например, новейшие версии или даже бета-версии. Часто такие программы распространяются в виде двоичных или BIN-файлов, которые обычно являются самораспаковывающимися архивами или исполняемыми программами установки. Процесс установки одинаков для обоих, и его можно выполнить либо в терминале, либо через Unity, стандартный интерфейс рабочего стола для Ubuntu.

Программное обеспечение Linux часто распространяется в виде исполняемых файлов BIN.credit: julos / iStock / Getty Images
Терминальная установка
Шаг 1
Загрузите файл BIN, который вы хотите установить, указав его имя и каталог, в котором он был сохранен.
Шаг 2
Откройте окно терминала, щелкнув значок Ubuntu, расположенный на панели задач Launcher, выполнив поиск «Терминал» и щелкнув полученный значок. Кроме того, вы можете нажать комбинацию клавиш «Ctrl-Alt-T».
Шаг 3
Нажмите на терминал сразу после командной строки, которая является строкой, содержащей ваше имя пользователя, за которым следуют символ «@», имя компьютера и знак доллара.
Шаг 4
Введите «Загрузки CD» (без кавычек здесь и далее), затем нажмите «Enter», чтобы перейти в каталог «Загрузки», который является местоположением по умолчанию для сохранения файлов.Обратите внимание, что команды терминала чувствительны к регистру, и после каждой команды должна следовать клавиша «Ввод». Если файл находится в другом каталоге, введите «cd», а затем полный путь к файлу. Например, если он хранится в подкаталоге «Files» основного каталога «George», полная команда будет «cd / George / Files /». Используйте команду «pwd» для определения текущего каталога.
Шаг 5
Введите команду «sudo chmod + x ./FILENAME.bin», заменив «FILENAME» именем вашего файла BIN, чтобы сделать его исполняемым. Введите пароль администратора при появлении запроса, затем нажмите «Ввод». «./» обозначает текущий каталог.
Шаг 6
Введите «sudo ./FILENAME.bin», чтобы начать установку, следуя инструкциям программы. Закройте терминал, когда процесс будет завершен.
Установка GUI
Шаг 1
Щелкните значок «Файлы» на панели запуска, чтобы запустить диспетчер файлов и перейти к каталогу, в котором был сохранен файл BIN. На других компьютерах запустите файловый менеджер по умолчанию.
Шаг 2
Щелкните правой кнопкой мыши файл BIN и выберите «Свойства». Нажмите на вкладку «Разрешения» и установите флажок рядом с параметром «Разрешить запуск файла как программы», затем нажмите кнопку «Закрыть». Эти шаги почти одинаковы для рабочих столов KDE (Kubuntu Edition), GNOME и Cinnamon. В Xubuntu, который использует рабочий стол XFCE, вы не можете установить атрибут «Выполнить» из графического рабочего стола, требуя использования метода терминала.
Шаг 3
Откройте сеанс терминала и введите «sudo» в командной строке, затем введите пробел, но пока не нажимайте клавишу «Ввод». Перетащите значок для файла BIN из файлового менеджера в окно терминала и вставьте его после пробела, чтобы автоматически добавить имя файла. Нажмите обратно в окно терминала, затем нажмите клавишу «Ввод», введите пароль и снова нажмите «Ввод». Следуйте инструкциям по установке, затем закройте терминал. Обратите внимание, что в KDE вам нужно будет выбрать «Вставить как текст» после того, как вы поместите значок в терминал.
Как установить ISO-файл Rosetta Stone

Создание цифровых резервных копий вашего дорогого программного обеспечения всегда хорошая идея. Эти резервные копии представлены в виде файла ISO. Проблема в том, как использовать резервную копию после того, как вы .
Как установить файл DMG в Ubuntu

Ubuntu — это распространенный вариант Linux, имеющий удобный интерфейс и полную гибкость в настройке через окно терминала. Windows и Linux разделяют возможности .
Как установить игру в Zip-файл

How to install .bin file in linux/ubuntu (Октябрь 2021).
Источник
How to Install or Execute a .bin File in Ubuntu Linux
This post will guide you how to install .bin file on Ubuntu 14.04/16.04/18.04 Linux. How do I execute a .bin file using SSH on Ubuntu Linux server. How to execute binary files on Ubuntu Linux.
What is Bin file?
Binary Files can be in .bin or .run files under Ubuntu Linux. and the .bin or .run is the only file types, and you need to mark as executable permission to install it on your Ubuntu system. You can install it either in terminal or through GUI.
Install Or Execute Bin File
This guide will introduce two methods to install executable file under Ubuntu Linux. And executable files can also be recognized by the extension .bin and .run.
Terminall Installation
Here are the steps to install .bin files via terminal on Ubuntu:
#1 you need to download the .bin file that you want to install.
#2 Open a terminal window by clicking the Ubuntu terminal icon located on the Launcher taskbar. and then searching for “Terminal” and then clicking Terminal icon on the result page. or you can right click on the desktop, and select Terminal from the popup menu list to open one terminal window.
#3 change the current directory to your directory where the executable file is stored. for example, you have downloaded .bin files into the /tmp directory. Then type the following command:
#4 You need to mark the file permission as executable with the following chmod command, type:
Then type the required password for root, and press Enter key. And the file can be executed by the current user with root privileges now.
#5 the bin file can be run in the terminal by typing the following command:
If you hit an error message such as “permission denied”, and you can try to execute the file by adding sudo before the above command.
GUI Installation
You can also install the executable binary files via Ubuntu Desktop GUI. Here are the steps:
#1 Click the Files icon on the Ubuntu Launcher to start the File Manger and then change to the directory in which the executable file is stored.
#2 right click on the BIN file and select Properties from the popup menu list, and the Properties dialog will appear. then switch to Permissions tab, and check the Allow Executing File as Program. then click the Close button.

#3 double-click on the .run or .bin file. and if there is no any action appears to be happening, and you need to run it in the terminal.
Conclusion
You should know that how to install the executable binary file (.bin or .run) on your Ubuntu 14.04 or 16.04 or 18.04 Linux from this guide.
Источник
4 Installing the Software
This chapter describes how to start the Oracle Communications Converged Application Server installation program in graphical mode in different environments, and describes the sequence of screens that may appear in the installation process, depending on the type of installer you are using and the components you select.
In order to run the installation program in graphical mode, the console attached to the machine on which you are installing the software must support a Java-based GUI. All consoles for Windows systems support Java-based GUIs, but not all consoles for UNIX systems do. If you attempt to start the installation program in graphical mode on a system that cannot support graphical display, the installation program automatically starts in console mode.
This chapter contains the following sections:
Running the Installation Program
The Converged Application Server software must be installed on all server machines that will run an instance of Converged Application Server. Follow these installation procedures for the computers on which you will install the Administration Server and all managed servers.
Additional Installation Features
The installation program provides additional features you can use, depending on your needs and environment, including the following:
Choice of installation mode
This guide shows the graphical-mode installation, the interactive, GUI-based method for installation. Installers also can be run in console mode, which is an interactive, text-based method used from the command line; and silent-mode, which is a non-interactive method that can be run from a script as well as the command line.
Option to create a detailed installation log.
If you launch the installation from the command line or from a script, you can specify the -log option to generate a verbose installation log. The installation log stores messages (informational, warning, error, and fatal) about events that occur during the installation process. This type of file can be especially useful for silent installations.
Complete details about each of these installation features are provided in Oracle WebLogic Server 11g Release 1 (10.3.3) Installation Guide in the Oracle WebLogic Server documentation.
Starting the Installation Program on Windows
To start the installation program in graphical mode on a Windows platform, follow these steps.
Log in to the Windows system.
Go to the directory that contains the installation program.
Double-click the installation program.
For example, the name of the installation program for the Converged Application Server installer for Windows 32-bit is occas500_ja_win32.exe .
The installation program begins to install the software.
Starting .bin Installation Programs on Linux or UNIX
To start the graphical-mode installation process with .bin installation files, follow these steps.
Log in to the target Linux or UNIX system.
Go to the directory that contains the installation program.
Launch the installation by entering the following commands:
chmod a+x filename.bin
Where filename.bin is the name of your installation program. For example, for Oracle Communications Converged Application Server 5.0, the name of the Package installer file for Solaris is occas500_ja__solaris32.bin . Substitute the appropriate filename for the installation program you have obtained
The installation program begins to install the software.
See «Responding to the Oracle Installer Screens» for a description of each installation program screen.
Starting JAR File Installation Programs for UNIX and Windows
The Converged Application Server occas500_ja_generic.jar installation program is provided as a single, generic file for use with all supported operating systems. The JAR file is also the only installation program for use with 64-bit operating systems (See «Installing JAR File Installation Programs for 64-Bit Platforms Using a 64-bit JDK» for more information.).
No JDK is included in the generic installation. You must have installed a JDK appropriate to your operating system prior to using the JAR file installation program.
To start the JAR installation program, perform the following steps.
Log in to the target operating system.
Add the bin directory of the JDK to the beginning of the PATH variable definition on the target system. For example:
Go to the directory where you downloaded the installation program.
Launch the installation program by entering the following command:
The installation program begins to install the software.
See «Responding to the Oracle Installer Screens» for a description of each installation program screen.
Installing JAR File Installation Programs for 64-Bit Platforms Using a 64-bit JDK
The JAR file is the only installation program for use with 64-bit operating systems. If you are installing Converged Application Server on a 64-bit platform using a JAR installation program:
Include the -d64 flag in the installation command when using a 32/64-bit hybrid JDK (such as for the Solaris64 platforms). For example, if installing in graphical mode using the Package installer:
Run the Java -version command (or java -d64 -version command on platforms using a 32/64-bit hybrid JDK) to ensure that your JAVA_home refers to a 64-bit JDK.
If you are using the Sun 64-bit JDK, use the following command to install Converged Application Server:
Responding to the Oracle Installer Screens
The installation program displays a series of screens prompting for information from which to create your Converged Application Server deployment. To install the software, see the Oracle WebLogic Server Installation Guide in the Oracle WebLogic Server documentation for information on responding to the installation program prompts.
After installing the Converged Application Server software, you must run the Configuration Wizard to configure the Converged Application Server domain for your particular deployment. See Chapter 5, «Post-Installation Tasks» for more information.
Источник


