- How to refresh, reset, or restore your PC
- Before you start to refresh or reset your PC
- Refresh, reset, or restore
- To refresh your PC
- To reset your PC
- To restore your PC to an earlier point in time
- Last reboot in windows
- How To Check Last Reboot Time Of Your Windows PC
- How to check last reboot on Windows Server
- Windows Server: How to schedule a reboot
- 1. Use the System Event Log
- 2. Use Command Prompt
- 3. Schedule reboot with Scheduled Tasks
- How can I get the Windows last reboot reason
- 2 Answers 2
How to refresh, reset, or restore your PC
Note: For information about this topic in Windows 10, see Recovery options in Windows 10.
If you’re having problems with your PC, you can:
Refresh your PC to reinstall Windows and keep your personal files and settings. Refresh also keeps the apps that came with your PC and the apps you installed from the Microsoft Store.
Reset your PC to reinstall Windows but delete your files, settings, and apps—except for the apps that came with your PC.
Restore your PC to undo recent system changes you’ve made.
If you’re having trouble starting (booting) your PC, see Windows Startup Settings (including safe mode), and go to the “Get to Windows Startup Settings in the Windows Recovery Environment” section. You can refresh, reset, or restore your PC from the Windows Recovery Environment.
If you want to back up and restore your personal files using File History, see Set up a drive for File History.
Before you start to refresh or reset your PC
In most cases, once you start to refresh or reset your PC, it’ll finish on its own. However, if Windows needs missing files, you’ll be asked to insert recovery media, which is typically on a DVD disc or thumb drive. If that happens, what you’ll need depends on your PC.
If your PC came with Windows 8.1 or Windows RT 8.1, you’ll need the discs or thumb drive that came with your PC. Check the info that came with your PC to see if your PC manufacturer provided these discs or media. In some cases, you might have created them when you first set up your PC.
If you don’t have either of those, you can make them if you have a USB thumb drive of 16 GB or larger. Having a recovery drive can help you troubleshoot and fix problems with your PC, even if it won’t start. For more info, see Create a USB recovery drive.
If you upgraded your PC to Windows 8.1 or Windows RT 8.1 with a DVD, use that disc. If you don’t have Windows 8.1 or Windows RT 8.1 media, contact Microsoft Support.
Refresh, reset, or restore
Select any of the following for more detailed info.
If your PC isn’t performing as well as it once did, and you don’t know why, you can refresh your PC without deleting any of your personal files or changing your settings.
Note: If you upgraded your PC from Windows 8 to Windows 8.1 and your PC has a Windows 8 recovery partition, refreshing your PC will restore Windows 8. You’ll need to upgrade to Windows 8.1 after the refresh has finished.
Warning: Apps you installed from websites and DVDs will be removed. Apps that came with your PC and apps you installed from Microsoft Store will be reinstalled. Windows puts a list of removed apps on your desktop after refreshing your PC.
To refresh your PC
Swipe in from the right edge of the screen, tap Settings, and then tap Change PC settings.
(If you’re using a mouse, point to the upper-right corner of the screen, move the mouse pointer down, click Settings, and then click Change PC settings.)
Tap or click Update and recovery, and then tap or click Recovery.
Under Refresh your PC without affecting your files, tap or click Get started.
Follow the instructions on the screen.
If you want to recycle your PC, give it away, or start over with it, you can reset it completely. This removes everything and reinstalls Windows.
Note: If you upgraded your PC from Windows 8 to Windows 8.1 and your PC has a Windows 8 recovery partition, resetting your PC will restore Windows 8. You’ll need to upgrade to Windows 8.1 after the reset has finished.
Warning: All of your personal files will be deleted and your settings will be reset. All apps that you installed will be removed. Only apps that came with your PC will be reinstalled.
To reset your PC
Swipe in from the right edge of the screen, tap Settings, and then tap Change PC settings.
(If you’re using a mouse, point to the upper-right corner of the screen, move the mouse pointer down, click Settings, and then click Change PC settings.)
Tap or click Update and recovery, and then tap or click Recovery.
Under Remove everything and reinstall Windows, tap or click Get started.
Follow the instructions on the screen.
Note: You’ll be asked to choose whether you want to erase data quickly or thoroughly. If you choose to erase data quickly, some data might be recoverable using special software. If you choose to erase data thoroughly, this will take longer but it makes recovering data less likely.
If you think an app or driver that you recently installed caused problems with your PC, you can restore Windows back to an earlier point in time, called a restore point. System Restore doesn’t change your personal files, but it might remove recently installed apps and drivers.
System Restore isn’t available for Windows RT 8.1.
Windows automatically creates a restore point when you install desktop apps and new Windows updates, if the last restore point is older than 7 days. You can also create a restore point manually at any time.
To restore your PC to an earlier point in time
Swipe in from the right edge of the screen, and then tap Search.
(If you’re using a mouse, point to the upper-right corner of the screen, move the mouse pointer down, and then click Search.)
Enter Control Panel in the search box, and tap or click Control Panel.
Enter Recovery in the Control Panel search box, and then tap or click Recovery.
Tap or click Open System Restore, and then follow the instructions.
If you need additional help refreshing, resetting, or restoring your PC, check out the Repair and Recovery community pages in the Windows forum for solutions that other people have found for problems they’ve experienced.
Last reboot in windows


- Home
- Microsoft
- Windows
- Mobile
- Office
- Xbox One
- Apple
- iPhone
- iPhone Activity Center
- iPhone Apps
- iPad
- iPad Activity Center
- iPad Apps
- Mac OS X
- Apple Watch
- iPhone
- Google
- Google Services
- Android
- Reviews
- Wearables
- Web
- IoT
- Home Automation
- Developer Tools
- Deals
- More
- Apps
- Sprink
- Turn Off LCD
- Drive Icon Changer
- About Us
- Advertise
- Apps

How To Check Last Reboot Time Of Your Windows PC
Here’s how to check last reboot time of your Windows PC in a few easy steps. More details on this can be found right here.
If you’re a Windows PC user then reboots are part and parcel of your daily life. Windows may now be a lot more stable than the rather dark days of yesteryear but computers still need a reboot every now and then for a range of reasons. Whether that reason be because of a recent software update or the age-old problem of some sort of unfortunate software goings on, reboots happen.
They’re also something you might want to do fairly regularly anyway in order to keep things running nice and smoothly, but if your memory is anything like ours you probably can’t remember the last time you gave your PC a reboot, so how can you quickly and easily check the last time your Windows machine was rebooted?
Well actually, it’s really easy indeed. Here’s how.
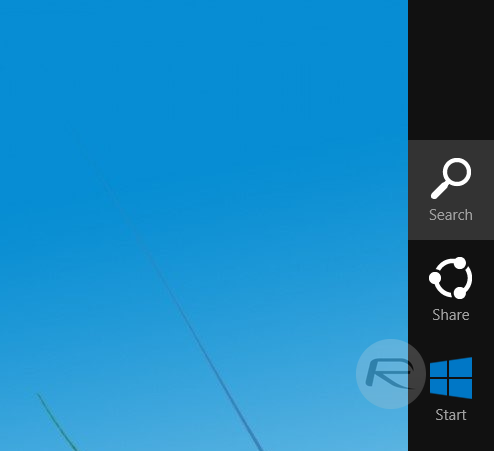
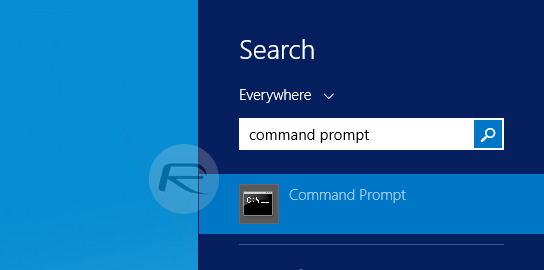
Step 1: Launch the Command Prompt. There are several ways you can do this, but if you’re using Windows 8.x or above, then simply bring up the Charms bar (Windows key + C) and do a search for ‘Command Prompt.’
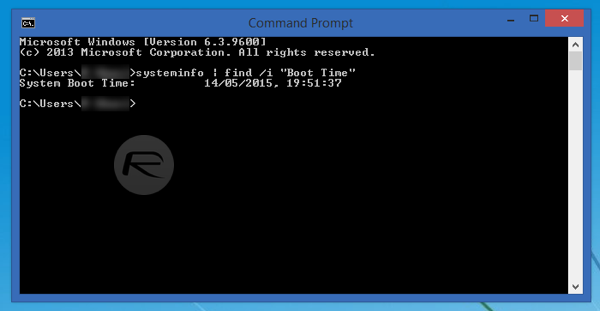
Step 2: When the Command Prompt is open, copy and paste the following command and press return:
Step 3: After a few seconds you’ll be shown the last date and time your machine was rebooted.
Alternatively, you can check out the last time your PC was rebooted by launching the Windows Task Manager (Ctrl + Shift + Esc), then click on Performance, and check out the ‘Up Time’ as highlighted in the screenshot below.
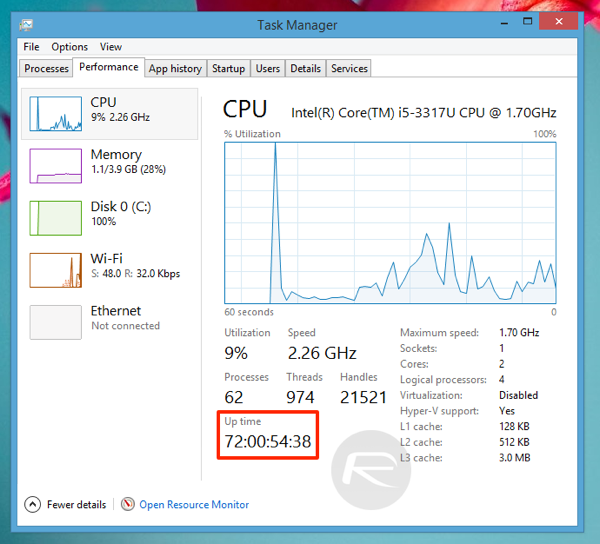
And that’s that. We told you it was easy!
You may also like to check out:
You can follow us on Twitter, add us to your circle on Google+ or like our Facebook page to keep yourself updated on all the latest from Microsoft, Google, Apple and the web.
How to check last reboot on Windows Server

Due to the enterprise nature of Windows Server, users are usually more tech-savvy and have an interest in minutiae details surrounding the performance. One of those interesting things to know is how to check the last reboot time on Windows Server or how to schedule a reboot. We made sure to instruct you about those below.
Windows Server: How to schedule a reboot
1. Use the System Event Log
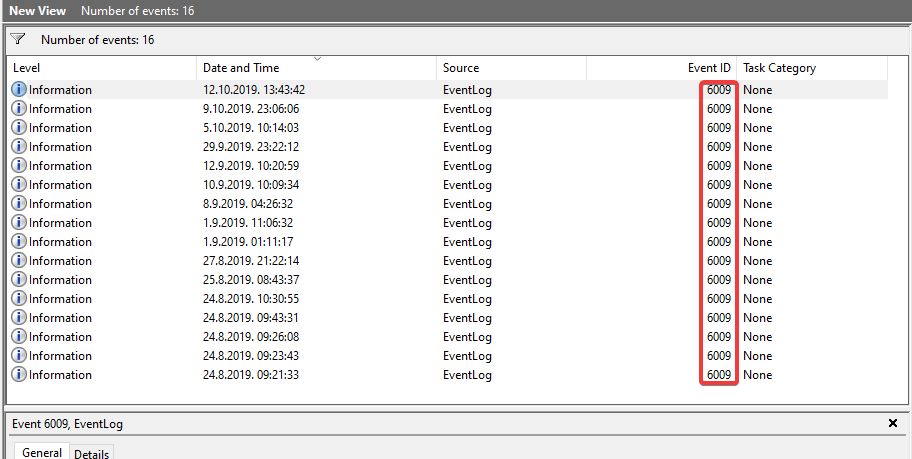
You can use the System Event Log to find out when was the last reboot of Windows Server. This procedure is quite simple as the only important thing is to single out one Event.
Follow these steps to see when was the last reboot via the System Event Log utility:
- Open Event Viewer from the Start menu.
- In the far right pane, select Create Custom View.
- Under the Log drop-down menu, choose Windows Logs.
- Under the add just 6009.
- Create a custom view.
- Now you can see all the times your PC was rebooted since the system was installed which is a great feature.
2. Use Command Prompt
Alternatively, you can use a certain Command Prompt command to check when was the last time a Windows Server reboot occurred. You can also check the up-time of your Server with a similar command.
Follow these steps to check the last reboot via the Command Prompt:
- Open Command Prompt as an administrator.
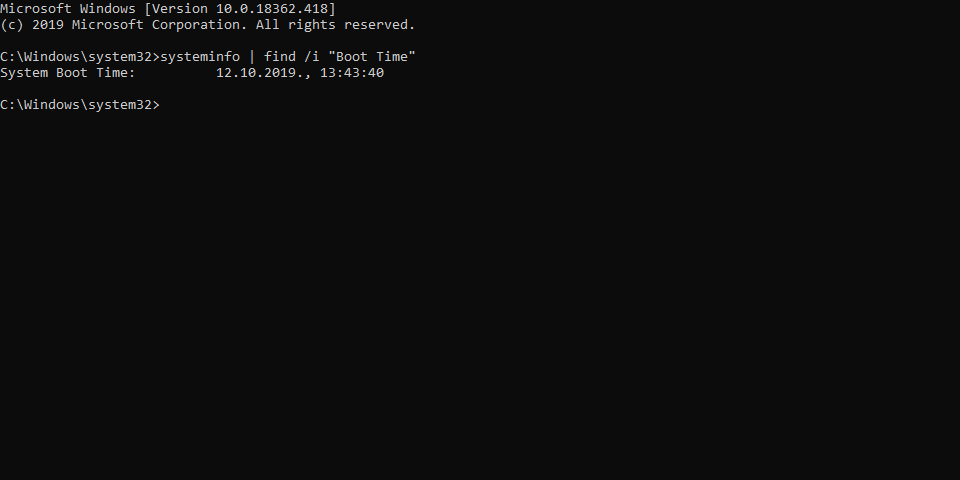
- In the command line, copy-paste the following command and press Enter:
systeminfo | find /i “Boot Time” - You should see the last time your PC was rebooted.
3. Schedule reboot with Scheduled Tasks
If you have an interest in automatizing the reboot sequence, you can do so by creating a scheduled task. If you are not familiar with it, here’s how to schedule reboot on Windows Server via the Scheduled Tasks utility:
- Open Scheduled Tasks from the Start menu.
- Select Add a New Scheduled Task and click Next.
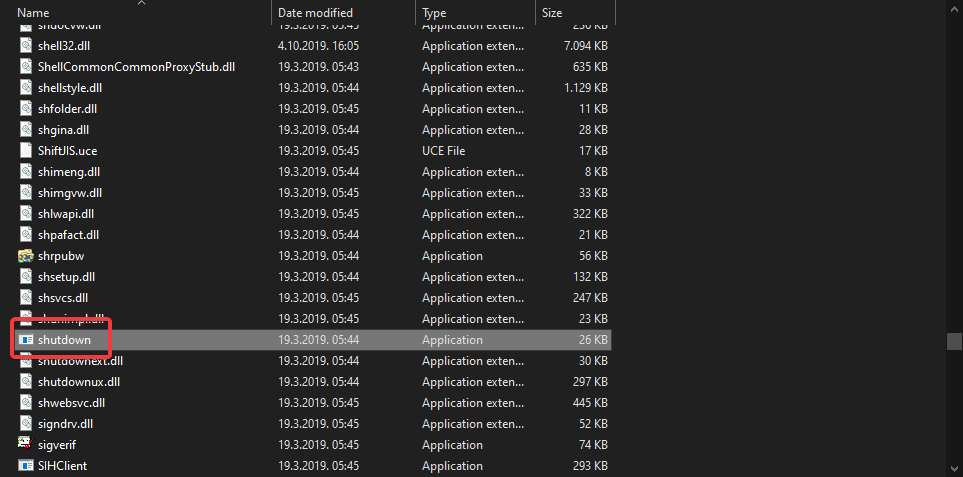
- On the Program selection screen, navigate to C:WINDOWSSystem32shutdown.exe.
- Select shutdown.exe and name the task shutdown.
- Choose the shutdown frequency.
- Select the time and day when the scheduled reboot will occur.
- Enter your administrative credentials and confirm.
- Now, check the Open Advanced options when I click Finish box and click Finish.
- Finally, when a new window appears, copy-paste the following command and replace the default one:
C:WINDOWSsystem32shutdown.exe -r -f -t 01 - Select Apply and you are good to go.
- Later, you can check when the last time Windows Server reboot occurred with one of the first two steps.
RELATED STORIES YOU SHOULD CHECK OUT:
How can I get the Windows last reboot reason
I’d like to know what is the Windows API function (if any exists) that provides information about the last Windows reboot source. There are three main possible causes:
- The computer crashed on a blue screen
- A user or a program shutdown/restarted the computer
- A power lost
The more details I can get the better. However, I need to know at least which reason it is from the main ones.
I need to support Windows Vista and Windows 7.
It seems that there is no direct API to get that information. Instead, we have to harvest the Windows Event Log. System reboot information is located in Event Viewer/Windows Logs/System. Here is the various information provided by the event ids:
- 6005: Windows start-up
- 6006: Windows shutdown (properly)
- 6008: Windows shutdown (unexpectedly)
I do not yet get the difference between power lost and system crash, but it’s a good start.
2 Answers 2
This article explains in detail how to find the reason for last startup/shutdown. In my case, this was due to windows SCCM pushing updates even though I had it disabled locally. Visit the article for full details with pictures. For reference, here are the steps copy/pasted from the website:
Press the Windows + R keys to open the Run dialog, type eventvwr.msc , and press Enter .
If prompted by UAC, then click/tap on Yes (Windows 7/8) or Continue (Vista).
In the left pane of Event Viewer, double click/tap on Windows Logs to expand it, click on System to select it, then right click on System, and click/tap on Filter Current Log.
Do either step 5 or 6 below for what shutdown events you would like to see.
To see the dates and times of all user shut downs of the computer
A) In Event sources, click/tap on the drop down arrow and check the USER32 box.
B) In the All Event IDs field, type 1074 , then click/tap on OK.
C) This will give you a list of power off (shutdown) and restart shutdown type of events at the top of the middle pane in Event Viewer.
D) You can scroll through these listed events to find the events with power off as the shutdown type. You will notice the date and time, and what user was responsible for shutting down the computer per power off event listed.
- To see the dates and times of all unexpected shut downs of the computer
A) In the All Event IDs field type 6008 , then click/tap on OK.
B) This will give you a list of unexpected shutdown events at the top of the middle pane in Event Viewer. You can scroll through these listed events to see the date and time of each one.


