- Kali Linux Metapackages
- Kali linux all apps
- This page details the steps to install Win-Kex in under 2 minutes.
- Installation
- Prerequisites
- Install Kali Linux in WSL2
- Install Win-KeX
- Run Win-KeX
- Win-KeX supports three modes:
- Optional Steps:
- Enjoy Win-KeX!
- TOP 25 BEST KALI LINUX TOOLS
- ANONYMITY
- 25. MacChanger
- 24. ProxyChains
- INFORMATION GATHERING
- 23. TraceRoute
- 22.WhatWeb
- 21. Whois
- 20. Maltegoce (Maltego Community Edition)
- 19. NMAP
- 18. Dirbuster / Dirb
- VULNERABILITY ANALYSIS
- 17. Nikto
- WEB APPLICATION ANALYSIS
- 16. SQLiv
- 15. BurpSuite
- 14. OWASP-ZAP
- 13. HTTRACK
- 12. JoomScan & WPScan
- DATABASE ASSESSMENT
- 11. SQLMap
- PASSWORD ATTACKS
- 10. Hash-Identifier and findmyhash
- 9. Crunch
- 8. John The Ripper (OFFLINE PASSWORD CRACKING SERVICE)
- 7. THC Hydra (ONLINE PASSWORD CRACKING SERVICE)
- WIRELESS ATTACK
- 6. Aircrack-NG Suite
- 5. Fluxion
- EXPLOITATION TOOLS 4. Social Engineering Toolkit (SET)
- 3. METASPLOIT FRAMEWORK
- SNIFFING AND SPOOFING
- 2. WireShark
- 1. Bettercap
- POST EXPLOITATION AND….
- THE BEST TOOL IN KALI LINUX!
- 1. METASPLOIT FRAMEWORK
- Exploit
- Payload
- Auxiliary
- Encoders
- Post
Kali Linux Metapackages
One of our goals when developing Kali Linux was to provide multiple metapackages that would allow us to easily install subsets of tools based on their particular needs. Until recently, we only had a handful of these meta packages but we have since expanded the metapackage list to include far more options:
- kali-linux
- kali-linux-all
- kali-linux-forensic
- kali-linux-full
- kali-linux-gpu
- kali-linux-pwtools
- kali-linux-rfid
- kali-linux-sdr
- kali-linux-top10
- kali-linux-voip
- kali-linux-web
- kali-linux-wireless
These metapackages allow for easy installation of certain tools in a specific field, or alternatively, for the installation of a full Kali suite. All of the Kali metapackages follow a particular naming convention, starting with “kali-linux” so if you want to see which metapackages are available, you can search for them as follows:
Although we tried to make the metapackage names self-explanatory, we are limited in the practical length we can use, so let’s take a brief look at each of them and see how much disk space is used by each one:
kali-linux
The kali-linux metapackage is a completely bare-bones installation of Kali Linux and includes various network services such as Apache and SSH, the Kali kernel, and a number of version control applications like git, svn, etc. All of the other metapackages listed below also contain kali-linux. Installation Size: 1.5 GB
kali-linux-full
When you download a Kali Linux ISO, you are essentially downloading an installation that has the kali-linux-full metapackage installed. This package includes all of the tools you are familiar with in Kali. Installation Size: 9.0 GB
kali-linux-all
In order to keep our ISO sizes reasonable, we are unable to include every single tool that we package for Kali and there are a number of tools that are not able to be used depending on hardware, such as various GPU tools. If you want to install every available Kali Linux package, you can install the kali-linux-all metapackage. Installation Size: 15 GB
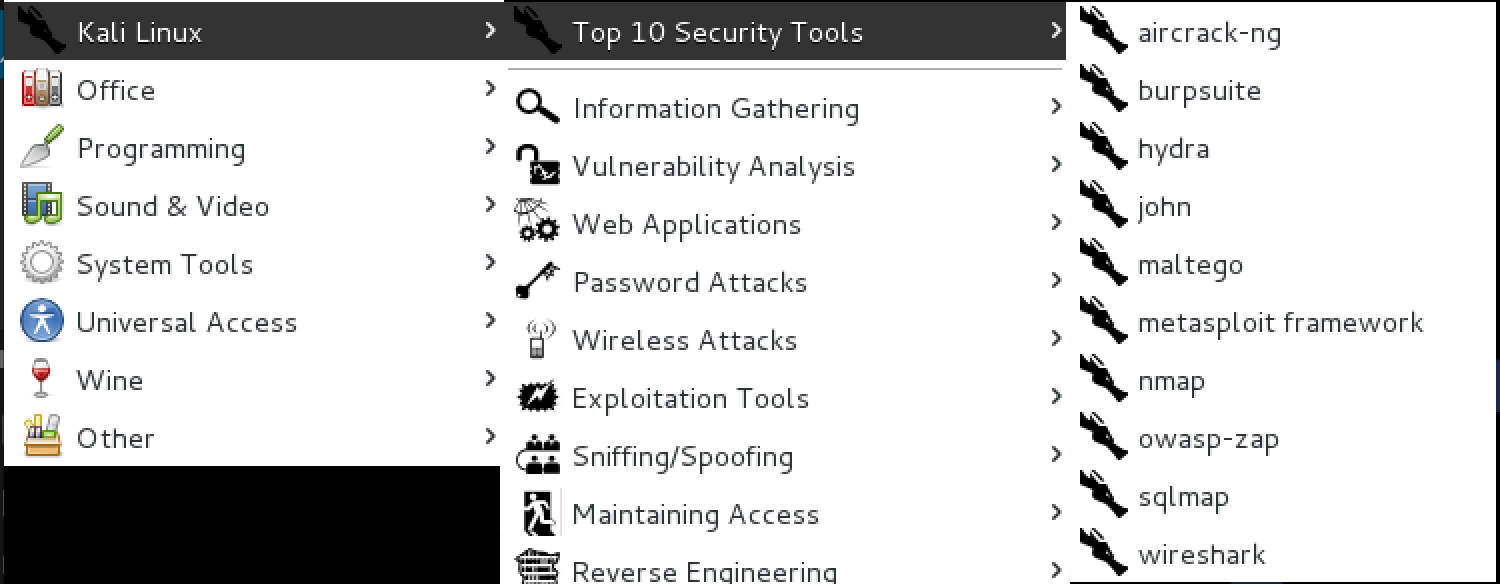
kali-linux-top10
In Kali Linux, we have a sub-menu called “Top 10 Security Tools”. The kali-linux-top10 metapackage will install all of these tools for you in one fell swoop. Installation Size: 3.5 GB
kali-linux-forensic
If you are doing forensics work, you don’t want your analysis system to contain a bunch of unnecessary tools. To the rescue comes the kali-linux-forensic metapackage, which only contains the forensics tools in Kali. Installation Size: 3.1 GB
kali-linux-gpu
GPU utilities are very powerful but need special hardware in order to function correctly. For this reason, they are not included in the default Kali Linux installation but you can install them all at once with kali-linux-gpu and get cracking. Installation Size: 4.8 GB
kali-linux-pwtools
The kali-linux-pwtools metapackage contains over 40 different password cracking utilities as well as the GPU tools contained in kali-linux-gpu. Installation Size: 6.0 GB
kali-linux-rfid
For our users who are doing RFID research and exploitation, we have the kali-linux-rfid metapackage containing all of the RFID tools available in Kali Linux. Installation Size: 1.5 GB
kali-linux-sdr
The kali-linux-sdr metapackage contains a large selection of tools for your Software Defined Radio hacking needs. Installation Size: 2.4 GB
kali-linux-voip
Many people have told us they use Kali Linux to conduct VoIP testing and research so they will be happy to know we now have a dedicated kali-linux-voip metapackage with 20+ tools. Installation Size: 1.8 GB
kali-linux-web
Web application assessments are very common in the field of penetration testing and for this reason, Kali includes the kali-linux-web metapackage containing dozens of tools related to web application hacking. Installation Size: 4.9 GB
kali-linux-wireless
Like web applications, many penetration testing assessments are targeted towards wireless networks. The kali-linux-wireless metapackage contains all the tools you’ll need in one easy to install package. Installation Size: 6.6 GB
To see the list of tools included in a metapackage, you can use simple apt commands. For example, to list all the tools included in the kali-linux-web metapackage, we could:
Источник
Kali linux all apps
This page details the steps to install Win-Kex in under 2 minutes.
Installation
All installation steps, up to the point where we install Win-Kex, are also explained in the 5 minute video guide by the amazing NetworkChuck:
Prerequisites
- Running Windows 10 version 2004 or higher
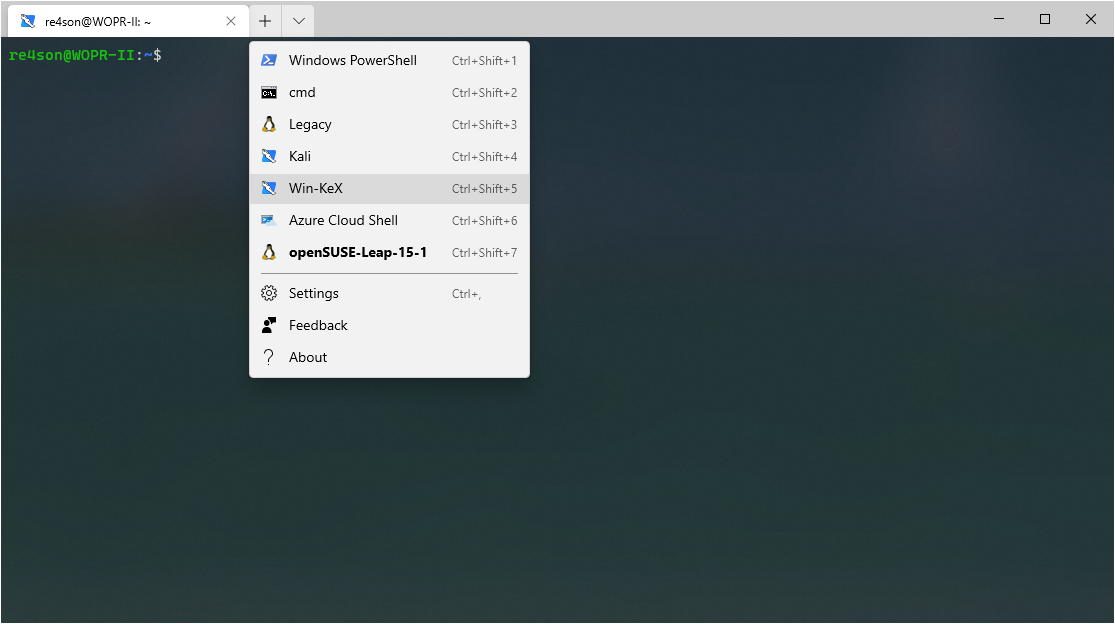
- Using Windows Terminal
Install Kali Linux in WSL2
- Open PowerShell as administrator and run:
-
Open PowerShell as administrator and run:
Download and install the WSL2 Linux Kernel from here: https://aka.ms/wsl2kernel
Open PowerShell as administrator and run: wsl —set-default-version 2
Install Kali Linux from the Microsoft Store
Note: to upgrade an existing WSL1 kali-linux installation, type: wsl —set-version kali-linux 2
Run Kali and finish the initial setup
Install Win-KeX
Run Win-KeX
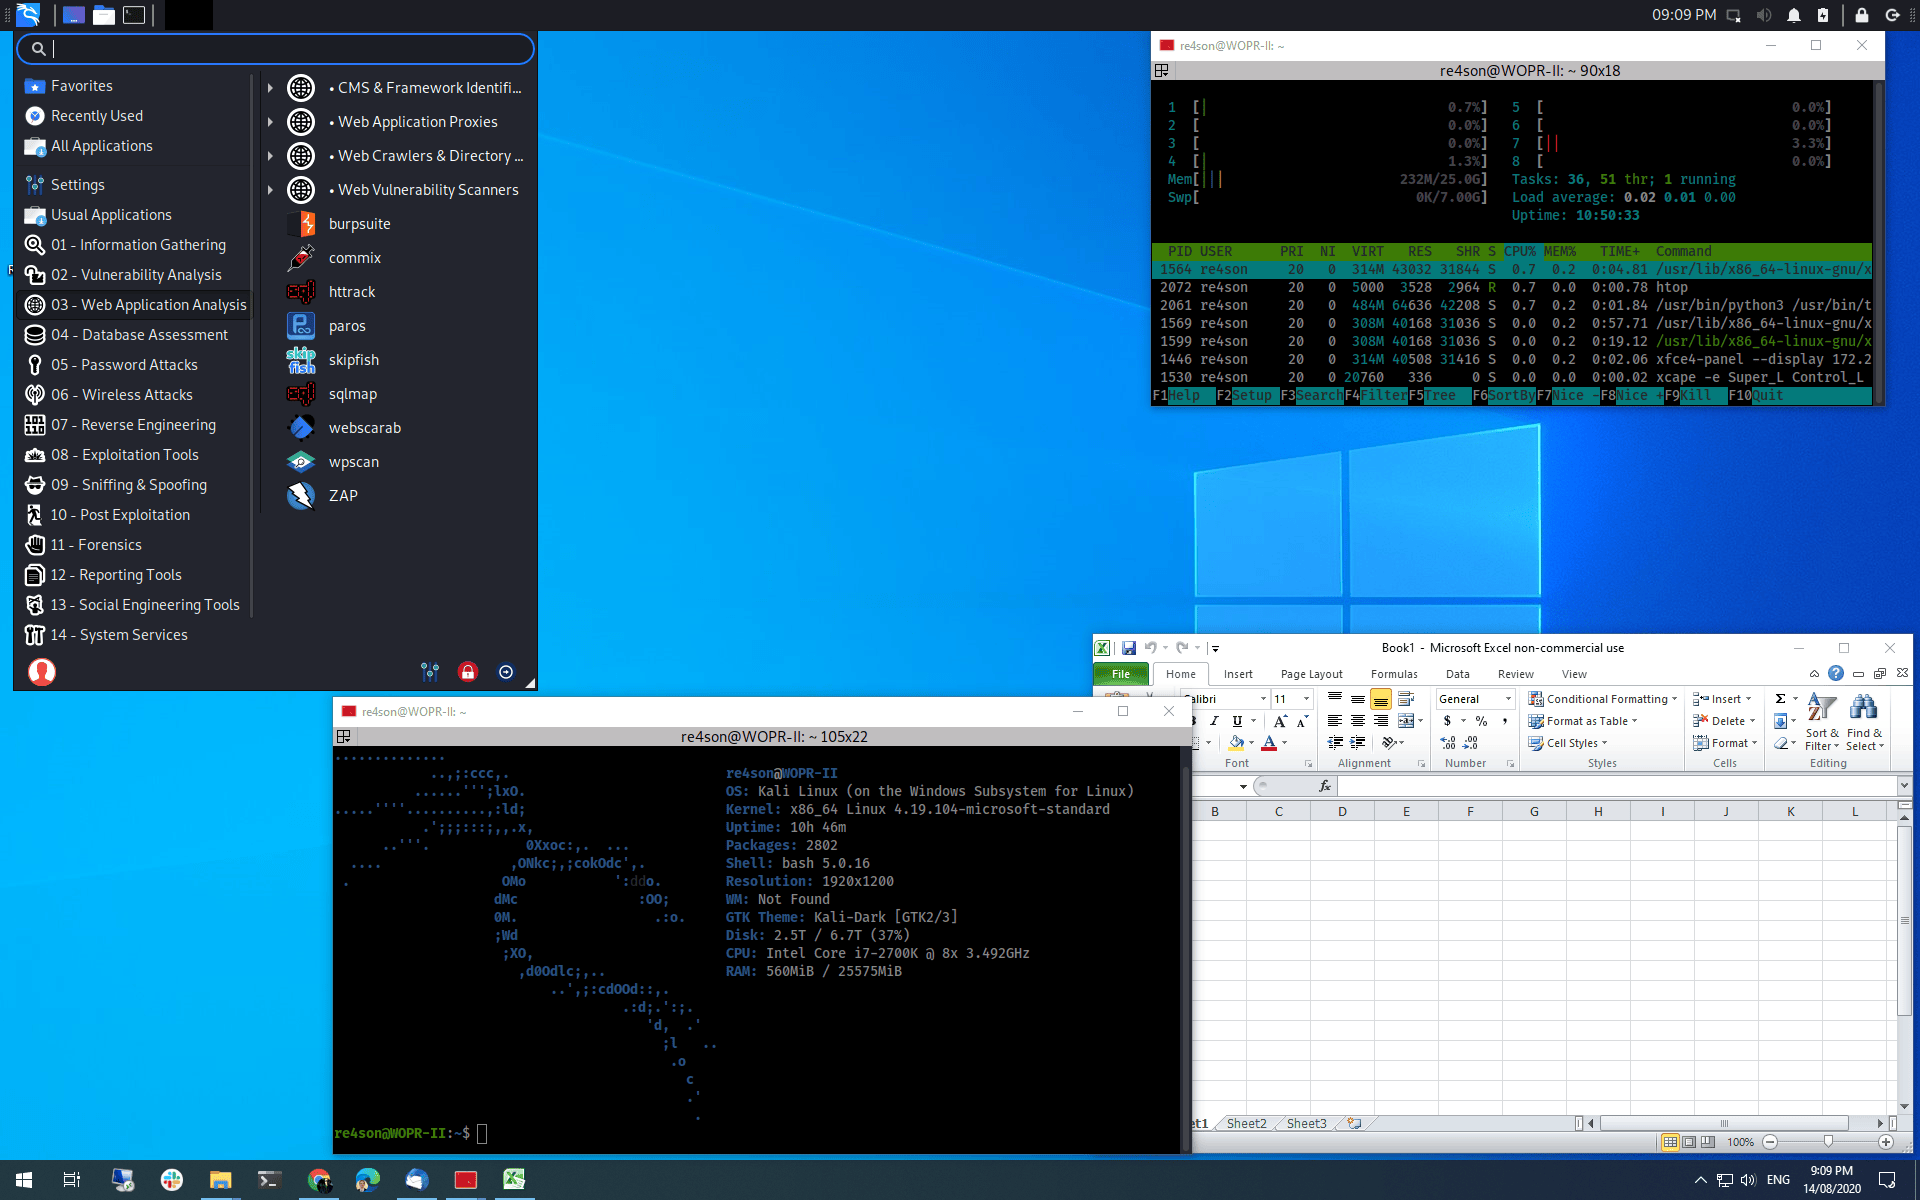
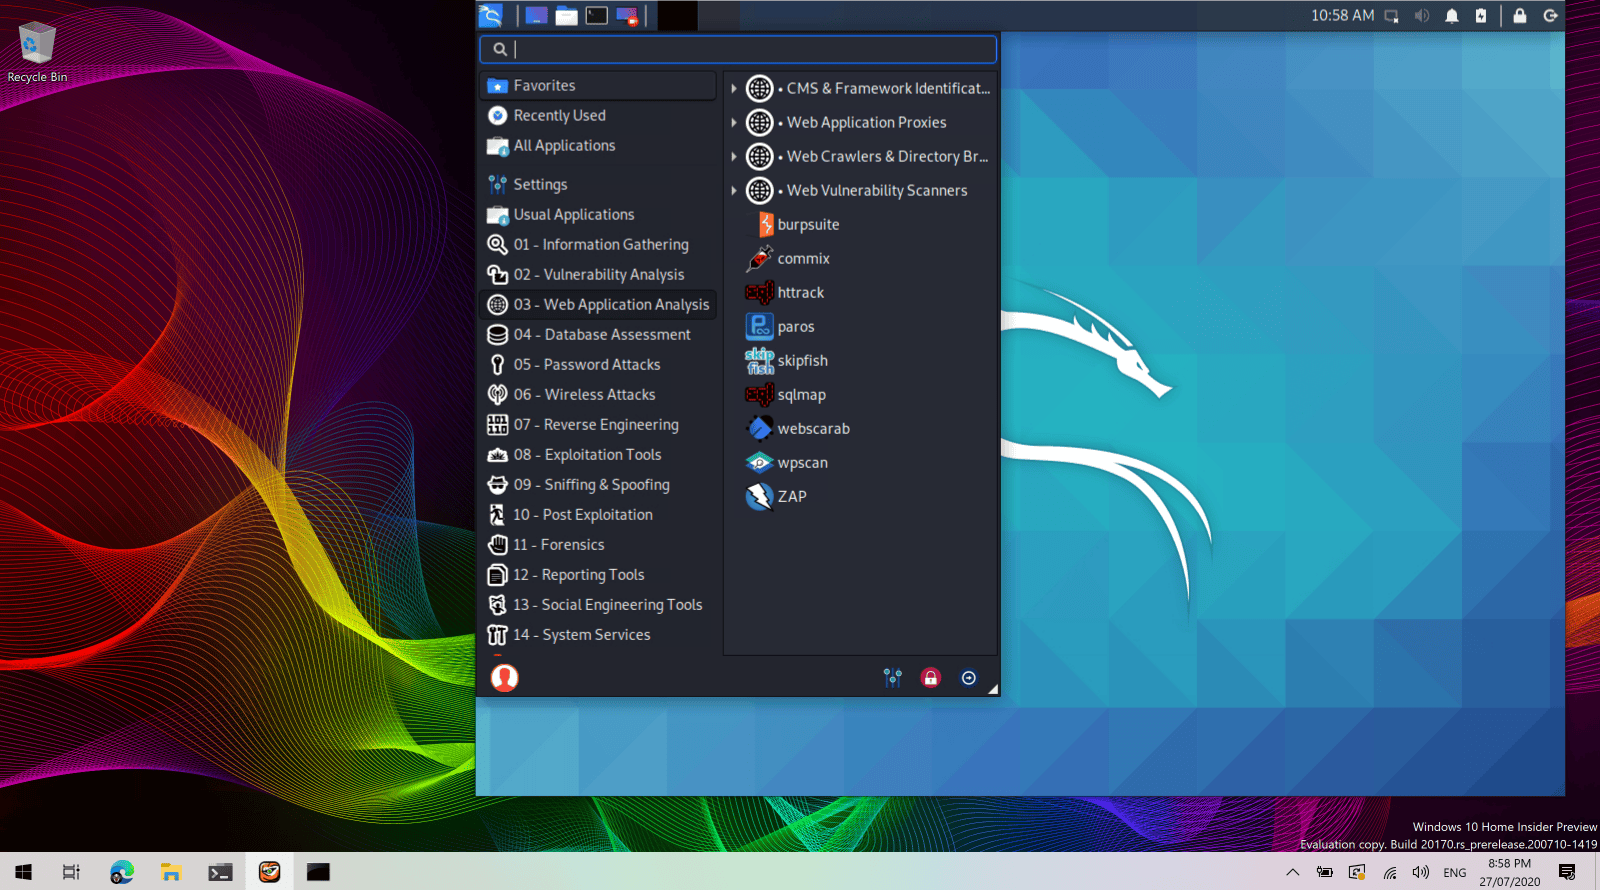
Win-KeX supports three modes:
Window Mode:

To start Win-KeX in Window mode with sound support, run
Refer to the Win-KeX Win usage documentation for further information.
Enhanced Session Mode:
To start Win-KeX in Enhanced Session Mode with sound support and arm workaround, run
Refer to the Win-KeX ESM usage documentation for further information.
Seamless mode:
To start Win-KeX in Seamless mode with sound support, run
Refer to the Win-KeX SL usage documentation for further information.
Optional Steps:
- If you have the space, why not install “Kali with the lot”?: sudo apt install -y kali-linux-large
Choose amongst these options:
Basic Win-KeX in window mode with sound:
Advanced Win-KeX in window mode with sound — Kali icon and start in kali home directory:
Copy the kali-menu.png icon across to your windows picture directory and add the icon and start directory to your WT config:
Basic Win-KeX in seamless mode with sound:
Advanced Win-KeX in seamless mode with sound — Kali icon and start in kali home directory:
Copy the kali-menu.png icon across to your windows picture directory and add the icon and start directory to your WT config:
Basic Win-KeX in ESM mode with sound:
Advanced Win-KeX in ESM mode with sound — Kali icon and start in kali home directory:
Copy the kali-menu.png icon across to your windows picture directory and add the icon and start directory to your WT config:
For more information, ask for help via:
or consult the manpage via:
or join us in the Kali Forums
Enjoy Win-KeX!
Updated on: 2021-Sep-27
Author: Re4sonИсточник
TOP 25 BEST KALI LINUX TOOLS
Becoming an Ethical Hacker is not quite as easy as to become a software developer, or programmer. An Ethical Hacker a.k.a Penetration Tester has to have a good understanding about various fields. Not just merely having in-depth programming languages in C, C++, Python, PHP, etc. Also in need is an advance Linux/Unix Environment knowledge just to get started in the field of Ethical Hacking.
Kali Linux comes with tons of pre-installed penetration testing tools, around about 600 tools included. As a beginner penetration tester, it sounds horrible. How could one learn or use all of those tools as a beginner? The truth is, you don’t need to master all of those, indeed, there are a lot of tools built into Kali Linux which have the same concept and purpose. But, among them, there are always the best. In this article I will cover the Top 25 Best Kali Linux tools for the beginner Penetration Tester. But if you’ve just installed Kali Linux, before you read further to this, i recommend you read here it is a good jump start into Kali.
The top 25 best Kali Linux tools I listed below, are based on functionality and also, its sequence in the Penetration Testing Cycle or procedure. If you have already followed along my earlier article in the Penetration Testing Cycle section, there are basically four procedures: Reconnaissance, Scanning, Exploitation and Post-Exploitation. Here I listed bottom to top best 25 Kali Linux tools, starting from Anonymity.
ANONYMITY
During penetration testing, it is crucial to prepare to stay anonymous. Don’t fool yourself by revealing your own identity while hacking, cover it!
25. MacChanger
There are several reasons changing the MAC address is important, I use MacChanger while pentesting a wireless network with MAC filtering enabled and have to assign an approved MAC address to the wireless adapter. Or just literally to change to a random MAC while pentesting. To use MacChanger, follow this command pattern:
For example, i use my WLAN1 device to connect to the network, to change the default WLAN1 MAC address fully random, i type the command:
24. ProxyChains
Proxychains cover and handle whatever job. Add command “proxychains” for every job, that means we enable Proxychains service. For example i want to trigger ProxyChain to cover NMAP. The command is:
But, before you use ProxyChains, you need to configure it first, adding proxy IP and other things, see full tutorial about ProxyChains here: https://linuxhint.com/proxychains-tutorial/
INFORMATION GATHERING
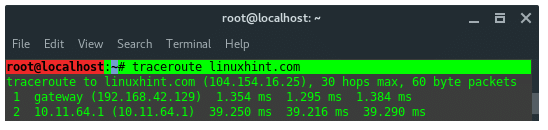
23. TraceRoute
Traceroute is a computer network diagnostic tool for displaying the connection route and measuring transit delays of packets across an IP network.
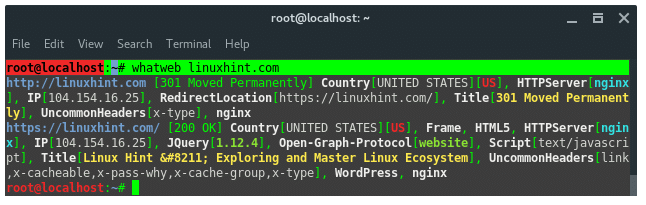
22.WhatWeb
WhatWeb is a website fingerprint utility. It identifies websites including content management systems (CMS), blogging platforms, statistic/analytic packages, JavaScript libraries, web servers, and embedded devices. WhatWeb has over 1700 plugins, each to recognize something different. WhatWeb also identifies version numbers, email addresses, account IDs, web framework modules, SQL errors, and more.
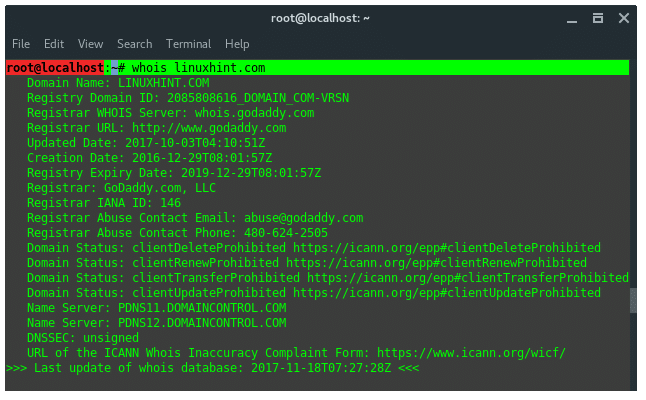
21. Whois
WHOIS is a database managed by local internet registrars, it is a query and response protocol that is widely used for querying databases that store the registered users of an Internet resource, such as a domain name or an IP address block, but is also used for a wider range of other personal information about the domain owner.
20. Maltegoce (Maltego Community Edition)
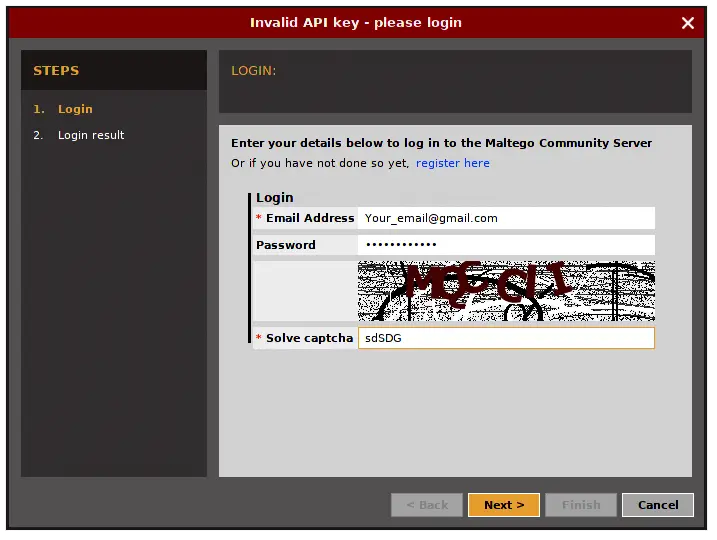
Maltegoce is an intelligence gathering tool which aims to discover and collect data about the target (company or personal) and visualizes that collected data into graph for analysis. Before we are using maltegoce, first register an maltego community edition here : https://www.paterva.com/web7/community/community.php
Once your done registering, now open the terminal and type “maltegoce”. wait a brief moment for it to startup. After it finishes loading, you will be greeted by a screen asking you to login to Maltego Community Edition.
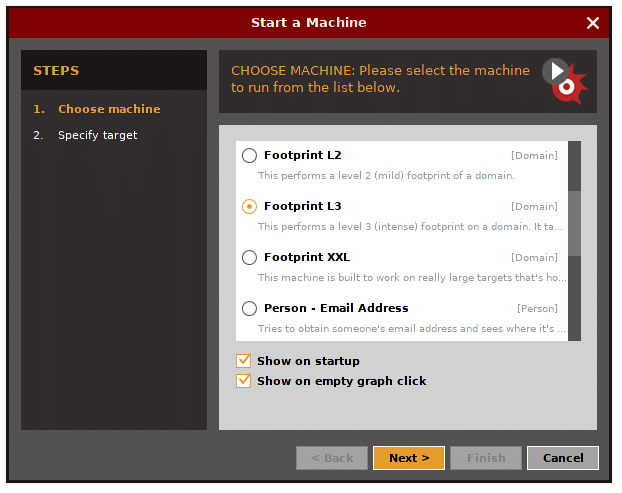
Sign in with the account you’ve just registered. After you are logged in you need to decide what type of “machine” is needed to run against the target.
- Company Stalker (gathers reconnaisance)
- Footprint L1 (basic reconnaisance)
- Footprint L2 (moderate amount of reconnaisance)
- Footprint L3 (intense and the most complete reconnaisance)
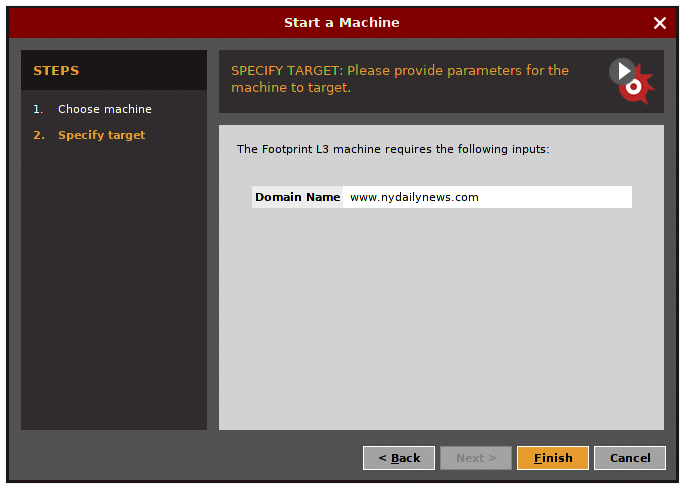
Let’s choose L3 footprint.
Enter the target domain name.
The result should look like that, it display whatever found, and visualize it in graph.
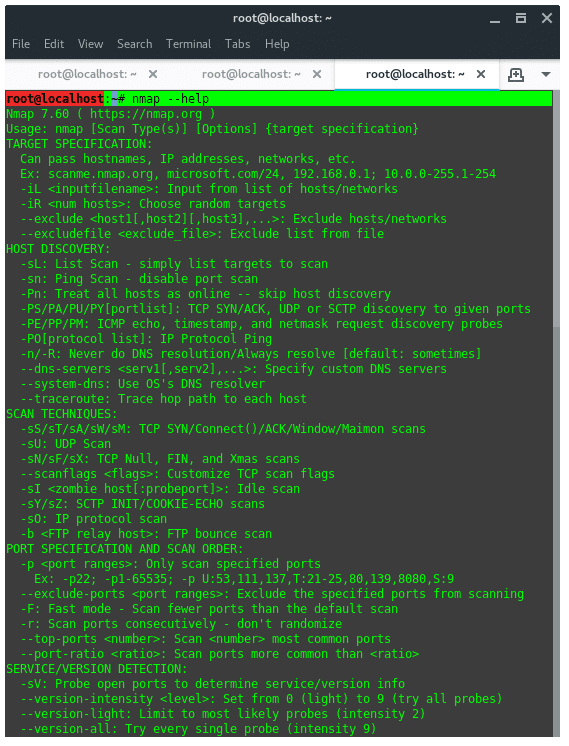
19. NMAP
Network Mapper (NMap) is a tool used for network discovery and security auditing. My favorite option in NMAP is “–script vuln” it tells NMAP to audit the security of each open port on target using NSE. For example:
To view full list of NMAP features, see the help page instead.
18. Dirbuster / Dirb
Dirb is a tool to find hidden objects, files and directories on a website. Dirb works by launching a dictionary based attack against a web server and analyzing the response. DIRB comes with a set of preconfigured wordlists, located under /usr/share/dirb/wordlists/. To launch dirb, use the following command pattern:
VULNERABILITY ANALYSIS
17. Nikto
Nikto is webserver and web application assessment tool to find potential security issues and vulnerabilities. Nikto scans for 6700 potentially dangerous files/programs. To run Nikto, type following command:
WEB APPLICATION ANALYSIS
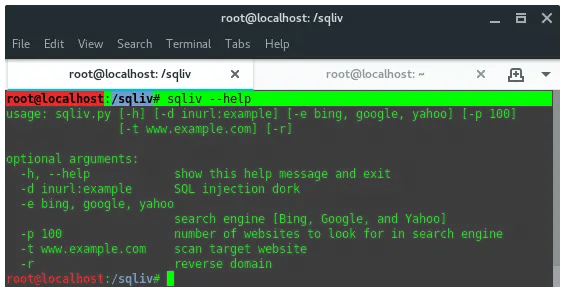
16. SQLiv
SQLiv is a simple and massive SQL injection vulnerability scanner. SQLiv is not installed by default in Kali Linux. To install it, run the following commands:
Once installed, just type in the terminal:
15. BurpSuite
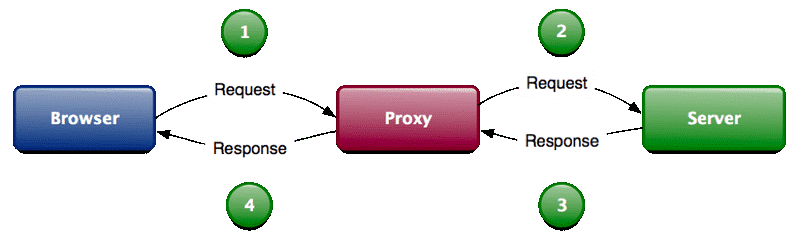
Burp Suite is a collection of tools bundled into a single suite which performs security testing of web applications, from initial mapping and analysis of an application’s attack surface, through to finding and exploiting security vulnerabilities. The main features of Burpsuite is that it can function as an intercepting proxy (see image below). Burpsuite intercepts the traffic between a web browser and the web server.
To open burpsuite, type “burpsuite” into the terminal.
14. OWASP-ZAP
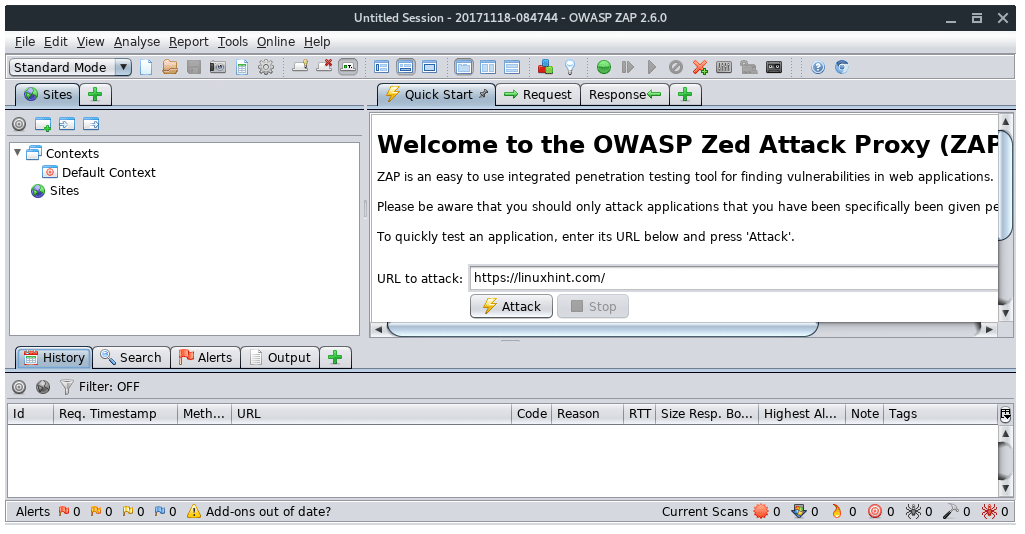
OWASP ZAP is a Java-based tool for testing web app security. It has an intuitive GUI and powerful features to do such things as fuzzing, scripting, spidering, proxying and attacking web apps. It is also extensible through a number of plugins. In this way, it is an all-in-one web app testing tool.
To open OWASP ZAP, type “owasp-zap” into the terminal.
13. HTTRACK
Httrack is a website / webpage cloner, from a penetration testing perspective, it is mainly used to create a fake website, or phising in attacker server. Run httrack wizard by typing in the terminal :
You will be prompted, some configuration needed with guidance. Such as, Project name, Base path of the project, set the URL target and the proxy configuration.
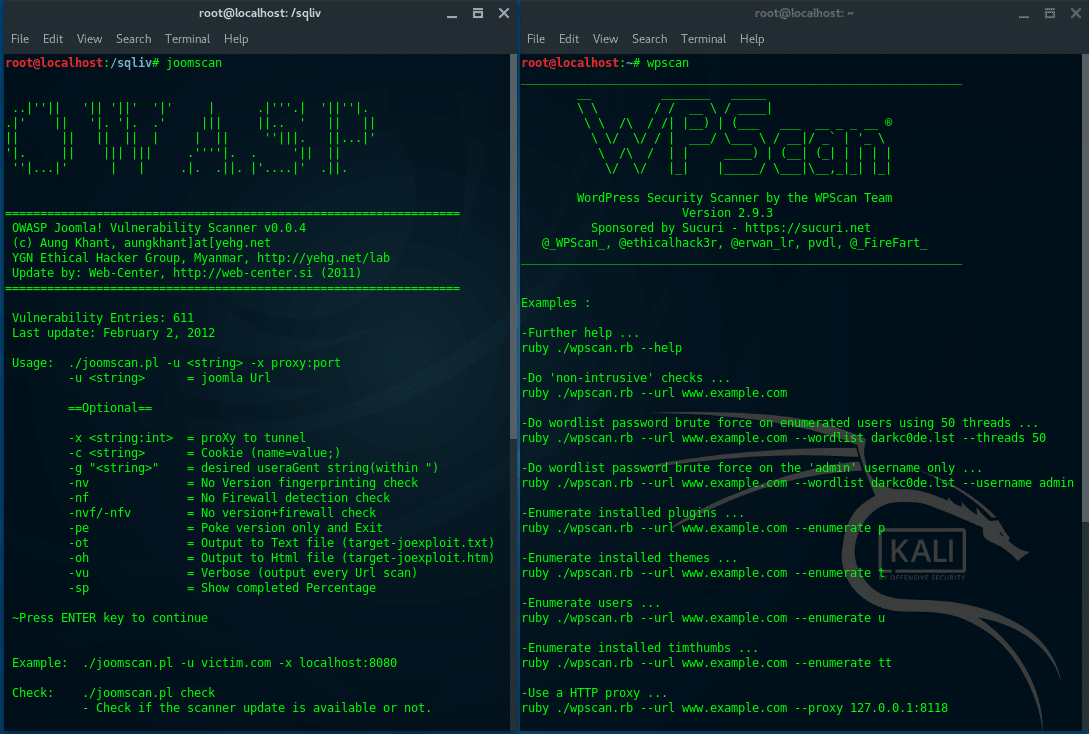
12. JoomScan & WPScan
JoomScan is a Web application analysis tool to scan and analyze Joomla CMS, while WPScan is a WordPress CMS vulnerability scanner. To check what CMS is installed on a target website, you can use either ONLINE CMS Scanner, or using additional tools, “CMSMap”. (https://github.com/Dionach/CMSmap). Once you know the target CMS, whether it is Joomla or WordPress, then you can decide to use JoomsScan or WPScan.
Run JoomScan: DATABASE ASSESSMENT
11. SQLMap
SQLMAP automates the process of detecting and exploiting SQL injection vulnerabilities and taking over databases. To use SQLMap, you need to find a website URL which is SQL injection vulnerable, you can find it by either using SQLiv (see list number) or using Google dork. Once you’ve got the vulnerable SQL injection URL, then open the terminal and run the following command pattern:
- Acquire databases list
- Acquire tables list
- Acquire columns list
- Acquire the data
For example, let’s say we have vulnerable SQL injection, it is http://www.vulnsite.com/products/shop.php?id=13. And we’ve already acquired the databases, tables and columns. If we want to acquire the data, then the command is:
Mostly, the data is encrypted, we need another tool to decrypt it. Below is another procedure to get the clear text password.
PASSWORD ATTACKS
10. Hash-Identifier and findmyhash
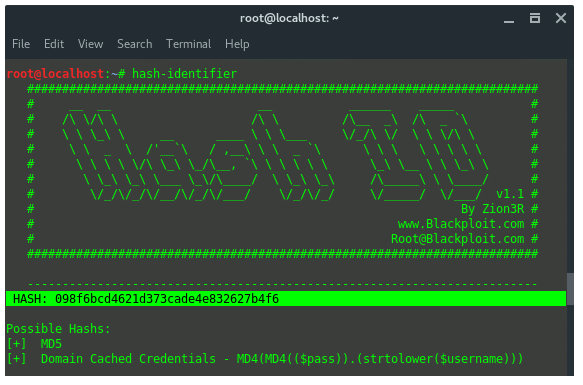
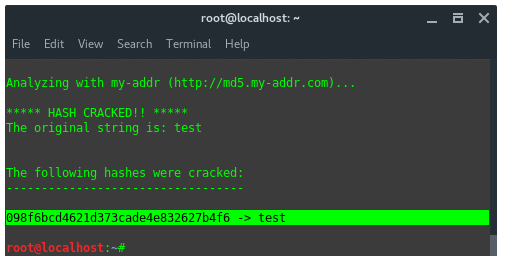
Hash-identifier is a tool to identify the different types of hashes used to encrypt data and especially passwords. Findmyhash is a tool to crack encrypted passwords or data using online services. For example we got encrypted data: 098f6bcd4621d373cade4e832627b4f6. First thing you are going to need to do is identify the hash type. To do that, launch “hash-identifier” in terminal, and input the hash value on it.
Hash-identifier detected this decrypted data is using hash algorithm MD5. After its hash type is known, then we use another tool, findmyhash to crack the data. Now, type in the terminal:
The result would be like this:
9. Crunch
Crunch is a utility to create custom wordlists, where you can specify a standard character set or a character set you specify. crunch can generate all possible combinations and permutations.
The basic syntax for crunch looks like this:
Now, let’s go over what’s included in the syntax above.
-
- min = The minimum password length.
- max = The maximum password length.
- characterset = The character set to be used in generating the passwords.
- -t
= The specified pattern of the generated passwords. For instance, if you knew that the target’s birthday was 0231 (February 31st) and you suspected they used their birthday in their password, you could generate a password list that ended with 0231 by giving crunch the pattern @@@@@@@0321. This word generate passwords up to 11 characters (7 variable and 4 fixed) long that all ended with 0321.
- -o = save the wordlist into a file name given.


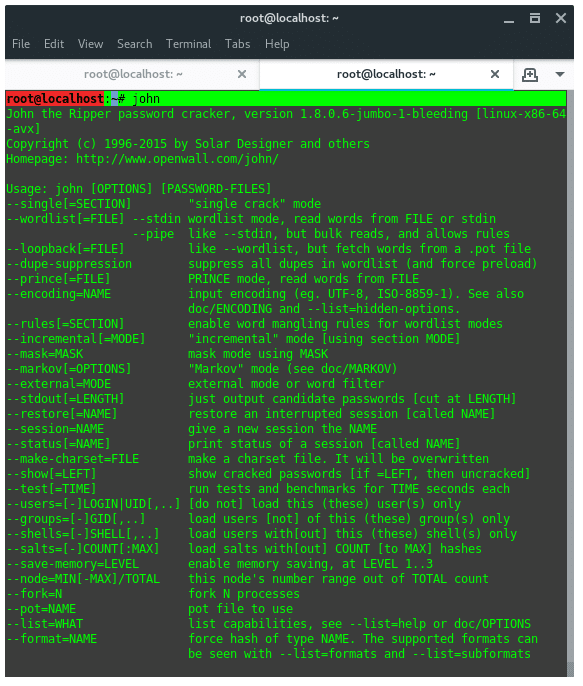
8. John The Ripper (OFFLINE PASSWORD CRACKING SERVICE)
John The Ripper is one of the most popular password testing and cracking programs as it combines a number of password crackers into one package, auto-detects password hash types, and includes a customization cracker. In Linux, “passwd” file located at /etc/passwd contains all user information. hash SHA encrypted password of each of the users found is stored in /etc/shadow file.
7. THC Hydra (ONLINE PASSWORD CRACKING SERVICE)
Hydra is the fastest network login cracker which supports numerous attack protocols. THC Hydra supports these protocols: Cisco AAA, Cisco auth, Cisco enable, CVS, FTP, HTTP(S)-FORM-GET, HTTP(S)-FORM-POST, HTTP(S)-GET, HTTP(S)-HEAD, HTTP-Proxy, ICQ, IMAP, IRC, LDAP, MS-SQL, MySQL, NNTP, Oracle Listener, Oracle SID, PC-Anywhere, PC-NFS, POP3, PostgreSQL, RDP, Rexec, Rlogin, Rsh, SIP, SMB(NT), SMTP, SMTP Enum, SNMP v1+v2+v3, SOCKS5, SSH (v1 and v2), SSHKEY, Subversion, Teamspeak (TS2), Telnet, VMware-Auth, VNC and XMPP.
For more depth and detail tutorial about hydra visit my previous article titled Crack Web Based Login Page With Hydra in Kali Linux (https://linuxhint.com/crack-web-based-login-page-with-hydra-in-kali-linux/)
WIRELESS ATTACK
6. Aircrack-NG Suite
Aircrack-ng is a network software suite consisting of a scanner, packet sniffer, WEP and WPA/WPA2-PSK cracker and analysis tool for 802.11 wireless LANs. Aircrack-NG suite, includes:
- aircrack-ng Cracks WEP keys using the Fluhrer, Mantin and Shamir attack (FMS) attack, PTW attack, and dictionary attacks, and WPA/WPA2-PSK using dictionary attacks.
- airdecap-ng Decrypts WEP or WPA encrypted capture files with known key.
- airmon-ng Placing different cards in monitor mode.
- aireplay-ng Packet injector (Linux, and Windows with CommView drivers).
- airodump-ng Packet sniffer: Places air traffic into pcap or IVS files and shows information about networks.
- airtun-ng Virtual tunnel interface creator.
- packetforge-ng Create encrypted packets for injection.
- ivstools Tools to merge and convert.
- airbase-ng Incorporates techniques for attacking client, as opposed to Access Points.
- airdecloak-ng Removes WEP cloaking from pcap files.
- airolib-ng Stores and manages ESSID and password lists and compute Pairwise Master Keys.
- airserv-ng Allows to access the wireless card from other computers.
- buddy-ng The helper server for easside-ng, run on a remote computer.
- easside-ng A tool for communicating to an access point, without the WEP key.
- tkiptun-ng WPA/TKIP attack.
- wesside-ng Automatic tool for recovering wep key.
5. Fluxion
Fluxion is my favorite Evil Twin Attack tool. fluxion doesn’t perform bruteforce attack to break the key. Fluxion creates a open twin AP of the target (Wi-Fi) network. When someone tries to connect to that network a fake authentication page pops up asking for key. When victim enters the key, fluxion captures that key and checks whether the key is a valid password by matching the key and the handshake. To install Fluxion, run the following commands:
Open the fluxion wizard by typing:
When first run, fluxion does dependency checking, and installs them automatically. After that go a long with the fluxion wizard instructions.
EXPLOITATION TOOLS
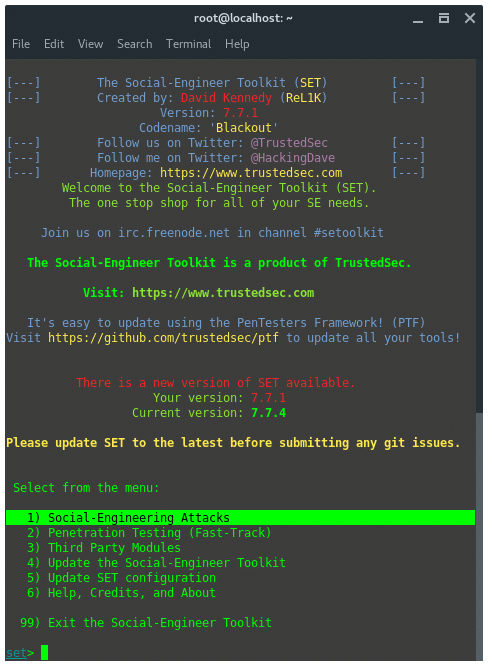
4. Social Engineering Toolkit (SET)
The Social-Engineer Toolkit is an open-source penetration testing framework designed for Social-Engineering. SET has a number of custom attack vectors such as phishing, spear-phishing, malicious USB, mass mail, etc. This toolkit is a free product by Trustedsec.com. To start using SET, type in terminal “seetolkit”.
3. METASPLOIT FRAMEWORK
Metasploit Framework initially was intended to be a maintainable framework which automates the process of exploiting rather than manually verifying it. Metasploit is a popular framework through history, it has rich modules aimed at a variety of targets such as Unix, BSD, Apple, Windows, Android, WebServers, etc. Below, is an example usage of metasploit, exploiting Windows OS using popular NSA Exploit EternalBlue and DoublePulsar.
SNIFFING AND SPOOFING
2. WireShark
Wireshark is a very popular network analyzer tool that’s most widely used in network security auditing. Wireshark uses display filters for general packet filtering. Here are some useful filters, including filters to grab captured password.
- Show only SMTP (port 25) and ICMP traffic:
port eq 25 or icmp - Show only traffic in the LAN (192.168.x.x), between workstations and servers — no Internet:
src==192.168.0.0/16 and ip.dst==192.168.0.0/16 - TCP buffer full — Source is instructing Destination to stop sending data:
window_size == 0 && tcp.flags.reset != 1 - Match HTTP requests where the last characters in the uri are the characters “gl=se”
request.uri matches “gl=se$” - Filter against particular IP
addr == 10.43.54.65 - Display POST request method, mostly containing user password:
request.method == “POST”
To run Wireshark, just type “wireshark” in the terminal. It will open up a graphical user interface. First, it will ask you to set the network interface that will be used.
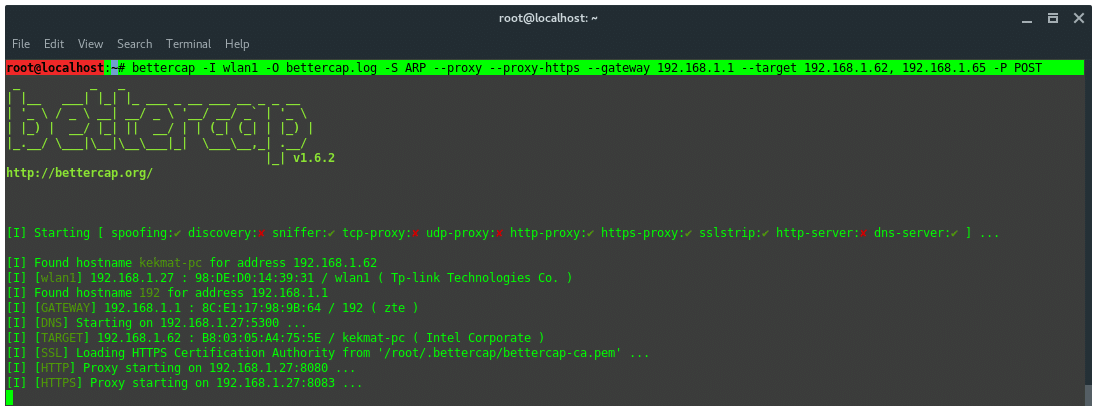
1. Bettercap
BetterCAP is a powerful and portable utility to perform various types of MITM attacks against a network, manipulate HTTP, HTTPS and TCP traffic in realtime, sniff for credentials and much more. BetterCAP is similar in concept as ettercap, but, in my experience comparing both features, Bettercap WON.
Bettercap is able to defeat SSL/TLS, HSTS, HSTS Preloaded. It uses SSLstrip+ and DNS server (dns2proxy) to implement partial HSTS bypass. The SSL/TLS connections are terminated. However, the downstream connection between client and attacker does not use SSL/TLS encryption and remains decrypted.
The partial HSTS bypass redirects the client from the domain name of the visited web host to a fake domain name by sending HTTP redirection request. The client is then redirected to a domain name with extra ‘w’ in www or web. in the domain name e.g. web.site.com. This way the web host is not considered as a member of HSTS preloaded hosts list and the client can access the web host without SSL/TLS. The fake domain names are then resolved to real and correct IP addresses by the special DNS server, which expects these changes in the domain names. The downside of this attack is that the client has to start the connection over HTTP due to the need of HTTP redirection. Bettercap is pre-installed on Kali Linux.
To do MitM with Bettercap, let’s see this example case. The attacker and the victim is on the same subnet in a wifi network. The victim IP is: 192.168.1.62. The Router IP is: 192.168.1.1. The attacker uses his WLAN1 wireless network interface. The attacker aims to sniff and spoof the target. So, the attacker type in command:
After the command is run, bettercap will start the ARP spoofing module, DNS server, HTTP and HTTPS proxy service. And also the victim information listed.
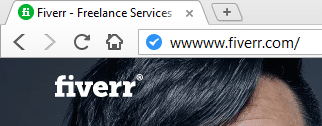
The victim enters the url ‘fiverr.com’ in the url tab. Bettercap detected that the victim is trying to access fiverr.com. Then, bettercap SSLStrip-ing the URL by downgrade the HTTPS protocol to HTTP and modify the URL name. As the image shown below.

The URL in the victim’s browser will look like strange, it has additional ‘w’, it is how SSLSTRIP+ and HSTS Preload bypass work.
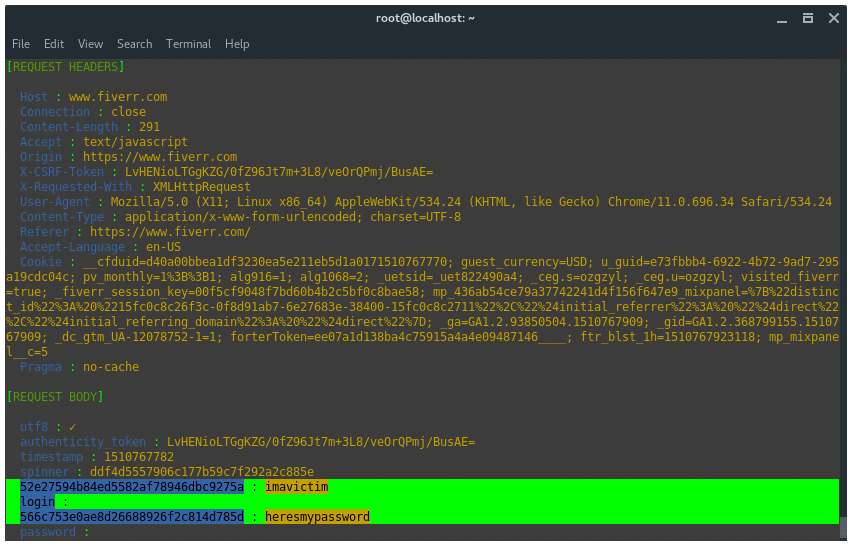
Once the victim logs in to the log in service, bettercap captures the credentials.
POST EXPLOITATION AND….
THE BEST TOOL IN KALI LINUX!
1. METASPLOIT FRAMEWORK
I think Metasploit Framework is THE BEST TOOL in KALI LINUX. Metasploit has a lot Modules it is:
Exploit
An exploit is the method by which the attacker takes advantage of a flaw within a system, service, application etc. The attacker generally uses this to do something with the particular system/service/application which he/she is attacking which the developer/implementer never intended to do. Kind of like misusing. This is the thing which an attacker uses to gain access to a system.
Exploits are always accompanied by payloads
Payload
A payload is the piece of code which is run in the successfully exploited system. After an exploit works successfully, the framework injects the payload through the exploited vulnerability and makes it run it within the target system. Thus an attacker gets inside the system or can get data from the compromised system using the payload.
Auxiliary
Provides additional functionality like fuzzing, scanning, recon, dos attack etc. Auxiliary scans for banners or OSes, fuzzes or does a DOS attack on the target. It doesn’t inject a payload like exploits. Means you wont be able to gain access to a system using an auxiliary
Encoders
Encoders are used to obfuscate modules to avoid detection by a protection mechanism such as an antivirus or a firewall. This is widely used when we create a backdoor. The backdoor is encoded (even multiple times) and sent to the victim.
Post
These modules are used for post-exploitation. After a system has been compromised, we can dig deeper into the system, send a backdoor or set it as a pivot to attack other systems using these modules.
METASPLOIT comes with variety of interfaces:
- msfconsole An interactive curses like shell to do all tasks.
- msfcli Calls msf functions from the terminal/cmd itself. Doesn’t change the terminal.
- msfgui the Metasploit Framework Graphical User Interface.
- Armitage Another graphical tool written in java to manage pentest performed with MSF.
- Web Interface The web based interface provided by rapid7 for Metasploit Community.
- CobaltStrike another GUI with some added features for post-exploitation, reporting, etc.
Источник


