- IntelliJ IDEA — Среда разработки на Kotlin
- Содержание статьи
- Установка и настройка IntelliJ IDEA
- Java и JDK
- Запуск IntelliJ IDEA
- Создание простого проекта на Kotlin
- Пример программы на Kotlin!
- Install IntelliJ IDEA
- System requirements
- Install using the Toolbox App
- Install the Toolbox App
- Install the Toolbox App
- Install the Toolbox App
- Standalone installation
- Silent installation on Windows
- Silent configuration file
- Install as a snap package on Linux
IntelliJ IDEA — Среда разработки на Kotlin
Добро пожаловать в Kotlin! В первом уроке мы настроим среду разработки для программирования на данном языке. С ее помощью вы сможете написать свой первый код на Kotlin и запустить его на компьютере.
Содержание статьи
Основным инструментом, который мы будем использовать для создания проектов на Kotlin, является IntelliJ IDEA от JetBrains. JetBrains также является компанией, стоящей у истоков самого языка, поэтому разработка на Kotlin тесно интегрирована в IntelliJ IDEA.
IntelliJ IDEA является Интегрированной средой разработки, или IDE. Она похожа на другие IDE вроде Visual Studio или Xcode. IntelliJ IDEA предоставляет основу для многих других IDE от JetBrains, включая Android Studio для разработки приложений на Android, PyCharm для программирования на Python и CLion для программирования на C и C++.
IDE используется для написания кода в редакторе, компиляции кода для запуска на компьютере, просмотра результатов программы, исправления ошибок кода и многого другого! В этом уроке мы познакомимся с возможностями IntelliJ IDEA, и это станет важной подготовкой к дальнейшему изучению языка Kotlin.
Установка и настройка IntelliJ IDEA
IntelliJ IDEA можно скачать с сайта JetBrains. В наличии есть версии Community и Ultimate. Для работы с примерами из уроков подойдет версия Community, которая является бесплатной для скачивания.
Перейдите на сайт и скачайте IntelliJ IDEA 2019.2 или более позднюю версию. Выберите свою систему — macOS, Windows или Linux. Установите IntelliJ IDEA, следуя инструкции. Большинство скриншотов в уроках сделаны на системе macOS, но работа на Windows или Linux проходит точно так же.
Перед запуском IntelliJ IDEA требуется также установить Java Development Kit, или JDK, который нужен для запуска Kotlin кода на компьютере.
Java и JDK
Kotlin позволяет программировать на нескольких различных платформах. Двумя наиболее популярными являются Java Virtual Machine, или JVM и Android.
По большому счету, изначально Kotlin задумывался как современная замена языку Java. Java был создан в девяностых, став ранней попыткой кроссплатформенного прикладного языка программирования. Подход “Write Once, Run Everywhere” звучал многообещающе.
Вместо компиляции в нативный машинный код на каждой платформе, программы на Java компилируются в формат, который называется байт-кодом. Байт-код выполняется внутри приложения на Java Virtual Machine. JVM можно рассматривать как слой над вашей реальной машиной. Запустив байт-код на виртуальной машине, можно совместно использовать Java-код и приложения на многих типах компьютерных систем.
Одной из целей языка Kotlin является 100% совместимость с языком Java. Это включает конвертацию Kotlin-кода в Java-совместимый код с помощью компилятора Kotlin, чтобы Kotlin-код мог запускаться на JVM.
Большая часть кода и проектов из данного курса предназначены для запуска в качестве Kotlin-проектов на JVM. Для этого наравне с IntelliJ IDEA требуется установить JDK. Проще всего это сделать на сайте Oracle. Лучше скачать и установить самую последнюю версию JDK — по крайней мере начиная с 8 версии. Инструменты программного обеспечения Java называются «Java SE». Они включают JDK и Java Runtime Environment, или JRE.
На заметку: Будьте внимательны, скачайте и установите JDK, а не только JRE, так как JRE позволяет запускать только Java-приложения и не включает инструменты для создания новых.
Запуск IntelliJ IDEA
После установки IntelliJ IDEA и JDK выполните обычный процесс запуска приложения IntelliJ IDEA на вашей платформе.
Если вы ранее устанавливали предыдущие версии IntelliJ IDEA на тот же компьютер, установщик, скорее всего, предложит импортировать настройки из предыдущей версии. В противном случае вам будет предложено выбрать цветовую тему и плагины для установки в IDE. Можете просто выбрать настройки по умолчанию и продолжить.
После этих действий вы увидите окно Welcome to IntelliJ IDEA.
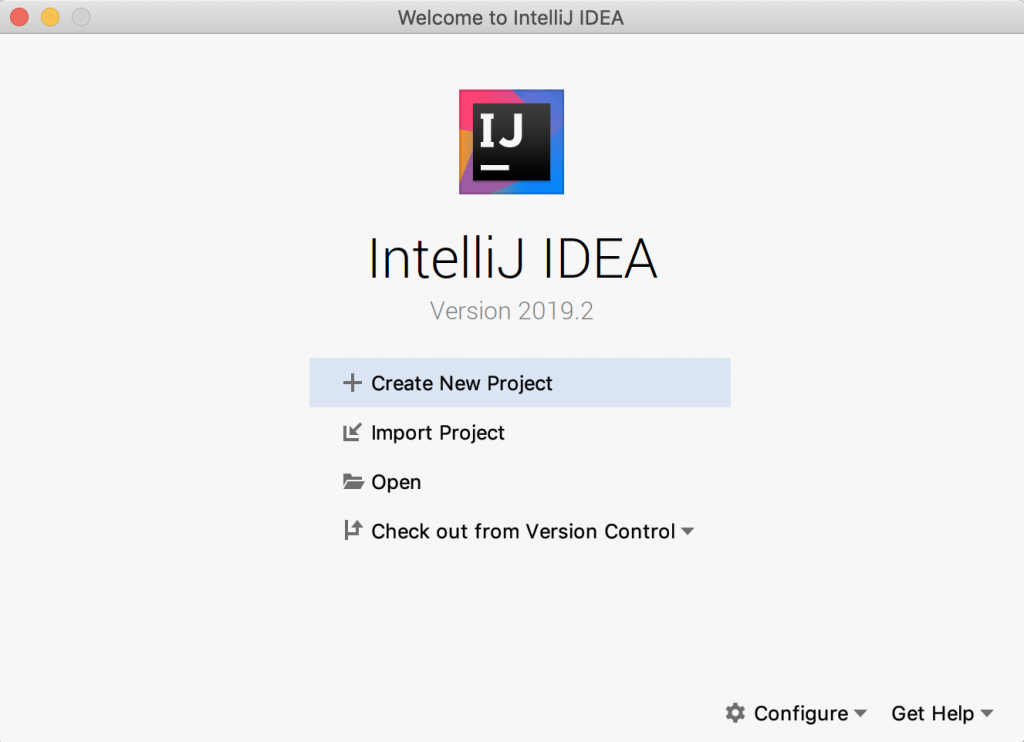
Из приветственного окна можно создать новый проект, импортировать или открыть существующие проекты, извлечь код из системы контроля версий вроде Git, запустить инструменты настройки или получить справку по IDE.
Создание простого проекта на Kotlin
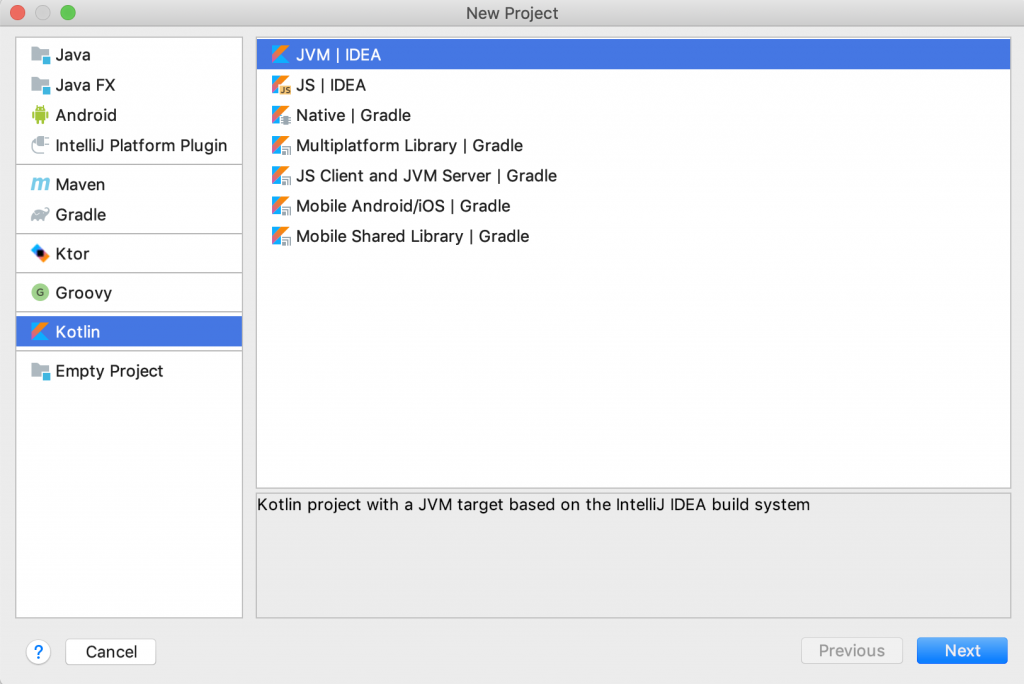
В приветственном окне выберите пункт Create New Project. Вы увидите первый экран конфигурации.
Выберите Kotlin из списка опций слева, Kotlin JVM в качестве типа проекта и нажмите Next.
Вы должны увидеть следующее:
Затем вы увидите экран для проекта с названием и местом хранения файлов. Вы также увидите Project SDK, который должен быть установленной ранее версией JDK — или другой версией JDK, если у вас на ПК установлено более одной версии.
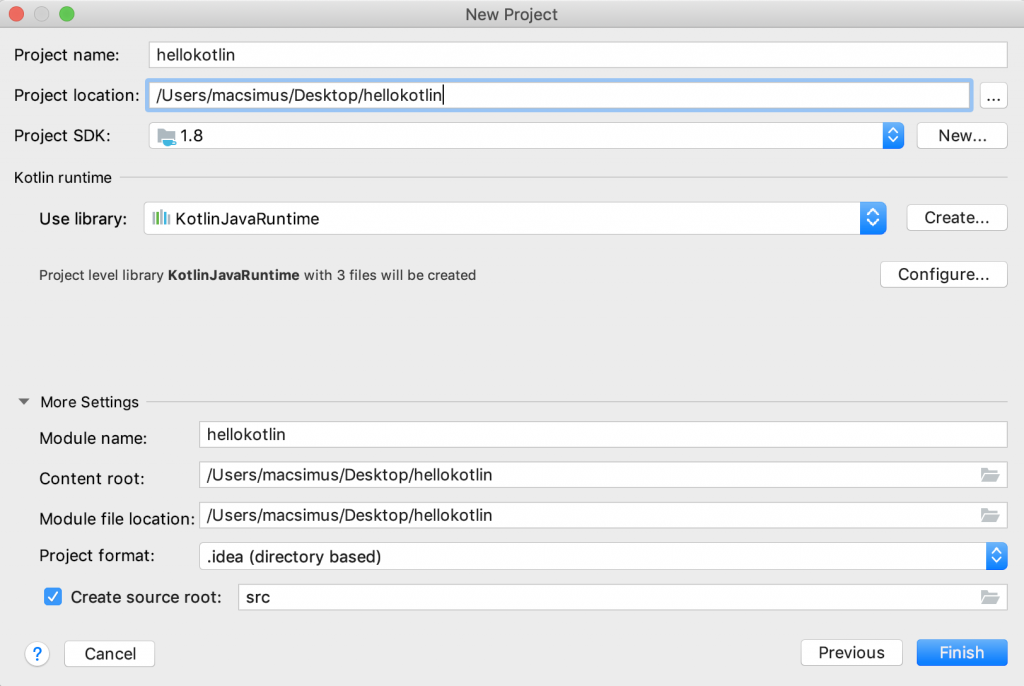
Введите hellokotlin для названия проекта, выберите место для проекта или просто оставьте значения по умолчанию. Ничего больше не указывайте и нажмите Finish.
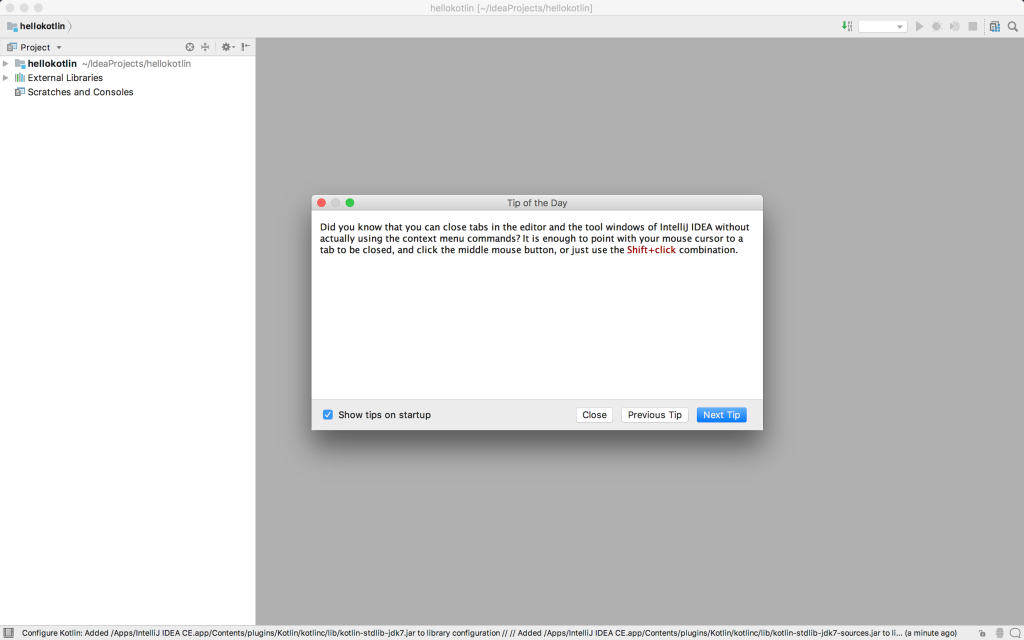
IntelliJ IDEA создает и конфигурирует ваш проект.
По завершении вы попадете в окно Tip of the Day, или Совет дня, в котором каждый раз при открытии приложения показываются полезные советы по IntelliJ IDEA.
Вы должны увидеть следующее:
Закройте окно подсказки и проверьте панель Project слева от главного окна IntelliJ IDEA. На панели Project можно управлять всеми файлами, связанными с проектом, например файлами исходного кода Kotlin, у которых расширение .kt.
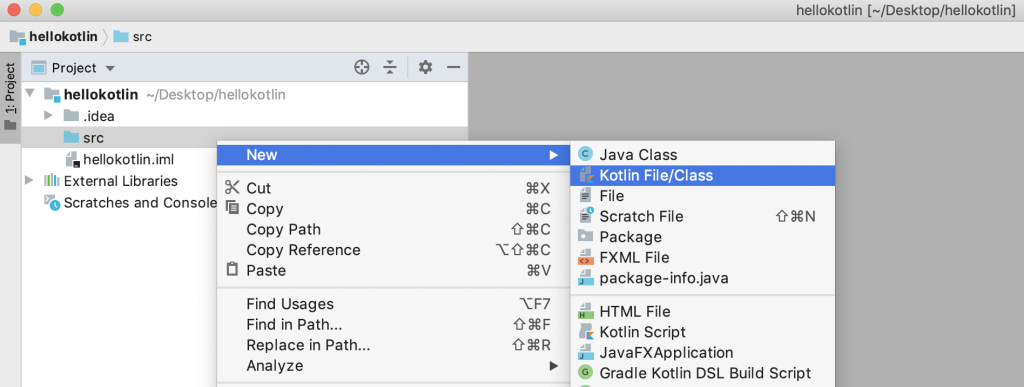
Кликните на стрелку рядом с hellokotlin, чтобы открыть его содержимое, и вы увидите папку src для проекта. Щелкните правой кнопкой мыши на папку src и выберите New ▸ Kotlin File/Class.
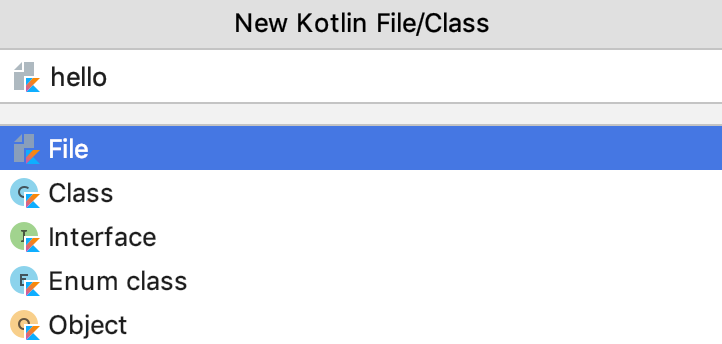
Должно открыться новое диалоговое окно New Kotlin File/Class. Введите hello и кликните OK.
Затем файл hello.kt откроется редакторе IntelliJ IDEA.
Базовый макет окна IntelliJ IDEA содержит панель Project слева, панель Editor посередине и Toolbar в верхней правой части, который можно использовать для запуска кода.

По ходу настройки проекта мы разобрали главные части окна IntelliJ IDEA. Пришло время для запуска Kotlin-кода!
Пример программы на Kotlin!
В данном уроке мы просто напишем в редакторе код на Kotlin и запустим его, для чего необязательно разбирать все его части. Каждый элемент кода будет подробнее разобран в дальнейшем. Если у вас есть опыт программирования в Java, Swift или Python, вы быстро вникните в ход дела.
Install IntelliJ IDEA
IntelliJ IDEA is a cross-platform IDE that provides consistent experience on the Windows, macOS, and Linux operating systems.
IntelliJ IDEA is available in the following editions:
Community Edition is free and open-source, licensed under Apache 2.0. It provides all the basic features for JVM and Android development.
IntelliJ IDEA Ultimate is commercial, distributed with a 30-day trial period. It provides additional tools and features for web and enterprise development.
For more information, see the comparison matrix.
System requirements
| Requirement | Minimum | Recommended |
|---|---|---|
| RAM | 2 GB of free RAM | 8 GB of total system RAM |
| CPU | Any modern CPU | Multi-core CPU. IntelliJ IDEA supports multithreading for different operations and processes making it faster the more CPU cores it can use. |
| Disk space | 2.5 GB and another 1 GB for caches | SSD drive with at least 5 GB of free space |
| Monitor resolution | 1024×768 | 1920×1080 |
| Operating system | Latest 64-bit version of Windows, macOS, or Linux (for example, Debian, Ubuntu, or RHEL) |
You do not need to install Java to run IntelliJ IDEA because JetBrains Runtime is bundled with the IDE (based on JRE 11). However, to develop Java applications, a standalone JDK is required.
Install using the Toolbox App
The JetBrains Toolbox App is the recommended tool to install JetBrains products. Use it to install and manage different products or several versions of the same product, including Early Access Program (EAP) releases, update and roll back when necessary, and easily remove any tool. The Toolbox App maintains a list of all your projects to quickly open any project in the right IDE and version.
Install the Toolbox App
Download the installer .exe from the Toolbox App web page.
Run the installer and follow the wizard steps.
After you run the Toolbox App, click its icon in the notification area and select which product and version you want to install.

Log in to your JetBrains Account from the Toolbox App and it will automatically activate the available licenses for any IDE that you install.
Install the Toolbox App
Download the disk image .dmg from the Toolbox App web page.
There are separate disk images for Intel and Apple Silicon processors.
Mount the image and drag the JetBrains Toolbox app to the Applications folder.
After you run the Toolbox App, click its icon in the main menu and select which product and version you want to install.

Log in to your JetBrains Account from the Toolbox App and it will automatically activate the available licenses for any IDE that you install.
Install the Toolbox App
Download the tarball .tar.gz from the Toolbox App web page.
Extract the tarball to a directory that supports file execution.
For example, if the downloaded version is 1.17.7391, you can extract it to the recommended /opt directory using the following command:
Execute the jetbrains-toolbox binary from the extracted directory to run the Toolbox App and select which product and version you want to install. After you run the Toolbox App for the first time, it will automatically add the Toolbox App icon to the main menu.

Log in to your JetBrains Account from the Toolbox App and it will automatically activate the available licenses for any IDE that you install.
You can use this shell script that automatically downloads the tarball with the latest version of the Toolbox App, extracts it to the recommended /opt directory, and creates a symbolic link in the /usr/local/bin directory.
Standalone installation
Install IntelliJ IDEA manually to manage the location of every instance and all the configuration files. For example, if you have a policy that requires specific install locations.
Run the installer and follow the wizard steps.
On the Installation Options step, you can configure the following:
Create a desktop shortcut for the launcher relevant to your operating system.
Add the directory with IntelliJ IDEA command-line launchers to the PATH environment variable to be able to run them from any working directory in the Command Prompt.
Add an item Open Folder as Project to the system context menu (when you right-click a folder).
Associate specific file extensions with IntelliJ IDEA to open them with a double-click.
Install the 32-bit version of JetBrains Runtime if you are running a 32-bit Windows version.

To run IntelliJ IDEA, find it in the Windows Start menu or use the desktop shortcut. You can also run the launcher batch script or executable in the installation directory under bin .
Extract the archive to the desired folder.
To run IntelliJ IDEA, use the launcher batch script or executable in the extracted directory under bin .
There are separate disk images for Intel and Apple Silicon processors.
Mount the image and drag the IntelliJ IDEA app to the Applications folder.
Run the IntelliJ IDEA app from the Applications directory, Launchpad, or Spotlight.
Extract the tarball to a directory that supports file execution.
For example, to extract it to the recommended /opt directory, run the following command:
Do not extract the tarball over an existing installation to avoid conflicts. Always extract it to a clean directory.
Execute the idea.sh script from the extracted directory to run IntelliJ IDEA.
To create a desktop entry, do one of the following:
On the Welcome screen, click Configure | Create Desktop Entry
From the main menu, click Tools | Create Desktop Entry
When you run IntelliJ IDEA for the first time, some steps are required to complete the installation, customize your instance, and start working with the IDE.
For information about the location of the default IDE directories with user-specific files, see Default IDE directories.
Silent installation on Windows
Silent installation is performed without any user interface. It can be used by network administrators to install IntelliJ IDEA on a number of machines and avoid interrupting other users.
To perform silent install, run the installer with the following switches:
/S : Enable silent install
/CONFIG : Specify the path to the silent configuration file
/D : Specify the path to the installation directory
This parameter must be the last in the command line and it should not contain any quotes even if the path contains blank spaces.
To check for issues during the installation process, add the /LOG switch with the log file path and name between the /S and /D parameters. The installer will generate the specified log file. For example:
Silent configuration file
You can download the default silent configuration file for IntelliJ IDEA at https://download.jetbrains.com/idea/silent.config
The silent configuration file defines the options for installing IntelliJ IDEA. With the default options, silent installation is performed only for the current user: mode=user . If you want to install IntelliJ IDEA for all users, change the value of the installation mode option to mode=admin and run the installer as an administrator.
The default silent configuration file is unique for each JetBrains product. You can modify it to enable or disable various installation options as necessary.
It is possible to perform silent installation without the configuration file. In this case, omit the /CONFIG switch and run the installer as an administrator. Without the silent configuration file, the installer will ignore all additional options: it will not create desktop shortcuts, add associations, or update the PATH variable. However, it will still create a shortcut in the Start menu under JetBrains .
Install as a snap package on Linux
You can install IntelliJ IDEA as a self-contained snap package. Since snaps update automatically, your IntelliJ IDEA installation will always be up to date.
To use snaps, install and run the snapd service as described in the installation guide.
On Ubuntu 16.04 LTS and later, this service is pre-installed.
IntelliJ IDEA is distributed via two channels:
The stable channel includes only stable versions. To install the latest stable release of IntelliJ IDEA, run the following command:
The —classic option is required because the IntelliJ IDEA snap requires full access to the system, like a traditionally packaged application.
The edge channel includes EAP builds. To install the latest EAP build of IntelliJ IDEA, run the following command:
When the snap is installed, you can launch it by running the intellij-idea-community , intellij-idea-ultimate , or intellij-idea-educational command.
To list all installed snaps, you can run sudo snap list . For information about other snap commands, see the Snapcraft documentation.


