- Ubuntu Documentation
- Overview
- RST & Ubuntu installation
- Possible installation scenarios
- RST enabled, Windows installed
- How to safely re-configure Windows to use AHCI
- Possible boot problems
- Command prompt, diskpart and bcdedit
- Arch Linux and Intel RST (“Fake RAID”)
- Overview
- Intel Rapid Storage Technology
- mdadm
- The Boot Process
- Installation
- Creating the RAID
- Installing Arch
- Final Notes
Ubuntu Documentation
Overview
Intel Rapid Storage Technology (RST) is a solution built into a range of Intel chipsets. On platforms that have RST support built and enabled in the computer’s BIOS, it allows users to group and manage multiple hard disks as single volumes. This functionality is known as the Redundant Array of Independent Disks (RAID).
In some usage scenarios, RAID offers various advantages over the use of several disks independently. RAID offers multiple configurations — levels — which focus on performance and redundancy.
A complete user guide is available through the official Intel documentation.
RST & Ubuntu installation
If you intend to install Ubuntu on a computer that supports RST functionality, you may need to make operational adjustments to your setup before you can proceed.
By default, the Ubuntu installer can detect certain RAID configurations, but it may not necessarily be able to access and use the hard disks grouped in them.
If the Ubuntu installer cannot detect the hard disks you need, then before you can install Ubuntu, you will need to turn RST in the computer’s BIOS. The exact terminology and steps required to access and manage RST in BIOS often depend on the specific implementation by the platform vendor. For instance, Dell computers may have different settings from Lenovo or HP computers.
Furthermore, you may already have Windows installed on the computer that uses RST. If you disable RST in the BIOS or change the RST configuration, Windows may become unbootable, as it may no longer be able to find and use the hard disks.
Possible installation scenarios
Broadly, there are two main configurations you may encounter when you try to install Ubuntu on a computer that supports and uses RST:
RST used and enabled, no operating system installed.
RST used and enabled, Windows installed.
RST enabled, no operating system installed.
Again, there are two possible scenarios here:
The Ubuntu installer correctly detects the hard disks and can use them. In this case, you can proceed normally.
The Ubuntu installer detects a conflict with RST and will notify the user that RST configuration is required.
The latter scenario can be resolved by either one of the two changes:
Turning RST off completely in BIOS.
Changing the storage controller protocol from RST to Advanced Host Controller Interface (AHCI).
AHCI is a relatively new specification that describes how computer storage is accessed and managed, and it supersedes several older specifications. It is primarily designed to utilize advanced features of hard drives connected via the Serial ATA (SATA) bus. Typically, these will be 2.5-in and 3.5-in hard disks, including both mechanical and SSD devices. The change from RST to AHCI may result in the loss of some of the advanced functionality that the RST module offers (for instance TRIM for SSD).
The exact terminology and steps required to access and manage controller type in BIOS often depend on the specific implementation by the platform vendor.
RST enabled, Windows installed
Similarly, there are two possible scenarios available:
The Ubuntu installer correctly detects the hard disks and can use them. In this case, you can proceed normally. You will need to create a side-by-side configuration for Windows and Ubuntu.
The Ubuntu installer detects a conflict with RST and will notify the user that RST configuration change is required. In this case, the change will affect the installed Windows operating system.
Caution: Please note that changes to storage configuration can be destructible and lead to irrecoverable loss of data. If you break a RAID setup, your data may no longer be accessible. Likewise, if you change the controller type from RST to AHCI, Windows may no longer be able to boot.
How to safely re-configure Windows to use AHCI
If the Ubuntu installer detects RST, and you have Windows installed on your system, there are several steps you need to do to allow Ubuntu to install side by side with Windows, without any loss of data and functionality.
Back your data up — any hard drive structure or configuration change, or installation of new operating systems on a hard drive that already contains data can potentially lead to a data loss. You need to make sure your personal data is safe. Even simply copying the important files to an external drive can minimize the risk of data loss.
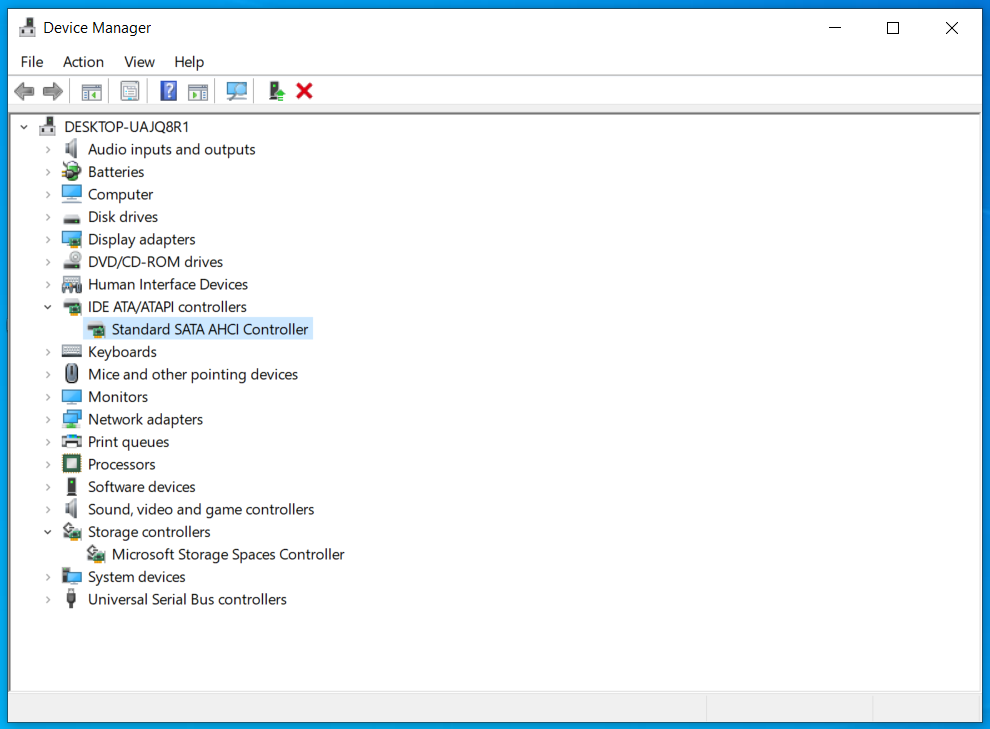
Verify which controller mode is in use in Windows. You can do this through the Device Manager. If the controller mode is set to anything other than “Standard SATA AHCI Controller”, then you will need to make a change that allows Windows to boot safely in AHCI mode. This can be done using the Registry Editor.
Start Registry Editor, and navigate to:
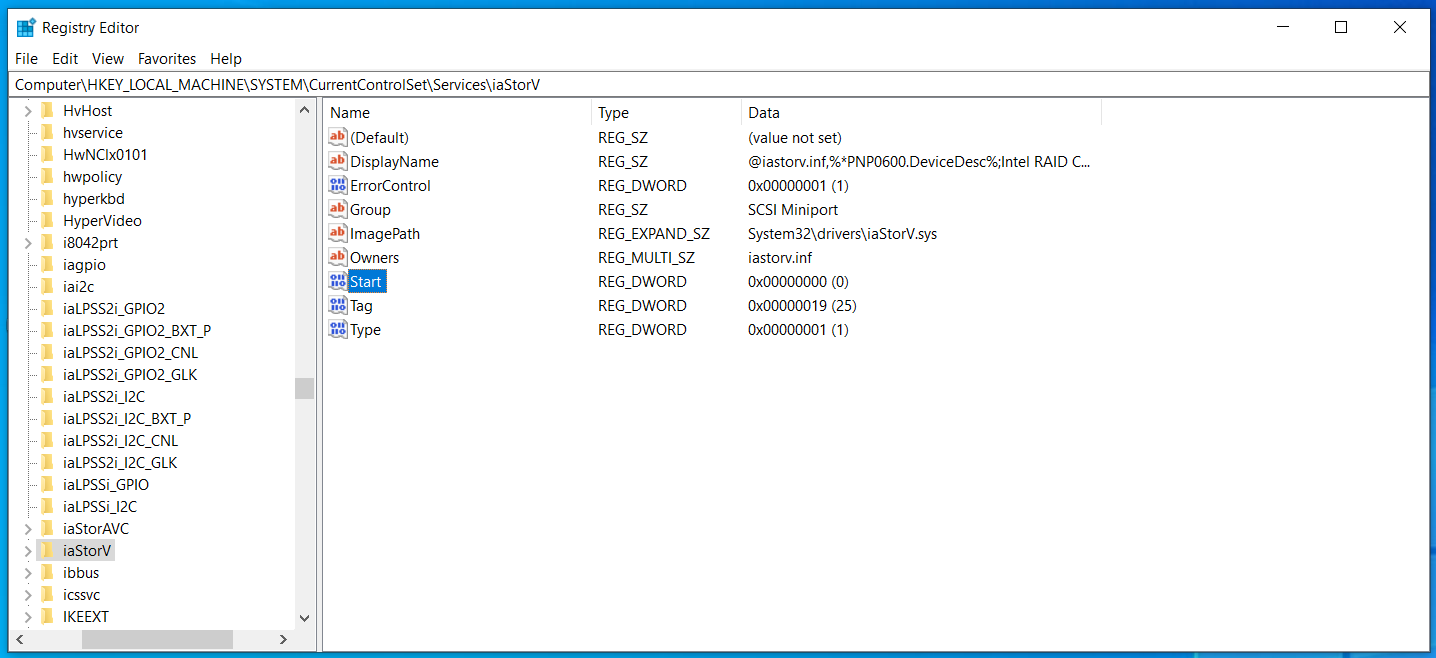
Here, in the right column, double-click on the Start key, and change its value to 0.
Next, double-click on the iaStorV entry in the left column to expand it, select the StartOverride entry, and then in the right column, change the value of the key 0 to 0.
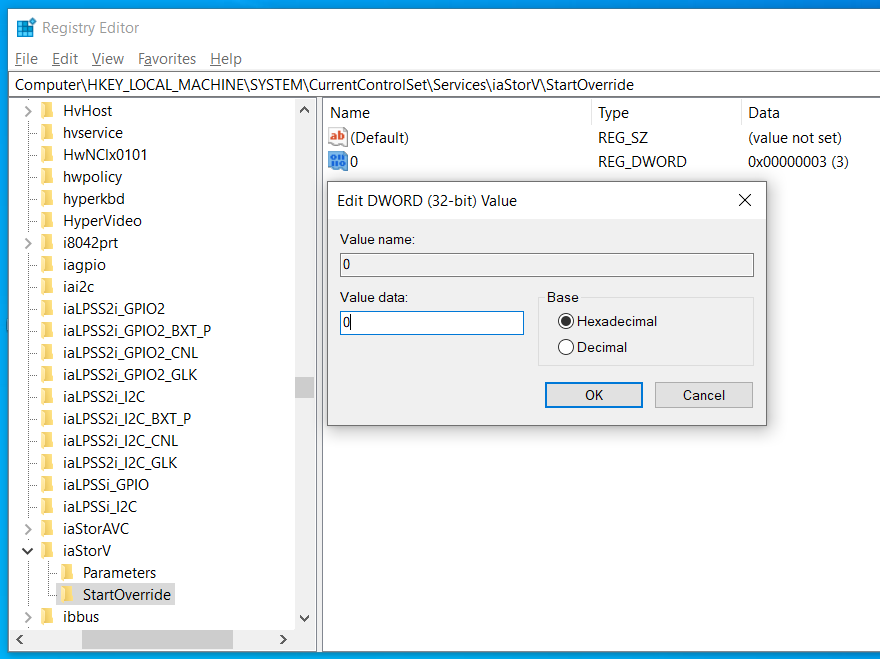
Repeat this set of changes for the following path in the Registry Editor:
Once this step is complete, reboot Windows and start your computer’s BIOS. Normally, BIOS is accessed by hitting the F2 or Del key during the early boot sequence. In the BIOS menu, change the hard disk controller type to AHCI. The exact terminology and steps required to access and manage controller type in BIOS often depend on the specific implementation by the platform vendor.
Exit BIOS, and let the system boot. Windows should load normally, and you can check the controller mode in the Device Manager. It should read: Standard SATA AHCI Controller.
Possible boot problems
After making the necessary changes to allow Ubuntu to install side by side with Windows, you may encounter a situation where Windows no longer boots. For instance, this could happen if you made the BIOS change without making the registry changes in Windows. In this case, you will need to recover your Windows.
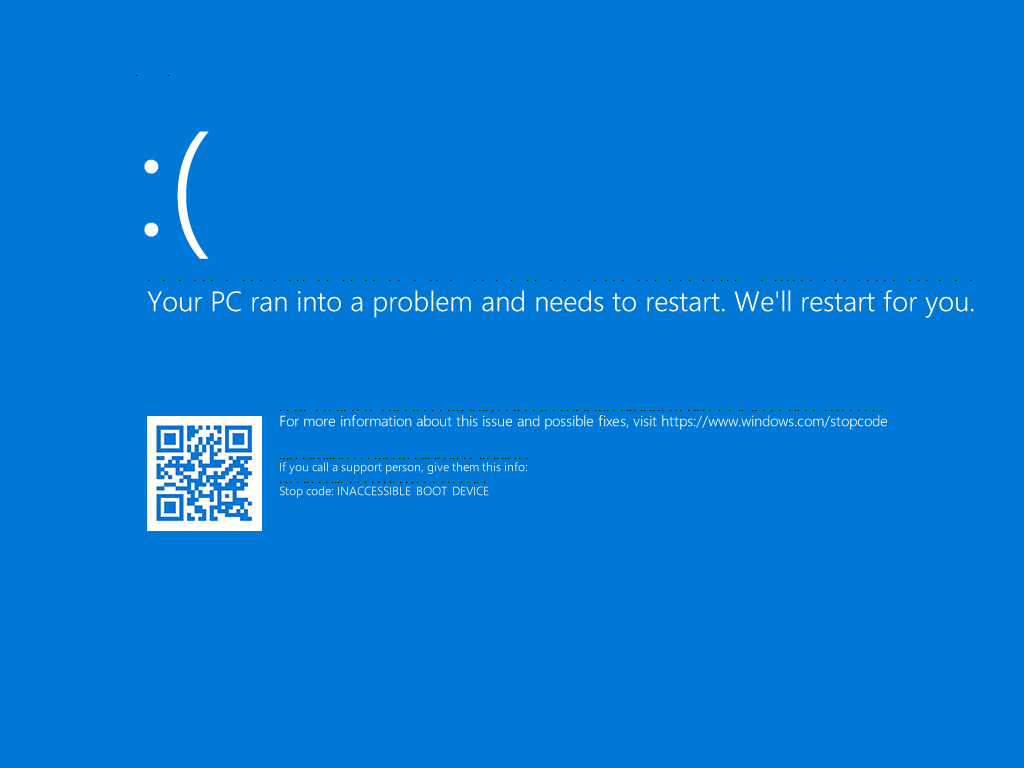
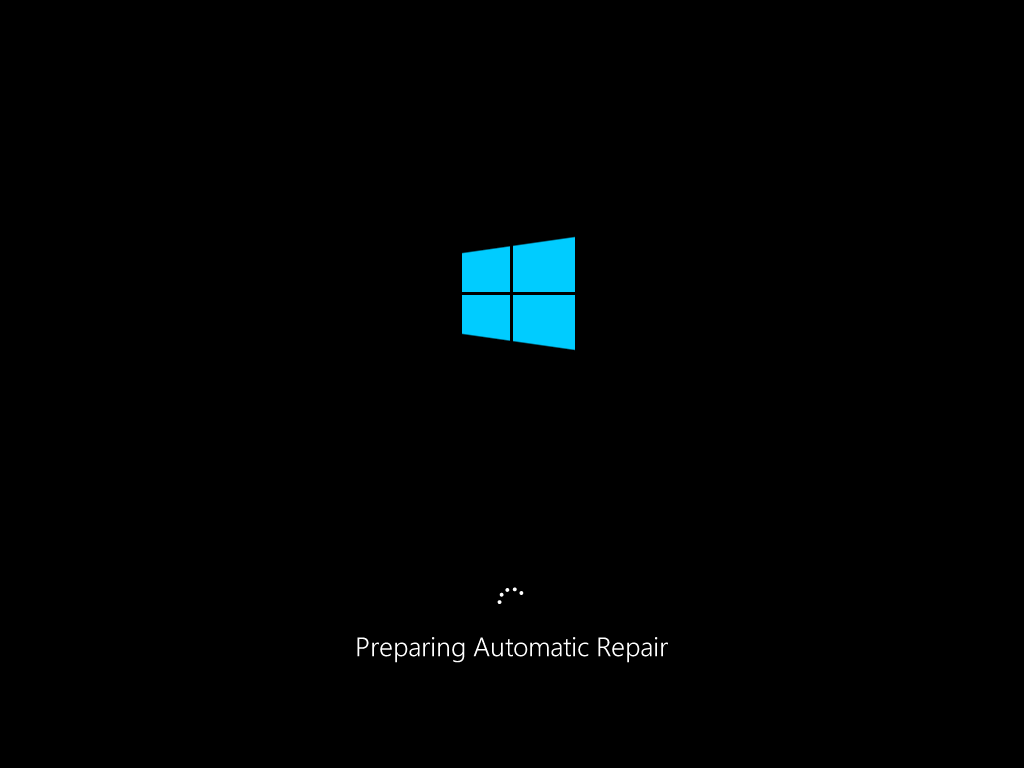
You will most likely see a blue screen with a Stop code: INACCESSIBLE BOOT DEVICE.
Windows will attempt to restart and automatically diagnose and repair the boot-related problems, but it will most likely not be able to complete the task itself, and you will need to manually launch the command prompt from the recovery screen, and fix the issue.
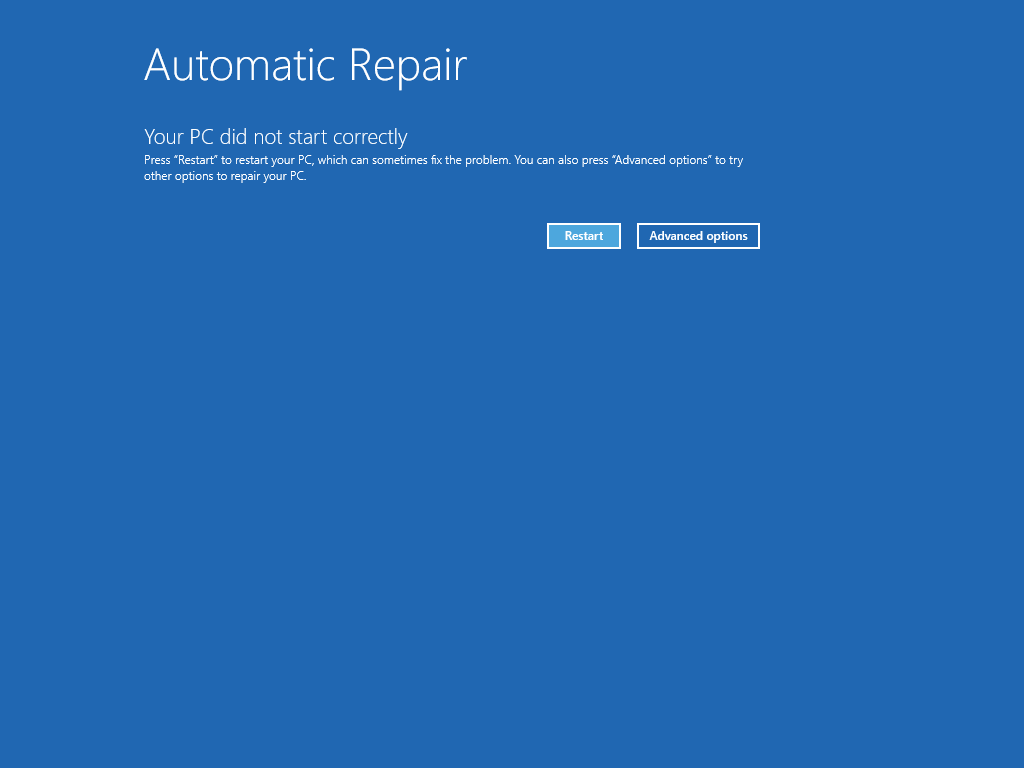
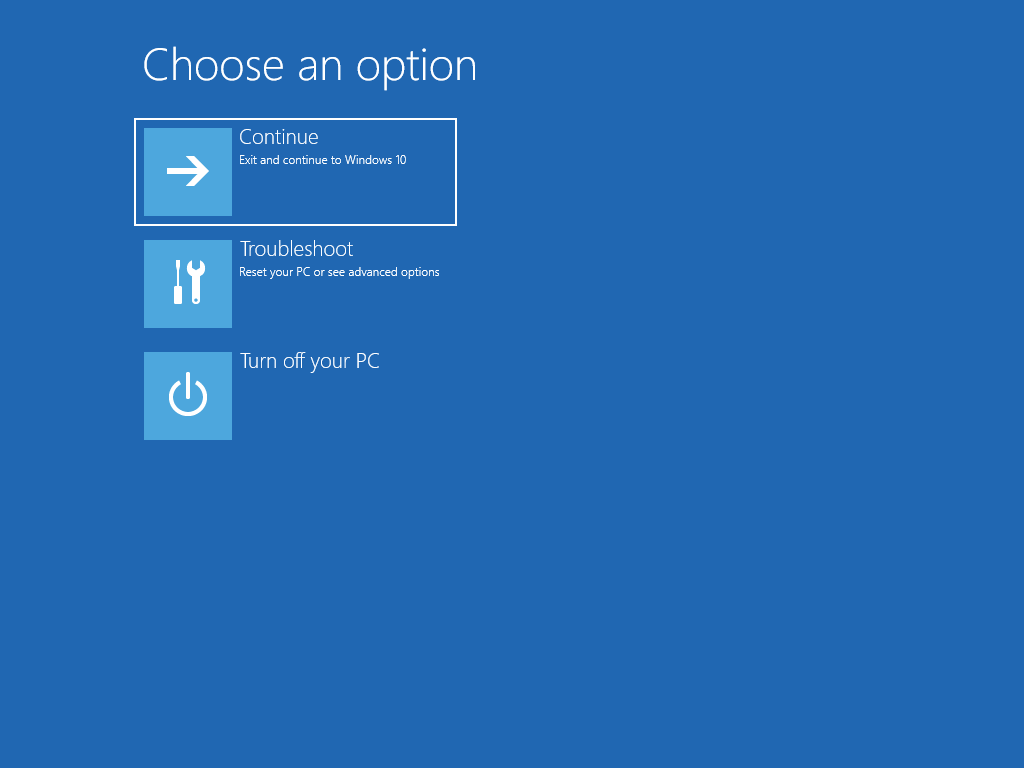
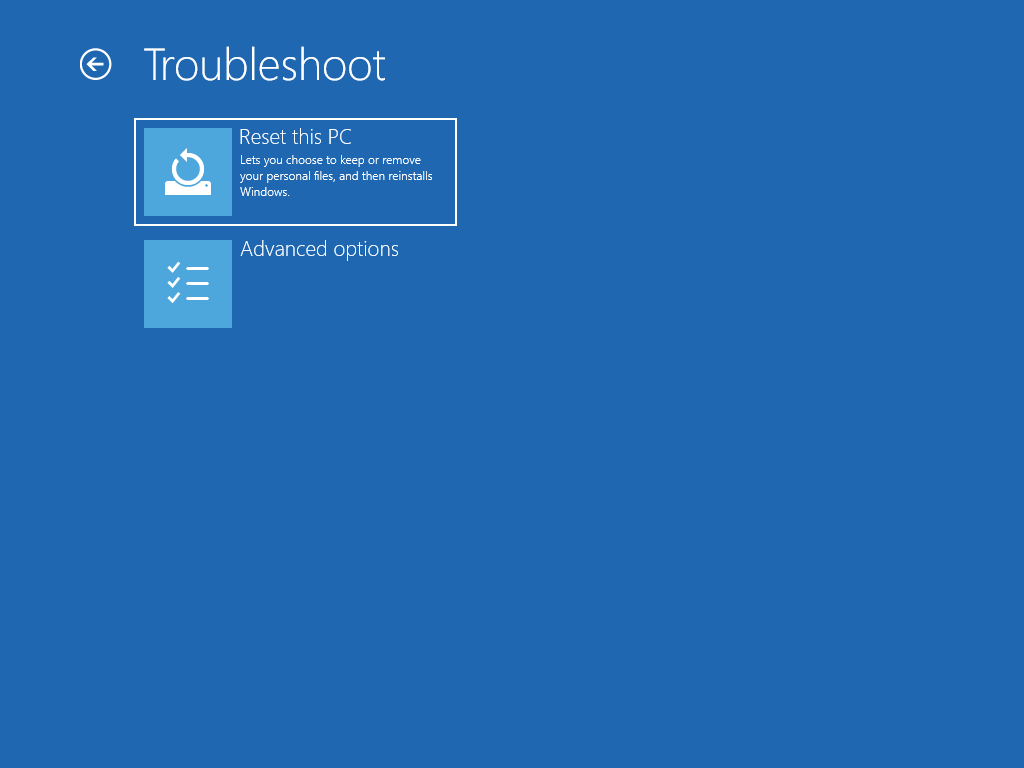
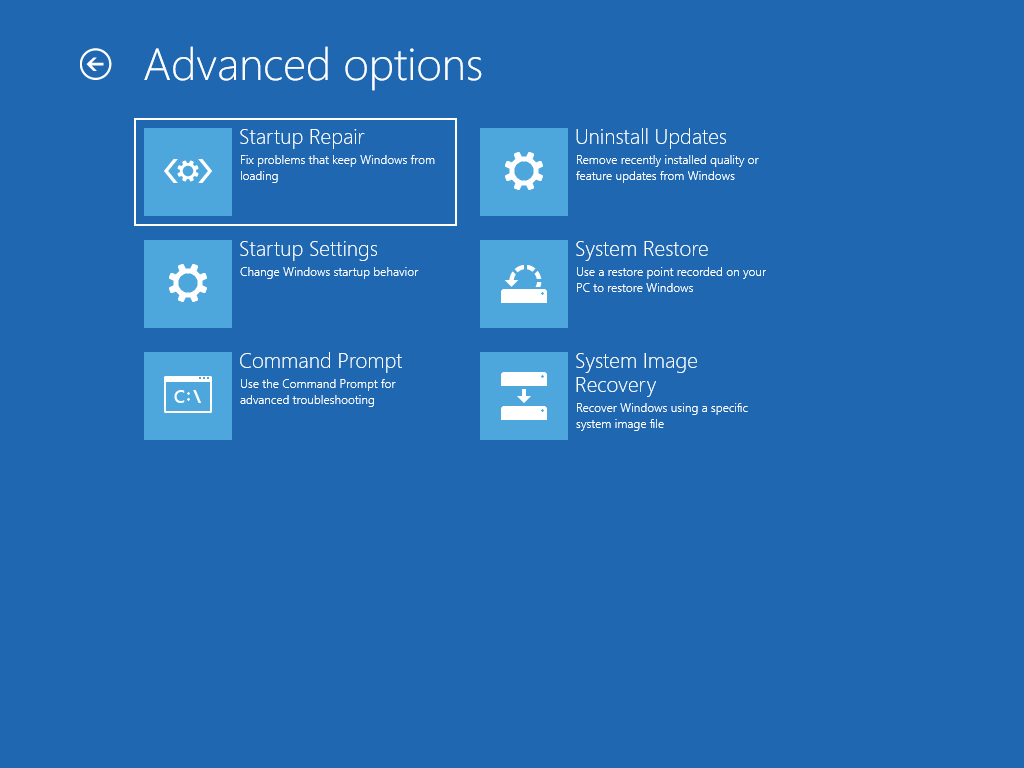
On the screen that gives you the result of the Automatic Repair, click on Advanced Options. Under Choose an option, select Troubleshoot. Next, selected Advanced Options again. Finally, select Command Prompt.
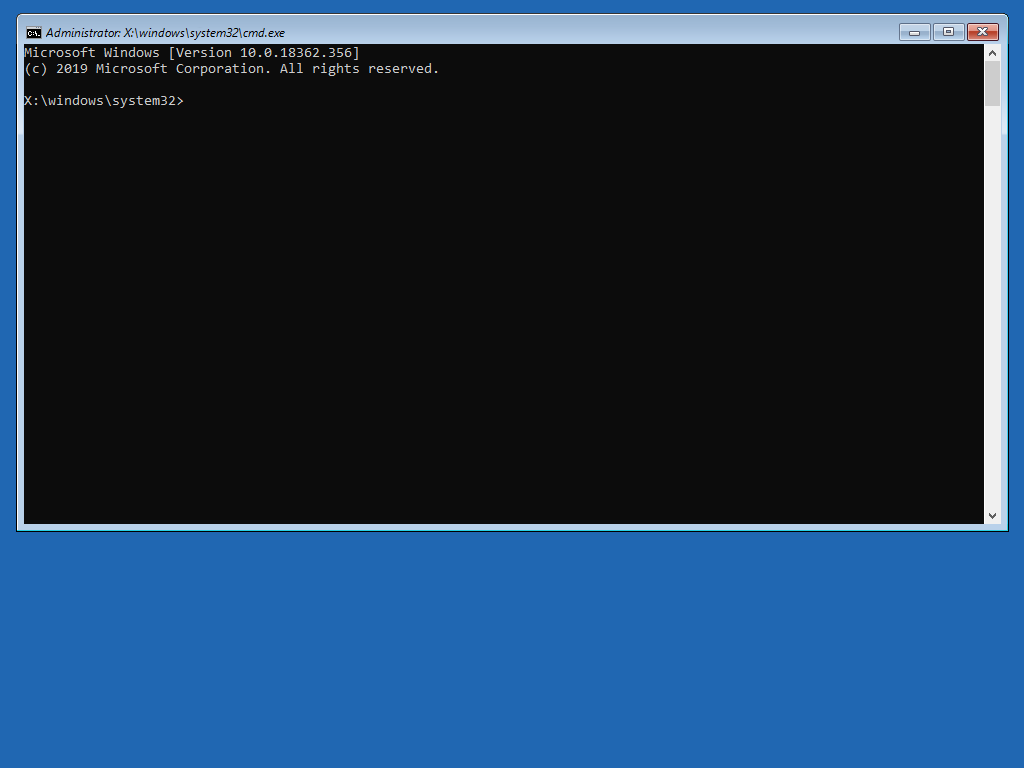
Command prompt, diskpart and bcdedit
This will launch the Windows command prompt, where you can run commands to diagnose and repair problems, including boot-related issues. The first step is to run the disk partition tool to see and understand the disk layout.
On the command line, type diskpart . Next, you will need to display the list of volumes, make sure the volume that contains Windows is correctly assigned the letter C: (if it’s not, you will need to change this), make this volume active, and then run the boot repair command.
The full sequence of commands is as follows:
For example, a “wrong” volume may be assigned the letter C:, so you will need to select it first, assign it a different letter (e.g.: F: or H:), select the volume that contains Windows, and then assign it the letter C:.
Finally, activate the C: volume, and exit the diskpart utility.
Now, run the bcdedit repair command:
If the above does not work, alternative commands you can run are:
If this command completes successfully, exit the command prompt, the Windows recovery console will restart, and Windows should load normally, with the controller mode set to AHCI.
If Windows does not start correctly, you can then manually recreate the bootloader file.
To this end, you will need to access either the System partition or the EFI partition on your computer. The Windows disk layout will typically include one of these two configurations:
A volume that contains Windows (C:) and a small hidden partition, usually 100MB in size called System partition, formatted as NTFS. It contains the files needed to start (boot) Windows, as well as recovery tools to help you diagnose and repair your system when it does not start correctly.
On UEFI-powered computers, a volume that contains Windows (C:) and a boot partition (also called EFI), typically 256-512MB in size, formatted as FAT32. This partition will contain the files needed to start (boot) Windows.
You will need to access the partition to make the necessary changes. If you have already run the diskpart utility, you do not need to do anything at this point, you only need to check the letter that is assigned to this partition (e.g.: letter F:).
Switch to the boot partition, move the existing boot file aside, and then create a new one. The sequence of commands to do this is as follows (assuming letter F: for the boot partition):
The bcdboot command will initialize the system partition by using BCD files from the C:\Windows folder, use the en-us locale (/l en-us), target the system partition assigned letter F: (/s option), and create boot files both for UEFI and BIOS (/f ALL option).
Once this command completes, reboot. Windows should start normally. You can now re-launch the Ubuntu installer and finish the side-by-side setup of the two operating systems.
The material in this document is available under a free license, see Legal for details.
For support please use Ask Ubuntu.
Источник
Arch Linux and Intel RST (“Fake RAID”)

Sep 27, 2017 · 5 min read
RAID is a common choke point for users installing Linux. This is somewhat due to the fact that the amount of information on the topic is absolutely overwhelming. Information is often conflicting or even entirely out-of-date. Additionally, it can be extremely unnerving to configure storage when one isn’t entirely sure if what they’re doing is correct.
This post aims to serve as a guide for users installing Arch Linux with RAID-1 using Intel Rapid Storage Technology (RST). While basic RAID concepts are beyond the scope of this guide, I will describe appropriate use cases of Intel RST versus other solutions and describe the process of configuring a RAID-1 array.
Overview
It is useful to have an understanding of several concepts before proceeding:
Intel Rapid Storage Technology
Intel Rapid Storage Technology, previously known as Intel Matrix RAID, is a feature included on several modern Intel chipsets. This firmware-based RAID (also known as “ fake RAID”) is an attractive option because it permits functionality such as disk mirroring without further monetary investment.
Firmware and software RAID differ from hardware RAID in that the array is ultimately managed by the operating system instead of a dedicated controller. The burden of processing is delegated to the host CPU. Additionally, firmware and software RAID do not benefit from features such as battery-backed write caching that are often included on dedicated controllers. As such, Intel RST is not an ideal option for users with critical reliability requirements — but it is a very reasonable choice for home users looking to achieve additional redundancy or performance.
mdadm
In Linux, the mdadm ( multiple device administrator) utility is considered the industry standard for managing firmware and software RAID. The md driver provides virtual devices that represent disks and partitions on the array. These virtual devices are stored at /dev/md * (or /dev/md/ * in the case of named arrays).
Within a RAID, devices may have metadata (also known as a superblock). Metadata is information that describes the structure and state of an array. For purely software-based RAID solutions, md can directly manage the metadata. For firmware-based RAID solutions such as Intel RST, md is also capable of supporting external metadata — metadata managed outside the context of the driver. For arrays with external metadata, md uses the concept of a container to manage a set of devices, and arrays are created within containers.
For more information, refer to the md and mdadm man pages.
Note: A significant amount of older documentation references dmraid . This refers to the utility formerly used for managing firmware and software RAID. It is now deprecated; mdadm should be used instead.
The Boot Process
As mentioned earlier, firmware-based RAID solutions are ultimately managed by the operating system. Therefore, an existing array must be assembled — that is, identified and mounted — at boot time for md to manage it.
Assembly happens within the initial ramdisk, which is the initial Linux environment mounted by the booting kernel. The initramfs contains any drivers and scripts necessary to make the real root filesystem accessible. The initramfs is compiled via the mkinitcpio command.
mkinitcpio uses the concepts of binaries and hooks when preparing the initramfs. Binaries are simply binaries (with all of their dependencies) to be included in the environment, and hooks are scripts that are executed in a provided order.
udev is the device manager for the Linux kernel. udev handles hardware events (such as addition/removal) with actions defined in rules. Hooks can be utilized to include udev rules in the initramfs that handle the automatic assembly of RAID arrays at boot time.
Installation
WARNING: These commands can destroy data if used incorrectly. If you have anything important on any disk connected to the system, ensure you have a backup!
Our primary goals are to create the RAID array, install the operating system, and configure the operating system to assemble the array during boot.
The following example utilizes mdadm to create a 2-device RAID-1 array named /dev/md/data comprised of /dev/sda and /dev/sdb. You may need to adjust the parameters accordingly to suit the configuration of your system.
Creating the RAID
Note: The RAID can alternatively be created via the Intel RST option ROM— the results are identical.
- Boot into the Arch Linux installer.
- Use lsblk to display your disk tree.
3. Because Intel RST utilizes external metadata, we must first create a container for our array. Create a container named /dev/md/imsm on the target devices using the imsm ( Intel Matrix Storage Manager) metadata format.
4. Create the array named /dev/md/data in the /dev/md/imsm container.
Installing Arch
Although most of the installation process is beyond the scope of this guide, there are several key concepts to note.
As described earlier, the md driver provides virtual devices that represent disks and partitions on the array. For example, if you create 2 partitions on /dev/md/data, the partitions may be accessible at /dev/md/data1 and /dev/md/data2. Inspect the output of ls -lR /dev/md* for the specific virtual devices on your system.
When writing to an assembled array, always reference the virtual device. For example, you must partition /dev/md/data, not /dev/sda or /dev/sdb — and you must format /dev/md/data1, not /dev/sda1 or /dev/sdb1.
Follow the Arch Linux installation guide, omitting the “Initramfs” and “Bootloader” steps. Prior to rebooting, proceed with the following steps.
- Generate /etc/mdadm.conf in preparation of generating the initial ramdisk. This will facilitate automatic RAID assembly during boot.
2. Open /etc/mkinitcpio.conf in your preferred text editor.
3. Add /sbin/mdmon to the BINARIES section. mdmon monitors external metadata and will be automatically executed by udev rules.
4. Add mdadm_udev to the HOOKS section between block and filesystems . mdadm_udev is an installation hook that includes mdadm and the udev rules responsible for RAID assembly in the initramfs.
5. Save and exit.
6. Generate the initramfs.
8. Reboot. The RAID should automatically assemble.
Final Notes
You can view the status of the RAID with cat /proc/mdstat . For more information, the Linux RAID Wiki is a valuable resource, as are the md and mdadm man pages.
Please feel free to share your thoughts on this guide, and how it could be improved. My goal here was to concisely present the information I wish I’d known when I began tinkering with RAID on Linux, and I’m hoping it significantly simplifies the installation process for others.
Источник


