- Установка и конфигурирование IIS
- Установка IIS
- Установка IIS на настольных версиях Windows (Windows Vista, Windows 7 и Windows 8)
- Установка IIS в Windows Server 2008
- Установка IIS в Windows Server 2012
- Управление IIS
- Windows Authentication
- Overview
- New in IIS 7.5
- Compatibility
- Setup
- Windows Server 2012 or Windows Server 2012 R2
- Windows 8 or Windows 8.1
- Windows Server 2008 or Windows Server 2008 R2
- Windows Vista or Windows 7
- How To
- How to enable Windows authentication for a Web site, Web application, or Web service
- How to enable Extended Protection for Windows authentication
- Configuration
- Attributes
- Child Elements
- Configuration Sample
- Sample Code
Установка и конфигурирование IIS
В большинстве случаев в реальных производственных проектах один или несколько серверов будут использоваться для обслуживания клиентских запросов веб-сайта. Эти серверы могут принадлежать и управляться непосредственно вами, специализированной командой или же сторонней компанией, предоставляющей услуги хостинга. В любом случае рано или поздно наступает момент, когда написание кода и его тестирование завершено, и работа должна быть представлена широкой публике — в этом и заключается развертывание веб-сайта.
В этой и следующих статьях мы рассмотрим различные варианты развертывания. Однако во всех случаях основные предпосылки остаются неизменными. На рабочей станции имеется готовый веб-сайт, который нужно развернуть на сервере, чтобы он был доступен клиентам. Для ASP.NET таким сервером является , а его текущей версией — IIS 8. Когда он был впервые реализован, IIS представлял собой базовый веб-сервер. С годами IIS развился в сложный сервер приложений, предоставляющий широкое множество функциональных средств, наиболее важным из которых является поддержка хостинга приложений ASP.NET.
В этой статье основное внимание уделяется IIS 8. Хотя машина, на которой запущен IIS 8, здесь называется сервером, IIS можно запускать под управлением версий Windows как для рабочей станции, так и для сервера. На рабочих станциях доступны не все, но большинство функциональных возможностей, что позволяет размещать сложные веб-сайты. По возможности мы рекомендуем использовать Windows Server, однако недорогой альтернативой могут послужить Windows 7 или Windows 8.
В Microsoft привязывают выпуски IIS с выпусками Windows. В состав Windows Server 2008 и Windows Vista входит версия IIS 7.0, в состав Windows Server 2008 R2 и Windows 7 — версия IIS 7.5, а в состав Windows Server 2012 и Windows 8 — IIS 8. Версии — 7.0 и 7.5 — в Microsoft обобщенно называют IIS 7, что может вносить путаницу. Версию IIS, поддерживаемую операционной системой, изменить нельзя — Windows Server 2008 будет использовать только IIS 7.0. Например, модернизировать ее до версии IIS 7.5, используемой в Windows Server 2008 R2, не получится.
Установка IIS
Компонент IIS включен как часть установки Windows (как для сервера, так и для рабочих станций) и требует активизации и конфигурирования. Далее представлены три способа активации IIS для различных операционных систем.
Установка IIS на настольных версиях Windows (Windows Vista, Windows 7 и Windows 8)
Каждая версия операционной системы Windows предлагает свою версию IIS — IIS 8 (в Windows 8), IIS 7.5 (в Windows 7) или IIS 7 (в Windows Vista). Во всех этих версиях Windows, IIS включен, но изначально не установлен. Чтобы установить его, необходимо выполнить следующие действия:
Откройте панель управления.
Нажмите кнопку «Включение или отключение компонентов Windows». Теперь вам нужно подождать, пока Windows исследует вашу систему.
Найдите элемент Internet Information Services (Службы IIS) в верхней части списка и нажмите на галочку чтобы включить его:

Обратите внимание, что Windows позволяет включить множество компонентов IIS: поддержка FTP-сервера, дополнительные инструменты управления, службы обратной совместимости с IIS 6 и т.д.
Убедитесь, что вы выбрали поддержку ASP.NET. Для этого раскройте узел Службы Интернета —> Компоненты разработки приложений —> ASP.NET (Internet Information Services —> World Wide Web Services —> Application Development Features —> ASP.NET):

Если вы хотите использовать поддержку IIS в Visual Studio, которая позволяет вам создавать виртуальные каталоги IIS непосредственно в диалоговом окне New Web Site, вам нужно выбрать пункт «Совместимость управления IIS 6» в разделе «Средства управления веб-сайтом» (Web Management Tools —> IIS 6 Management Compatibility).
Как только вы выбрали нужные параметры IIS, нажмите кнопку OK для завершения установки.
Установка IIS в Windows Server 2008
Установка и настройка IIS одинакова для Windows Server 2008 и Windows Server 2008 R2. Необходимые шаги описаны ниже:
Запустите диспетчер сервера. Чтобы сделать это, нажмите кнопку Start и выберите All Programs —> Administrative Tools —> Server Manager.
Выберите узел Roles в дереве слева.
В правой части окна нажмите на ссылке Add Roles. Это открывает мастер, позволяющий добавить новую роль сервера.
Выполните необходимые действия в мастере. Вас вероятно попросят установить дополнительные необходимые роли — если это так, нужно просто принять операции и продолжить.
После установки вам будет предложено настроить веб-сервер. Как в настольных версиях Windows, вы можете выбрать специфические особенности IIS 7, которые должны быть включены.
Если вы работаете в ASP.NET с версией .NET Framework 4.5, то эту версию .NET Framework необходимо будет установить (центр разработчиков .NET Framework)
Установка IIS в Windows Server 2012
Процесс установки IIS в Windows Server 2012, по существу, такой же, как и в Windows Server 2008. Основное различие заключается в том, что пользовательский интерфейс несколько отличается. Подробное описание вы можете найти перейдя по ссылке Installing IIS 8 on Windows Server 2012.
Управление IIS
При установке IIS, он автоматически создает каталог с именем C:\inetpub\wwwroot, который представляет ваш веб-сайт. Все файлы в этом каталоге будет отображаться, как будто они находятся в корневом каталоге вашего веб-сервера.
Чтобы добавить дополнительные страницы на ваш веб-сервер, можно скопировать файлы HTML, ASP или ASP.NET напрямую в каталог C:\Inetpub\wwwroot. Например если добавить файл TestFile.html в этот каталог, вы можете запросить его в браузере через URL-адрес http://localhost/TestFile.html. Вы даже можете создавать вложенные папки для группирования связанных ресурсов. Например, вы можете получить доступ к C:\inetpub\wwwroot\MySite\MyFile.html через браузер, используя URL-адрес http://localhost/MySite/MyFile.html.
Каталог wwwroot удобен для запуска простых примеров и статичных страниц. Для правильного использования ASP.NET вы должны сделать свой собственный виртуальный каталог для каждого веб-приложения, которое вы создаете. Например, вы можете создать папку с любым именем на любом диске вашего компьютера и поместить ее в виртуальный каталог IIS как будто она расположена в каталоге C:\inetpub\wwwroot.
Прежде чем начать работу, вам нужно запустить диспетчер служб IIS. Его можно найти в меню Start (Пуск). Конкретное расположение может зависеть от используемой версии Windows (IIS —> Диспетчер служб IIS). Ярлык программы будет располагаться в разделе Programs (Программы) или Administrative Tools (Администрирование). Начальная страница IIS Manager показана на рисунке ниже:

Теперь нужно ознакомиться с рядом терминов, используемых в IIS. В левой части окна IIS Manager отображается запись с именем используемого сервера. Наш сервер имеет имя PROFESSORWEB, сгенерированное по умолчанию Windows 8, которое будет использоваться в большинстве примеров. В центральной области отображается представление сервера. Это представление отображает набор значков, которые позволяют конфигурировать параметры сервера. В правой части экрана расположен список доступных действий. Например, в этом представлении можно запускать, останавливать и перезапускать сервер.
Если развернуть элемент сервера в древовидном представлении в левой части экрана, отобразится элемент Sites (Сайты), содержащий единственную запись Default Web Site (Веб-сайт по умолчанию). Сайт — это коллекция файлов и каталогов, образующих веб-сайт. На одном сервере IIS может поддерживать несколько сайтов, как правило, на различных портах TCP/IP (по умолчанию используется порт 80). Сочетание имени сервера и порта сайта образует первую часть URL-адреса. Например, при использовании сервера mywebserver с сайтом, подключенным к порту 80, URL-адрес выглядит следующим образом:
Каждый сайт может содержать множество файлов и каталогов. Каждый из них образует часть URL-адреса. Так, URL-адрес статической страницы mypage.html, расположенной в каталоге myfiles, будет следующим:
В некоторых ситуациях имя, под которым сервер известен вам, и имя, которое клиенты используют для получения содержимого, будут различаться. Мы оставим этот нюанс без внимания, но администратор сервера или компания, предоставляющая услуги хостинга, предоставят необходимые сведения, если это важно для конкретного сервера.
Чтобы проверить работоспособность IIS выберите Default Web Site и в правой области диспетчера служб IIS выберите пункт «Запустить». После этого нажмите кнопку «Обзор *.80 (http)» чтобы открыть страницу сайта в браузере:

Как видите, в моем случае я поменял порт используемый по умолчанию (с 80 на 8080). Я сделал это, т.к. на 80-м у меня запущен локальный Apache-сервер. Если у вас возникает такая же проблема, то изменить порт можно щелкнув правой кнопкой мыши по сайту (Default Web Site) и выбрав в контекстном меню «Изменить привязки» (Bindings). После этого в диалоговом окне можно изменить порт, используемый по умолчанию.
Итак, каждый сервер может поддерживать множество сайтов, каждый из которых работает на другом порту или с другим IP-адресом. Каждый сайт может иметь множество файлов и каталогов, и сочетание этих элементов предоставляет информацию о URL-адресе. Мы вернемся к URL-адресам и использованию IIS Manager при рассмотрении каждого из подходов к развертыванию.
Windows Authentication
Overview
The element defines configuration settings for the Internet Information Services (IIS) 7 Windows authentication module. You can use Windows authentication when your IIS 7 server runs on a corporate network that is using Microsoft Active Directory service domain identities or other Windows accounts to identify users. Because of this, you can use Windows authentication whether or not your server is a member of an Active Directory domain.
Windows authentication (formerly named NTLM, and also referred to as Windows NT Challenge/Response authentication) is a secure form of authentication because the user name and password are hashed before being sent across the network. When you enable Windows authentication, the client browser sends a strongly hashed version of the password in a cryptographic exchange with your Web server.
Windows authentication supports two authentication protocols, Kerberos and NTLM, which are defined in the
element. When you install and enable Windows authentication on IIS 7, the default protocol is Kerberos. The element can also contain a useKernelMode attribute that configures whether to use the kernel mode authentication feature that is new to Windows Server 2008.
Windows authentication is best suited for an intranet environment for the following reasons:
- Client computers and Web servers are in the same domain.
- Administrators can make sure that every client browser is Internet Explorer 2.0 or later.
- HTTP proxy connections, which are not supported by NTLM, are not required.
- Kerberos version 5 requires a connection to Active Directory, which is not feasible in an Internet environment.
New in IIS 7.5
The element was introduced in IIS 7.5, which allows you to configure the settings for the new extended protection features that have been integrated into Windows authentication.
Compatibility
| Version | Notes |
|---|---|
| IIS 10.0 | The element was not modified in IIS 10.0. |
| IIS 8.5 | The element was not modified in IIS 8.5. |
| IIS 8.0 | The element was not modified in IIS 8.0. |
| IIS 7.5 | The element was added in IIS 7.5. |
| IIS 7.0 | The element was introduced in IIS 7.0. |
| IIS 6.0 | The element replaces portions of the IIS 6.0 AuthType and AuthFlags metabase properties. |
Setup
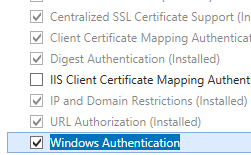
The default installation of IIS 7 and later does not include the Windows authentication role service. To use Windows authentication on IIS, you must install the role service, disable Anonymous authentication for your Web site or application, and then enable Windows authentication for the site or application.
After you install the role service, IIS 7 commits the following configuration settings to the ApplicationHost.config file.
Windows Server 2012 or Windows Server 2012 R2
- On the taskbar, click Server Manager.
- In Server Manager, click the Manage menu, and then click Add Roles and Features.
- In the Add Roles and Features wizard, click Next. Select the installation type and click Next. Select the destination server and click Next.
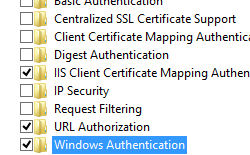
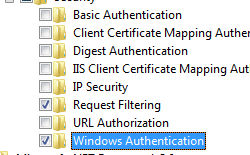
- On the Server Roles page, expand Web Server (IIS), expand Web Server, expand Security, and then select Windows Authentication. Click Next.
 .
. - On the Select features page, click Next.
- On the Confirm installation selections page, click Install.
- On the Results page, click Close.
 .
.Windows 8 or Windows 8.1
- On the Start screen, move the pointer all the way to the lower left corner, right-click the Start button, and then click Control Panel.
- In Control Panel, click Programs and Features, and then click Turn Windows features on or off.
- Expand Internet Information Services, expand World Wide Web Services, expand Security, and then select Windows Authentication.
- Click OK.
- Click Close.
Windows Server 2008 or Windows Server 2008 R2
- On the taskbar, click Start, point to Administrative Tools, and then click Server Manager.
- In the Server Manager hierarchy pane, expand Roles, and then click Web Server (IIS).
- In the Web Server (IIS) pane, scroll to the Role Services section, and then click Add Role Services.
- On the Select Role Services page of the Add Role Services Wizard, select Windows Authentication, and then click Next.
- On the Confirm Installation Selections page, click Install.
- On the Results page, click Close.

Windows Vista or Windows 7
- On the taskbar, click Start, and then click Control Panel.
- In Control Panel, click Programs and Features, and then click Turn Windows Features on or off.
- Expand Internet Information Services, then World Wide Web Services, then Security.
- Select Windows Authentication, and then click OK.
How To
How to enable Windows authentication for a Web site, Web application, or Web service
Open Internet Information Services (IIS) Manager:
If you are using Windows Server 2012 or Windows Server 2012 R2:
- On the taskbar, click Server Manager, click Tools, and then click Internet Information Services (IIS) Manager.
If you are using Windows 8 or Windows 8.1:
- Hold down the Windows key, press the letter X, and then click Control Panel.
- Click Administrative Tools, and then double-click Internet Information Services (IIS) Manager.
If you are using Windows Server 2008 or Windows Server 2008 R2:
- On the taskbar, click Start, point to Administrative Tools, and then click Internet Information Services (IIS) Manager.
If you are using Windows Vista or Windows 7:
- On the taskbar, click Start, and then click Control Panel.
- Double-click Administrative Tools, and then double-click Internet Information Services (IIS) Manager.
In the Connections pane, expand the server name, expand Sites, and then the site, application, or Web service for which you want to enable Windows authentication.
Scroll to the Security section in the Home pane, and then double-click Authentication.
In the Authentication pane, select Windows Authentication, and then click Enable in the Actions pane. 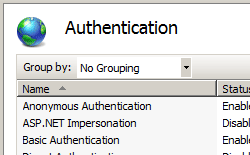
How to enable Extended Protection for Windows authentication
Open Internet Information Services (IIS) Manager:
If you are using Windows Server 2012 or Windows Server 2012 R2:
- On the taskbar, click Server Manager, click Tools, and then click Internet Information Services (IIS) Manager.
If you are using Windows 8 or Windows 8.1:
- Hold down the Windows key, press the letter X, and then click Control Panel.
- Click Administrative Tools, and then double-click Internet Information Services (IIS) Manager.
If you are using Windows Server 2008 or Windows Server 2008 R2:
- On the taskbar, click Start, point to Administrative Tools, and then click Internet Information Services (IIS) Manager.
If you are using Windows Vista or Windows 7:
- On the taskbar, click Start, and then click Control Panel.
- Double-click Administrative Tools, and then double-click Internet Information Services (IIS) Manager.
In the Connections pane, expand the server name, expand Sites, and then the site, application, or Web service for which you want to enable Extended Protection for Windows authentication.
Scroll to the Security section in the Home pane, and then double-click Authentication.
In the Authentication pane, select Windows Authentication.
Click Enable in the Actions pane. 
Click Advanced Settings in the Actions pane.
When the Advanced Settings dialog box appears, select one of the following options in the Extended Protection drop-down menu:
- Select Accept if you want to enable extended protection while providing down-level support for clients that do not support extended protection.
- Select Required if you want to enable extended protection without providing down-level support.
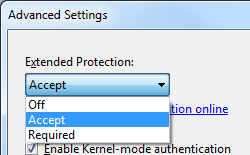
Click OK to close the Advanced Settings dialog box.
Configuration
The element is configurable at the site, application, or virtual directory level in the ApplicationHost.config file.
Attributes
| Attribute | Description |
|---|---|
| authPersistNonNTLM | Optional Boolean attribute. |
Specifies whether IIS automatically reauthenticates every non-NTLM (for example, Kerberos) request, even those on the same connection. False enables multiple authentications for the same connections.
Note: A setting of true means that the client will be authenticated only once on the same connection. IIS will cache a token or ticket on the server for a TCP session that stays established.
The default is false .
Setting this flag to true specifies that authentication persists only for a single request on a connection. IIS resets the authentication at the end of each request, and forces reauthentication on the next request of the session.
The default value is false .
Specifies whether Windows authentication is enabled.
The default value is false .
Specifies whether Windows authentication is done in kernel mode. True specifies that Windows authentication uses kernel mode.
Kernel-mode authentication may improve authentication performance and prevent authentication problems with application pools that are configured to use a custom identity.
As a best practice, do not disable this setting if you use Kerberos authentication and have a custom identity on the application pool.
The default is true .
Child Elements
| Element | Description |
|---|---|
| extendedProtection | Optional element. |
Specifies extended protection options for Windows authentication.
Note: This element was added in IIS 7.5.
Specifies security support providers used for Windows authentication.
Configuration Sample
The following default element is configured at the root ApplicationHost.config file in IIS 7.0, and disables Windows authentication by default. It also defines the two Windows authentication providers for IIS 7.0.
The following example enables Windows authentication and disables Anonymous authentication for a Web site named Contoso.
Sample Code
The following examples disable Anonymous authentication for a site named Contoso, then enable Windows authentication for the site.


