- Build a minimal Linux system and run it in QEMU
- Environment setup
- Building the Linux system
- Compiling the kernel
- Preparing the root filesystem — Option 1: Handcraft init
- Preparing the root filesystem — Option 2: BusyBox
- Share on
- Leave a comment
- You may also enjoy
- A Deep Dive into Containers
- High-performance mass web crawling on AWS
- Disassembling a hardware RAID 1 array in Proxmox VE
- Install Alpine Linux in Qemu
- Before You Start
- Create the Virtual Machine
- Booting the Virtual Machine
- Live mode
- Letting the .iso image load an apkovl
- Advanced network configuration
- Using Xorg inside Qemu
- Run a guest OS on Alpine Linux using Qemu
- Как пользоваться qemu
- Что такое qemu?
- Установка qemu
- Как пользоваться qemu?
- 1. Использование qemu-system
- 2. Использование эмуляции окружения
- Выводы
Build a minimal Linux system and run it in QEMU
All you need to know
Apr 7, 2019 6 minute read
![]()
Developer, System Administrator, Geek
Linux is the #1 open-source operating system nowadays, and many people are running a Linux distro, such as Ubuntu or Arch. Linux is also the most popular choice for a server OS.
Building Linux from scratch is a good way to learn how it works, and is also a good practice for whoever wanting to learn about how operating systems work. And for me, the task of the first experiment of the course Operating System Concepts.
Environment setup
The lab task is to build Linux 2.6.26 and run it in QEMU. For the most convenient setup, I recommend the 32-bit versions of Ubuntu 14.04 “trusty” or Debian 7 “wheezy”. If you prefer another Linux distro, make sure it comes with glibc of a version no newer than 2.19. This is because glibc 2.20 requires Linux kernel 2.6.32, which supercedes our target version.
There’s no need to install the base system physically if you don’t have one yet, as a virtual machine will work perfectly well, and you can enjoy your Windows or Mac applications while the VM is running.
Before we start this experiment, we need to have proper tools installed. On Ubuntu 14.04 or Debian 7, the following command will install all we need for this lab:
- The build-essential package, as suggested by its name, contains essential tools for building, such as binutils, C compiler and library, and automation tools like Make.
- The libncurses5-dev package provides header files for the New Curses library, which is used to display beautiful user interface in a text terminal. Many good-looking terminal programs use it, such as Vim or Emacs.
- QEMU is what we’ll be booting our Linux with — of course it’s needed
Building the Linux system
Now we’re ready to build our own Linux. The first thing is the kernel.
Compiling the kernel
Download and extract the source code:
Next, generate the default configuration and build against that:
You’ll likely encounter a few errors during the building process. Here are the fixes to two most common errors people encounter:
The first one you’ll meet should look like this:
To fix this, open arch/x86/vdso/Makefile in a text editor, such as Vim or gedit. Replace -m elf_x86_64 with -m64 and -m elf_i386 with -m32 . Save the changes.
The second one would be like this:
To fix this, open kernel/mutex.c and look for the above two functions. You’ll see them written like these:
Insert __used after the keyword static in both cases, so they should end up looking like these:`
For most people, fixing the above two things should enable the build process to complete without interrupts.
That’s the kernel. Before we can boot it up, we need an initial filesystem, with some critical files for the system to be able to boot up.
Here two options are presented. Although only one is necessary, I still recommend trying out both — for a better understanding how Linux works.
Preparing the root filesystem — Option 1: Handcraft init
With the first option, we will be creating a minimal program to serve as the “startup program”.
Open your favorite text editor and write the following C program:
Save it as test.c , and run the following command to compile it:
Now you have the init program. You need to prepare the filesystem. The following commands will create an empty 4 MB image and mount it at rootfs .
Next, copy your init program into it, and create some device files as required:
After having the linux kernel and the root filesystem ready, you can try booting it in QEMU:
You’ll see QEMU launching in a new window, with a lot of messages followed by the output of your init program, like this:

Preparing the root filesystem — Option 2: BusyBox
The first option is just a minimal example of what a root filesystem should contain. It is, however, not quite function-rich.
With BusyBox that packs many common Unix & Linux utilities into one single binary, you’ll be able to create a mostly functional, yet still minimal Linux system.
Busybox is available as source code so whoever need it can compile it themselves. Download the source code and configure it:
You need to configure some build options so it best suits this lab. Run make defconfig then make menuconfig to start. You’ll need to change at least four options as shown below. The first option is switched on and off with the space bar, and the second and the third one requires you to enter the string manually. Finally, the last one is a multiple choice. You should put the X on the desired option.
With the build properly configured, now you can run make then make install to build BusyBox and deploy your build. Installed files will appear under _install directory inside busybox-1.30.1 .
To be able to use the _install directory as a bootable root filesystem, you should create the special files identical to what’s there in Option 1.
Next, you need a init program. This time we want to go the easy way with BusyBox, instead of writing a dummy one in C. Open your favorite text editor and type the following content:
Save it with the name init under the directory _install . Run chmod a+x init so it becomes executable.
Now pack everything up as a ramdisk image. Make sure you’re inside _install directory before running the following command:
There should be a new file initramfs.cpio.gz in your home directory. You can now run QEMU with this new package:
Make sure the path to the Linux kernel is correct. Your path will likely vary depending on your procedure. You can always run find
-name bzImage to see where it’s located.
If everything’s going right, you’ll see the following screen in QEMU:

Congratulations! You’ve built your own Linux-from-Scratch and booted it in QEMU.
There’s a second part of the original Lab 1 of Operating System Concepts, which I will describe in a later article (or more likely, skipped 🙂 ).
Updated: Feb 19, 2021
Share on
Leave a comment
You may also enjoy
A Deep Dive into Containers
Jan 31, 2021 20 minute read
Since years ago, containers have been a hot topic everywhere. There are many container softwares like Docker, Linux Containers and Singularity. It’s hard to say one understand what containers are without diving into all the gory details of them, so I decided to go on this exploration myself.
High-performance mass web crawling on AWS
Dec 28, 2019 16 minute read
The 3rd-and-last experiment of course Web Information Processing and Application required us to create a recommendation engine, and “predict” the rating (1-5 stars) for 4M user-item pairs based on the training data of 9M user-item pairs and a social network.
Disassembling a hardware RAID 1 array in Proxmox VE
Aug 15, 2021 7 minute read
Yesterday in a server maintenance period, we decided to tune the storage layout of our Proxmox VE server, which included disassembling a RAID 1 array and adjusting the size of the root filesystem.
Источник
Install Alpine Linux in Qemu
Before You Start
- Download the latest Alpine image.
- Install QEMU on your system (e.g. sudo apt install qemu on Ubuntu, yum -y install qemu on Fedora)
Create the Virtual Machine
Create a disk image if you want to install Alpine Linux.
qemu-img create -f qcow2 alpine.qcow2 8G
The following command starts QEMU with the Alpine ISO image as CDROM, the default network configuration, 512MB RAM, the disk image that was created in the previous step, and CDROM as the boot device.
qemu-system-x86_64 -m 512 -nic user -boot d -cdrom alpine-standard-3.10.2-x86_64.iso -hda alpine.qcow2
Log in as root (no password) and run:
Run poweroff to shut down the machine.
Booting the Virtual Machine
After the installation, QEMU can be started from disk image ( -boot c ) without CDROM.
qemu-system-x86_64 -m 512 -nic user -hda alpine.qcow2
Live mode
To just give Alpine Linux a try in diskless mode, qemu can be used to boot the .iso file without any need for a virtual HDD image or further configuration.
qemu -m 512 -cdrom alpine-3.2.0-x86_64.iso
at boot prompt to avoid being forced into graphical mode and losing access.
Letting the .iso image load an apkovl
This works by mounting a persitent filesytem under /media and selecting it to store the apkovl and the apkcache.
Preparing a KVM with a virtual drive:
And inside the KVM (running alpine linux):
The next reboot then loads the generated apkovl and apkcache found on /dev/vda1 — completely running-from-ram based on the latest official ISO.
Advanced network configuration
To get networking running correctly, you can use the tun/tap interface, which then becomes a real interface. The key is to define the virtual network interface on the correct virtual vlan, and the correct ifup script.
You need 2 net commands on the command line interface, one for the host:
one for the guest
So to have a single NIC on the qemu virtual system that is connected to tap0 on the physical host:
To create a qemu guest with more than one nic, just repeat the -net commands
Now your alpine guest will have 3 NICs, mapped to tap0, tap1, and tap2 respectively.
What’s actually happening is you are effectively creating a point-to-point tunnel, with the phys tap0 device being one endpoint, and the virtual box’s eth0 being on the other point of the tunnel.
So you need to assign ip addresses to BOTH sides of the tunnel. The qemu-ifup script is what does that for the host. Here’s an example:
In your alpinebox, create an interfaces file like this:
If on your host you now add a MASQUERADE rule for tap0 to your host’s default nic, and you turn on ip_forward on your host, you can now do svn updates, surf, run tranmission, etc right from your qemu guest.
Using Xorg inside Qemu
The video driver needed for Xorg inside Qemu is xf86-video-modesetting .
If you decided to use a qxl Video on KVM/Qemu guest, add this configuration to `/etc/X11/xorg.conf`
Section «Device» Identifier «qxl» Driver «qxl» Option «ENABLE_SURFACES» «False» EndSection
Run a guest OS on Alpine Linux using Qemu
sudo apk add qemu-system-x86_64 qemu-ui-gtk
sudo modprobe kvm-intel
sudo addgroup user kvm
Logout and login again so you become part of the kvm group
qemu-system-x86_64 —enable-kvm -m 1024M -fda M6410220.IMG
If you are interested in using a bridged network (so that the guest machine can be reached easily from the outside), see Bridge.
Источник
Как пользоваться qemu
Преимущество виртуализации в том, что она позволяет запустить несколько разных операционных систем на одном компьютере одновременно и при этом неважно какой они будут архитектуры. Среди домашних пользователей достаточно часто используются такие программы для эмуляции компьютера, как Virtualbox и VMware, это мощные программы с графическим интерфейсом и множеством возможностей, которые очень просто настроить.
Но существуют и другие решения, которые дают больше контроля над процессом виртуализации и при этом более сложны. Один из таких инструментов — qemu. В этой инструкции мы рассмотрим что такое qemu и как пользоваться qemu для виртуализации, кроме того, разберем его преимущества над другими программами.
Что такое qemu?
Qemu — это бесплатный инструмент с открытым исходным кодом для эмуляции и виртуализации работы операционных систем на компьютере. Программа может работать в Windows, Linux, MacOS и даже на Android. Ресурсы хоста, такие как процессор, жесткий диск, память, разделяются между виртуальными машинами.
Qemu использует аппаратную виртуализацию, поэтому может выполнять гостевые операционные системы почти так же быстро, как и на основном железе. Может использоваться гипервизор XEN или модуль ядра KVM в Linux. Qemu может работать в двух режимах работы:
- Полная эмуляция системы — в этом режиме qemu полностью эмулирует устройство, например, компьютер, включая все его компоненты, процессор и различные периферийные устройства. Он может использоваться для запуска нескольких операционных систем без перезагрузки или отладки системного кода.
- Эмуляция пользовательского режима — работает только для Linux хоста, позволяет запускать процессы Linux, скомпилированные для одной архитектуры в другой, например, ARM программы в x86. Полезно для разработки, кросс-компиляции и отладки.
Эмулировать можно такие архитектуры: x86 (32 и 64 бит), PowerPC (32 и 64 бит), ARM, MIPS (32 бит), Sprac (32 и 64 бит), Alpha, ColdFire(m68k), CRISv2 и MicroBlaze. Этот список уже более внушительный чем у Virtualbox.
Установка qemu
Перед тем как мы сможем использовать программу, необходимо ее установить. Если вы используете дистрибутив Linux, например, Ubuntu, то сможете найти программу в официальных репозиториях. Для Ubuntu команда будет выглядеть вот так:
sudo apt install qemu-kvm qemu
Для Fedora и других систем RedHat можно установить группу Virtualization:
sudo dnf install @virtualization
В ArchLinux используйте Pacman:
Для Windows или MacOS вам нужно скачать исполняемый файл из официального сайта. Программа управляется только через терминал, так что вы главном меню системы ничего не появиться после установки. А теперь перейдем к тому как настроить qemu.
Как пользоваться qemu?
Теперь, когда программа установлена и готова к использованию попытаемся разобраться как ее запустить и применять. Но сначала нужно разобраться какие команды и для чего используются. Эмулятор qemu создает много команд, но их можно разделить на группы:
- qemu-архитектура — эмуляция окружения пользователя для указанной архитектуры;
- qemu-system-архитектура — эмуляция полной системы для архитектуры;
- qemu-img — утилита для работы с дисками;
- qemu-io — утилита для работы с вводом/выводом на диск;
- qemu-user — оболочка для qemu-архитектура, позволяет запускать программы других архитектур в этой системе;
- qemu-system — оболочка для qemu-system-архитектура, позволяет полностью эмулировать систему нужной архитектуры.
Сначала разберемся с эмуляцией полной системы, поскольку для решения этой задачи виртуальная машина qemu используется чаще всего, а уже потом перейдем к режиму пользователя.
1. Использование qemu-system
Чтобы вы понимали что и откуда берется для начала рассмотрим опции утилиты qemu-system. Синтаксис команды такой:
$ qemu-system параметры
Куда сложнее здесь синтаксис каждого из параметров:
-имя_параметра имя_опции = значение : значение2
Мы рассмотрим только основные параметры, и их опции, которые нам понадобятся:
- -machine указывает тип компьютера, который вы собрались эмулировать, можно выбрать ubuntu, pc, pc-q35 и другие варианты, смотрите подробнее командой -machine help;
- -cpu — тип процессора, можно передать непосредственно тип процессора, а также дополнительные флаги;
- -smp — включает симуляцию мультипроцессорной архитектуры;
- -boot — позволяет настроить порядок загрузки устройств, a,b — дискета, с — первый жесткий диск, d — CDROM, n-p — загрузка через сеть, по умолчанию виртуальная машина загружается из жесткого диска;
- -m — указывает количество оперативной памяти, доступной машине;
- -k — раскладка клавиатуры по умолчанию;
- -soundhw — подключить звуковую карту к системе;
- -device — подключить указанное устройство к машине, нужно указать драйвер и его опции;
- -name — имя гостевой системы, будет отображаться в верху окна;
- -uuid — установить UUID для системы;
- -fda, fdb — подключить дискету из файла;
- -hda, hdb — подключить жесткий диск из файла;
- -cdrom — подключить оптический диск;
- -usb — включить поддержку USB;
- -usbdevice — подключить USB устройство;
- -display — выбрать тип отображения, доступно sdl, curses, gtk, none, vga и другие;
- -full-screen — запустить в полный экран;
- -no-acpi — отключить поддержку ACPI;
- -net — создать сетевой интерфейс;
- -realtime включить режим реального времени, опции mclock нужно передать значение on;
- -gdb — ожидать подключения отладчика gdb;
- -enable-kvm — включить поддержку kvm;
- -loadvm — загрузить сохраненное состояние;
- -daemonize — сделать процесс фоновым;
- -snapshot — записывать изменения не в файл жесткого диска, а в отдельные файлы;
- -nographic — отключить графический вывод.
- -kernel — использовать указанный образ ядра linux.
- -append — командная строка для ядра;
- -initrd — файл initrd для загрузки Linux.
Мы рассмотрели опции для qemu-system-x86-64, для других архитектур, они могут немного отличаться. А теперь разберем несколько простых примеров как использовать qemu, как создать машину qemu и настроить ее.
Сначала нужно создать жесткий диск для установки. Вы можете использовать реальные жесткие диски, но работать с образами намного удобнее. Можно просто создать пустой файл, заполненный нулями, а затем форматировать его в нужную файловую систему во время установки, но также можно создать файл формата qcow2, этот формат используется по умолчанию в qemu. Воспользуемся командой qemu-img:
qemu-img create -f qcow2 ubuntu.qcow 10G

Опция -f указывает формат нового файла. Теперь мы можем непосредственно перейти к запуску qemu-system. Вот так будет выглядеть самая простая команда запуска системы:
qemu-system-x86_64 -hda ubuntu.qcow -boot d -cdrom
/downloads/ubuntu-17.04-server-amd64.iso -m 640

Здесь мы подключаем наш жесткий диск как hda, затем указываем что нужно загружаться с cdrom и подключаем образ системы ubuntu к нему. Последний параметр указывает сколько оперативной памяти будет выделено для машины.
Дальше откроется окно, похожее на VritualBox и начнется установка системы. После того как установка будет завершена, вы сможете запускать машину командой:
qemu-system-x86_64 -hda ubuntu.img -m 640
Создавать виртуальную машину с другой архитектурой не очень сложно, достаточно изменить команду. Например, сделаем виртуальную машину ppc:
qemu-system-ppc -hda ubuntu.qcow -boot d -cdrom
/downloads/ubuntu-17.04-server-amd64.iso -m 640
Поскольку сейчас мы не используем kvm, то система будет работать очень медленно все можно очень сильно ускорить, если его включить с помощью опции -enable-kvm:
qemu-system-x86_64 -hda ubuntu.qcow -m 640 -enable-kvm
По умолчанию в гостевой системе не будет звука, но вы можете подключить туда звуковую карту:
qemu-system-x86_64 -hda ubuntu.qcow -m 640 -enable-kvm -soundhw ac97
Не всегда мы запускаем машину только в качестве сервера, иногда нужно запустить обычную десктопуную систему, в таком случае нам придется настроить виртуальную видеокарту, потому что того, что идет по умолчанию хватит только на консоль. Для этого используется опция -vga:
qemu-system-x86_64 -hda ubuntu.qcow -m 640 -enable-kvm -soundhw ac97 -vga qxl
С помощью опции -global qxl-vga.vram_size можно задать объем видеопамяти, доступный машине, значение указывается в байтах, например:
qemu-system-x86_64 -hda ubuntu.qcow -m 640 -enable-kvm -soundhw ac97 -vga qxl -global qxl-vga.vram_size=4294967
Для многих машин важно чтобы из них был доступ в сеть интернет. Настройка сети qemu — это достаточно обширная тема, которую мы не будем полностью раскрывать в этой статье. Если кратко, то, в qemu используется специальный виртуальный шлюз vlan, который позволяет соединять машины с внешней сетью или между собой. Каждый vlan имеет свой номер. Самый простой способ настроить сеть — использовать такие параметры:
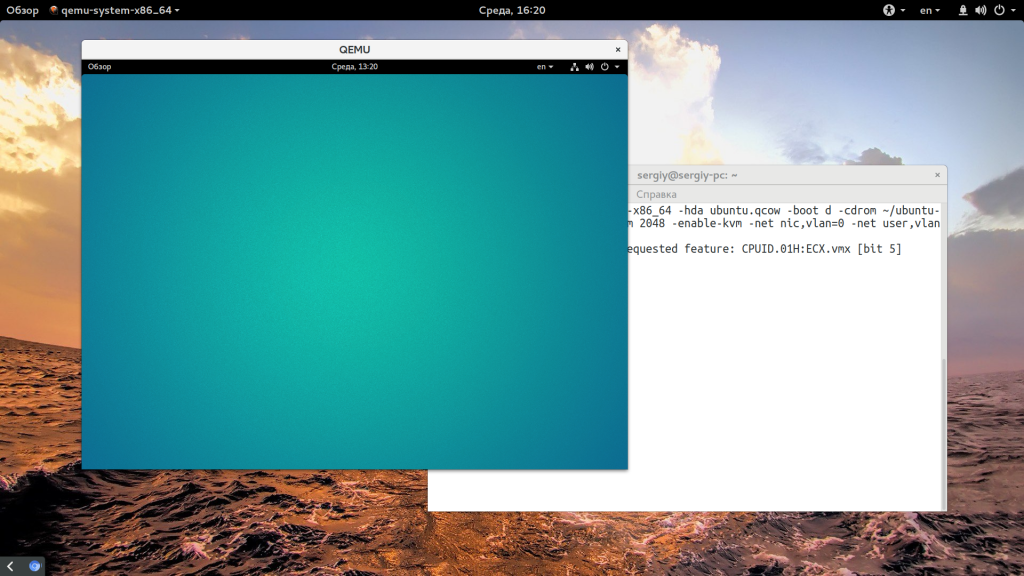
qemu-system-x86_64 -hda ubuntu.qcow -m 640 -enable-kvm -net nic,vlan=0 -net user,vlan=0

Здесь мы два раза вызываем опцию -net, в первый раз создаем виртуальную сетевую карту с помощью параметра -nic и подключаем ее к vlan с номером 0. Вторая же опция -net создает наш vlan 0 с типом конфигурации user, которая не требует дополнительной настройки и автоматически подключается к сети хоста.
2. Использование эмуляции окружения
Теперь рассмотрим использование qemu для эмуляции архитектуры в окружении пользователя. Команда qemu-user или qemu-архитектура позволяет выполнять программы, собранные для другой архитектуры прямо в вашей системе. Это очень часто используется для отладки программ, собранных для arm на компьютере или других подобных задач. Команде достаточно передать команду и ее параметры:

Точно так же вы можете выполнить arm программу или программу для любой из поддерживаемых архитектур.
Выводы
В этой статье мы очень кратко рассмотрели как пользоваться qemu, основные настройки этой утилиты и опции. На самом деле там намного больше опций и возможностей. Одна только возможность эмулировать такое огромное количество архитектур чего стоит. Если для вас эмулятор qemu слишком сложен через терминал, то можно использовать графический интерфейс, например, virt-manager. А вы используете qemu? Или предпочитаете другие виртуальные машины? Почему? Напишите в комментариях!
Источник


