- Как установить VirtualBox в Ubuntu 20.04
- Установка VirtualBox из репозиториев Ubuntu
- Установка VirtualBox из репозиториев Oracle
- Установка пакета расширений VirtualBox
- Запуск VirtualBox
- Выводы
- Install Linux Inside Windows Using VirtualBox
- Installing Linux inside Windows using VirtualBox
- Requirements
- Step 1: Download and install VirtualBox
- Step 2: Download the Linux ISO
- Step 3: Install Linux using VirtualBox
- Troubleshooting: AMD-V is disabled in the BIOS
- How to Install Windows 10 in VirtualBox in Linux
- What is VirtualBox and what are its advantages?
- Install Windows 10 in VirtualBox on Ubuntu and Linux Mint
- Step 1: Download Windows 10 ISO
- Step 2: Install VirtualBox on Ubuntu and Linux Mint
- Step 3: Install Windows 10 in VirtualBox
Как установить VirtualBox в Ubuntu 20.04
VirtualBox — это кроссплатформенное программное обеспечение для виртуализации с открытым исходным кодом, которое позволяет запускать несколько гостевых операционных систем (виртуальных машин) одновременно. Обычно Virtualbox используется пользователями настольных компьютеров в качестве среды тестирования и разработки.
В этом руководстве мы покажем вам два способа установки VirtualBox в Ubuntu 20.04:
- Из стандартных репозиториев Ubuntu.
- Из репозиториев Oracle.
Пакет VirtualBox, доступный в репозитории Ubuntu multiverse, может быть не самой последней версией. Репозитории Oracle всегда содержат последнюю выпущенную версию.
Установка VirtualBox из репозиториев Ubuntu
Установка VirtualBox из репозиториев Ubuntu — простой процесс. Выполните следующие команды от имени пользователя root или пользователя с привилегиями sudo, чтобы обновить индекс пакета и установить VirtualBox и Extension Pack:
Это оно! Вы успешно установили VirtualBox на свой компьютер с Ubuntu и можете начать его использовать.
Установка VirtualBox из репозиториев Oracle
На момент написания этой статьи последней версией VirtualBox была версия 6.1.x.
Чтобы установить VirtualBox из репозиториев Oracle, выполните следующие действия:
Импортируйте открытые ключи Oracle с помощью следующих команд:
Обе команды должны вывести OK , что означает, что ключи успешно импортированы, и пакеты из этого репозитория будут считаться доверенными.
Добавьте репозиторий VirtualBox APT в вашу систему:
$(lsb_release -cs) выводит кодовое имя Ubuntu. Например, если у вас Ubuntu версии 20.04, команда напечатает focal .
Обновите список пакетов и установите последнюю версию VirtualBox:
Установка пакета расширений VirtualBox
Пакет расширений VirtualBox предоставляет несколько полезных функций для гостевых машин, таких как виртуальные устройства USB 2.0 и 3.0, поддержка RDP, шифрование изображений и многое другое.
Загрузите файл пакета расширений, набрав:
Когда загрузка будет завершена, импортируйте пакет расширений с помощью следующей команды:
Вам будет представлена лицензия Oracle и предложено принять их условия.
Введите y и нажмите Enter . После завершения установки вы увидите следующий вывод:
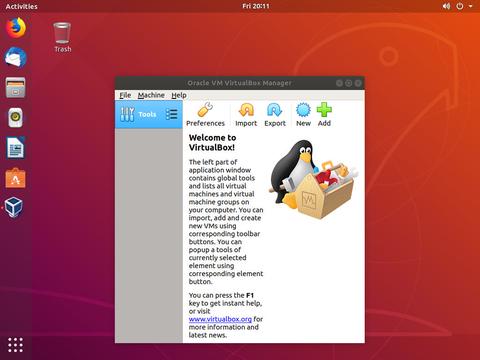
Запуск VirtualBox
VirtualBox можно запустить из командной строки, набрав virtualbox или щелкнув значок VirtualBox ( Activities -> VirtualBox ).
Когда вы запускаете масштабирование в первый раз, появится следующее окно:
Выводы
Мы показали вам, как установить VirtualBox в Ubuntu 20.04. Теперь вы можете создать свою первую гостевую машину с Windows или Linux.
Для получения дополнительной информации о VirtualBox посетите официальную страницу документации VirtualBox .
Если вы хотите управлять своими виртуальными машинами из командной строки, ознакомьтесь с нашей статьей о том, как установить Vagrant на Ubuntu 20.04 .
Не стесняйтесь оставлять комментарии, если у вас есть вопросы.
Install Linux Inside Windows Using VirtualBox
Last updated August 14, 2019 By Abhishek Prakash 198 Comments
Brief: Using Linux in a virtual machine gives you the option to try Linux within Windows. This step-by-step guide shows you how to install Linux inside Windows using VirtualBox.
There are several ways to install Linux. You can clean everything from your system and install Linux. You can dual boot Linux with Windows and choose one of the operating systems at the boot time. You can even install Linux within Windows from Microsoft Store (though this only provides you with the command line version of Linux).
But if you want to use Linux without making any changes to your Windows system, you can go the virtual machine route. Basically, you install and use Linux like any regular Windows application. When you just want to try Linux for limited use, virtual machines provide the most comfortable option.
In this tutorial, I’ll show you how to install Linux inside Windows using VirtualBox.
Installing Linux inside Windows using VirtualBox
VirtualBox is free and open source virtualization software from Oracle. It enables you to install other operating systems in virtual machines. It is recommended that your system should have at least 4GB of RAM to get decent performance from the virtual operating system.
Requirements
- Good internet connection to download software and Linux ISO. (You can also use some other computer with an internet connection to download these files.)
- Windows system with at least 12 GB of free space.
- Windows system with 4GB of rRAM. (It can work with less RAM as well, but your system will start to lag while using Linux in the virtual machine.)
I am installing Ubuntu 17.10 in this tutorial, but the same steps apply to any other Linux distribution. If you prefer videos, you can watch the one below from our YouTube channel:
Step 1: Download and install VirtualBox
Go to the website of Oracle VirtualBox and get the latest stable version from here:
Installing VirtualBox is not rocket science. Just double-click on the downloaded .exe file and follow the instructions on the screen. It is like installing any regular software on Windows.
Step 2: Download the Linux ISO
Next, you need to download the ISO file of the Linux distribution. You can get this image from the official website of the Linux distribution you are trying to use.
I am using Ubuntu in this example, and you can download ISO images for Ubuntu from the link below:
Step 3: Install Linux using VirtualBox
You have installed VirtualBox and you have downloaded the ISO for Linux. You are now set to install Linux in VirtualBox.
Start VirtualBox, and click on the New symbol. Give the virtual OS a relevant name.

Allocate RAM to the virtual OS. My system has 8GB of RAM and I decided to allocate 2GB of it. You can use more RAM if your system has enough extra.

Create a virtual disk. This serves as the hard disk of the virtual Linux system. It is where the virtual system will store its files.

I recommend using the VDI file type here.

You can choose either the “Dynamically allocated” or the “Fixed size” option for creating the virtual hard disk.

The recommended size is 10 GB. However, I suggest giving it more space if possible. 15-20 GB is preferable.

Once everything is in place, it’s time to boot that ISO and install Linux as a virtual operating system.

If VirtualBox doesn’t detect the Linux ISO, browse to its location by clicking the folder icon as shown in the picture below:

Soon you’ll find yourself inside Linux. You should be presented with the option to install it.
Things from here are Ubuntu-specific. Other Linux distributions may have slightly different looking steps, but it won’t be complicated at all.

You can skip to Continue.

Select ‘Erase disk and install Ubuntu’. Don’t worry. It won’t delete anything on your Windows operating system. You are using the virtual disk space of 15-20GB that we created in previous steps. It won’t impact the real operating system.

Just click on Continue.

Things are pretty straightforward from here.


Try to choose a password that you can remember. You can also reset the password in Ubuntu if you forget it.

You are almost done. It may take 10-15 minutes to complete the installation.

Once the installation finishes, restart the virtual system.

If it gets stuck on the screen below, you may close the VirtualBox.

And that’s all. From now on, just click on the installed Linux virtual machine. You’ll be able to use it directly. The installation is a one time only process. You can even delete the Linux ISO that you downloaded earlier.
I strongly recommend using VirtualBox Guest Additions on Ubuntu for it provides better compatibility and you would be able to use copy-paste and drag-drop between Linux and Windows.
Troubleshooting: AMD-V is disabled in the BIOS
If you face this error while using the virtual machine:
Not in a hypervisor partition (HVP=0) (VERR_NEM_NOT_AVAILABLE).
AMD-V is disabled in the BIOS (or by the host OS) (VERR_SVM_DISABLED).
Result Code:
E_FAIL (0x80004005)
Component:
ConsoleWrap
Interface:
IConsole
This means that virtualization is blocked on your system. You’ll have to activate it in your BIOS settings first.
Reboot your system and as soon as it powers up, press F2/F10/F12 to access BIOS settings. You have to look for the virtualization option in the BIOS and enable it.
Any questions?
That’s all you need to do to install Linux in VirtualBox on Windows. If you have any doubts, or if you encounter any issues, please feel free to ask your questions in the comment box below.
Like what you read? Please share it with others.
How to Install Windows 10 in VirtualBox in Linux
This detailed beginner’s guide shows you how to install Windows 10 in VirtualBox on Linux.
I regularly encourage people to use Linux, and when I give them reasons to switch, I always mention that they can use Windows and Linux together if they’re ‘scared of Linux’.
One way to use the two systems together is to dual boot Windows and Linux. It works well except that you have to switch between the operating systems by restarting the system. This is somewhat inconvenient.
If, like me, you’re an infrequent user of Windows and don’t want to trouble yourself with dual booting Ubuntu and Windows 10, I suggest installing Windows 10 inside Linux by creating a virtual machine. In an earlier tutorial, I showed you how to install VMWare on Ubuntu, but in this one, we’ll be using Oracle VirtualBox to create virtual machines and installing Windows 10 on them.
What is VirtualBox and what are its advantages?
VirtualBox is open-source virtualization software from Oracle for creating virtual machines. With a virtual machine, you can run an operating system like an application inside your current operating system. It’s like a computer inside a computer.
These are called virtual machines because they’re basically emulating other operating systems, but they’re not really interacting with the computer system like a true operating system would.
The bottom line is that with virtual machine software, you can use Windows like an application inside Linux. Unlike regular applications, it will consume lots of RAM. But this way, you can use Windows-specific software and programs inside Linux without needing to install Windows fully.
Install Windows 10 in VirtualBox on Ubuntu and Linux Mint

Before installing Windows 10 in VirtualBox, let’s see what you need first:
- An internet connection with good speed, or a Windows 10 ISO that you’ve already downloaded.
- At least 4 GB of RAM. The more RAM you’ve got, the better.
- Around 20 GB of free storage for installing Windows 10.
Once you’ve made sure you have the prerequisites, let’s see how to do it. If you prefer, you can watch this tutorial as a video. Do subscribe to our YouTube channel for more Linux tutorials:
Step 1: Download Windows 10 ISO
First and foremost, you need to download a Windows 10 ISO. You can download Windows 10 32-bit or 64-bit, depending on your system. Go to the link below and choose which version of Windows 10 you’d like to download:
You’ll have to choose the edition and language, and then pick between a 32-bit or 64-bit system, before you download the ISO.
Step 2: Install VirtualBox on Ubuntu and Linux Mint
It’s very easy to install VirtualBox on Ubuntu. All you need to do is to use the command below:
Step 3: Install Windows 10 in VirtualBox
Start VirtualBox. You should see a screen like the one below.
Name the VM anything you like. Also select the operating system and version. In this case I’ve chosen Windows 10 and 64-bit.
Choose the RAM size. The recommended RAM size for 64-bit Windows 10 is 2 GB, while for 32-bit Windows 10 it’s 1 GB. But I suggest you have a little more than that for a smoother experience.
Next is the size for the virtual machine. If you’re crunched on space choose the recommended size, otherwise make it a little more than the recommended size.
For the format, go ahead with the VDI format.
Confused about dynamic or fixed size? If you choose dynamic, the installed VM will grow beyond its allocated size later. If you’re not going to use Windows extensively, I suggest that you go with fixed size.
Now it’s time to finalize the installation size. You can choose where to create the virtual disk. The default location (Home directory) works fine.
You should now be back at the start screen. But wait, we haven’t used our Windows 10 ISO yet, have we? Now’s the time to actually use the ISO. Click on Settings.
In here, go to Storage and add a new optical drive. I added this screenshot later because a few readers had difficulties finding it.
Click Choose disk and point to the Windows 10 ISO.
Now you should see the Windows 10 ISO listed under Storage. Press OK.
You should now be back at the main screen of Oracle VirtualBox. Now everything is ready. The next step is to install Windows 10. Click on Start from the main screen:
Voila!! You should see the familiar Windows boot screen:
A couple of seconds later, you should see the option to install Windows:

Note: At this point, if you see the Windows logo with a black background and it never starts to install, you may have to perform a little tweak.
As It’s FOSS reader Larry points out, “There seems to be an incompatibility between Virtualbox and Windows 10 1703. A virtual machine that runs W10 1607 fine will fail to boot W10 1703 -UNLESS- the following parameter is set: Under System – Acceleration you must set Paravirtualization to None and then reboot.”
I think you can handle things from here, as installing Windows is just a matter of few clicks. For your convenience I’ve added the screenshots in a gallery. Click on the images to enlarge them if you need any hints.


Once you’ve successfully installed Windows 10, you’ll find that the internet connection is shared with the virtual Windows as well: no need for further configuration. Here’s It’s FOSS on the Edge browser in Windows 10 inside a VM.

When you’re done using the virtual Windows, you can go back to the main screen and switch off the virtual machine from there:
To start the virtual OS again, just click on Start (green arrow) on the main screen of VirtualBox again. That’s it. More on using virtual operating systems later. I think this gives you a good idea of how to install Windows in Ubuntu or Linux Mint to begin with 🙂
In a related post, you can learn how to create a bootable Windows USB in Linux.
Your take?
Did this tutorial help you install Windows on Linux using VirtualBox? If you have questions or suggestions, feel free to drop a comment.
Like what you read? Please share it with others.


