- Apache Subversion Binary Packages
- Centos Linux 
- Debian Linux 
- SVN на Маке
- Benohead’s Software Blog
- Install svn (subversion) on Mac OS X
- Versions²
- Subversion Client for Mac
- Versions’ award winning interface lets you unravel any Subversion project in seconds.
- New to Subversion?
- Why Version Control instead of Dropbox?
- Fresh UI for macOS Big Sur
- Inline Actions
- Native on Apple silicon
- Working Copy View
- Timeline
- Repository View
- Crisp
- Powerful
- svn can not be used in MacOS Big Sur 11.0.1 (20B29).
- Answers
Apache Subversion Binary Packages
Find packages for your operating system:
The Apache Subversion project does not officially endorse or maintain any binary packages of the Subversion software. However, volunteers have created binary packages for different distributions and platforms, and as a convenience, we maintain a list of links to them here. If there are any problems with or questions about the different binary packages please send email to the Subversion users mailing list.
Note that binary packages usually come out about a week after the corresponding source release. Please don’t post to the mailing lists asking when a binary package for a given platform will be ready. The packagers already know when new source releases come out, and work as fast as they can to make binaries available.
Binaries are typically built from the latest stable release.
Note also that this list does not include distributions of larger collections of software of which Subversion is but one piece. Several vendors offer such things, but we concern ourselves primarily with Subversion itself. As such, the listing here is limited to those packages which may be reasonably considered binary distributions of Apache Subversion alone. If you are looking for more widely scoped, Subversion-related value-add offerings, we trust that $
Centos Linux 
CollabNet (supported and certified by CollabNet; requires registration)
WANdisco (supported and certified by WANdisco; requires registration)
Debian Linux 
Debian Project (maintained by Debian Project; client and server; svnserve is part of the subversion package, mod_dav_svn is in the separate libapache2-mod-svn package (formerly libapache2-svn))
WANdisco (supported and certified by WANdisco; requires registration)
Источник
SVN на Маке

Купив Мак, я озадачился установкой на него софта, который стоял до этого у меня на PC. Перенести удалось почти всё. Для чего-то нашлись маковские версии, для чего-то удалось подобрать замену. Проблемы возникли с Subversion (SVN). На PC я пользовался Visual SVN Server, который не требует практически никакой настройки и работает сразу после установки. На Маке такого удовольствия не оказалось, так что пришлось немного повозиться.
Итак, вот что я сделал:
- Существует несколько сборок SVN для Mac OS X. Я для себя выбрал версию от MacPorts. На то было ряд причин. Версия там предлагается последняя. Помимо SVN через MacPorts доступно множество других полезных Open Source проектов. В том числе, к примеру, MySQL, который мне тоже нужен. Загрузить MacPorts можно вот отсюда.
Загрузив dmg файл, смонтируйте образ, если он не смонтировался автоматически. После чего запустите pkg файл, что внутри. MacPorts установится на ваш компьютер.
После установки желательно проверить обновления. Для этого в терминале следует ввести:
sudo port -v selfupdate
Если новая версия доступна, то произойдет обновление. Если вы загрузили последнюю версию, то этот шаг можно пропустить.
Загружаем SVN. Для этого в терминале вводим:
sudo port install subversion
Это займет некоторое время. По окончании SVN будет установлен. Все необходимые переменные будут добавлены в PATH. Протестировать установку можно набрав
Должно появиться что-то типа:
Теперь нужно перенести ваши репозитории с PC. Для этого я создал папку Repositories в корне системного диска и скопировал туда все репозитории с PC. Если репозиториев у вас до этого не было, то их можно создать командой svnadmin create. К примеру, svnadmin create /Repositories/MyRepo . Подробно описывать процесс создания репозитория я не буду. Посмотреть можно вот тут.
Запустить SVN сервер просто, для этого в терминале нужно ввести
svnserve -d -r /Repositories
Эта команда запускаем демон SVN. После этого можно обращаться к репозиториям по сети. К примеру так:
Теперь переходим к самому интересному. Я с этим возился дольше всего. Проблема в том, что SVN сервер не запускается автоматически при старте компьютера. Поправить это можно с помощью launchd, стандартного способа автозапуска на Маке. Для этого нужно создать файл
/Library/LaunchAgents/org.tigris.subversion.svnserve.plist (имя можно выбрать по своему усмотрению):
Важно указать полный путь к svnserve. В моём случае это /opt/local/bin/svnserve. Без этого работать всё будет криво. Если вам не нужна конфигурация IPv6, то соответствующий dict блок можно удалить.
После чего в терминале вводятся следующие команды для активации конфигурации:
Ну вот и всё. После этого у меня всё заработало. Этот способ автостарта не запускает демон, а использует inetd. Преимущество такого способа в том, что процесс запускается только при обращении к соответствующему порту. Система также удаляет процесс из памяти, когда считает нужным. Что есть хорошо.
Надеюсь, эта небольшая инструкция избавит вас от множества проблем. 🙂
Источник
Benohead’s Software Blog

Install svn (subversion) on Mac OS X
I wrote an article about a year ago, about svn (Subversion) being missing in Mountain Lion (10.8) and how to install it manually. Since then, I’ve got a new mac and have used myself this post to install it on the new machine. Since then there has also been new versions of subversion but unfortunately all my software are not compatible with it. So I’ve been looking into this topic again and wanted to share.
Another way to install svn on mac is to use a ditribution package from wandisco. They are available here. Do not use the packages on CollabNet which are outdated.
Unzip the .pkg file and double click on it and follow the instructions to have it installed.
I still like it better with Homebrew since it makes it very easy to upgrade the packages and switch between packages.
To find out the version currently active with Homebrew:
You can check the versions of subversion which are available using:
This will return multiple lines, one per version, each containing a version number and the checkout command e.g.:
Choose the version you want to install e.g. here 1.8.1, switch Homebrew’s prefix,checkout the package and install it:
Then reset the formula:
You can then switch between versions using brew switch (which updates the symlink in /usr/local/bin to the specified formula version in the Homebrew cellar) e.g.:
Of course mechanism can be used for any other Homebrew package.
If you get errors in XCode while accessing working copies created with a newer version, you might need to link the newer version into XCode by doing the following:
- Create a backup directory for the svn binaries currently used by XCode
- Moving the current binaries to the backup folder
- Linking the binaries of the new version installed with Homebrew into Xcode (as a replacement for the moved ones)
You can do that by executing the following and replacing 1.7.4 by the actual subversion version you want to use in XCode:
Note that you can also use Homebrew-versions instead. It provides multiple formulas for different versions of existing packages e.g. subversion1.6 and subversion1.7. If you use it, you will of course not be able to upgrade from 1.7 to 1.8 but only from 1.7.2 to 1.7.3 but it’s maybe what you are after…
You can install from Homebrew-versions using:
You’ll notice that Homebrew-versions only has packages for subversion 1.6 and 1.7. But I guess 1.8 should come soon.
Источник
Versions²
Subversion Client for Mac
Versions² offers the best way to work with
Subversion on the Mac. Thanks to its clear-cut
approach, you’ll hit the ground running.
Versions’ award winning interface lets you unravel any Subversion project in seconds.
Developers
Designers
Managers
Editors
New to Subversion?
Don’t panic. Versions makes Subversion easy. Even if you’re new to version control systems altogether. Commit your work, stay up to date, and easily track changes to your files. All from Versions’ pleasant, true to the Mac interface.
Why Version Control instead of Dropbox?
File syncing services work well for sharing files, but they are not meant for two people editing the same file. With Version Control one person changing a file can never unknowingly overwrite changes made by another person.
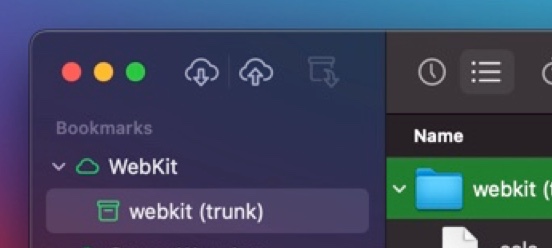
Fresh UI for macOS Big Sur
Versions received the first bold user interface refresh in 10 years. From a new app icon, a revamped toolbar to support for the gorgeous Dark Appearance, Versions² fully embraces macOS Big Sur.
Inline Actions
While Subversion offers many features, your typical workday consists of only executing the same few actions over. Versions² offers those, right when you need them, right where you need them.
Native on Apple silicon
Versions² is optimized for smooth operation on new Macs with M1 chip and also includes the latest Subversion libraries.
Working Copy View
- New: Convenient inline buttons offering the most frequent actions, right there when you need them.
- Support for all common Subversion commands
- Single click to compare local changes
- Or compare any two revisions of a file
- Show all files and folders, or changes only
- Revert to a specific revision
- View or ignore remote updates
- Lock and unlock from the Browse view
- Set svn:ignore and other properties
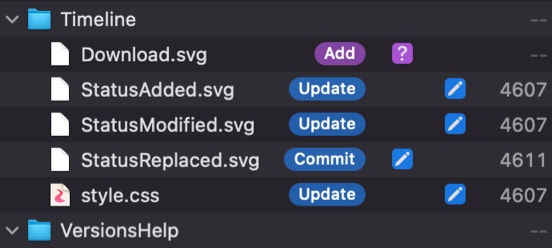
Timeline
- Clear overview of all revisions by date With author names and lists of changed items
- Automatically link ticket numbers In commit messages to your issue tracker
- Click any changed file to see a comparison
- View as many revisions as you like
Repository View
- Browse and manipulate repositories Without checking them out
- Drag & drop folders within a repository To move or copy them
- Drag in a file or folder from the Finder To import it, and out to export it
- Easily set file and folder properties
- Browse any previous revision
- Checkout and export from any revision
- Double-click any file to open a copy
Your repository is the central spot for all of your project’s files. To work on them, you checkout a local working copy to your Mac. There can be many working copies per repository.
A working copy looks just like any regular folder. You can make sub-folders in it and use any applications you want to create and edit files in there. Text, images, code, anything goes.
When you’re happy with your work, you commit it. This creates a new revision in the repository. You can also add new files, and delete files to remove them from the repository.
After you commit , everyone in your team can see the new revision, and update their working copies to get the latest changes. Later, it’s also easy to figure out who commited what and when.
Crisp
Keep it clear with Versions’ polished interface. Quickly scan through revisions and review commit logs, added, deleted and modified files in the Timeline. Work on your working copies in the Browse view and instantly see the status of every file and folder. Review local changes with your favorite file comparison app and commit, update and revert with ease.
Powerful
Versions puts the power of Subversion at your fingertips. Heading back in time to revert to an earlier revision? Done. Trying to figure out who changed that line of code? Also done. Want to lock some files to prevent conflicts, or need to see every revision they’re changed in? Double done. When you are ready, all of the advanced features you need are waiting for you.
Источник
svn can not be used in MacOS Big Sur 11.0.1 (20B29).
Update the MacOS Big Sur 11.0.1 (20B29).
zsh: command not found: svn.
Update the Xcode Line tool and then svn —version.
zsh: command not found: svn.
Answers
As you see. Subversion is removed from macOS or Xcode Command Line tools.
It was announced a long time before:
Xcode 11 Release Notes
Command line support for Subversion will be removed in a future release. (50195246, 50231958, 50266910, 51740851, 52528748)
You may install one from some package manager like MacPorts or HomeBrew.
Ok, the problem is solved. As OOPer said Subversion is removed from macOS or Xcode Command Line tools. So
brew install svn.
home-brew wont install SVN because MacOS 11 is not supported. Was a workaround done for it?
CFLAGS=-Os -w -pipe -march=nehalem -mmacosx-version-min=11.0 -isysroot/Library/Developer/CommandLineTools/SDKs/MacOSX11.1.sdk
LINKFLAGS=-L/usr/local/opt/sqlite/lib -L/usr/local/opt/readline/lib -L/usr/local/opt/openssl@1.1/lib -L/usr/local/lib -F/usr/local/Frameworks -Wl,-headerpadmaxinstallnames -isysroot/Library/Developer/CommandLineTools/SDKs/MacOSX11.1.sdk
Error: You are using macOS 11.0.
We do not provide support for this released but not yet supported version.
You will encounter build failures with some formulae.
Please create pull requests instead of asking for help on Homebrew’s GitHub,
Twitter or any other official channels. You are responsible for resolving
any issues you experience while you are running this
Источник


