- How to Install ImageMagick 7 on Debian and Ubuntu
- Installing Dependencies for ImageMagick
- Download ImageMagick Source Files
- ImageMagick Compilation and Installation
- If You Appreciate What We Do Here On TecMint, You Should Consider:
- How to Install ImageMagick on Ubuntu 18.04 & 16.04 LTS
- Step 1 – Prerequsities
- Step 2 – Install ImageMagick
- Step 3 – Install imagick PHP Extension
- Step 4 – Restart Apache and Verify
- Как установить ImageMagick на Ubuntu 20.04 LTS
- Как установить ImageMagick на Ubuntu 20.04 LTS
- Установите ImageMagick на Ubuntu 20.04 LTS Focal Fossa
- Шаг 1. Во-первых, убедитесь, что все ваши системные пакеты обновлены, выполнив следующие apt команды в терминале.
- Шаг 2. Установка ImageMagick в Ubuntu 20.04.
- Шаг 3. Затем скомпилируйте ImageMagick, используя следующую команду:
- Шаг 4. Затем настройте привязки среды выполнения динамического компоновщика:
- Download
- Linux Binary Release
- Mac OS X Binary Release
- iOS Binary Release
- Download iOS Distribution
- ImageMagick compiling script for iOS OS and iOS Simulator
- Xcode project settings
- Sample project
- Windows Binary Release
How to Install ImageMagick 7 on Debian and Ubuntu
ImageMagick is a free and open source, feature-rich, text-based and cross-platform image manipulation tool used to create, edit, compose, or convert bitmap images. It runs on Linux, Windows, Mac Os X, iOS, Android OS, and many other operating systems.
It features command line processing, creation of animations, color management, special effects, text and comments, complex text layout, connected content labeling, image decoration, and drawing (add shapes or text to an image). It also supports format conversion, distributed pixel caching, large images, image transformation and so much more.
Although its functionality is typically utilized from the command-line, you can use its features from programs written in any of the supported programming languages. It is designed for batch processing of images (i.e ImageMagick allows you to combine image processing operations in a script (shell, DOS, Python, Ruby, Perl, PHP, and many others)).
In this article, we will explain how to install and compile ImageMagick from source code in Debian and Ubuntu distributions.
Installing Dependencies for ImageMagick
To install ImageMagick from source, you need a proper development environment with a compiler and related development tools. If you don’t have the required packages on your system, install build-essential as shown:
Once you’ve installed compilation dependencies, now you can download the ImageMagick source code.
Download ImageMagick Source Files
Go to the official ImageMagick download page and grab the latest “ImageMagick.tar.gz” source code package. Alternatively, you can use the following wget command to download the source code directly in the terminal as shown.
Once the download is complete, extract its content and move into the extracted directory.
ImageMagick Compilation and Installation
Now it’s time to configure and compile ImageMagick by running the ./configure command to perform a compilation configuration.
Next, run the make command to perform the compilation.
Once the compilation is successful, install it and configure the dynamic linker run-time bindings as follows.
Finally, verify that ImageMagick 7 has been installed on your system by checking its version.
![]() Check ImageMagick Version in Ubuntu
Check ImageMagick Version in Ubuntu
That’s all! ImageMagick is a feature-rich image manipulation tool used to create, edit, compose, or convert bitmap images.
In this article, we have showed how to install ImageMagick 7 from source in Debian and Ubuntu. Use the comment form below to ask any questions or give us feedback.
If You Appreciate What We Do Here On TecMint, You Should Consider:
TecMint is the fastest growing and most trusted community site for any kind of Linux Articles, Guides and Books on the web. Millions of people visit TecMint! to search or browse the thousands of published articles available FREELY to all.
If you like what you are reading, please consider buying us a coffee ( or 2 ) as a token of appreciation.

We are thankful for your never ending support.
Источник
How to Install ImageMagick on Ubuntu 18.04 & 16.04 LTS
ImageMagick is a software suite to create, edit, compose, or convert bitmap images. It can read and write images in a variety of formats like GIF, JPEG, PNG, Postscript, and TIFF. We can also use ImageMagick to resize, flip, mirror, rotate, distort, shear and transform images, adjust image colors, apply various special effects, or draw text, lines, polygons, ellipses and Bézier curves.
This article will help you to install ImageMagick on 19.04, 18.04 & 16.04 LTS operating systems.
Step 1 – Prerequsities
First of all, You need to install the required packages in order to install ImageMagick and Imagick PHP extension. You can also visit our tutorial to install different versions of PHP on Ubuntu.
Step 2 – Install ImageMagick
After installing required packages, let’s install ImageMagick using the following command. ImageMagick package is available under default apt repositories.
Step 3 – Install imagick PHP Extension
At this point, you have successfully installed ImageMagick package on your system. Now, you need to install Imagick PHP extension, So that we can use it through PHP code.
For different PHP version’s you need to install the specific version of imagick like php7.1-imagick or php7.3-imagick etc.
Step 4 – Restart Apache and Verify
After completing above steps you need to reload apache service to enable php exension using following command
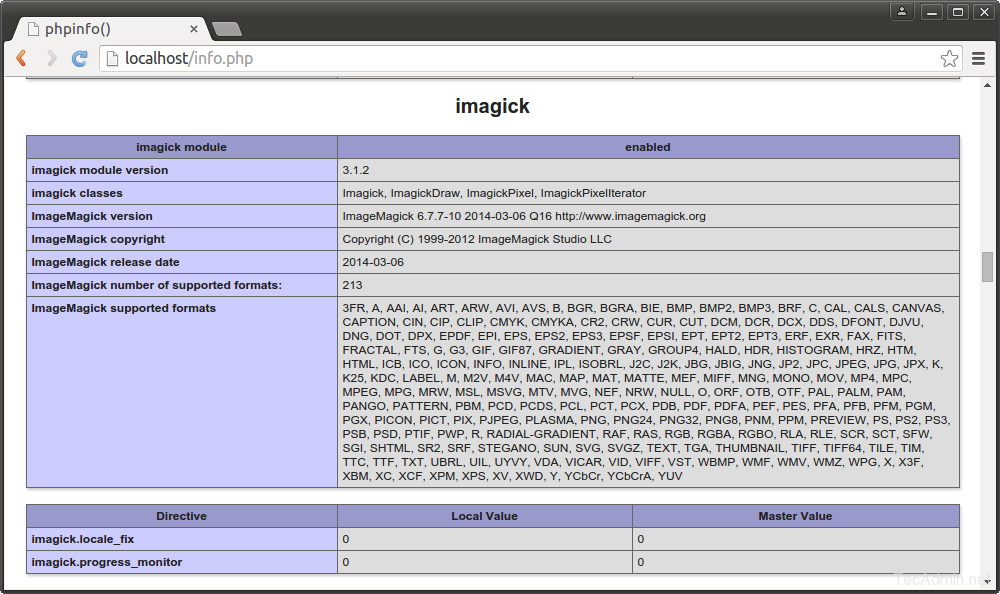
Now verify that module is enabled properly.
You can also create phpinfo() file to view ImageMagick on the web browser.
Click here to read more details about ImageMagick setup and there uses.
Источник
Как установить ImageMagick на Ubuntu 20.04 LTS

Как установить ImageMagick на Ubuntu 20.04 LTS
В этом руководстве мы покажем вам, как установить Install ImageMagick в Ubuntu 20.04 LTS. Для тех из вас, кто не знал, ImageMagick — это бесплатное приложение с открытым исходным кодом, с помощью которого мы можем управлять (то есть создавать / редактировать / конвертировать и т. Д.) Растровой графикой. ImageMagick обычно используется из командной строки. Также мы можем использовать его с любого языка программирования, используя его интерфейс, такой как Magick.NET (.Net), IMagick (PHP), PerlMagick (Perl) и т. Д.
В этой статье предполагается, что у вас есть хотя бы базовые знания Linux, вы знаете, как использовать оболочку, и, что наиболее важно, вы размещаете свой сайт на собственном VPS. Установка довольно проста и предполагает, что вы работаете с учетной записью root, в противном случае вам может потребоваться добавить sudo к командам для получения привилегий root. Я покажу вам пошаговую установку ImageMagick на сервере Ubuntu 20.04 (Focal Fossa).
Установите ImageMagick на Ubuntu 20.04 LTS Focal Fossa
Шаг 1. Во-первых, убедитесь, что все ваши системные пакеты обновлены, выполнив следующие apt команды в терминале.
Шаг 2. Установка ImageMagick в Ubuntu 20.04.
Установка ImageMagick в системе Ubuntu — довольно простой процесс. В окне терминала выполните следующую команду:
Он также установит все необходимые зависимости. Наконец, чтобы проверить, работает ли он:
- Другой способ установить ImageMagick на Ubuntu, скомпилировав исходный код:
Сначала загрузите исходный код с официального сайта ImageMagick
Шаг 3. Затем скомпилируйте ImageMagick, используя следующую команду:
Шаг 4. Затем настройте привязки среды выполнения динамического компоновщика:
Поздравления! Вы успешно установили ImageMagick . Благодарим за использование этого руководства по установке ImageMagick в системах Ubuntu 20.04 (Focal Fossa). Для получения дополнительной помощи или полезной информации мы рекомендуем вам посетить официальный сайт ImageMagick .
Источник
Download
You can install ImageMagick from source. However, if you don’t have a proper development environment or if you’re anxious to get started, download a ready-to-run Linux or Windows executable. Before you download, you may want to review recent changes to the ImageMagick distribution.
ImageMagick source and binary distributions are available from a variety of FTP and Web mirrors around the world.
Linux Binary Release
These are the Linux variations that we support. If your system is not on the list, try installing from source. Although ImageMagick runs fine on a single core computer, it automagically runs in parallel on multi-core systems reducing run times considerably.
| Version | Description |
|---|---|
| magick | Complete portable application on Linux, no installation required. Just download and run. AppImages require FUSE and libc to run. Many distributions have a working FUSE setup out-of-the-box. However if it is not working for you, you must install and configure FUSE manually. |
| ImageMagick-7.1.0-9.x86_64.rpm | Redhat / CentOS 8.3 x86_64 RPM |
| ImageMagick-libs-7.1.0-9.x86_64.rpm | Redhat / CentOS 8.3 x86_64 RPM |
| ImageMagick RPM’s | Development, Perl, C++, and documentation RPM’s. |
| ImageMagick-i386-pc-solaris2.11.tar.gz | Solaris Sparc 2.11 |
| ImageMagick-i686-pc-cygwin.tar.gz | Cygwin |
| ImageMagick-i686-pc-mingw32.tar.gz | MinGW |
ImageMagick RPM’s are self-installing. Simply type the following command and you’re ready to start using ImageMagick:
You’ll need the libraries as well:
Note, if there are missing dependencies, install them from the EPEL repo.
For other systems, create (or choose) a directory to install the package into and change to that directory, for example:
Next, extract the contents of the package. For example:
Set the MAGICK_HOME environment variable to the path where you extracted the ImageMagick files. For example:
If the bin subdirectory of the extracted package is not already in your executable search path, add it to your PATH environment variable. For example:
On Linux and Solaris machines add $MAGICK_HOME/lib to the LD_LIBRARY_PATH environment variable:
Finally, to verify ImageMagick is working properly, type the following on the command line:
Congratulations, you have a working ImageMagick distribution under Linux or Linux and you are ready to use ImageMagick to convert, compose, or edit your images or perhaps you’ll want to use one of the Application Program Interfaces for C, C++, Perl, and others.
Mac OS X Binary Release
We recommend Homebrew which provides pre-built binaries for Mac (some users prefer MacPorts). Download HomeBrew and type:
ImageMagick depends on Ghostscript fonts. To install them, type:
The brew command downloads and installs ImageMagick with many of its delegate libraries (e.g. JPEG, PNG, Freetype, etc). Homebrew no longer allows configurable builds; if you need different compile options (e.g. librsvg support), you can download the ImageMagick Mac OS X distribution we provide:
| Version | Description |
|---|---|
| ImageMagick-x86_64-apple-darwin20.1.0.tar.gz | macOS High Sierra |
| Version | Description |
|---|---|
| ImageMagick-7.1.0-9-Q16-HDRI-x64-dll.exe | Win64 dynamic at 16 bits-per-pixel component with High-dynamic-range imaging enabled |
Or choose from these alternate Windows binary distributions:
| Version | Description |
|---|---|
| ImageMagick-7.1.0-9-Q16-x64-static.exe | Win64 static at 16 bits-per-pixel component |
| ImageMagick-7.1.0-9-Q8-x64-dll.exe | Win64 dynamic at 8 bits-per-pixel component |
| ImageMagick-7.1.0-9-Q8-x64-static.exe | Win64 static at 8 bits-per-pixel component |
| ImageMagick-7.1.0-9-Q16-x64-dll.exe | Win64 dynamic at 16 bits-per-pixel component |
| ImageMagick-7.1.0-9-Q16-HDRI-x64-dll.exe | Win64 dynamic at 16 bits-per-pixel component with high dynamic-range imaging enabled |
| ImageMagick-7.1.0-9-Q16-HDRI-x64-static.exe | Win64 static at 16 bits-per-pixel component with high dynamic-range imaging enabled |
| ImageMagick-7.1.0-9-Q16-x86-dll.exe | Win32 dynamic at 16 bits-per-pixel component |
| ImageMagick-7.1.0-9-Q16-x86-static.exe | Win32 static at 16 bits-per-pixel component |
| ImageMagick-7.1.0-9-Q8-x86-dll.exe | Win32 dynamic at 8 bits-per-pixel component |
| ImageMagick-7.1.0-9-Q8-x86-static.exe | Win32 static at 8 bits-per-pixel component |
| ImageMagick-7.1.0-9-Q16-HDRI-x86-dll.exe | Win32 dynamic at 16 bits-per-pixel component with high dynamic-range imaging enabled |
| ImageMagick-7.1.0-9-Q16-HDRI-x86-static.exe | Win32 static at 16 bits-per-pixel component with high dynamic-range imaging enabled |
| ImageMagick-7.1.0-portable-Q16-x64.zip | Portable Win64 static at 16 bits-per-pixel component. Just copy to your host and run (no installer, no Windows registry entries). |
| ImageMagick-7.1.0-portable-Q16-x86.zip | Portable Win32 static at 16 bits-per-pixel component. Just copy to your host and run (no installer, no Windows registry entries). |
| ImageMagick-7.1.0-portable-Q8-x64.zip | Portable Win64 static at 8 bits-per-pixel component. Just copy to your host and run (no installer, no Windows registry entries). |
| ImageMagick-7.1.0-portable-Q8-x86.zip | Portable Win32 static at 8 bits-per-pixel component. Just copy to your host and run (no installer, no Windows registry entries). |
| ImageMagick-7.1.0-portable-Q16-HDRI-x64.zip | Portable Win64 static at 16 bits-per-pixel component with high dynamic-range imaging enabled. Just copy to your host and run (no installer, no Windows registry entries). |
| ImageMagick-7.1.0-portable-Q16-HDRI-x86.zip | Portable Win32 static at 16 bits-per-pixel component with high dynamic-range imaging enabled. Just copy to your host and run (no installer, no Windows registry entries). |


