- Как установить и пользоваться ADB на Linux Ubuntu
- Подсказка по терминам интерфейса Андроид
- Как установить ADB на Linux Ubuntu
- Как пользоваться ADB на Linux Ubuntu
- Как включить ADB на устройстве Андроид
- Как пользоваться ADB
- Команды ADB
- Удаление приложений через ADB
- Создание резервной копии приложений и данных
- Присвоение разрешений (permissions) приложению через ADB
- ADB не видит телефон
- ADB для Windows
- Установка ADB & Fastboot на Ubuntu 18.04 / Linux Mint 19
- Как установить ADB & Fastboot на Ubuntu 18.04 / Linux Mint 19?
- Установите ADB & Fastboot на Ubuntu 18.04 / Linux Mint 19
- Как включить отладку adb на вашем устройстве
- How to Install ADB on Windows, macOS, and Linux
- What is Android Debug Bridge (ADB)?
- How does ADB Work?
- How to Setup ADB
- Phone Setup
- How to setup ADB on Microsoft Windows
- How to setup ADB on macOS
- How to setup ADB on Linux
- Examples of ADB Commands
- Bonus
- What else can I do with ADB?
Как установить и пользоваться ADB на Linux Ubuntu

Сопутствующие статьи
Если вам оказалась полезна или просто понравилась эта статья, тогда не стесняйтесь — поддержите материально автора. Это легко сделать закинув денежек на Яндекс Кошелек № 410011416229354. Или на телефон +7 918-16-26-331.
Даже небольшая сумма может помочь написанию новых статей 🙂
Или поделитесь ссылкой на эту статью со своими друзьями.
Опубликовано: 12.12.2019 Последнее обновление этой статьи: 12.12.2019
В этой статье инструкция как установить и пользоваться ADB на Linux, на примере дистрибутива Ubuntu 18.04.
ADB это аббревиатура от Android Debug Bridge. Это специальный сетевой интерфейс, который позволяет получить доступ к консольной оболочке (shell) на устройстве под управлением операционной системы Андроид. Тем, кто пользуется ОС Linux, очень просто понять что такое ADB. Когда интерфейс ADB включен, на устройстве (смартфоне или планшете) запускается SSH сервер. И с другого устройства можно подключиться к этому серверу через сетевой интерфейс, используя SSH клиент.
Подключиться к серверу ADB, на устройстве Андроид, можно или через WiFi или через USB. Для подключения через WiFi необходимо чтобы оба устройства были подключены к одной точке доступа. И нужно знать IP адрес целевого устройства (на котором запущен сервер). Подключаться через USB удобнее, если подключение выполняется с компьютера. Для этого, на компьютере, нужно установить драйвер ADB. Этот драйвер эмулирует сетевое подключение через USB порт. Также нужно установить специальный пакет программ, которые реализуют клиентскую часть ADB на компьютере. И драйвер и программа ADB есть и для ОС Windows и для ОС Linux.
В этой статье будет описано как установить клиентскую часть ADB, на компьютер под управлением ОС Linux, на примере дистрибутива Ubuntu 18.04.
Подсказка по терминам интерфейса Андроид
- Тап, тапнуть — короткое прикосновение пальцем к сенсорному экрану. Аналогично левому клику мышью на компьютере.
- Длинный тап — прикосновение с удержанием пальца. Аналогично правому клику мышью на компьютере.
- Свайп — движение пальцем (или несколькими) по сенсорному экрану. Свайпом например выполняется прокрутка содержимого экрана на мобильных устройствах. Или вывод дополнительных панелей управления (свайп от верхней или от боковой кромки экрана).
Как установить ADB на Linux Ubuntu
На Ubuntu установка ADB предельно проста. Нужно открыть терминал и там выполнить команду:
sudo apt-get install adb
Примечание. Пакет adb можно установить и через какую-либо программу с графическим интерфейсом — Программы, Synaptic.
Если у вас другой дистрибутив и у него в репозитарии нет пакета с ADB, тогда можно скачать пакет ADB с официального сайта.
Как пользоваться ADB на Linux Ubuntu
ADB запускается в терминале. Но вначале нужно включить серверную часть, на устройстве (смартфоне или планшете).
Как включить ADB на устройстве Андроид
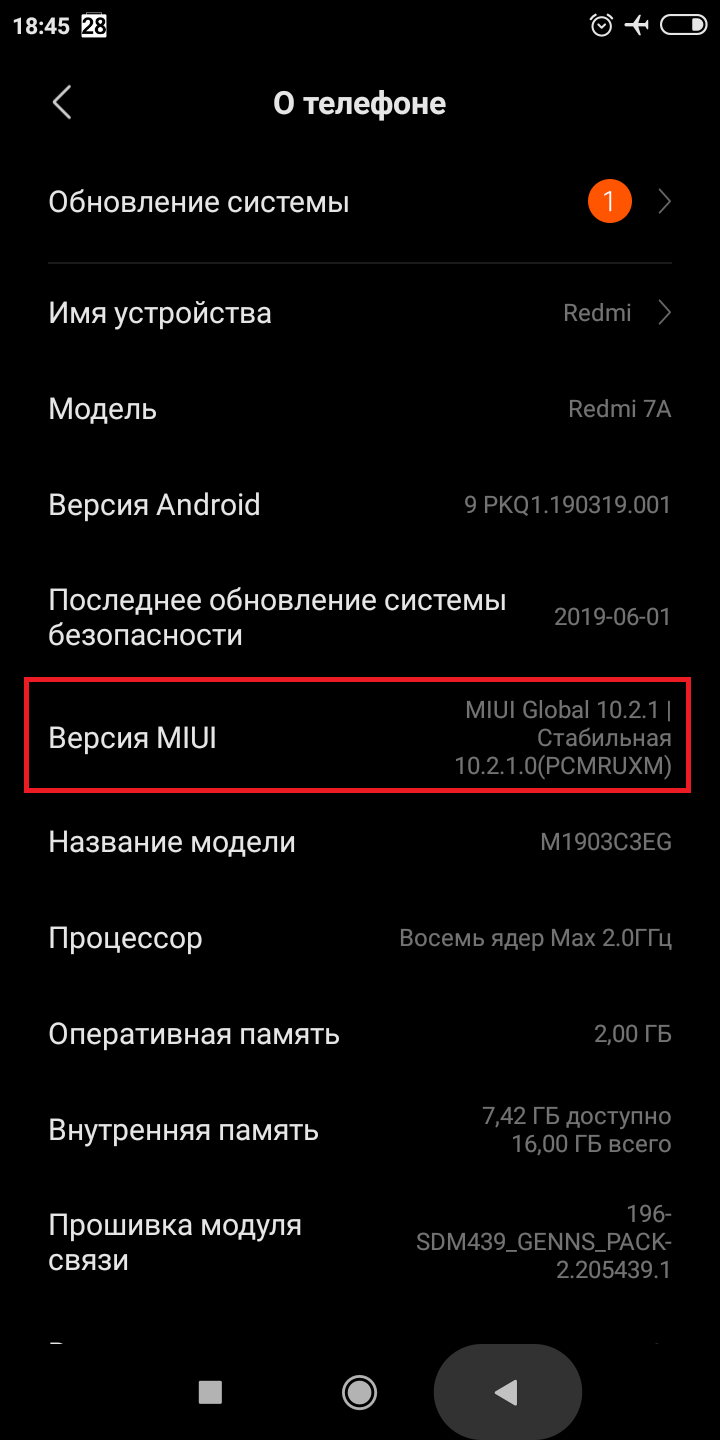
Для этого нужно, в настройках найти и открыть пункт «Об устройстве«. В некоторых сборках Андроид, этот пункт может называться «О телефоне«. В этом пункте нужно открыть следующий пункт — «Сведения о ПО«. И в этом пункте нужно 9 раз тапнуть на строке «Номер сборки«. В некоторых сборках Андроид этот пункт может называться иначе, например «Версия MIUI«, на устройствах Xiaomi:
Когда вы будете тапать, на этом пункте, на экране появится подсказка — сколько раз еще нужно тапнуть, чтобы стал доступен режим разработчика. После 9 тапов, будет включен режим разработчика и в настройках появится соответствующий пункт:
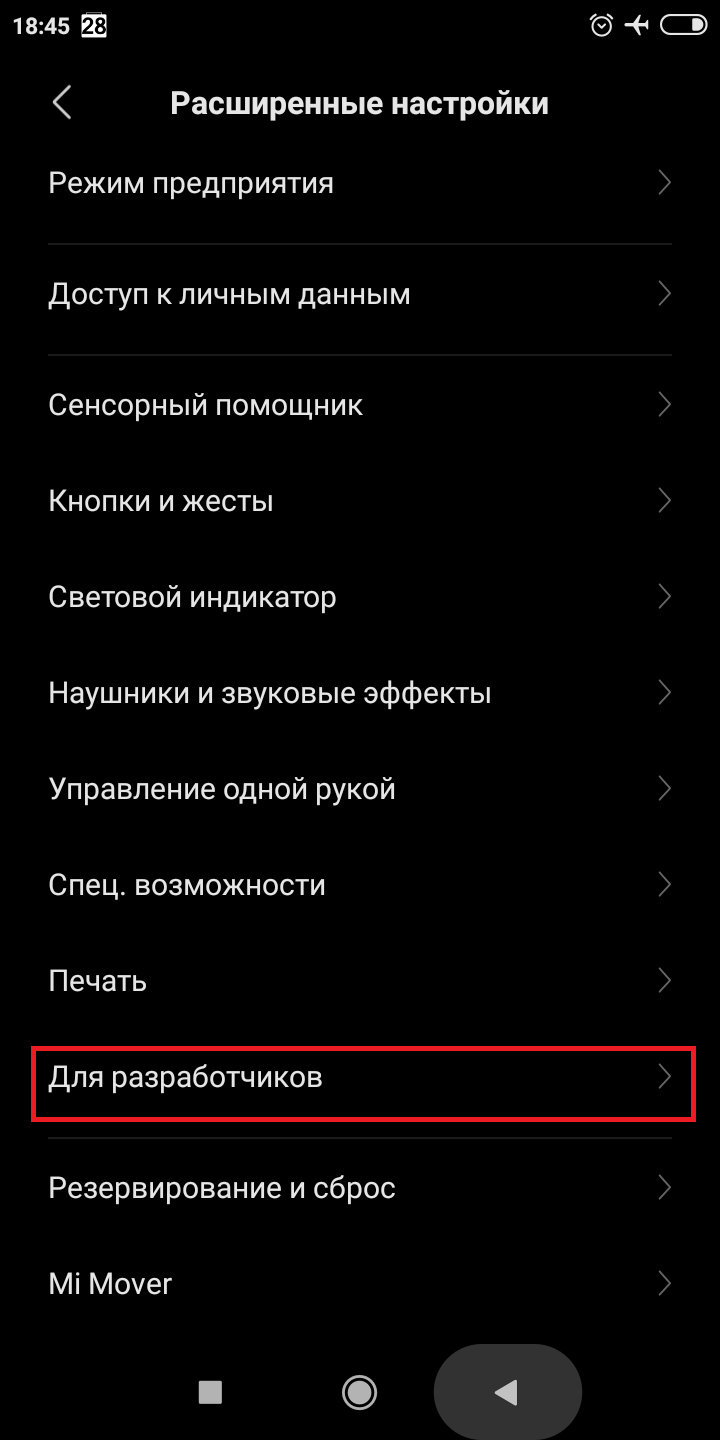
Пункт «Для разработчиков» может быть сразу в корневом списке настроек или во вложенном пункте настроек — это зависит от сборки Андроид.
Теперь нужно открыть пункт «Для разработчиков» и там найти и включить опцию «Отладка по USB«:
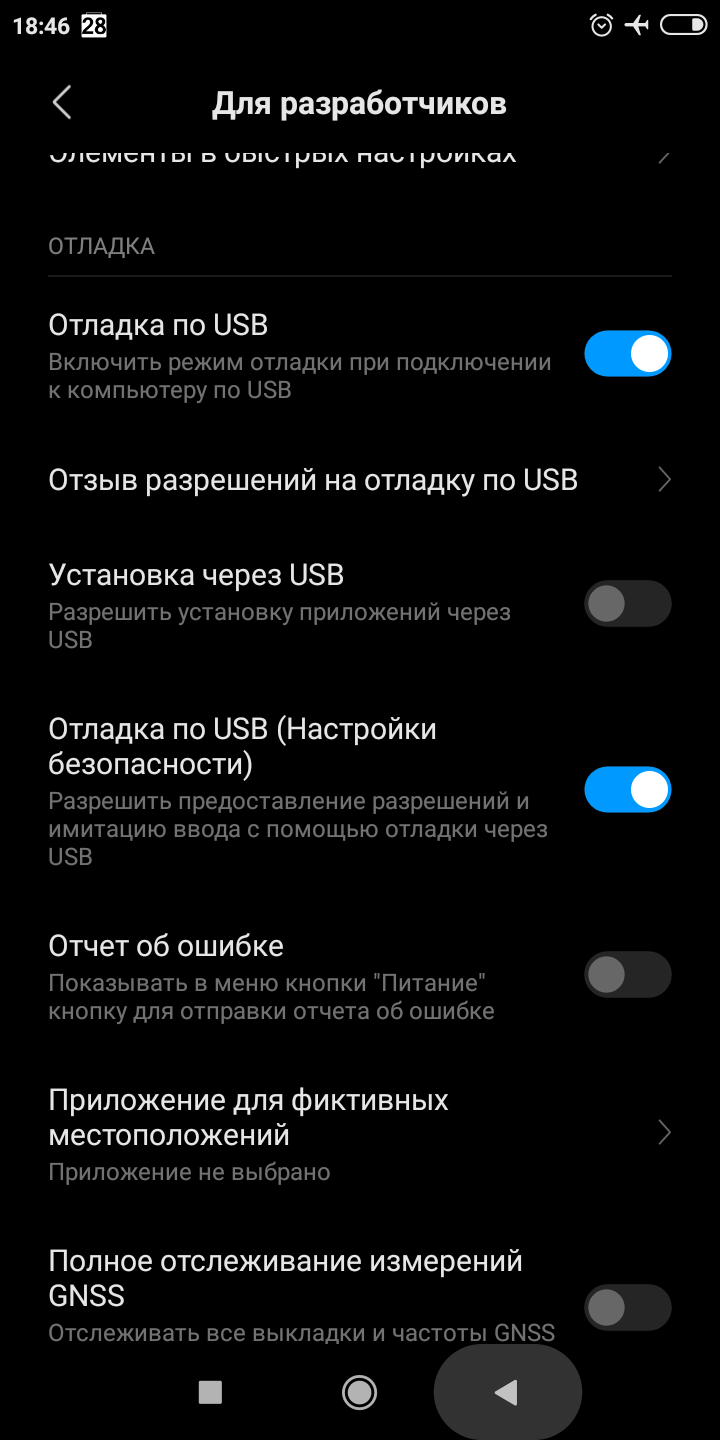
При включении этой опции как раз и запускается сервер ADB на устройстве. И теперь, к этому устройству можно подключиться через ADB интерфейс. Не смотря на то, что в названии опции фигурирует USB, когда эта опция включена, подключение к ADB серверу возможно и через WiFi.
Как пользоваться ADB
Когда вы в первый раз будете подключаться к устройству, на котором включена опция «Отладка по USB«, на этом устройстве будет запрос на разрешение подключения, с указанием цифровой подписи компьютера (или другого устройства):
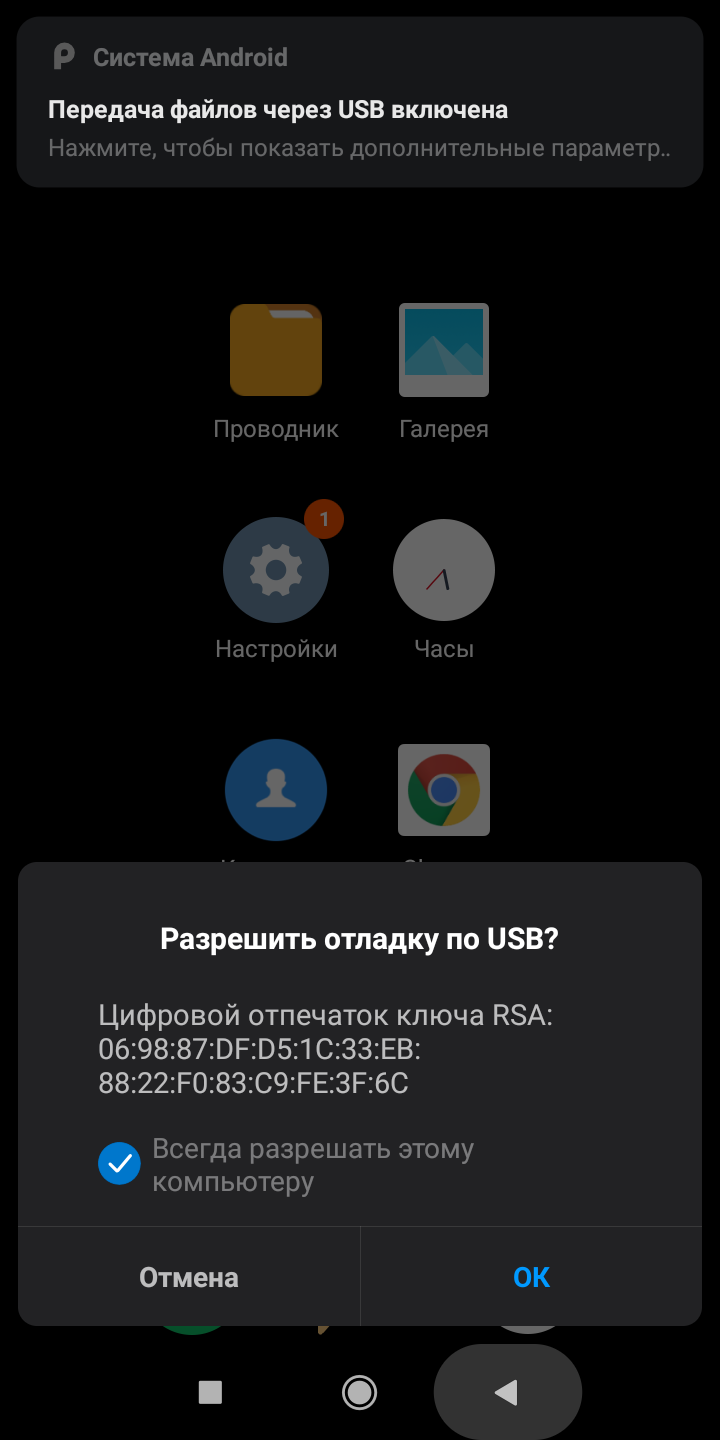
Такой запрос выдается, когда вы соедините USB кабелем компьютер и устройство Андроид.
После подтверждения, устройство будет доступно для выполнения команд ADB. Проверить подключение устройства можно командой «adb devices«. На этом скриншоте видно, что через ADB интерфейс подключено одно устройство:
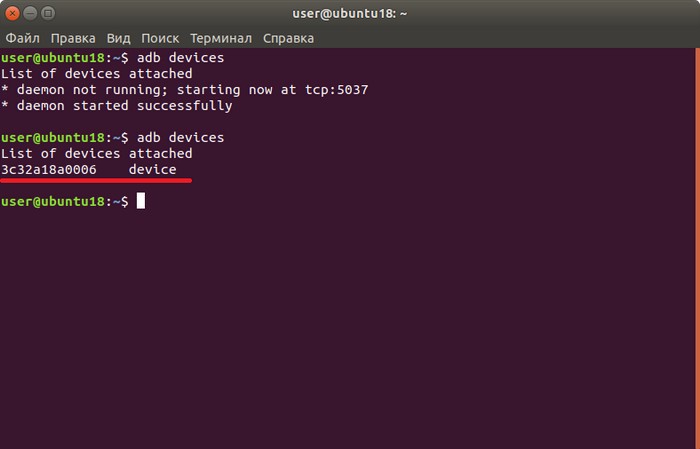
Теперь можно выполнять команды ADB.
Что можно сделать с помощью ADB? Самые распространенные задачи, которые можно выполнить через ADB это:
- Создание резервной копии данных и приложений.
- Удаление предустановленных приложений, которые нельзя удалить через графический интерфейс Андроид.
- Изменение разрешений для какого-либо приложения.
Также, через ADB доступны некоторые консольные команды Linux, такие как ls, cp, top, ps, cat и так далее. Однако на Андроид доступны далеко не все консольные команды Linux.
В общем случае команды ADB выполняются с префиксом «adb shell«:
Но можно и войти в shell устройства и выполнять команды уже «внутри».
Команды ADB
Удаление приложений через ADB
Удаление приложения facebook:
adb shell pm uninstall -k —user 0 ‘com.facebook.katana’ adb shell pm uninstall -k —user 0 ‘com.facebook.system’ adb shell pm uninstall -k —user 0 ‘com.facebook.appmanager’
Удаление некоторых приложений Google :
adb shell pm uninstall -k —user 0 ‘com.google.android.gm’ // GMail adb shell pm uninstall -k —user 0 ‘com.google.android.apps.tachyon’ // Google Duo adb shell pm uninstall -k —user 0 ‘com.google.android.apps.turbo’ // Device Health Services
Через ADB можно удалить приложения, которые нельзя удалить через графический интерфейс Андроид, например GMail. Некоторое неудобство в том, что в команде нужно указывать название пакета приложения. В то время как в графическом интерфейсе отображается его имя. Так что, если вы хотите удалить какое-то приложение, сначала нужно узнать название пакета. Это можно сделать:
- Через свойства приложения, в списке приложений (Настройки — приложения).
- На сайте Google Play Market. Если его открыть в браузере и через поиск (по имени) найти нужное приложение и открыть страницу этого приложения, в URL этой страницы будет имя пакета.
- Через какое-либо приложение, которое работает со списком приложений.
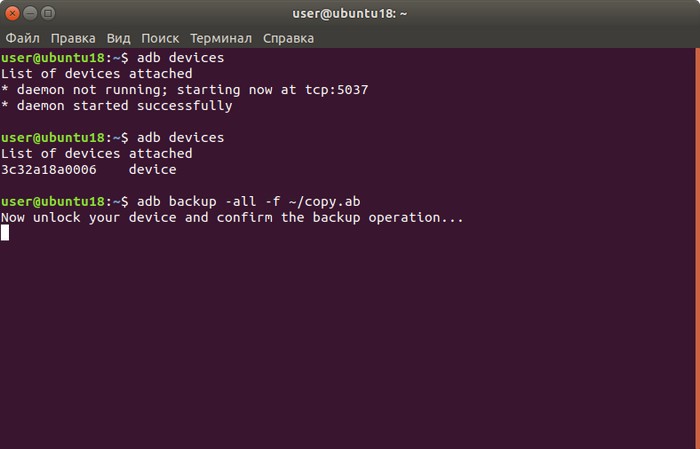
Создание резервной копии приложений и данных
adb backup -all -f
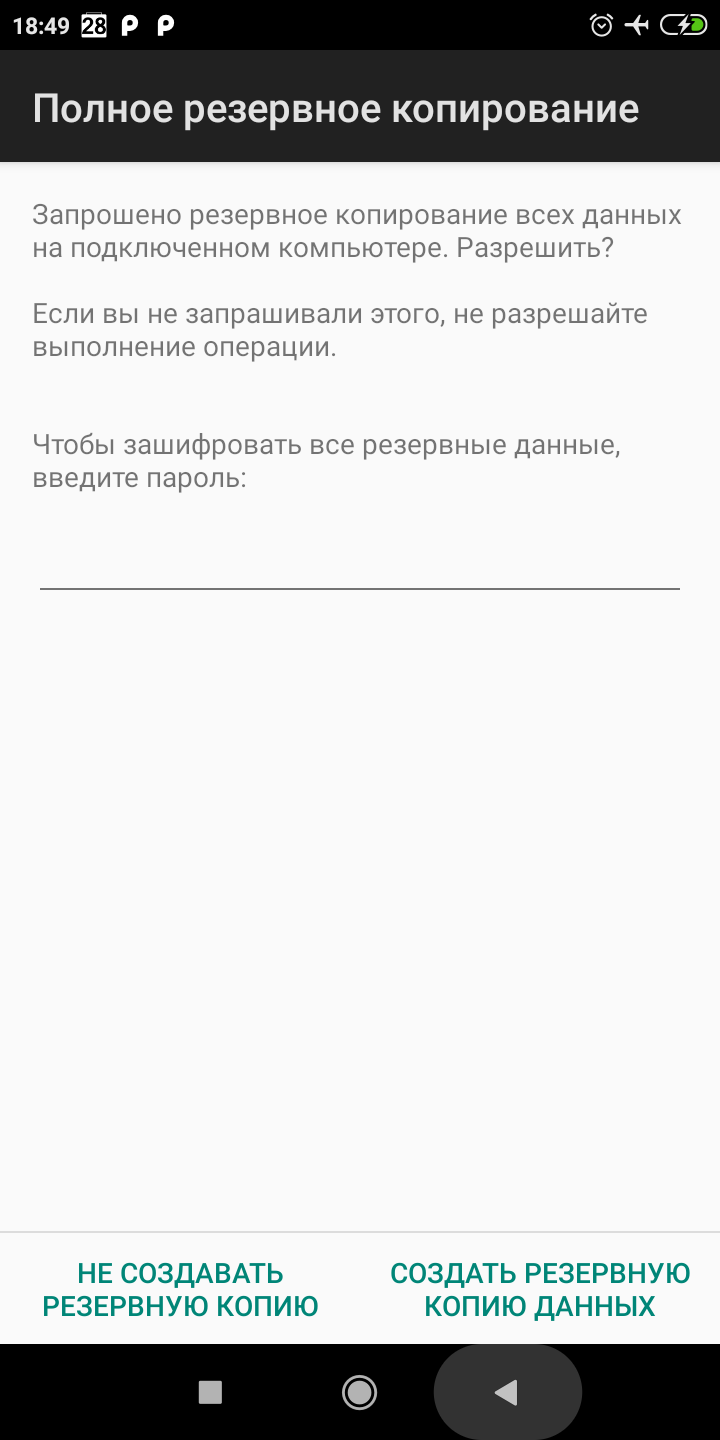
Эта команда делает копию данных всех приложений. Перед ее исполнением, на устройстве будет дан запрос на подтверждение:
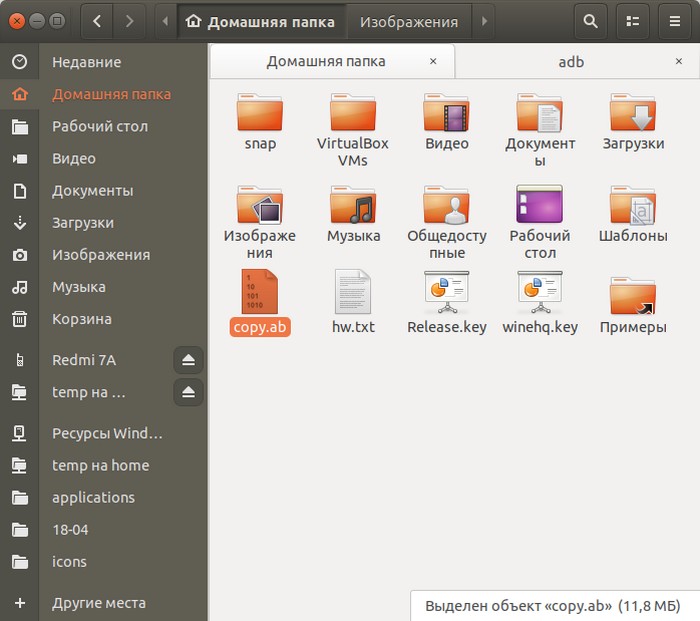
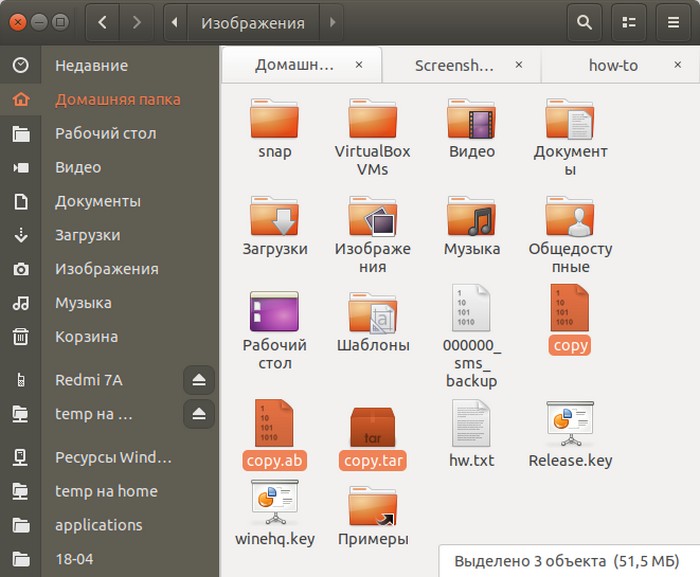
В результате будет создан файл-архив с данными всех приложений:
Этот архив даже можно посмотреть в архиваторе. Но для этого нужно этот файл предварительно обработать:
/copy.ab bs=1 skip=24 >
printf «\x1f\x8b\x08\x00\x00\x00\x00\x00» | cat —
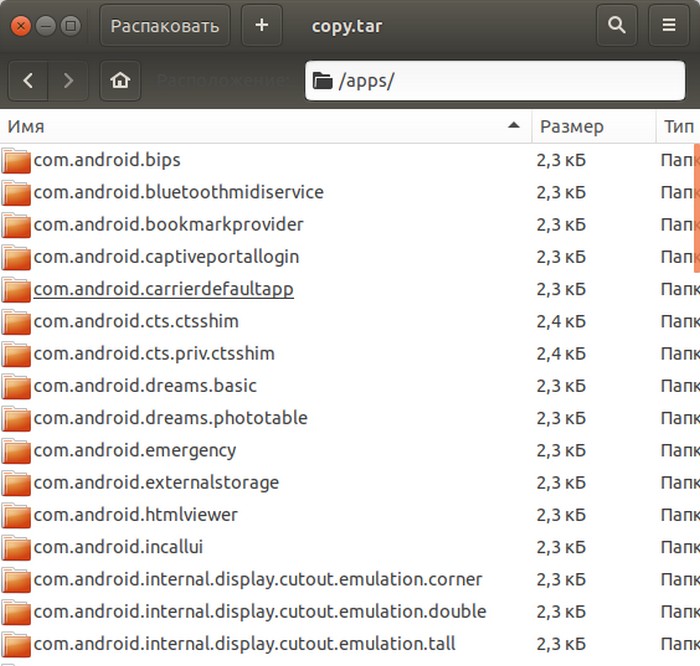
И теперь файл copy.tar можно открыть:
Восстановить данные из копии тоже не сложно:
Присвоение разрешений (permissions) приложению через ADB
adb shell pm grant com.gsamlabs.bbm android.permission.BATTERY_STATS
В этой команде, приложению «GSam Battery Monitor» (имя пакета com.gsamlabs.bbm) присваивается разрешение (permission) BATTERY_STATS. Это разрешение на доступ к детальной информации об использовании батареи. После присвоения этого разрешения приложение «GSam Battery Monitor» сможет показывать не только текущий уровень заряда, напряжения и температуры батареи, но все приложения которые работают и «съедают» заряд батареи.
ADB не видит телефон
Если вы соединили USB кабелем компьютер и устройство Андроид, но команда «adb devices» не показывает (не видит) подключенное устройство, то самые частые причины:
- На устройстве (смартфон, планшет) не включена опция «Отладка по USB«.
- На устройстве (смартфон, планшет) не подтвержден запрос на подключение с компьютера. Подробнее выше, в разделе «Как пользоваться ADB».
- Используется поврежденный USB кабель или кабель без сигнальной линии. Кабели на некоторых зарядных устройствах не имеют сигнальной линии.
- Устройство (смартфон, планшет) не может работать через стандартный драйвер ADB.
ADB для Windows
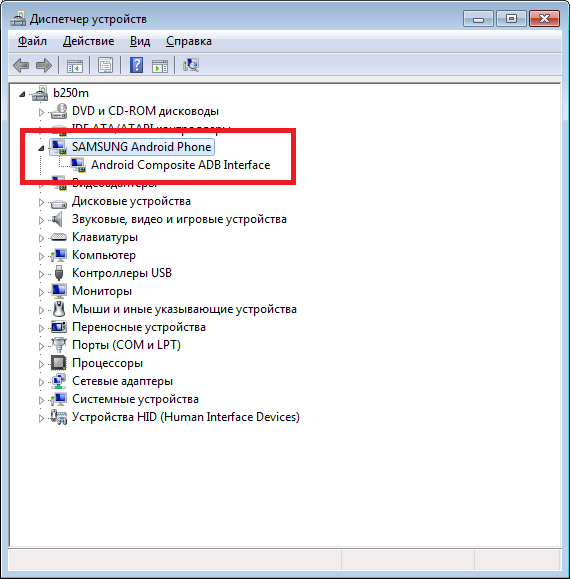
На Windows используется точно так же. Только нужно скачать и у стуановить драйвера и скачать программу ADB клиент для Windows. Драйвера ADB, для Windows, можно взять у какого-нибудь производителя смартфонов, например Samsung. Драйвера ADB должны подходить для любого устройства, вне зависимости от производителя. Вот например смартфон Xiaomi, нормально подключен через ADB драйвер Samsung:
Если вам оказалась полезна или просто понравилась эта статья, тогда не стесняйтесь — поддержите материально автора. Это легко сделать закинув денежек на Яндекс Кошелек № 410011416229354. Или на телефон +7 918-16-26-331.
Даже небольшая сумма может помочь написанию новых статей 🙂
Или поделитесь ссылкой на эту статью со своими друзьями.
Источник
Установка ADB & Fastboot на Ubuntu 18.04 / Linux Mint 19

Как установить ADB & Fastboot на Ubuntu 18.04 / Linux Mint 19?
Android Debug Bridge (ADB) – это универсальный инструмент командной строки, который позволяет взаимодействовать с устройством с клиентского компьютера.
С помощью команды adb вы можете выполнять различные действия на устройстве, такие как установка приложений, копирование файлов, запуск команд оболочки, отладка приложений и т. д.
ADB также обеспечивает доступ к оболочке Unix для запуска команд на устройстве.
ADB работает в модели клиент-сервер и включает три компонента:
- adbd: это демон, работающий в фоновом режиме и позволяющий запускать команды.
- Сервер: это фоновый процесс, выполняющийся на вашем компьютере для управления связью между клиентом и демоном.
- Клиент: клиент отвечает за отправку команд с локального компьютера на устройство через USB-соединение.
Установите ADB & Fastboot на Ubuntu 18.04 / Linux Mint 19
ADB поставляется в комплекте с Android SDK от Google, но пакет можно установить независимо на Ubuntu 18.04 / Linux Mint 19.
Установите ADB и Fastboot, выполнив приведенные ниже команды.
Получить информацию о версии ADB.
Если вы попробуете список подключенных устройств, сервер ADB должен быть запущен, если он еще не запущен.
Сервис также можно запустить, выполнив:
Как включить отладку adb на вашем устройстве
Вы должны включить отладку по USB на вашем устройстве, чтобы использовать ADB через USB.
Перейдите к настройкам системы и включите его в разделе Developer options.
Чтобы сбросить хост adb, запустите:
Проверьте страницу справки с параметром –help.
Источник
How to Install ADB on Windows, macOS, and Linux
Several features of the Android platform can be accessed only through paths and methods that are hidden away from the average user. These have generally been done with the help of some command line Android Debug Bridge (ADB) commands, a tool that Google offers for developers to debug various parts of their applications or the system, but which we can use for all kinds of neat and hidden tricks. A prerequisite to these tricks is installing ADB on your computer. So, in this guide, we will show you how to install ADB on Windows, macOS, and Linux in quick and easy-to-follow steps.
Table of Contents:
What is Android Debug Bridge (ADB)?
The internal structure of the Android Debug Bridge (ADB) is based on the classic client-server architecture. There are three components that make up the entire process.
- The client, i.e. the PC or Mac you have connected to your Android device. We are sending commands to our device from this coomputer through the USB cable (and wirelessly as well in some cases).
- A daemon (adbd), which runs commands on a device. The daemon runs as a background process on each device.
- A server, which manages communication between the client and the daemon. The server runs as a background process on the PC/Mac.
How does ADB Work?
Because there are three pieces that makeup ADB (the Client, Daemon, and the Server), this requires certain pieces to be up and running in the first place. So if you have freshly booted the computer (and you don’t have it setup to start the daemon on boot), then you will need it to be running before any communication can be sent to the target Android device. You’ll see this the following message in the command prompt or terminal, as it will check to make sure the daemon is running.

If the daemon isn’t running, then it will start the process and tell you which local TCP port it has been started on. Once that ADB service has been started, it will continue to listen to that specific port for commands that have been sent by the ADB client. It will then set up connections to all running devices which are attached to the computer (including emulators). This is the moment where you’ll receive the authorization request on the Android device if the computer hasn’t been authorized in the past.
How to Setup ADB
Note: Setting up ADB on the computer is just half the equation since you’ll also need to do some things on the smartphone or tablet to accept the ADB commands.
Phone Setup
- Launch the Settings application on your phone.
- Tap the About Phone option generally near the bottom of the list.
- Then tap the Build Number option 7 times to enable Developer Mode. You will see a toast message when it is done.
- Now go back to the main Settings screen and you should see a new Developer Options menu you can access.
- Go in there and enable the USB Debugging mode option.

- You are partially done with the phone setup process. Next up, you will need to scroll below and follow the rest of the instructions for your particular operating system.

Follow along for the operating system on your computer.
How to setup ADB on Microsoft Windows
- Download the Android SDK Platform Tools ZIP file for Windows.
- Extract the contents of this ZIP file into an easily accessible folder (such as C:\platform-tools)
- Open Windows explorer and browse to where you extracted the contents of this ZIP file
- Then open up a Command Prompt from the same directory as this ADB binary. This can be done by holding Shift and Right-clicking within the folder then click the “Open command window here” option. (Some Windows 10 users may see “PowerShell” instead of “command window”.)
- Connect your smartphone or tablet to your computer with a USB cable. Change the USB mode to “file transfer (MTP)” mode. Some OEMs may or may not require this, but it’s best to just leave it in this mode for general compatibility.
- In the Command Prompt window, enter the following command to launch the ADB daemon:В adb devices
- On your phone’s screen, you should see a prompt to allow or deny USB Debugging access. Naturally, you will want to grant USB Debugging access when prompted (and tap the always allow check box if you never want to see that prompt again).
- Finally, re-enter the command from step #6. If everything was successful, you should now see your device’s serial number in the command prompt (or the PowerShell window).


Yay! You can now run any ADB command on your device! Now go forth and start modding your phone by following our extensive list of tutorials!
How to setup ADB on macOS
- Download the Android SDK Platform Tools ZIP file for macOS.
- Extract the ZIP to an easily-accessible location (like the Desktop for example).
- Open Terminal.
- To browse to the folder you extracted ADB into, enter the following command:В cd /path/to/extracted/folder/
- For example, on my Mac it was this: cd /Users/Doug/Desktop/platform-tools/
- Connect your device to your Mac with a compatible USB cable. Change the USB connection mode to “file transfer (MTP)” mode. This is not always required for every device, but it’s best to just leave it in this mode so you don’t run into any issues.
- Once the Terminal is in the same folder your ADB tools are in, you can execute theВ following command to launch the ADB daemon:В ./adb devices
- On your device, you’ll see an “Allow USB debugging” prompt. Allow the connection.
- Finally, re-enter the command from step #7. If everything was successful, you should now see your device’s serial number in macOS’s Terminal window.

Congratulations! You can now run any ADB command on your device!В Now go forth and start modding your phone by following our extensive list of tutorials!
While the guide above will certainly work, some seasoned macOS users should be aware that there can be an easier way to install ADB on their Macs using an unofficial package manager such as Homebrew or MacPorts.
How to setup ADB on Linux
- Download the Android SDK Platform Tools ZIP file for Linux.
- Extract the ZIP to an easily-accessible location (like the Desktop for example).
- Open a Terminal window.
- Enter the following command:В cd /path/to/extracted/folder/
- This will change the directory to where you extracted the ADB files.
- So for example: cd /Users/Doug/Desktop/platform-tools/
- Connect your device to your Linux machine with your USB cable. Change the connection mode to “file transfer (MTP)” mode. This is not always necessary for every device, but it’s recommended so you don’t run into any issues.
- Once the Terminal is in the same folder your ADB tools are in, you can execute theВ following command to launch the ADB daemon:В ./adb devices
- Back on your smartphone or tablet device, you’ll see a prompt asking you to allow USB debugging. Go ahead and grant it.
- Finally, re-enter the command from step #8. If everything was successful, you should now see your device’s serial number in the Terminal window output.

Congrats! You can now run any ADB command on your device!В Now go forth and start modding your phone by following our extensive list of tutorials!
Some Linux users should be aware that there can be an easier way to install ADB on their computer. The guide above will certainly work for you, but those own a Debian or Fedora/SUSE-based distro of Linux can skip steps 1 and 2 of the guide above and use one of the following commands:
- Debian-based Linux users can type the following command to install ADB:
- Fedora/SUSE-based Linux users can type the following command to install ADB:
However, it is always better to opt for the latest binary from the Android SDK Platform Tools release, since the distro-specific packages often contain outdated builds.
Just to cover all of our bases here, users may need to put a ./ in front of the ADB commands we list in future tutorials, especially when they are using the extracted binaries directly from the Platform Tools ZIP. This is something that is likely known by any *nix user (or Windows user running PowerShell) already, but again, we want as many people as possible to understand how to do these tweaks for Android no matter how much of your operating system you know.
Examples of ADB Commands
To check if you have successfully installed ADB, connect your device to your PC/Mac with your USB cable, and run the adb devices command as described above. It should display your device listed in the Command Prompt/PowerShell/Terminal window. If you get a different output, we recommend starting over with the steps.
As mentioned above, you can use ADB to do all sorts of things on an Android device. Some of these commands are built directly into the ADB binary and should work on all devices. You can also open up what is referred to as an ADB Shell and this will let you run commands directly on the device. The commands which are run directly on the device can vary from device to device (since OEMs can remove access to certain ones, and also modify adb behavior) and can vary from one version of Android to the next as well.
Below, you’ll find a list of example commands which you can do on your device:
- Print a list of connected devices: adb devices
- Kill the ADB server: adb kill-server
- Install an application: adb install
Copy a file/directory to the device: adb push
Bonus
For those who want to take this a step further, you can follow this new tutorial we put together that will walk you through how to set up ADB so that you can use the command from any directory on a Windows or Linux desktop.
What else can I do with ADB?
Below is a list of XDA tutorials for various devices that detail many applications of ADB commands in order to modify hidden settings, customize OEM features or user interfaces, and much more!
Источник


