- How to Partition a Hard Disk in Windows 10
- Hard disk partitions
- Conditions
- Check how the information on disk partitions is stored
- Partition a hard disk
- Create and format a hard disk partition
- Create Hard Disk Partitions Before Installing Windows 10/8/7
- Why create partition before installing Windows 10/8/7?
- Partition a hard drive during Windows setup
- Create partitions without OS pre-installed with free partition manager
- How to Partition Hard Drive Disk without Formatting
- Why Need Partition Hard Drive
- Solution 1: Partition hard drive without formatting using EaseUS partition manager
- How to partition a new hard drive
- How to partition an existing hard drive
- Solution 2: Partition hard drive with Disk Management
- How to partition a new hard drive
- How to partition an existing hard drive
- The Bottom Line
How to Partition a Hard Disk in Windows 10
Read this article for a detailed step-by-step tutorial on how to partition an HDD or SSD with the tools integrated into Windows 10.
Hard disk partitions
Your internal hard disk may already have two or three partitions, because an IT specialist has already done all the partitioning work for you. However, there are cases when you need to change the configuration of the existing partition or break it into two or more smaller parts.
It may sound like a very complicated process, but it’s not that difficult. Although partitioning a hard disk does require a great deal of attention and caution, it is easy enough for any competent user to cope with. Also, it does not require installing any additional software, which makes this procedure even more convenient for us ordinary users.
The Device Manager has an integrated feature called Disk Management, which lets you divide a disk into partitions, and it is quite easy to use. If you are using Windows 10 Creators Update or a newer version of Windows, you can apply the Disk Management feature to partition a USB drive or SD card. After all, though, in this article we will focus on partitioning a hard disk.
This way, you can use the described sequence of actions to partition an internal or external hard disk. If you have a solid-state drive (SSD), it can be partitioned just like that.
Conditions
In order to partition a hard disk in Windows 10, you should have administrator rights and access to the hard disk connected to your computer.
If you are going to partition an external hard disk, make sure it is conveniently positioned on a surface that prevents it from getting disconnected accidentally during the process of partitioning.
Keep in mind that there is a limitation for the number of partitions you can create. If your hard disk stores the information on partitions according to the MBR standard, you can create no more than four partitions. If your disk works with such information on the GPT principle, the number of partitions is unlimited.
Check how the information on disk partitions is stored
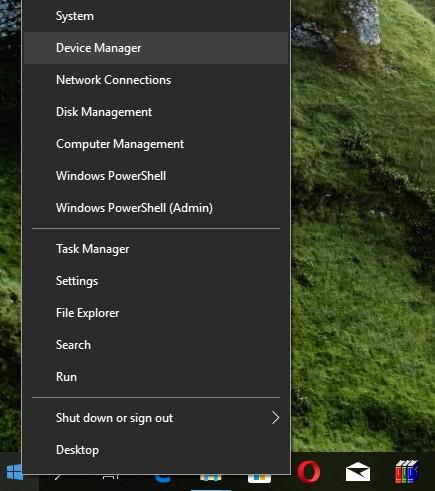
To find out how the information on disk partitions is stored, do the following. Run the Device Manager.
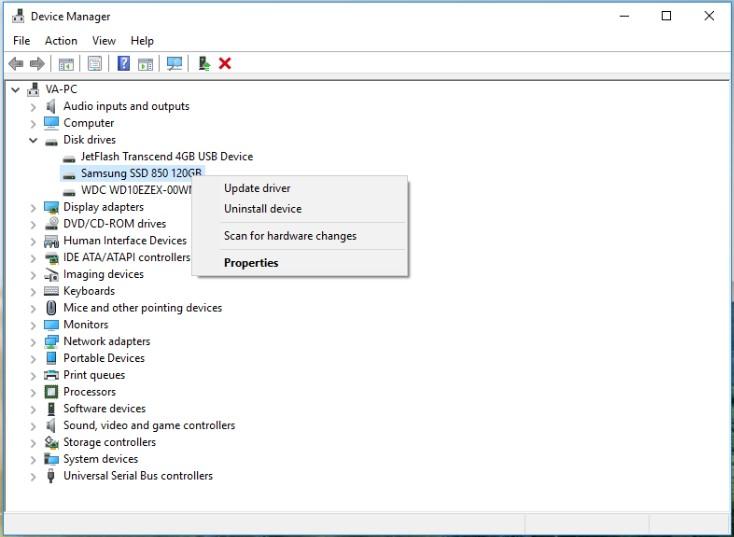
In the window that opens, select Disk drives. You will see the list of hard disks installed in your computer. Select the disk you need and right-click on it, then select Properties from the menu.
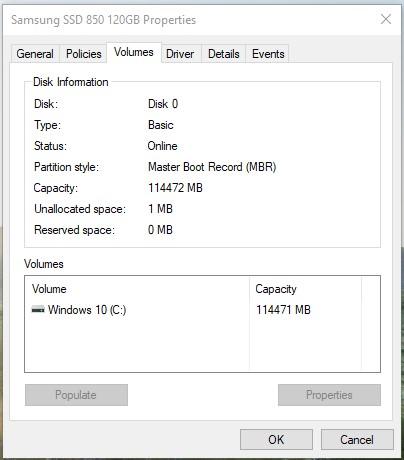
In the Properties window, jump to Volumes and click on Populate.
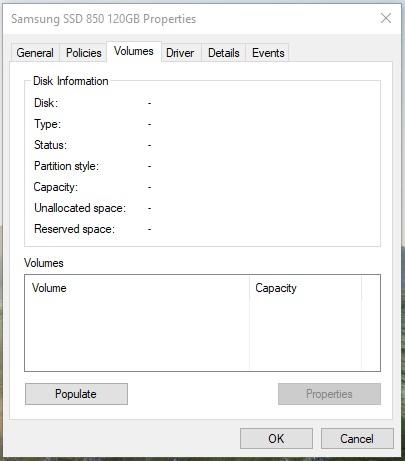
You will see all available data on your disk in the section Disk Information. View the line Partition style to find out what way of storing partition data is used by this disk.
Partition a hard disk
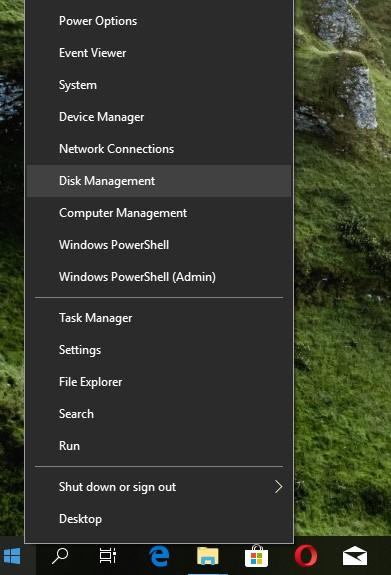
Start the Disk Management utility.
In the middle/bottom panel, you will see the list of all partitions in the selected hard disk.
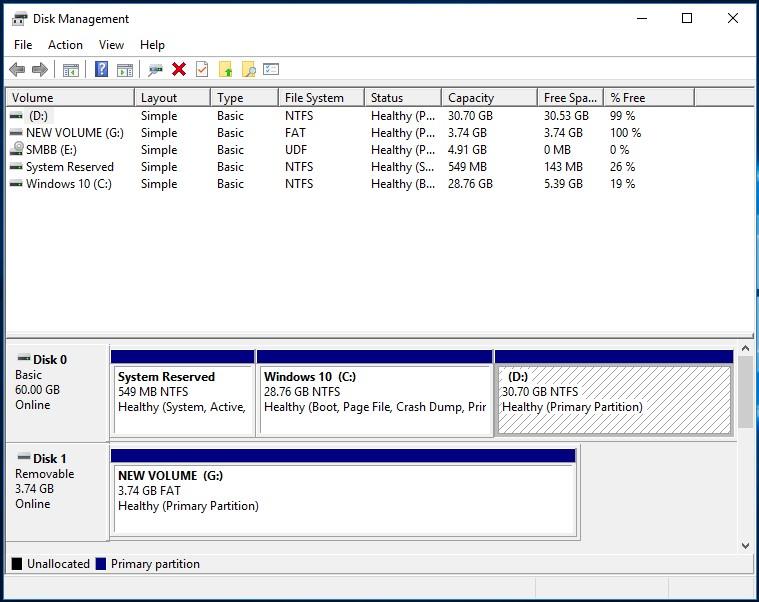
In our case, we will create a partition in partition D which already exists. If you have a disk without partitions, the sequence of steps will be similar.
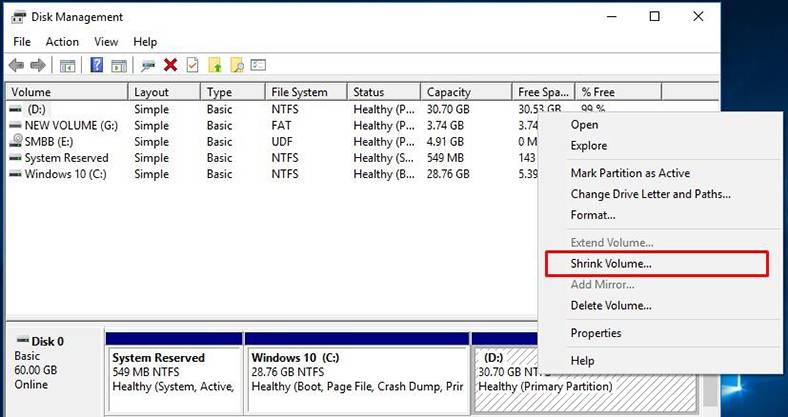
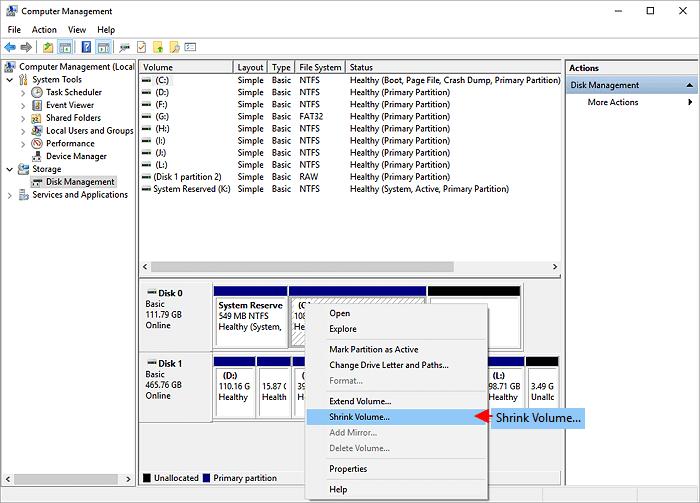
Right-click on the disk which is not partitioned yet (in our case, this is partition D) and select Shrink Volume.
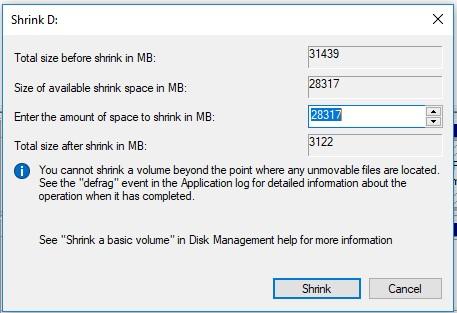
Windows 10 will check the maximal amount of disk space which can be used to create a new partition. This is done to ensure that none of your files should get lost after the partitioning process is complete. The new partition you will create is not going to contain any files.
For example, if you have a hard disk of 1 Tb with 800 GB occupied, you won’t be able to create two partitions of 500 GB each (and don’t even try that). Windows Disk Management can’t shrink the volume beyond the point where any unmovable files are located. That is why, as soon as you see the amount of space that can be shrunk, select the size of the future partition with account of the options that the operating system suggests. It’s better if you don’t have any files saved on the disk though it’s not always the way it is.
Be very attentive when choosing the partition size, as it is the only difficult part of the entire process. Make sure that the size of the new partition should not exceed the size given in the line Size of available shrink space in MB. The rest of the process is not so difficult – just click Shrink to start.
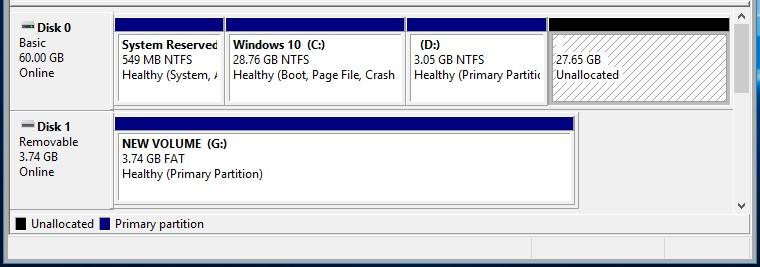
This is what you get. There will be two partitions in the disk, one of them displayed as an unallocated area.
Create a new partition in an unallocated disk space.
Create and format a hard disk partition
To create a partition or volume (the two terms are often used interchangeably) on a hard disk, you must be logged in as an administrator, and there must be either unallocated disk space or free space within an extended partition on the hard disk.
If there is no unallocated disk space, you can create some by shrinking an existing partition, deleting a partition, or by using a third-party partitioning program.
Open Computer Management by selecting the Start button. The select Control Panel > System and Security > Administrative Tools, and then double-click Computer Management.
In the left pane, under Storage, select Disk Management.
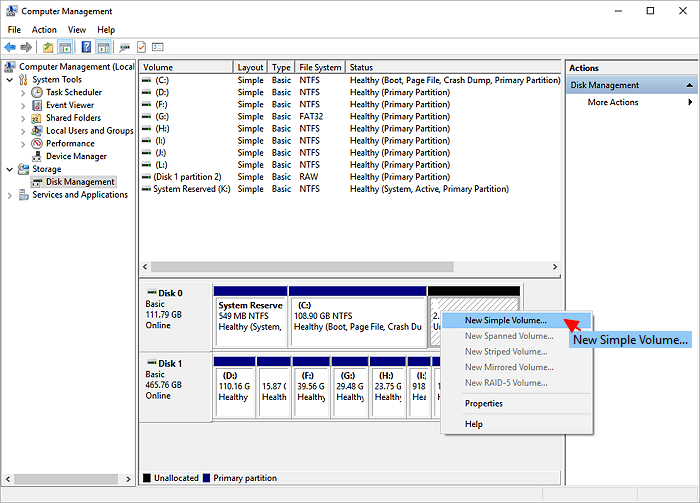
Right-click an unallocated region on your hard disk, and then select New Simple Volume.
In the New Simple Volume Wizard, select Next.
Enter the size of the volume you want to create in megabytes (MB) or accept the maximum default size, and then select Next.
Accept the default drive letter or choose a different drive letter to identify the partition, and then select Next.
In the Format Partition dialog box, do one of the following:
If you don’t want to format the volume right now, select Do not format this volume, and then select Next.
To format the volume with the default settings, select Next.
Review your choices, and then select Finish.
Note: When you create new partitions on a basic disk, the first three will be formatted as primary partitions. Beginning with the fourth, each one will be configured as a logical drive within an extended partition.
Create Hard Disk Partitions Before Installing Windows 10/8/7
Learn how to create hard disk partitions before installing Windows 10/8/7 operating system on your hard drive for your system, applications, games and other data better organized.

By AOMEI  / Last Updated January 16, 2020
Why create partition before installing Windows 10/8/7?
By default, Windows will generate a system reserved partition (on MBR disk) or recovery partition (on GPT disk) and C: drive if you select an unallocated space to install Windows operating system (OS). Since GPT disks can have multiple primary partitions as you like, it is no big deal to have one or more extra small partitions on a GPT disk, but things will be different for MBR disks, because you can have at most 4 primary partitions on a MBR disk.
If your computer supports UEFI boot mode, you can convert MBR to GPT disk without data loss. Otherwise, for those people who want to install multiple OS on one MBR drive, the 4 primary partitions are really precious. Besides, you can only have three primary partitions if you have logical partition(s) on the same disk. Therefore, to make full use of the primary partitions is to allow Windows to be installed into one partition without generating a system reserved partition or system recovery partition. The only way to prevent Windows from creating another partition is to partition hard drive before installing.
Partition a hard drive during Windows setup
Windows build-in tool, Disk Management or Diskpart.exe can be used for hard drive partitioning. Disk Management can only be used when OS has been successfully loaded, so you can use Disk Management to create a new partition for another OS if you already have windows installed. If you want to create partition without Windows pre-installed on the hard drive, you can use a Windows installation disc to run Diskpart. The specific steps listed below:
1. Insert the installation disc, and boot your computer from it.
2. At the Windows Setup screen, press Shift+F10 simultaneously to open a command line prompt. If you use the New button to create partitions, it will generate a system partition for an MBR disk.
3. Type “diskpart” and press Enter.
4. At Diskpart>, run a few lines of commands to create a new partition:
в—† List disk
в—† Select disk [disk number]
в—† Create partition primary [size=n]
For example, the following command is to create a 30000 MB primary partition on disk 0:
в—† List disk
в—† Select disk 0
в—† Create primary partition size=30000
5. Then you will have created a partition around 30GB. You can use this command to create more partitions or exit.
If your hard drive has enough space, then it is recommended to allocate more than 100GB to the system drive because Windows update, installed programs, and other system files will keep consuming space on system partition. If you don’t have a Windows installation disc, then you can use third-party free partition manager software to create partition without operating system.
Create partitions without OS pre-installed with free partition manager
AOMEI Partition Assistant Standard is a freeware for disk and partition management that provides the ability to create bootable media, so you can partition a hard drive with or without OS pre-installed. If you have Windows installed on your hard drive, you can just free download this software and start to partition your hard drive without losing data. Let’s see how it works:
1. Boot your computer from the AOMEI bootable media you created. It will lead you to the main interface of AOMEI Partition Assistant.
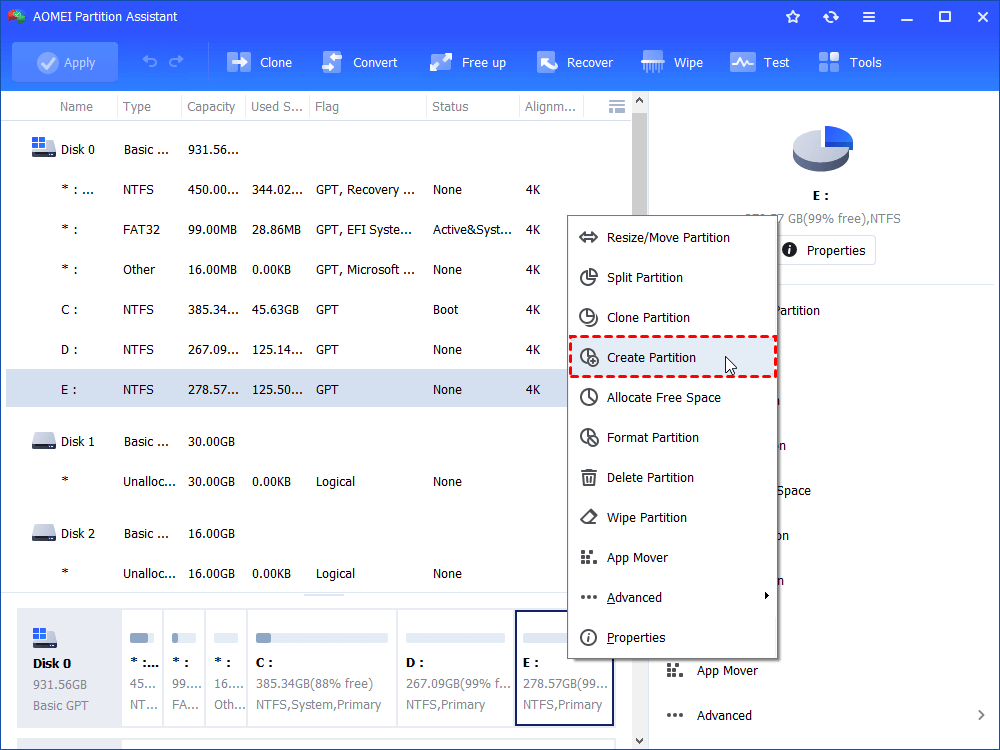
2. Right-click on unallocated space or a partition that is big enough to create a new partition, and then choose Create Partition button.
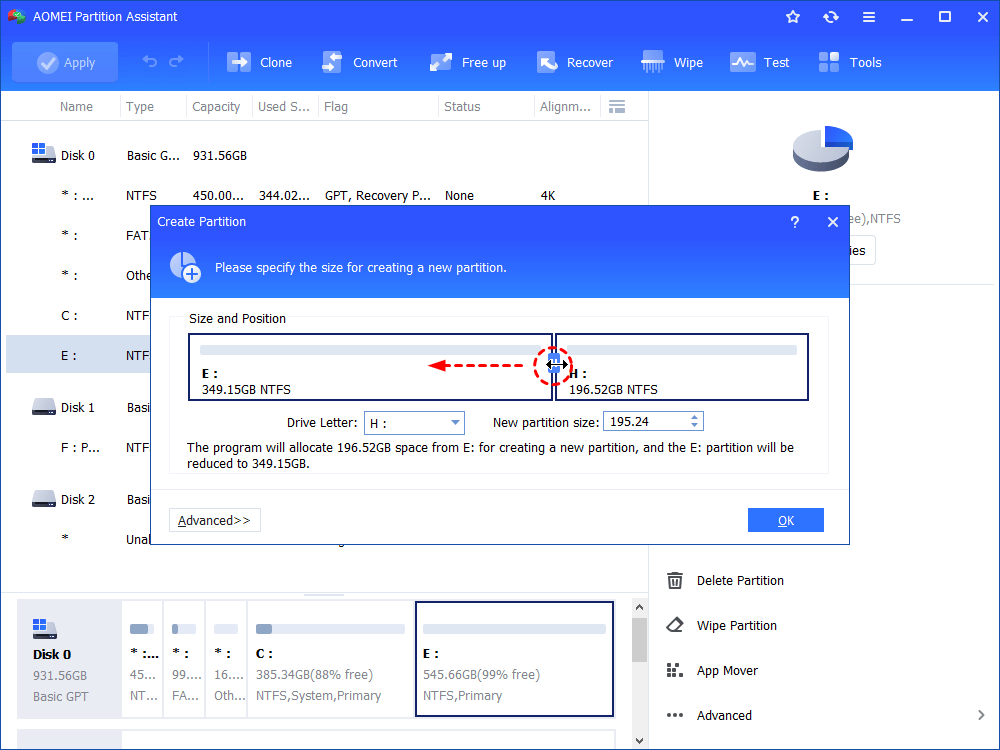
3. At the next screen, drag the slider or enter the amount of space to specify the partition size. You can also click Advanced option to see more options. Click OK when settings are done.
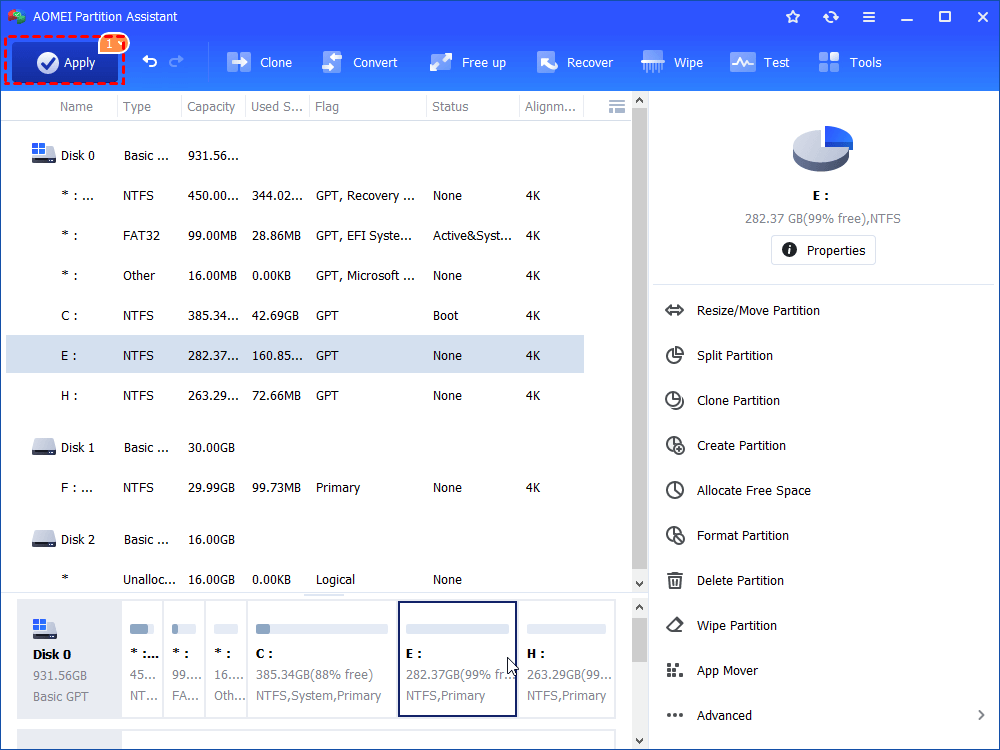
4. The program allows you to preview the partition layout without making any changes to your hard drive. If no problem, click Apply to run the operations.
It is really a good shot to create partition before installing another OS on your hard drive. Besides NTFS, AOMEI Partition Assistant also supports many other file systems including FAT32, FAT16, FAT12, exFAT, ReFS, and Ext2/Ext3/Ext4. The paid edition, like AOMEI Partition Assistant Professional or AOMEI Partition Assistant Server, provides even more advanced features like enabling you to migrating OS to GPT disk, converting dynamic disk into basic, etc.
How to Partition Hard Drive Disk without Formatting
The methods on this page can be applied to partition hard driveВ inВ Windows 10/8.1/8/7, Windows XP/Vista.В
Why Need Partition Hard Drive
Disk partitioning is a process of dividing a hard drive into several partitions -В managing the hard disk drive byВ shrinking, extending, deleting, creating partitions and change partition size, label, even location, etc. Why do we need to partition a hard drive? Here are the common reasons to partition a new/existing hard drive:
- To make full use of hard drive space, splittingВ it into several partitions.
- Operating System update.
- The changes in computer and hard drive usage.
- The change of computer users needs.
Hard drive partitions first being prepared for saving data, games, system, etc., normally, will be resized, moved, split, merged or created into new partitions in a new format or new size in Windows 10/8/7 or dual boot system.
Partition a new hard drive: If you buy a new hard drive and want to partition it, you need to initialize it before using it. Then follow the step-by-step tutorial to split it up.
Partition an existing hard drive: You’ll need to resize/move disk space for drive partition.
But to partition a hard drive without formatting it is very important for some specific purposes. How to partition hard drive disk without formatting it? Here, both Disk Management and third-party partition manager software can work.В
Solution 1: Partition hard drive without formatting using EaseUS partition manager
Professional partition manager software -В EaseUS Partition MasterВ can partition a hard drive with its advanced partition operations on your hard drive without formatting it, including resize and move partitions, convert partition, split partition, merge partitions, resize dynamic disk, etc.
Moreover, EaseUS Partition Master can extend or resize partition whenВ there is no unallocated space behind it that Disk Management can’t.
See how to partition a hard drive without formatting with EaseUS Partition Master on your own:
How to partition a new hard drive
Step 1. Open EaseUS Partition Master. Connect the hard drive or SSD to PC.
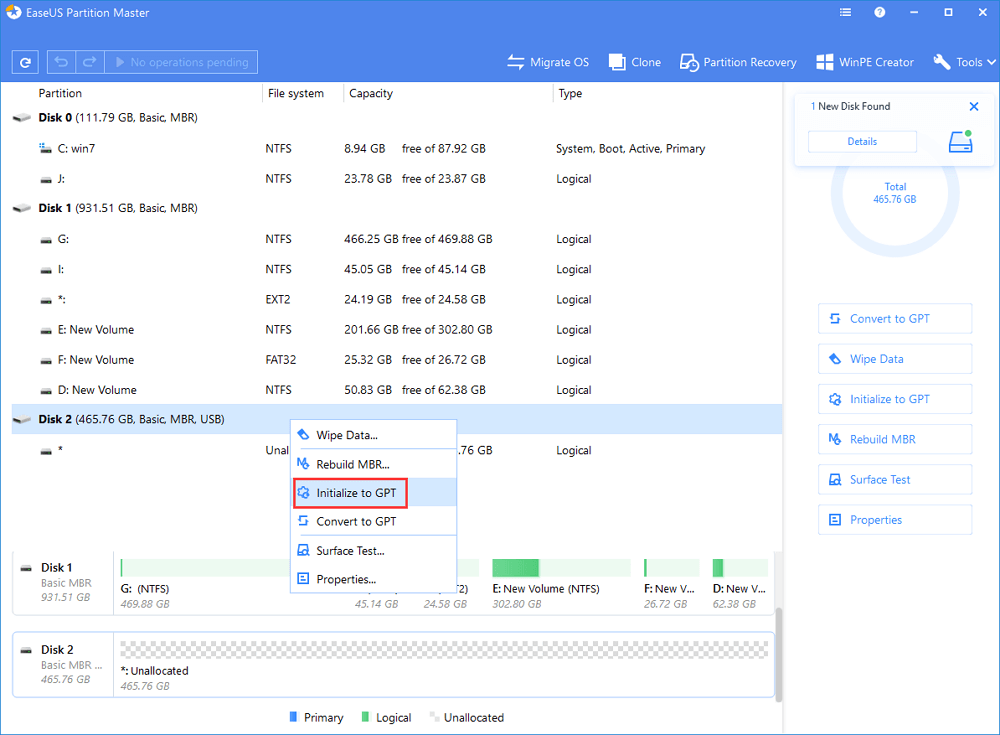
Right-click the target HDD or SSD and select «Initialize to MBR» or «Initialize to GPT» accordingly.
Fig 1. Initialize to MBR:
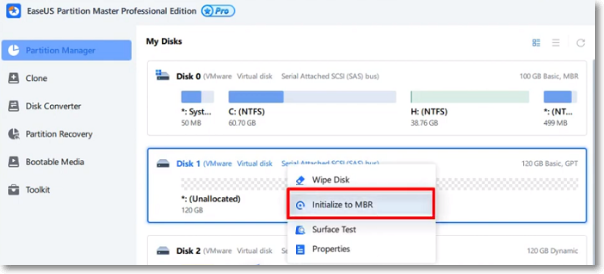
Fig 2. Initialize to GPT:
Step 2.В A pending operation of initializing disk to MBR or GPT disk will be added. Execute the operation and click «Apply».

After the initialization, So the next step is to partition hard drive in Windows 10.
How to partition an existing hard drive
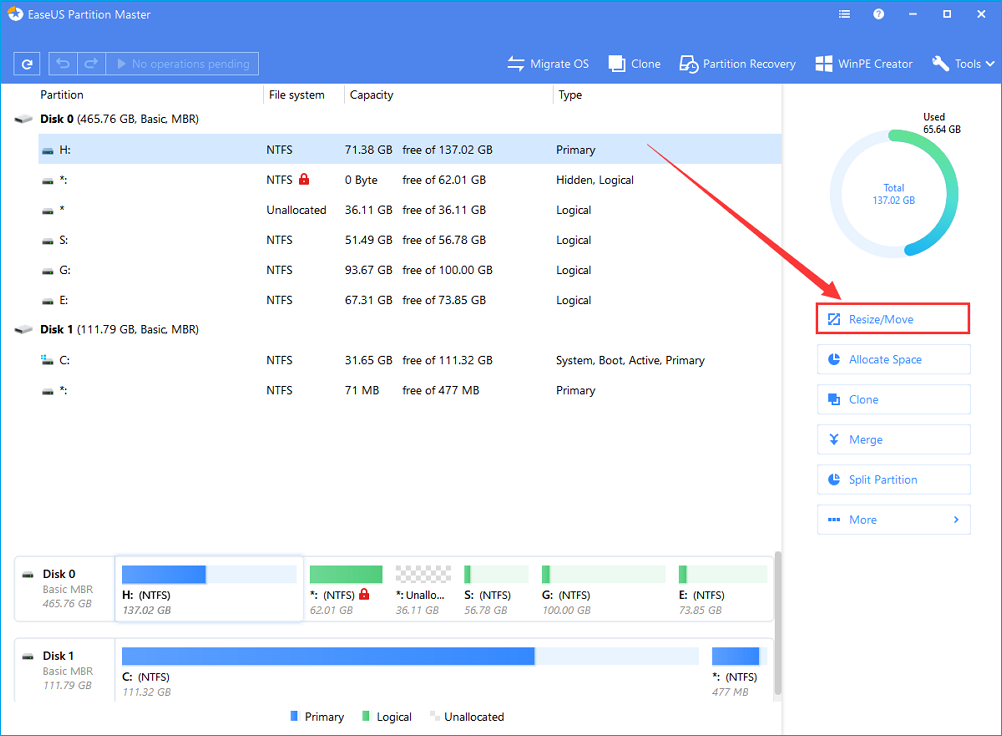
Step 1. Locate the Target Partition
To start extending partition, you should first locate the target partition andВ select «Resize/Move».
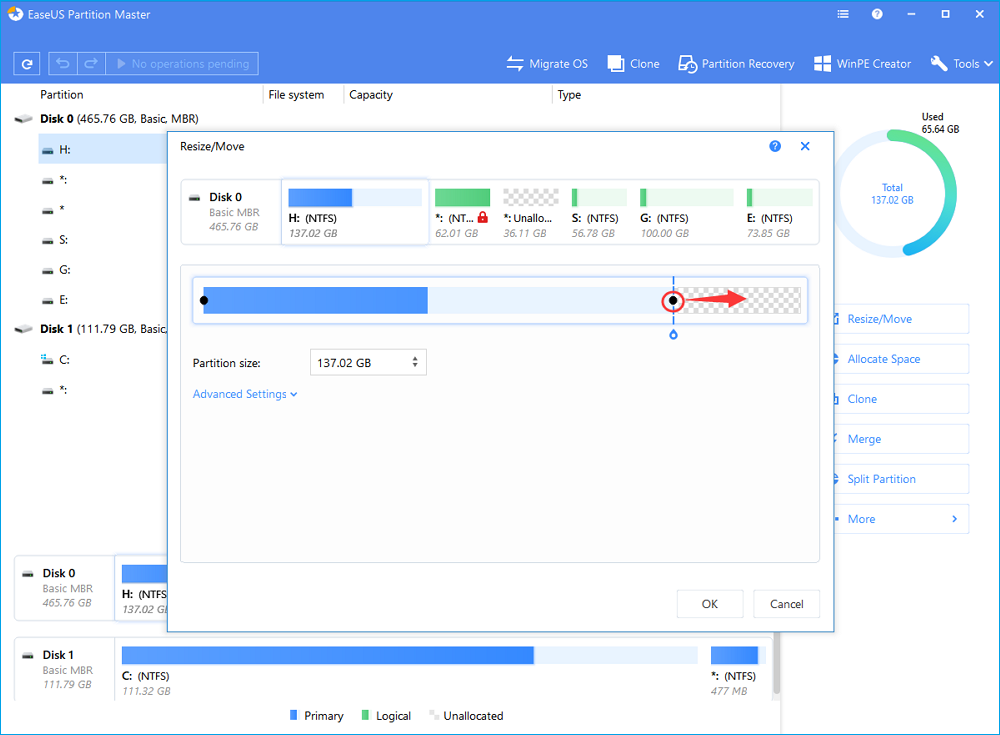
Step 2. Extend the Target Partition
Drag the partition panel rightward or leftward to add unallocated space into your current partition and clickВ «OK» to confirm.
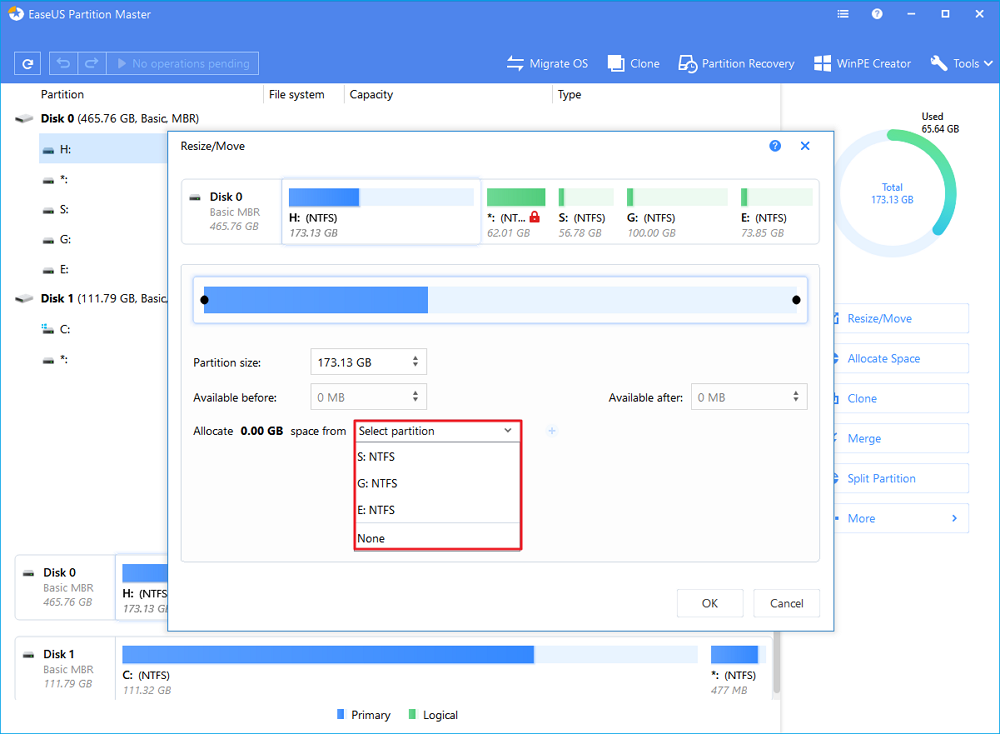
Extra Option: Get Space from Another Drive
If there isВ not enough unallocated space on your disk, right-click on a big partition withВ enough free space,В selectВ «Allocate space «.
Then select the target partition thatВ you want to extend at the allocate space to column.
Step 3. Execute Operations to Extend Partition.
Drag the dots of the target partition into the unallocated space and click «OK».
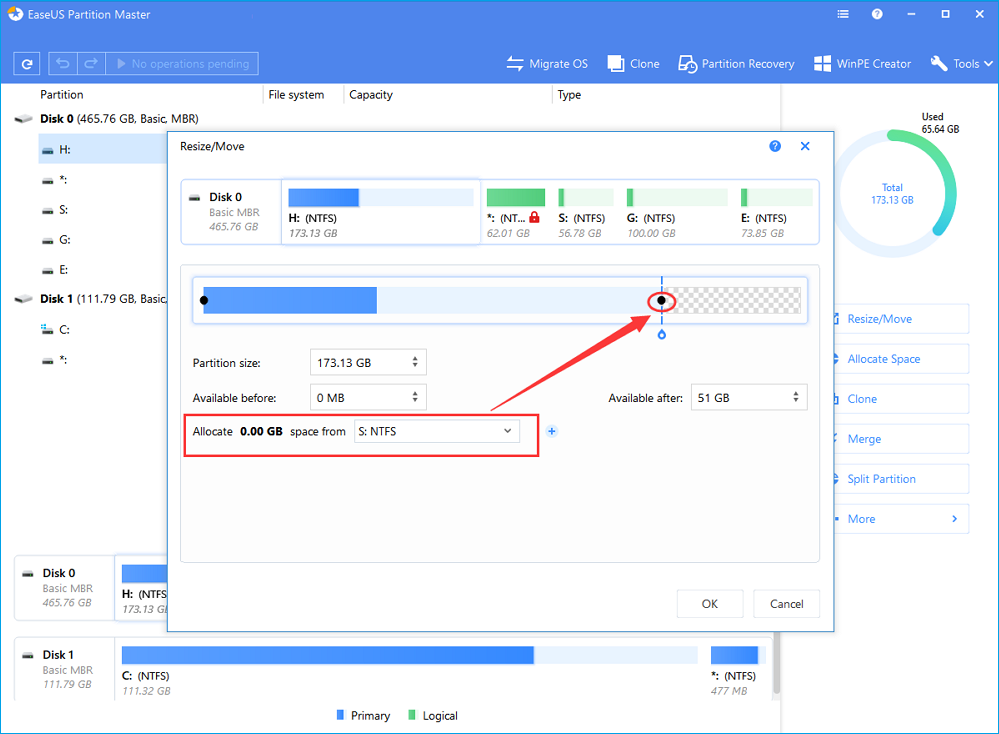
Then Click the «Execute Operation» button and click «Apply» to keep all the changes.В
In addition, you can also apply some advanced featuresВ В as listed below to manage your hard drive in all Windows OS:
If you think this hard drive partitioning software is useful, why not apply it to manage different Windows OS partition problems with ease.
Solution 2: Partition hard drive with Disk Management
Before you start partition hard drive with Disk Management, you should first understand that it has different features in different Windows OS.
- In Windows 10/8/7,В Vista and Windows Server 2008,В Disk Management can shrink volume, extend volume, shrink volume, create volume, delete the volume, format volume, etc. on a hard drive.
- InВ Windows 2000/XP and Windows Server 2003,В Disk Management can onlyВ create a partition, delete partition, format partition, change the drive letter on a hard drive.
So how to partition hard drive with Disk Management? Let’s see:
How to partition a new hard drive
Step 1: Open Disk Management
Right-click on This PC/My Computer > Click «Manage» > Enter Device Manager and click «Disk Management».
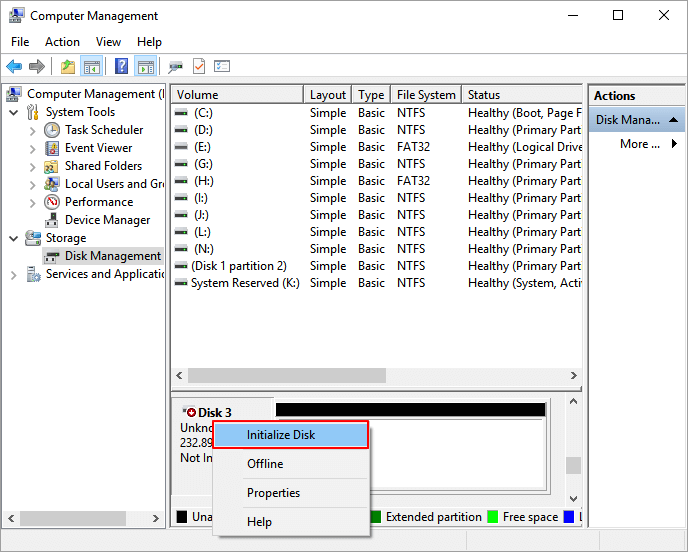
Step 2: Initialize the new hard drive
Step 3. Right-click on the unallocated space and select «New Simple Volume» to create a new partition.
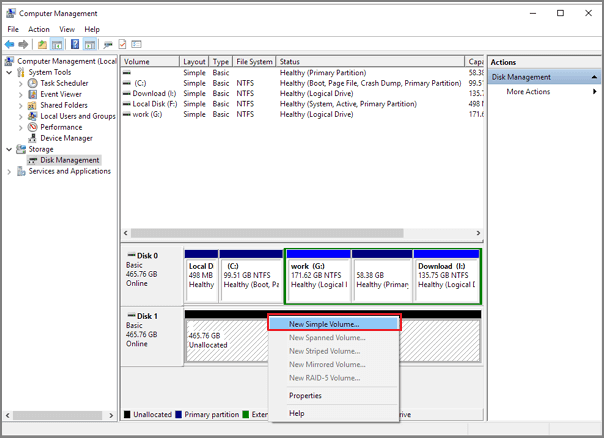
You’ll then enter the New Simple Volume Wizard to choose the volume size, drive letter, and file system.В
How to partition an existing hard drive
- Step 1: Open Disk Management
- Right-click on This PC/My Computer > Click «Manage» > Enter Device Manager and click «Disk Management».
- Step 2: Partition hard drive
- Shrink partition:
- 1. Right-click on the partition that you want to shrink and select «Shrink Volume».
2. Adjust the partition size and «Shrink» to confirm. 
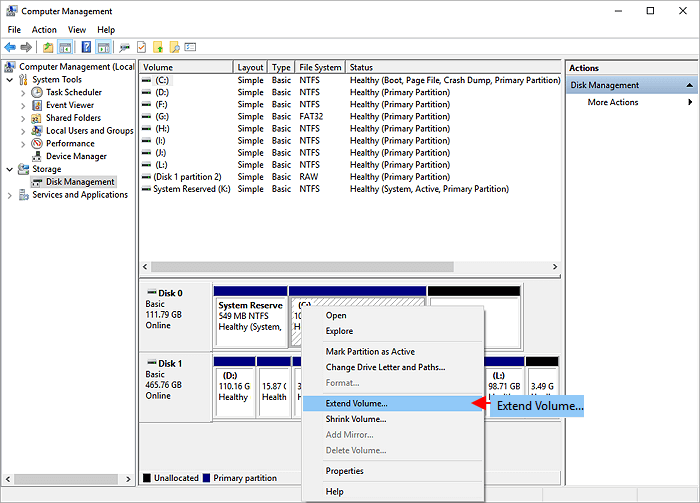
- Extend partition:
- 1. Shrink partition next to the target partition that you want to extend in advance.
2. Right-click on the target partition and select «Extend Volume». - 3. Click «Next» to continue, add the unallocated space to extend the target partition. Click «Next» and «Finish» to complete.
- Create partition: (formatting required)
- 1. Right-click on the unallocated space, select «New Simple Volume».
- 2. Click «Next» to continue, set the new partition size, drive letter, file system, click «Finish».
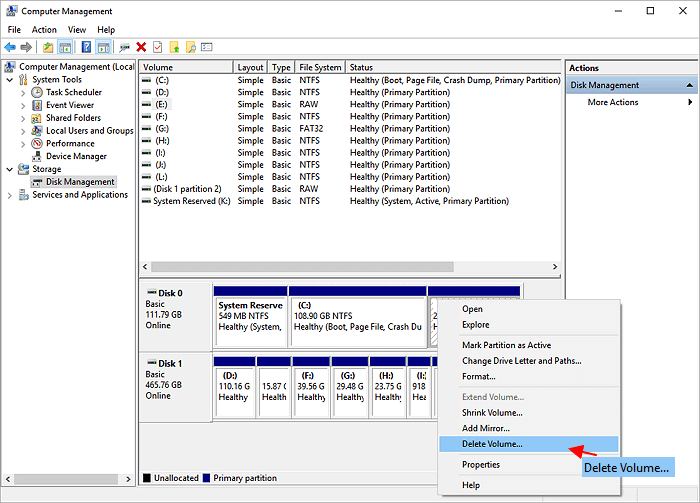
Wait for the formatting complete. - Delete partition:
- Right-click on the partition that you want to delete, select «Delete Volume» and select «Yes».
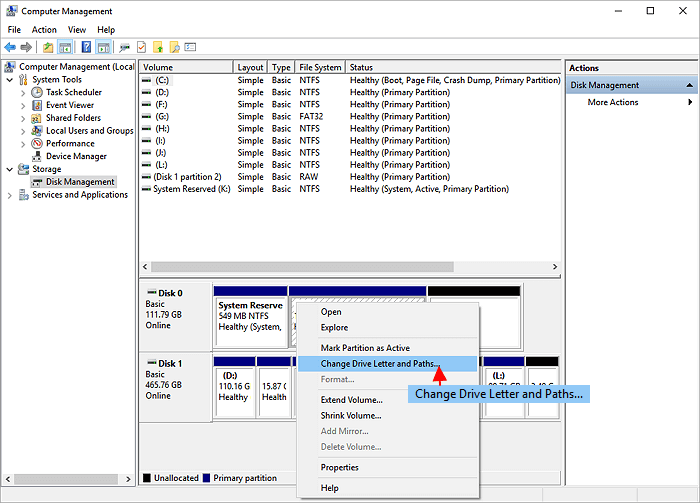
- Change drive letter:
- 1. Right-click on the partition and select «Change Drive Letter and Paths».
2. Click «Change» to set a new drive letter for your partition.
Although, Disk Management is capable of dealing with most simple partition management tasks. It still has cons to solve some complex problems that you’ll need a third-partyВ partition manager like EaseUS Partition Master for help:
- It can’t re-partition hard drive especially create a new partition without formatting.В
- It can’t extend system partition when the unallocated space is not behind the system partition.В
- It has no «Move Partition» feature to move the unallocated space next to the volume which you want to extend.
- It can’t convert disk to MBR/GPT.
- It can’t convert Dynamic disk to Basic disk.
In all situations, a third-party partition manager software is highly required since Disk Management has so many limitations when partitioning a hard drive. EaseUS Partition Master can always be your best choice.
The Bottom Line
This article focuses on how to partition a hard drive without formatting via EaseUS Partition Manager and Disk Management. For partition a new or existing hard drive, the third-party software provides more convenience than Disk Management.


