- How to Add User to a Group in Linux
- What is a User Group in Linux
- Primary Group
- Secondary Groups
- How to Create a User Group
- How to Add User to Group
- Add an Existing User to an Existing Group
- Add a User to Multiple Groups at Once
- Create a User and Add to Group
- Change a Users Primary Group
- How to Remove a User From a Group
- Delete a Group
- How to List Groups in Linux
- Other Common Groups
- How to Add or Remove a User from a Group in Linux
- Check a User Group in Linux
- Add a User to a Group in Linux
- Remove a User from a Group in Linux
- If You Appreciate What We Do Here On TecMint, You Should Consider:
- How to Manage Users with Groups in Linux
- Creating the users
- Creating groups and adding users
- Giving groups permissions to directories
- Using access control lists
- All the control you need
How to Add User to a Group in Linux
Home » SysAdmin » How to Add User to a Group in Linux
In Linux, a group is a unit in which you can manage privileges for several users simultaneously. Linux groups allow you to manage multiple user permissions quickly and easily.
In this tutorial learn how user groups work in Linux, and how to add users to specific groups.

- A system running Linux
- A user account with sudo or root privileges
- Access to a terminal window/command line (Ctrl-Alt-T, Ctrl-Alt-F2)
What is a User Group in Linux
In Linux, different users have different roles or responsibilities. Some users might need the ability to execute applications, while others are restricted from accessing specific files and folders.
Groups let you create categories of users with pre-set permissions. Instead of managing permissions for each user account, you can simply add a user to a group to grant the appropriate permissions.
Primary Group
The primary group is set to the logged-in user. Any files the user creates are automatically added to that group. A user can only belong to one primary group at a time. A primary group with the same name as the user is created, and any files created by the user are included in that group.
Secondary Groups
A user can belong to any number of secondary groups (including none). Secondary groups are created to manage individual files and software applications. Members of the group inherit the read, write, and execute privileges for that group.
How to Create a User Group
To create a new group, enter the following:
Replace new_group with the name you want for your new group.

How to Add User to Group
Add an Existing User to an Existing Group
Use the adduser command to add a user to a group:

Use the useradd command to add a user:
You can also use the usermod command to add a user to a group:
The usermod command uses the –append and –group options to append the user to a particular group. Without using –append , the user could be dropped from other groups.
Add a User to Multiple Groups at Once
Use the usermod command to specify multiple groups to add to:
Create a User and Add to Group
This is useful for creating a new user on the fly for a specific software application. Enter the following:
Next, assign a password to the new user:
Change a Users Primary Group
All previous commands have been used to manage the secondary groups a user belongs to. In most cases, a user’s primary group is the same as their username.
To change a users primary group, enter the command:
The lower-case –g specifies the primary group. (Upper-case –G refers to a secondary group.) A user can only have one primary group, so the old primary group user_name won’t be primary anymore for this user.
How to Remove a User From a Group
The gpasswd tool is used for managing groups. To remove a user from a group:
Note: The gpasswd tool can also be used for other administrative tasks such as defining group administrators and setting a password for access to group resources. Use the Linux man command man gpasswd for details.
Delete a Group
To delete a group, use the command:

How to List Groups in Linux
Linux comes with several different groups by default. Some of these, like the sudo group, can be used to grant permissions. Others are hidden, used for system tasks.
To view a list of groups on your system by displaying the /etc/groups file:
To display the groups that a user belongs to with the groups command:

The image above shows the groups that the logged-in user ‘sofija’ belongs to. You can display groups for a different user by specifying the username:
Another method to display the groups a user belongs to, including user ID (uid) and group ID (gid), is to use the id command:
Other Common Groups
There are a several common group names you might encounter in Linux:
- sudo – A member of this group can use the sudo command to elevate their privileges
- wheel – This is an older method of granting sudo-like privileges
- cdrom – Allows the user to mount the optical drive
- adm – Allows the user to monitor Linux system logs
- lpadmin – Allows the user to configure printers
- plugdev – Allows the user to access external storage devices
You should now have a good understanding of Linux groups and how to add and remove members from those groups. For more information on specific commands, you can enter the man command to display a manual in your terminal window.
Источник
How to Add or Remove a User from a Group in Linux
Linux is by default a multi-user system (meaning many users can connect to it simultaneously and work), thus user management is one of the fundamental tasks of a system administrator. User management includes everything from creating, updating, and deleting user accounts or user groups on a Linux system.
In this short quick article, you will learn how to add or remove a user from a group in a Linux system.
Check a User Group in Linux
To check a user group, just run the following groups command and provide the username (tecmint in this example) as an argument.
To check your own groups, just run the groups command without any argument.
![]() Check a User Group in Linux
Check a User Group in Linux
Add a User to a Group in Linux
Before trying to add a user to a group, ensure that the user exists on the system. To add a user to a certain group, use the usermod command with the -a flag which tells the usermod to add a user to the supplementary group(s), and the -G option specifies the actual groups in the following format.
In this example, tecmint is the username and postgres is the group name:
![]() Add User to Group in Linux
Add User to Group in Linux
Remove a User from a Group in Linux
To remove a user from a group, use the gpasswd command with the -d option as follows.
![]() Remove User from Group in Linux
Remove User from Group in Linux
Additionally, on Ubuntu and it’s derivative, you can remove a user from a specific group using the deluser command as follows (where tecmint is the username and postgres is the group name).
For more information, see the man pages for each of the different commands we have used in this article.
You will also find the following user management guides very useful:
If You Appreciate What We Do Here On TecMint, You Should Consider:
TecMint is the fastest growing and most trusted community site for any kind of Linux Articles, Guides and Books on the web. Millions of people visit TecMint! to search or browse the thousands of published articles available FREELY to all.
If you like what you are reading, please consider buying us a coffee ( or 2 ) as a token of appreciation.

We are thankful for your never ending support.
Источник
How to Manage Users with Groups in Linux
When you administer a Linux machine that houses multiple users, there might be times when you need to take more control over those users than the basic user tools offer. This idea comes to the fore especially when you need to manage permissions for certain users. Say, for example, you have a directory that needs to be accessed with read/write permissions by one group of users and only read permissions for another group. With Linux, this is entirely possible. To make this happen, however, you must first understand how to work with users, via groups and access control lists (ACLs).
We’ll start from the beginning with users and work our way to the more complex ACLs. Everything you need to make this happen will be included in your Linux distribution of choice. We won’t touch on the basics of users, as the focus on this article is about groups.
For the purpose of this piece, I’m going to assume the following:
You need to create two users with usernames:
You need to create two groups:
Olivia needs to be a member of the group editors , while nathan needs to be a member of the group readers. The group readers needs to only have read permission to the directory /DATA , whereas the group editors needs to have both read and write permission to the /DATA directory. This, of course, is very minimal, but it will give you the basic information you need to expand the tasks to fit your much larger needs.
I’ll be demonstrating on the Ubuntu 16.04 Server platform. The commands will be universal—the only difference would be if your distribution of choice doesn’t make use of sudo . If this is the case, you’ll have to first su to the root user to issue the commands that require sudo in the demonstrations.
Creating the users
The first thing we need to do is create the two users for our experiment. User creation is handled with the useradd command. Instead of just simply creating the users we need to create them both with their own home directories and then give them passwords.
The first thing we do is create the users. To do this, issue the commands:
We have now created our users. If you look in the /home directory, you’ll find their respective homes (because we used the -m option, which creates a home directory).
Next each user must have a password. To add passwords into the mix, you’d issue the following commands:
When you run each command, you will be prompted to enter (and verify) a new password for each user.
That’s it, your users are created.
Creating groups and adding users
Now we’re going to create the groups readers and editors and then add users to them. The commands to create our groups are:
That’s it. If you issue the command less /etc/group , you’ll see our newly created groups listed ( Figure 1 ).
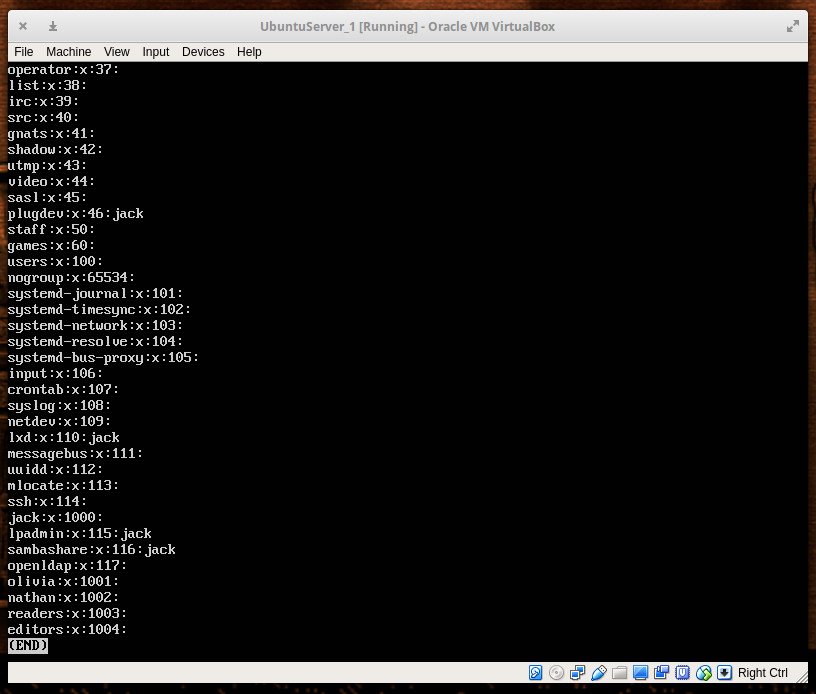 Figure 1: Our new groups ready to be used.
With our groups created, we need to add our users. We’ll add user nathan to group readers with the command:
We’ll add the user olivia to the group editors with the command:
Now we’re ready to start managing the users with groups.
Giving groups permissions to directories
Let’s say you have the directory /READERS and you need to allow all members of the readers group access to that directory. First, change the group of the folder with the command:
Next, remove write permission from the group with the command:
Now we remove the others x bit from the /READERS directory (to prevent any user not in the readers group from accessing any file within) with the command:
At this point, only the owner of the directory (root) and the members of the readers group can access any file within /READERS .
Let’s say you have the directory /EDITORS and you need to give members of the editors group read and write permission to its contents. To do that, the following command would be necessary:
At this point, any member of the editors group can access and modify files within. All others (minus root) have no access to the files and folders within /EDITORS .
The problem with using this method is you can only add one group to a directory at a time. This is where access control lists come in handy.
Using access control lists
Now, let’s get tricky. Say you have a single folder— /DATA— and you want to give members of the readers group read permission and members of the group editors read/write permissions. To do that, you must take advantage of the setfacl command. The setfacl command sets file access control lists for files and folders.
The structure of this command looks like this:
Where OPTION is the available options, X is either u (for user) or g (for group), NAME is the name of the user or group, and DIRECTORY is the directory to be used. We’ll be using the option -m for modify. So our command to add the group reader for read access to the /DATA directory would look like this:
Now any member of the readers group can read the files contained within /DATA , but they cannot modify them.
To give members of the editors group read/write permissions (while retaining read permissions for the readers group), we’d issue the command;
The above command would give any member of the editors group both read and write permission, while retaining the read-only permissions to the readers group.
All the control you need
And there you have it. You can now add members to groups and control those groups’ access to various directories with all the power and flexibility you need. To read more about the above tools, issue the commands:
Источник


