- Hide ALL IP для Windows
- Отзывы о программе Hide ALL IP
- Hide opened windows with ALT+TAB in Windows 10
- About Sergey Tkachenko
- 8 thoughts on “ Hide opened windows with ALT+TAB in Windows 10 ”
- Hide Windows Security app notifications
- Use Group Policy to hide non-critical notifications
- Use Group Policy to hide all notifications
- How to show File Extensions in Windows 10
- What are File Extensions & how are they useful
- Show File Extensions in Windows 10
- 1] Through Folder or File Explorer Options
- 2] Via Windows File Explorer
- 3] Using the Registry Editor
Hide ALL IP для Windows
| Оценка: |
3.33 /5 голосов — 3 |
| Лицензия: | Условно-бесплатная | Цена: $29.00 |
| Ограничение: | 3 дня |
| Версия: | 2019.04.14 | Сообщить о новой версии |
| Обновлено: | 23.04.2019 |
| ОС: | Windows 10, 8.1, 8, 7, Vista, XP |
| Интерфейс: | Английский |
| Разработчик: | www.hideallip.com |
| Категория: | другое |
| Загрузок (сегодня/всего): | 0 / 3 194 | Статистика |
| Размер: | 5,31 Мб |
| СКАЧАТЬ | |

Hide ALL IP — удобное приложение для подмены IP-адреса и анонимного серфинга в Сети. Поможет скрыть реальный IP и маршруты интернет-трафика через зашифрованные интернет-серверы.
Программа достаточна проста в управлении. После запуска автоматически идет подключение к другому IP, об этом сообщается в трее слева список, вы выбираете страну и жмете «Connect». Теперь все входящие и исходящие соединения зашифровываются. Это позволяет частично обезопасить себя от хакеров и различного рода злоумышленников.
- Минимум настроек.
- Работа в фоновом режиме.
- Интеграция в популярные браузеры.
- Самостоятельное добавление страны для нового IP адреса.
- Возможность использовать веб-сервисы, имеющие территориальные ограничения.
- Поддерживает приложения на базе UDP. С ней вы можете играть в онлайн игры, смотреть Интернет ТВ (Hulu,BBC iplayer и т.д.), общаться через мессенджеры.
- Помогает уменьшить Ping в онлайн-играх. Также найдет лучший по скорости сервер для любой игры.
- Блокирует запросы сайтов, которые пытаются установить месторасположение пользователя.
- Технология Tunnel помогает обойти защиту любого брандмауэра.
- Логи НЕ сохраняются. Чистит куки и историю посещений.
- Автоматическое обновление.

AdwCleaner — бесплатная программа от Malwarebytes для борьбы с нежелательным и рекламным ПО, которые.
ESET Uninstaller — небольшая утилита для полной деинсталляции антивирусных продуктов вендора ESET.
Avast Clear — утилита для удаления приложений avast, когда стандартным путём из панели управления Windows удалить невозможно.
Как часто вы, устанавливая какую-либо программу, получали в довесок ворох ненужных.
Простая в использовании, легковесная и портативная утилита, с помощью которой можно легко.
Shadow Security Scanner — сканер сетевой безопасности который благодаря уникальным методам позволит.
Отзывы о программе Hide ALL IP
 Admin
Admin
Отзывов о программе Hide ALL IP 2019.04.14 пока нет, можете добавить.
Hide opened windows with ALT+TAB in Windows 10
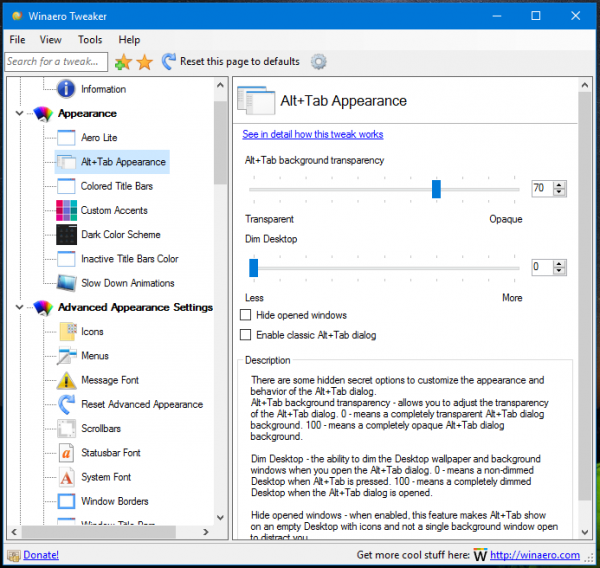
Recently, we reviewed secret hidden options which allow you to tweak the transparency of the Alt+Tab dialog in Windows 10. In this article, we will see how to make the Alt+Tab dialog hide open windows while cycling through them in the Alt+Tab user interface. Here is how it can be done.
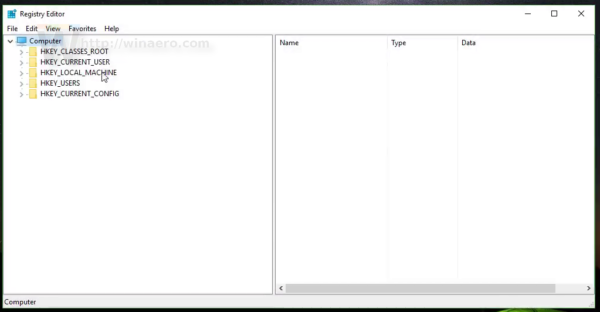
- Open Registry Editor.

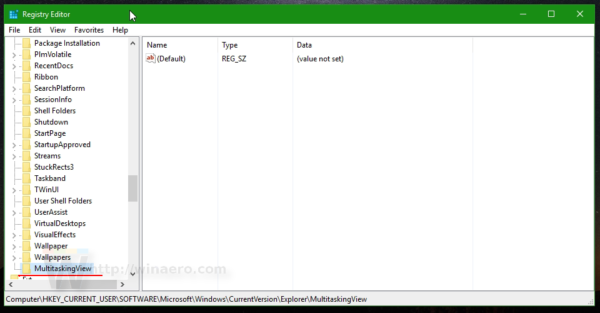
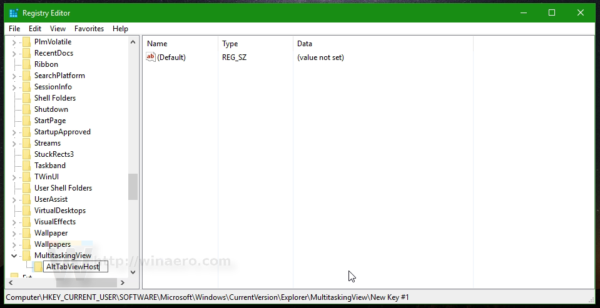
- Go to the following Registry key:
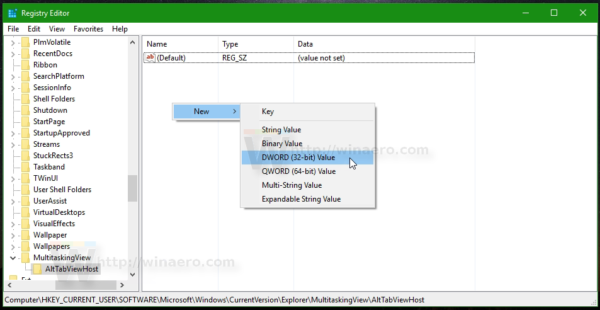
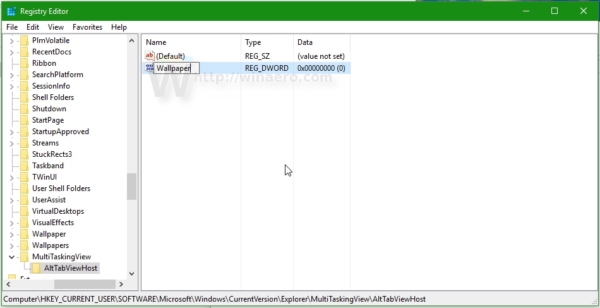
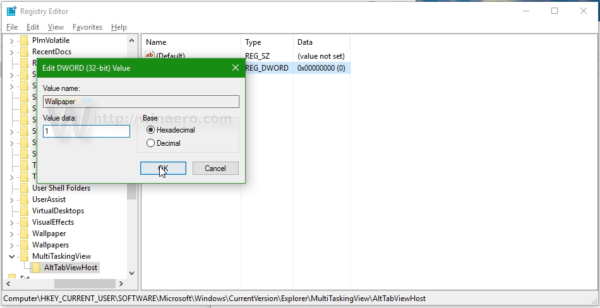
Set its value data to 1.
1 — hide background windows.
0 or delete the Wallpaper value — means the default behavior with windows visible on the Desktop.
In the following example, I set it to 1:
This is the default appearance and behavior of the Alt+Tab dialog: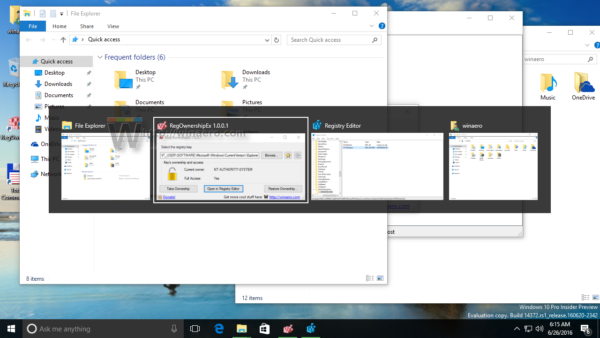
And this is how it looks when the value data of «Wallpaper» is set to 1: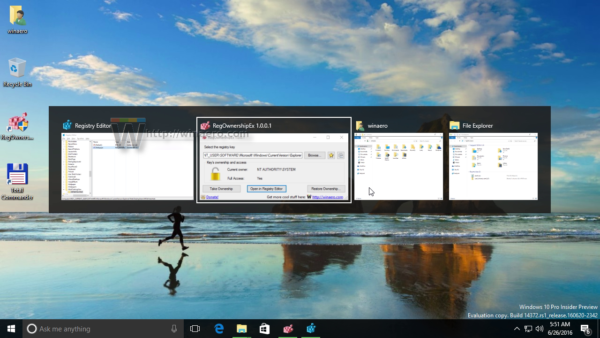
Use Winaero Tweaker
If you would like to avoid Registry editing, you can use Winaero Tweaker. It will allow adjusting all the mentioned settings using a user friendly interface.
Watch the following video to see this tweak in action:
Tip: you can subscribe to our YouTube channel .
Winaero greatly relies on your support. You can help the site keep bringing you interesting and useful content and software by using these options:
Share this post
About Sergey Tkachenko
Sergey Tkachenko is a software developer from Russia who started Winaero back in 2011. On this blog, Sergey is writing about everything connected to Microsoft, Windows and popular software. Follow him on Telegram, Twitter, and YouTube.
8 thoughts on “ Hide opened windows with ALT+TAB in Windows 10 ”
thanks for the informative article. I notice in the pictures that you are probably using the “Print Screen” function to take pictures of the whole desktop, and then crop them manually to the window in front.
Just to let you know, you can avoid the tedious step of cropping by pressing “Prt Sc” + “Alt”, which will grab only the portion of the screen occupied by your selected window. This makes for much nicer pictures, and judging from the focus of your site you could also write an article on it.
Could you please tell me how to adjust start menu transparency?
Thank you very much!
To be honest, I have no idea.
It is not tunable as I know unless you are using a third party start menu like Classic Shell.
http://classicshell.net
If you use Classic Shell, see this: http://www.classicshell.net/forum/viewtopic.php?f=7&t=1178
I want to ask please if there any way to hide the program icon and its name when alt+tab on Windows 10.
see the screenshot please:
https://i.imgur.com/BjxOg0e.png
any help would be much appreciated. Thanks in advance and Best Regards.
AFAIK, Windows 10 doesn’t support this. However, you can go with something like VistaSwitcher.
Сергей, добрый день!
Прогуглил вдоль и поперёк но нигде не нашёл решения. Есть ли в Win10 способ скрывать все открытые окна кроме выбранного, во время навигации при использовании ALT+TAB (на манер превьюшек открытых приложений на таскбаре)? Так же подобное поведение было в Win7. Ваше решение хорошее но оно скрывает все без исключения открытые окна, оставляя только рабочий стол.
Is there a way to hide all opened windows/apps except chosen window/app while using ALT+TAB?
Увы, такого решения для Windows 10 не существует. Во всяком случае, штатными средствами.
Hide Windows Security app notifications
Applies to
- Windows 10, version 1809 and above
Audience
- Enterprise security administrators
Manageability available with
The Windows Security app is used by a number of Windows security features to provide notifications about the health and security of the machine. These include notifications about firewalls, antivirus products, Windows Defender SmartScreen, and others.
In some cases, it may not be appropriate to show these notifications, for example, if you want to hide regular status updates, or if you want to hide all notifications to the employees in your organization.
There are two levels to hiding notifications:
- Hide non-critical notifications, such as regular updates about the number of scans Microsoft Defender Antivirus ran in the past week
- Hide all notifications
If you set Hide all notifications to Enabled, changing the Hide non-critical notifications setting will have no effect.
You can only use Group Policy to change these settings.
Use Group Policy to hide non-critical notifications
You can hide notifications that describe regular events related to the health and security of the machine. These are notifications that do not require an action from the machine’s user. It can be useful to hide these notifications if you find they are too numerous or you have other status reporting on a larger scale (such as Update Compliance or Microsoft Endpoint Configuration Manager reporting).
This can only be done in Group Policy.
Requirement: You must have Windows 10, version 1903 or higher. The ADMX/ADML template files for earlier versions of Windows do not include these Group Policy settings.
On your Group Policy management machine, open the Group Policy Management Console, right-click the Group Policy Object you want to configure and click Edit.
In the Group Policy Management Editor go to Computer configuration and click Administrative templates.
Expand the tree to Windows components > Windows Security > Notifications. For Windows 10 version 1803 and below the path would be Windows components > Windows Defender Security Center > Notifications
Open the Hide non-critical notifications setting and set it to Enabled. Click OK.
Use Group Policy to hide all notifications
You can hide all notifications that are sourced from the Windows Security app. This may be useful if you don’t want users of the machines from inadvertently modifying settings, running antivirus scans, or otherwise performing security-related actions without your input.
This can only be done in Group Policy.
Requirement: You must have Windows 10, version 1903 or higher. The ADMX/ADML template files for earlier versions of Windows do not include these Group Policy settings.
On your Group Policy management machine, open the Group Policy Management Console, right-click the Group Policy Object you want to configure and click Edit.
In the Group Policy Management Editor go to Computer configuration and click Administrative templates.
Expand the tree to Windows components > Windows Security > Notifications. For Windows 10 version 1803 and below the path would be Windows components > Windows Defender Security Center > Notifications.
For Windows 10 version 2004 and above the path would be Windows components > Windows Security > Notifications.
Open the Hide all notifications setting and set it to Enabled. Click OK.
You can use the following registry key and DWORD value to Hide all notifications. [HKEY_LOCAL_MACHINE\SOFTWARE\Policies\Microsoft\Windows Defender Security Center\Notifications] «DisableNotifications»=dword:00000001 You can use the following registry key and DWORD value to Hide not-critical notifications. [HKEY_LOCAL_MACHINE\SOFTWARE\Policies\Microsoft\Windows Defender Security Center\Notifications] «DisableEnhancedNotifications»=dword:00000001
How to show File Extensions in Windows 10
File Extension is that which identifies the file type. If you are a regular Windows user, then it is not at all a problem to identify the file type. For it is very important to see file extension to identify the type of file you are trying to open from a security point of view. So in this post, we will see how to hide or show File Extensions in Windows 10/8/7 and why you should show them.
Since file names allow you to use multiple full stops, the real name of a malware file could be realword .docx.exe . But because you have not set Windows to show file extensions, you would see only realword .docx . Thinking its a Word document, you could well end up clicking on it and infecting your computer. If you had, on the other hand, set your PC to show file extensions, you would see its full name – realword .docx.exe , which would help you to identify that it was actually an executable file and in all probability a malware file.
What are File Extensions & how are they useful
Different file types have different extensions. Audio files have .mp3, .wav, .wma, and more based on the program used to open that file. File extensions also help the operating system to identify the corresponding program to open that particular file. So, you should be able to see file extensions to be at the safer side, and we will let you know how to enable options to see file extensions in Windows.
As mentioned earlier, by default Windows does not show file extensions and they are hidden. But, you can toggle the option to see them.
Show File Extensions in Windows 10
There are five ways how you can go about accessing this setting:
- Through the File Explorer Options
- Through Windows Explorer Ribbon
- Using the Registry
- Using Command Prompt
- Using Group Policy Editor.
1] Through Folder or File Explorer Options
Open Control Panel > Appearance and Personalization. Now, click on Folder Options or File Explorer Option, as it is now called > View tab.
In this tab, under Advanced Settings, you will see the option Hide extensions for known file types. Uncheck this option and click on Apply and OK.
Windows 10 users may also search for File Explorer Options in Start search box and open this box.
Now, you can see file extensions for all files anywhere on your Windows system.
In Windows 10/8.1 Explorer, you can access File Explorer Options via Explorer.
Click View > Options > Change folder and search options.
Once here, you can do the needful as explained above.
In Windows 7, open Explorer, press Alt on your keyboard to make the Classic bar appear. Next, click on Tools > Folder Options. Now follow the steps mentioned above.
These are very simple steps to follow, and you do not need any third-party software to view file extensions. Windows provides us with everything which can be easily achieved, and the point lies in knowing and implementing them. This is the first way to see file extensions in Windows 7.
2] Via Windows File Explorer
Open Explorer and click on the View tab. Simply select the File name extensions checkbox, and you are all set.
3] Using the Registry Editor
Hit the WINKEY + R button combination to launch the Run utility, type in regedit and hit Enter. Once Registry Editor opens, navigate to the following key-
Look up for a DWORD entry labeled as HideFileExt.
Double click on the mentioned DWORD entry and set its value as 0. This will show up the hidden file extensions.
A value of 0 will hide the file extensions.
Exit the Registry Editor and then reboot your computer for the changes to take effect.
4] Use Windows Command Prompt
This fix can be used in both the scenarios mentioned above. Insert a bootable drive of Windows 10 installer.
Start by hitting the WINKEY + X combinations and select Command Prompt (Admin) to launch Command Prompt with Administrator Privileges.
Navigate to the root location of that bootable device inside the Command Prompt command line. Once you get there, type in the following to show the file extensions-
And then hit Enter.
You can also enter the following command to hide the file extensions,
5] Using Group Policy Editor
You can also use the Group Policy Editor and change the setting here:
User Configuration > Preferences > Control Panel Settings > Folder Options.
Set “Show hidden files and folders” and uncheck “Hide extensions for known file types”.
Thus, you can set your Windows to show file extensions in Windows 10/8. If you have anything to add, please do share it with us through comments.
Date: March 22, 2020 Tags: Explorer, Features


