- Графические интерфейсы Linux
- Budgie — графическая оболочка
- Cinnamon — среда рабочего стола
- Enlightenment
- GNOME — среда рабочего стола
- KDE (Plasma) — среда рабочего стола
- LXDE — lightweight desktop environment
- LXQt — легковесная среда рабочего стола
- MATE — продолжение развития классического Gnome
- Openbox — быстрый оконный менеджер
- Window Maker
- Graphical user interface linux
- 21.1 X Window System #Edit source
- 21.2 Installing and Configuring Fonts #Edit source
- 21.2.1 Showing Installed Fonts #Edit source
- 21.2.2 Viewing Fonts #Edit source
- 21.2.3 Querying Fonts #Edit source
- 21.2.4 Installing Fonts #Edit source
- 21.2.5 Configuring the Appearance of Fonts #Edit source
- 21.2.5.1 Configuring Fonts via sysconfig #Edit source
- 21.2.5.2 Diving into Fontconfig XML #Edit source
Графические интерфейсы Linux
В данном разделе сайта публикуется информация о графических интерфейсах операционной системы Linux. Интерфейсы разделены на две группы: среды рабочего стола и оконные менеджеры.
Среда рабочего стола Linux (Desktop Environment) — это комплексная готовая к работе оболочка. Обычно среда рабочего стола включает панель задач, функциональные меню, менеджер входа в систему, программы настройки, базовые программы и другие функциональные элементы, включая оконный менеджер.
Оконный менеджер Linux (Window Manager) — это программа, которая занимается отрисовкой окон, позволяет перемещать и изменять размер окна, обрабатывает действия пользователя, которые он делает в окне программы. Оконный менеджер может работать независимо или быть в составе среды рабочего стола.
Budgie — графическая оболочка
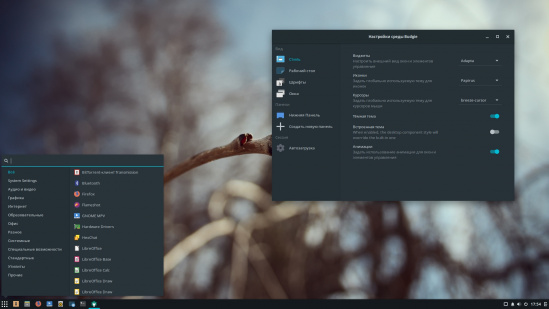
Budgie — графическая оболочка, которая была написана с нуля, но использует технологии GNOME.
Cinnamon — среда рабочего стола
Cinnamon — самостоятельная среда рабочего стола, являющаяся ответвлением от Gnome 3, но имеющая дизайн в стиле классического Gnome.
Enlightenment
Enlightenment (или просто E) — легковесный оконный менеджер (пользовательское окружение) не требовательный к ресурсам компьютера, потребляет очень мало оперативной памяти.
GNOME — среда рабочего стола

GNOME (GNU Network Object Model Environment) — популярная среда рабочего стола для Linux. Включает в себя набор утилит для настройки среды, прикладное программное обеспечение, системные утилиты и другие компоненты.
KDE (Plasma) — среда рабочего стола
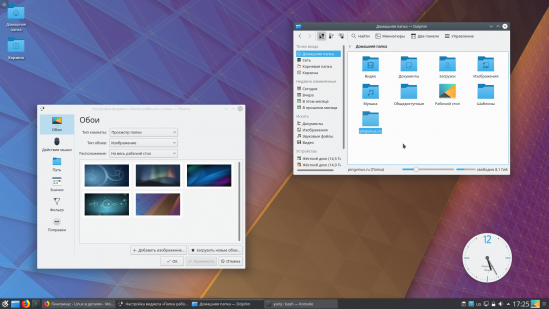
KDE — полнофункциональная среда рабочего стола. В рамках проекта KDE разрабатывается большое количество приложений для повседневных нужд. KDE использует библиотеки Qt.
LXDE — lightweight desktop environment
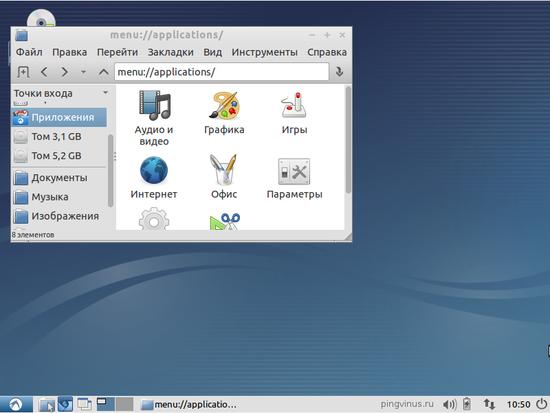
LXDE (Lightweight X11 Desktop Environment) — быстрая легковесная среда рабочего стола, не требовательная к ресурсам компьютера. В качестве оконного менеджера используется Openbox. Окна и меню открываются без задержек, интерфейс отзывчивый и не вызывает раздражения.
LXQt — легковесная среда рабочего стола
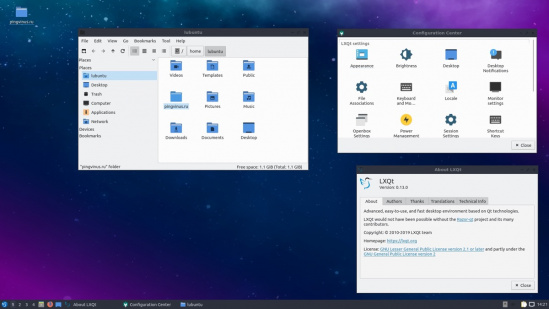
LXQt — легковесная среда рабочего стола, использующая библиотеки (фреймворк) Qt.
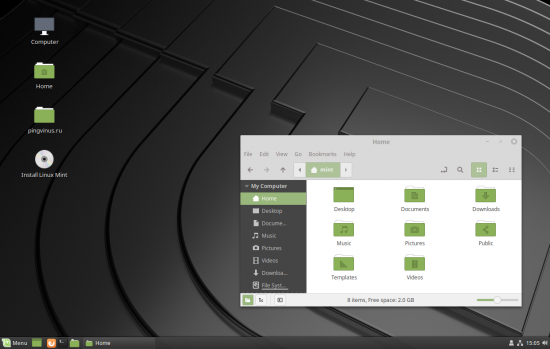
MATE — продолжение развития классического Gnome
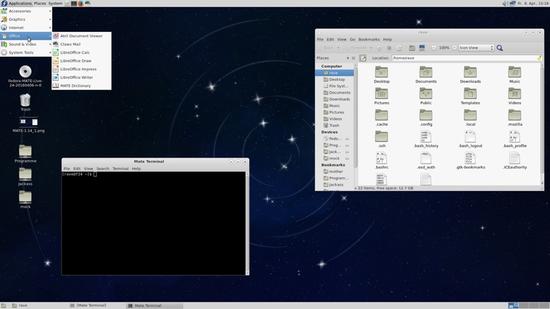
MATE — среда рабочего стола, которая является продолжением развития Gnome 2. MATE является сбалансированной средой с хорошим набором программ и утилит и приятным классическим интерфейсом.
Openbox — быстрый оконный менеджер
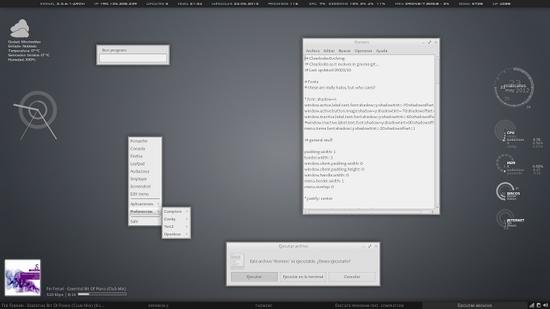
Openbox — легковесный оконный менеджер с простым минималистским интерфейсом. Данный оконный менеджер не требователен к системным ресурсам и работает очень быстро. При клике правой кнопкой мыши вызывается главное меню Openbox, через которое можно вызывать любые программы. Openbox хорошо настраивается и поддерживает темы оформления.
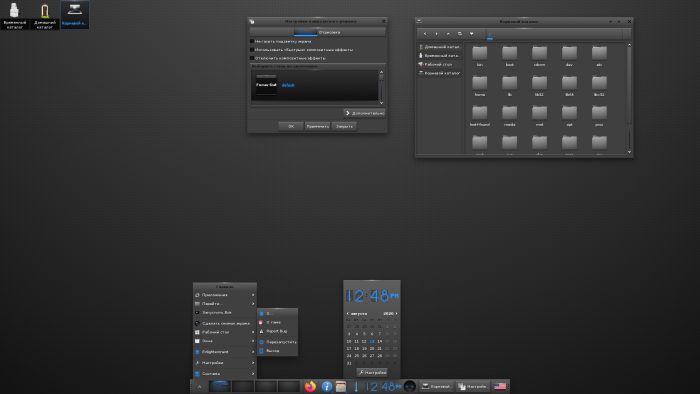
Window Maker
Window Maker — менеджер окон для Linux. Главными элементами интерфеса в Window Maker являются функциональные кнопки на рабочем столе и меню, вызываемое при клике правой кнопкой мыши по рабочему столу. Работает быстро, хорошо настраивается.
Источник
Graphical user interface linux
SUSE Linux Enterprise Server includes the X.org server and the GNOME desktop. This chapter describes the configuration of the graphical user interface for all users.
21.1 X Window System #Edit source
The X.org server is the de facto standard for implementing the X11 protocol. X is network-based, enabling applications started on one host to be displayed on another host connected over any kind of network (LAN or Internet).
Usually, the X Window System needs no configuration. The hardware is dynamically detected during X start-up. The use of xorg.conf is therefore deprecated. If you still need to specify custom options to change the way X behaves, you can still do so by modifying configuration files under /etc/X11/xorg.conf.d/ .
Install the package xorg-docs to get more in-depth information about X11. man 5 xorg.conf tells you more about the format of the manual configuration (if needed). More information on the X11 development can be found on the project’s home page at http://www.x.org.
Drivers are found in xf86-video-* packages, for example xf86-video-ati . Many of the drivers delivered with these packages are described in detail in the related manual page. For example, if you use the ati driver, find more information about this driver in man 4 ati .
Information about third-party drivers is available in /usr/share/doc/packages/
. For example, the documentation of x11-video-nvidiaG03 is available in /usr/share/doc/packages/x11-video-nvidiaG04 after the package was installed.
21.2 Installing and Configuring Fonts #Edit source
Fonts in Linux can be categorized into two parts:
Contains a mathematical description as drawing instructions about the shape of a glyph. As such, each glyph can be scaled to arbitrary sizes without loss of quality. Before such a font (or glyph) can be used, the mathematical descriptions need to be transformed into a raster (grid). This process is called font rasterization . Font hinting (embedded inside the font) improves and optimizes the rendering result for a particular size. Rasterization and hinting is done with the FreeType library.
Common formats under Linux are PostScript Type 1 and Type 2, TrueType, and OpenType.
Bitmap or Raster Fonts
Consists of an array of pixels designed for a specific font size. Bitmap fonts are extremely fast and simple to render. However, compared to vector fonts, bitmap fonts cannot be scaled without losing quality. As such, these fonts are usually distributed in different sizes. These days, bitmap fonts are still used in the Linux console and sometimes in terminals.
Under Linux, Portable Compiled Format (PCF) or Glyph Bitmap Distribution Format (BDF) are the most common formats.
The appearance of these fonts can be influenced by two main aspects:
choosing a suitable font family,
rendering the font with an algorithm that achieves results comfortable for the receiver’s eyes.
The last point is only relevant to vector fonts. Although the above two points are highly subjective, some defaults need to be created.
Linux font rendering systems consist of several libraries with different relations. The basic font rendering library is FreeType, which converts font glyphs of supported formats into optimized bitmap glyphs. The rendering process is controlled by an algorithm and its parameters (which may be subject to patent issues).
Every program or library which uses FreeType should consult the Fontconfig library. This library gathers font configuration from users and from the system. When a user amends their Fontconfig setting, this change will result in Fontconfig-aware applications.
More sophisticated OpenType shaping needed for scripts such as Arabic, Han or Phags-Pa and other higher level text processing is done using Harfbuzz or Pango.
21.2.1 Showing Installed Fonts #Edit source
To get an overview about which fonts are installed on your system, ask the commands rpm or fc-list . Both will give you a good answer, but may return a different list depending on system and user configuration:
Invoke rpm to see which software packages containing fonts are installed on your system:
Every font package should satisfy this expression. However, the command may return some false positives like fonts-config (which is neither a font nor does it contain fonts).
Invoke fc-list to get an overview about what font families can be accessed, whether they are installed on the system or in your home:
Note: Command fc-list
The command fc-list is a wrapper to the Fontconfig library. It is possible to query a lot of interesting information from Fontconfig—or, to be more precise, from its cache. See man 1 fc-list for more details.
21.2.2 Viewing Fonts #Edit source
If you want to know what an installed font family looks like, either use the command ftview (package ft2demos ) or visit http://fontinfo.opensuse.org/. For example, to display the FreeMono font in 14 point, use ftview like this:
If you need further information, go to http://fontinfo.opensuse.org/ to find out which styles (regular, bold, italic, etc.) and languages are supported.
21.2.3 Querying Fonts #Edit source
To query which font is used when a pattern is given, use the fc-match command.
For example, if your pattern contains an already installed font, fc-match returns the file name, font family, and the style:
If the desired font does not exist on your system, Fontconfig’s matching rules take place and try to find the most similar fonts available. This means, your request is substituted:
Fontconfig supports aliases : a name is substituted with another family name. A typical example are the generic names such as “ sans-serif ” , “ serif ” , and “ monospace ” . These alias names can be substituted by real family names or even a preference list of family names:
The result may vary on your system, depending on which fonts are currently installed.
Note: Similarity Rules according to Fontconfig
Fontconfig always returns a real family (if at least one is installed) according to the given request, as similar as possible. “ Similarity ” depends on Fontconfig’s internal metrics and on the user’s or administrator’s Fontconfig settings.
21.2.4 Installing Fonts #Edit source
To install a new font there are these major methods:
Manually install the font files such as *.ttf or *.otf to a known font directory. If it needs to be system-wide, use the standard directory /usr/share/fonts . For installation in your home directory, use
If you want to deviate from the standard directories, Fontconfig allows you to choose another one. Let Fontconfig know by using the element, see Section 21.2.5.2, “Diving into Fontconfig XML” for details.
Install fonts using zypper . Lots of fonts are already available as a package, be it on your SUSE distribution or in the M17N:fonts repository. Add the repository to your list using the following command. For example, to add a repository for SLE 15 :
To search for your FONT_FAMILY_NAME use this command:
21.2.5 Configuring the Appearance of Fonts #Edit source
Depending on the rendering medium, and font size, the result may be unsatisfactory. For example, an average monitor these days has a resolution of 100dpi which makes pixels too big and glyphs look clunky.
There are several algorithms available to deal with low resolutions, such as anti-aliasing (grayscale smoothing), hinting (fitting to the grid), or subpixel rendering (tripling resolution in one direction). These algorithms can also differ from one font format to another.
Important: Patent Issues with Subpixel Rendering
Subpixel rendering is not used in SUSE distributions. Although FreeType2 has support for this algorithm, it is covered by several patents expiring at the end of the year 2019. Therefore, setting subpixel rendering options in Fontconfig has no effect unless the system has a FreeType2 library with subpixel rendering compiled in.
Via Fontconfig, it is possible to select a rendering algorithms for every font individually or for a set of fonts.
21.2.5.1 Configuring Fonts via sysconfig #Edit source
SUSE Linux Enterprise Server comes with a sysconfig layer above Fontconfig. This is a good starting point for experimenting with font configuration. To change the default settings, edit the configuration file /etc/sysconfig/fonts-config . (or use the YaST sysconfig module). After you have edited the file, run fonts-config :
Restart the application to make the effect visible. Keep in mind the following issues:
A few applications do need not to be restarted. For example, Firefox re-reads Fontconfig configuration from time to time. Newly created or reloaded tabs get new font configurations later.
The fonts-config script is called automatically after every package installation or removal (if not, it is a bug of the font software package).
Every sysconfig variable can be temporarily overridden by the fonts-config command line option. See fonts-config —help for details.
There are several sysconfig variables which can be altered. See man 1 fonts-config or the help page of the YaST sysconfig module. The following variables are examples:
Consider FORCE_HINTSTYLE , FORCE_AUTOHINT , FORCE_BW , FORCE_BW_MONOSPACE , USE_EMBEDDED_BITMAPS and EMBEDDED_BITMAP_LANGAGES
Preference Lists of Generic Aliases
Use PREFER_SANS_FAMILIES , PREFER_SERIF_FAMILIES , PREFER_MONO_FAMILIES and SEARCH_METRIC_COMPATIBLE
The following list provides some configuration examples, sorted from the “ most readable ” fonts (more contrast) to “ most beautiful ” (more smoothed).
Prefer bitmap fonts via the PREFER_*_FAMILIES variables. Follow the example in the help section for these variables. Be aware that these fonts are rendered black and white, not smoothed and that bitmap fonts are available in several sizes only. Consider using
to disable metric compatibility-driven family name substitutions.
Scalable Fonts Rendered Black and White
Scalable fonts rendered without antialiasing can result in a similar outcome to bitmap fonts, while maintaining font scalability. Use well hinted fonts like the Liberation families. Unfortunately, there is a lack of well hinted fonts though. Set the following variable to force this method:
Render monospaced fonts without antialiasing only, otherwise use default settings:
All fonts are rendered with antialiasing. Well hinted fonts will be rendered with the byte code interpreter (BCI) and the rest with autohinter ( hintstyle=hintslight ). Leave all relevant sysconfig variables to the default setting.
Use fonts in CFF format. They can be considered also more readable than the default TrueType fonts given the current improvements in FreeType2. Try them out by following the example of PREFER_*_FAMILIES . Possibly make them more dark and bold with:
as they are rendered by hintstyle=hintslight by default. Also consider using:
Even for a well hinted font, use FreeType2’s autohinter. That can lead to thicker, sometimes fuzzier letter shapes with lower contrast. Set the following variable to activate this:
Use FORCE_HINTSTYLE to control the level of hinting.
21.2.5.2 Diving into Fontconfig XML #Edit source
Fontconfig’s configuration format is the eXtensible Markup Language (XML). These few examples are not a complete reference, but a brief overview. Details and other inspiration can be found in man 5 fonts-conf or in /etc/fonts/conf.d/ .
The central Fontconfig configuration file is /etc/fonts/fonts.conf , which—along other work—includes the whole /etc/fonts/conf.d/ directory. To customize Fontconfig, there are two places where you can insert your changes:
Fontconfig Configuration Files #
System-wide changes.В Edit the file /etc/fonts/local.conf (by default, it contains an empty fontconfig element).
User-specific changes.В Edit the file
/.config/fontconfig/fonts.conf . Place Fontconfig configuration files in the
User-specific changes overwrite any system-wide settings.
Note: Deprecated User Configuration File
/.fonts.conf is marked as deprecated and should not be used anymore. Use
Every configuration file needs to have a fontconfig element. As such, the minimal file looks like this:
If the default directories are not enough, insert the dir element with the respective directory:
Fontconfig searches recursively for fonts.
Font-rendering algorithms can be chosen with following Fontconfig snippet (see Example 21.1, “Specifying Rendering Algorithms”):
ExampleВ 21.1: Specifying Rendering Algorithms #
Various properties of fonts can be tested. For example, the element can test for the font family (as shown in the example), size interval, spacing, font format, and others. When abandoning completely, all elements will be applied to every font (global change).
Источник


