- Git SSH Windows — пошаговое руководство
- Генерация ключа SSH
- Добавление SSH-ключа в ssh-agent
- Добавление ключа SSH в учетную запись GitHub
- 4.3 Git на сервере — Генерация открытого SSH ключа
- Генерация открытого SSH ключа
- cham11ng / git-ssh-configuration.md
- Setting up SSH and Git on Windows 10
- What is SSH?
- What is Git?
- Create a SSH Key
- What is an ssh-agent?
- Register your SSH Key on Github
- Setup Github in your Shell
- Signing your GitHub commits (Optional Step)
- Use Git
- Conclusion
- Discussion (5)
- Git — Как в windows установить ssh ключи для github (пошаговая инструкция)
- Инструкция для github.com
Git SSH Windows — пошаговое руководство
Настроим пошагово Git SSH для Windows 10. Это позволит вам выполнять команды git без ввода пароля от своей учетной записи GitHub.
- Генерация ключа SSH.
- Добавление SSH-ключа в ssh-agent.
- Добавление ключа SSH в учетную запись GitHub.

Генерация ключа SSH
Откройте bash/терминал . Добавьте следующий текст, подставив свой адрес электронной почты GitHub .
Будет создан ключ ssh , используя e-mail в качестве метки.
Когда вам будет предложено «Введите файл, в котором вы хотите сохранить ключ», нажмите Enter . Это установит в местоположение по умолчанию.
Enter a file in which to save the key (/c/Users/you/.ssh/id_rsa):[Press enter]
Далее введите безопасную фразу-пароль дважды или просто нажмите Enter .
Enter passphrase (empty for no passphrase): [Type a passphrase]
Enter same passphrase again: [Type passphrase again]
Добавление SSH-ключа в ssh-agent
Чтобы запустить ssh-агент введите следующую команду.
На экране отобразится похожая строка.
Agent pid 31724
Добавим свой закрытый ключ SSH в ssh-agent . Если вы создали свой ключ с другим именем (или добавляете существующий ключ с другим именем), замените в команде id_rsa на имя вашего файла закрытого (приватного) ключа.
Ключ будет успешно добавлен в ssh-агент .
Добавление ключа SSH в учетную запись GitHub
Мы сгенерировали у себя на компьютере закрытый ключ SSH и добавили его в ssh-агент . Теперь нам необходимо добавить SSH ключ в учетную запись GitHub.
Сейчас нам необходимо скопировать SSH ключ в буфер обмена.
Способов есть несколько, но я же вам предлагаю следующее решения для Windows 10: введите команду ниже.
Прямо в терминале вы увидите содержимое необходимого файла с ключем. Скопируйте его в буфер.
Теперь зайдите на вашу страницу GitHub » Settings .

Перейдите во вкладку SSH and GPG keys и нажмите на кнопку New SSH key для добавления SSH ключа в вашу учетную запись GitHub.

В поле Title добавьте заголок для данного ключа. Например, если вы захотите настроить SSH доступ на нескольких устройствах, то вы будите понимать какой ключ принадлежит какому устройству.
В поле Key добавьте свой ssh-ключ, который вы скопировали в буфер обмена на предыдущем шаге.
Нажмите Add SSH key .

Для подтверждения вам потребуется ввести свой пароль от учетной записи GitHub .
На этом настройка SSH для вашего устройства завершена, теперь вы можете работать с git без ввода пароля от своей учетной записи.
Если вам понравилась данная статья, можете прочитать как настроить моментальную загрузку сайта на хостинг и синхронизацию файлов.
Надеюсь, вам понравилась данная информация. Если вам интересна тема web-разработки, то можете следить за выходом новых статей в Telegram.
4.3 Git на сервере — Генерация открытого SSH ключа
Генерация открытого SSH ключа
Как отмечалось ранее, многие Git-серверы используют аутентификацию по открытым SSH-ключам. Для того чтобы предоставить открытый ключ, каждый пользователь в системе должен его сгенерировать, если только этого уже не было сделано ранее. Этот процесс аналогичен во всех операционных системах. Сначала вам стоит убедиться, что у вас ещё нет ключа. По умолчанию пользовательские SSH ключи сохраняются в каталоге
/.ssh домашнем каталоге пользователя. Вы можете легко проверить наличие ключа перейдя в этот каталог и посмотрев его содержимое:
Ищите файл с именем id_dsa или id_rsa и соответствующий ему файл с расширением .pub . Файл с расширением .pub — это ваш открытый ключ, а второй файл — ваш приватный ключ. Если указанные файлы у вас отсутствуют (или даже нет каталога .ssh ), вы можете создать их используя программу ssh-keygen , которая входит в состав пакета SSH в системах Linux/Mac, а для Windows поставляется вместе с Git:
Сначала программа попросит указать расположение файла для сохранения ключа ( .ssh/id_rsa ), затем дважды ввести пароль для шифрования. Если вы не хотите вводить пароль каждый раз при использовании ключа, то можете оставить его пустым или использовать программу ssh-agent . Если вы решили использовать пароль для приватного ключа, то настоятельно рекомендуется использовать опцию -o , которая позволяет сохранить ключ в формате, более устойчивом ко взлому методом подбора, чем стандартный формат.
Теперь каждый пользователь должен отправить свой открытый ключ вам или тому, кто администрирует Git-сервер (подразумевается, что ваш SSH-сервер уже настроен на работу с открытыми ключами). Для этого достаточно скопировать содержимое файла с расширением .pub и отправить его по электронной почте. Открытый ключ выглядит примерно так:
cham11ng / git-ssh-configuration.md
Git Installation and SSH Configuration
Installation
We can check if Git is installed by typing git —version in your Terminal or Git Bash (Windows) respectively.
Download Git for Windows from this link https://git-scm.com/downloads
Configuration
Set up SSH for Git
Open your Terminal or Git Bash(Windows).
- Ensure we have SSH client installed:
List the contents of your
If we have already setup default identity, we can see two id_ files
- Set up our default identity:
The system adds keys for all identities to the /home/ /.ssh (Linux) or /c/Users/ /.ssh (Windows) directory. The following procedure creates a default identity.
Hit ssh-keygen command on Terminal or Git Bash.
Press enter to accept the default key and location or we can set somewhere else.
We enter and re-enter a passphrase when prompted. Unless you need a key for a process such as script, you should always provide a passphrase. The command creates your default identity with its public and private keys
List the contents of your
- Adding your SSH key to the ssh-agent:
Ensure ssh-agent is enabled:
Add your SSH key to the ssh-agent
- Find and take a note of your public key fingerprint. If you’re using OpenSSH 6.7 or older:
- Install the public key on your Remote GitHub/Bitbucket account:
Copy this output to respective SSH keys setting.
- GitHub Setting >> SSH and GPG keys >> New SSH key
- Bitbucket Setting >> SSH keys >> Add Key
You have now successfully configured SSH for Git in Windows/Linux/Mac OS.
Setting up SSH and Git on Windows 10
Welcome to my first official guide on Dev.to. Today I want to explain how you can setup SSH and Git on your Windows 10 computer.
Note: This is not about 100% securing your keys but about how to generate keys for use with GitHub.
Thanks to garethdd for his constructive feedback.
What is SSH?
SSH stands for Secure Shell and is an awesome way to authenticate yourself on remote servers (for example the Github server) without typing in a password everytime.
SSH works via two keys, the Private Key and the Public Key. While the private key should always stay private and safe, the public key can be shared around the internet without any problems.
The private key allows you to get access to servers that have your public key registered, so your access can only be stolen if the attacker somehow gets your Secret Key so keep it safe!
SSH should be preinstalled on new Windows 10 machines.
What is Git?
Git is a free version management tool that helps you to versionize your code and potentially save it on a remote server (for example Github, Gitlab or Bitbucket).
You can also install Git via chocolatey:
Create a SSH Key
The first step is to generate a new SSH key. Use cmd or Powershell and run the following command:
You can but don’t need to give it a passphrase since you should never share your secret key around but using one will secure your keys. Keep in mind that everybody can have as many private keys as they want.
This generates a new private SSH key with rsa encryption and 4096 bits. It also generates a public key from the secret key which you can share around.
There will be a new folder and files in your Windows user folder.
In general you can create as many keys as you want. The id_rsa key is the default key generated by ssh and will be automatically be used by your ssh-agent if you don’t tell it to use another key.
What is an ssh-agent?
An ssh-agent is the agent process used to actually authenticate yourself with ssh. There are a few out there (PuTTY with Pageant for example) but for this example we’ll use the ssh-agent provided by the native and default Windows 10 ssh-agent.
If you want to you can use PuTTY and Pageant to make your keys even more secure. Read this post on Digital Ocean for more information.
If you want to change the key used by your ssh-agent, you must first start the service. The service will be disabled on Windows 10 by default. Search for Services and open the Services settings and look for the «OpenSSH Authentication Agent» and Activate it:

Now you will be able to access the ssh-agent from your console via ssh-agent .
For this example we’re going to try to load another key called example into our agent and use it instead of the id_rsa key. To do this you can run the following command:
Now you will have both keys available for this session.
Register your SSH Key on Github
The next step is to register your generated SSH key on Github. For that, run the following command:
and copy the output string into your clipboard. Now go to your Github keys settings and add a new SSH key with your public key and save it.
Congratulations! You now are able to get and push code to Github without any password!
Note: There should also be a C:\Users\your_user_name\.ssh\id_rsa file. This is your private key, don’t share this around!
Setup Github in your Shell
Now it’s time to setup Git on your machine. After installing it from the link above, open a new cmd or Powershell window. Now we need to set your public Git name and Git email address. This will always be public when pushing code.
Luckily Github gives you a privatized email address for use. Go to https://github.com/settings/emails and you will find a @users.noreply.github.com email address for your account. Copy this email address.
Next register your name and email in Git:
Congratulations! Now all your Commits will be registered as being commited from your Github user.
Signing your GitHub commits (Optional Step)
To sign your commits you first must install the GPG command line tools. After you installed the GPG toolkit, you can run the following command to generate a new gpg key:
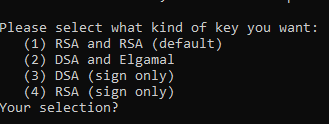
This will ask you what kind of key you want. Go for RSA and RSA.
Now you need to enter a bit length. The recommendation is 4096 bits.
After that you can specify a expiration length or if the key should never expire. Pick as you want. Expiring keys are more secure in general because you have to renew them every now and then.
Now enter your personal informations to verifying your identity with your gpg key.
When you’re done you will be asked for a passphrase. Give it a secure passphrase and you will be done with your gpg-key generation.
After that you will be able to find your key in your users .gnupg folder as specified in the success message.
If you want to list your gpg keys, simply run
Your GPG key you can share with Github is the key coming after sec rsa4096/ so for example in
the gpg key would be 3AA5C34371567BD2
To get your public key block, simply run
which will output your public GPG Key Block. Copy it and paste it to your GitHub Account here.
From now on your commits will be signed when commited.
Use Git
Now you’re ready to actually use Git. From now you can clone repositories via git clone or push new code to Github. Here is a quick reference:
Conclusion
Thanks for reading this post. I hope it helped you with the setup. If you need help or have questions let me know!
Discussion (5)

Not using a passphrase for personal keys is madness. No mention of using a ssh agent (putty pageant on windows) to manage keys. No mention of the benefits of using a smart card (or yubikey) to store and protect your private key further.
Simply setting your name and email in your git config doesn’t sign your commits, you need gpg for that, again a smart card is the way forward.
Git — Как в windows установить ssh ключи для github (пошаговая инструкция)
Сам я не пользуюсь windows для разработки, но мои ученики как правило начинают с windows в качестве основной системы, по этому для них я решил написать эту пошаговую инструкцию.
Инструкция для github.com
Предполагается что вы используете OpenServer
Шаг 1. Сгенерировать ssh-ключи.
Для этого нужно открыть консоль OpenServer (это просто программа conEmu с указанием системных переменных) и набрать как написано в этой инструкции:


Шаг 2. Найти где лежат ключи
При генерации консоль напишет куда упали сгенерированные ключи. Из скриншотов выше видно что они лежат по адресу C:/OpenServer/.ssh вот пусть там и лежат. Находим эту папку и видим там два файла:

Для удобства я их переименовываю id_rsa в github, а id_rsa.pub в github.txt.
Шаг 3. Создать конфигурационный файл
В папке .ssh найденной на шаге 2 создаём файл config (без расширения) с следующим содержанием:
Шаг 4. Добавить публичный ключ в аккаунт github
Заходим по этой ссылке https://github.com/settings/keys и нажимаем кнопку «New SSH key». Указываем Title (любой) а в поле Key копируем содержание файла github.txt полученного на шаге 2, нажимаем «Add SSH key» и ещё раз вводим свой пароль от аккаунта github (меры безопасности)
Вот и всё, теперь можно клонировать из репозиториев с github используя ssh а главное можно пушить в свои репозитории на github без постоянного ввода пароля (как при использовании протокола https)


