- Windows Update: FAQ
- Manage Windows 10 software updates in Intune
- Policy types to manage updates
- Move from update ring deferrals to feature updates policy
- Plan to transition
- Switch to feature updates policy
- Reporting on updates
- Fix Windows Update errors by using the DISM or System Update Readiness tool
- Symptom
- Resolution for Windows 8.1, Windows 10 and Windows Server 2012 R2
- Resolution for Windows 7 Service Pack 1 (SP1) and Windows Server 2008 R2 SP1
- Resolution — Download the package from Microsoft Update Catalog directly
- Description of the common corruption errors
- What does the System Update Readiness tool do
- Verify the integrity of resources
- Logging
- How to fix errors that are found in the CheckSUR log file
Windows Update: FAQ
Note: If you’re looking for Microsoft Office update info, see Install Office updates.
In Windows 10, you decide when and how to get the latest updates to keep your device running smoothly and securely. When you update, you’ll get the latest fixes and security improvements, helping your device run efficiently and stay protected. In most cases, restarting your device completes the update. Make sure your device is plugged in when you know updates will be installed.
If other questions come up when you update Windows 10, here are some other areas that might interest you:
When you only want info about updating Windows 10, you’ll find answers to many of your questions here:
When the Windows 10 May 2020 Update is ready for your device, it will be available to download and install from the Windows Update page in Settings. Choose a time that works best for you to download the update. You’ll then need to restart your device and complete the installation. After that, your device will be running Windows 10, version 2004.
To manually check for the latest recommended updates, select Start > Settings > Update & Security > Windows Update > Windows Update .
To get help updating to the latest version of Windows 10, go to the Microsoft software download page and download the Update Assistant.
Some updates may not be available on all devices at the same time—we’re making sure updates are ready and compatible.
To stay up to date, select Start > Settings > Update & Security > Windows Update > Windows Update , and then select Check for updates.
If a feature update is available for your device, it will appear separately on the Windows Update page. To install it, select Download and install now.
Here are a few things you can try if you’re having trouble installing updates:
Make sure that your device is connected to the internet. Downloading updates requires an internet connection.
If you’re connected the internet, try to install the updates manually. Select Start > Settings > Update & Security > Windows Update > Windows Update , and then view available updates.
Check for updates
Run the Windows Update Troubleshooter. Select Start > Settings > Update & Security > Troubleshoot . Under Get up and running, select Windows Update.
The time required to download updates primarily depends on internet connection speed, network settings, and update size. Make sure your device is plugged in and connected to the internet to download updates faster.
You can’t stop updates entirely—because they help keep your device safe and secure, updates will eventually need to be installed and downloaded, regardless of your update settings. Here’s how to temporarily pause updates from being downloaded and installed. Note that after the pause limit is reached, you’ll need to install the latest updates before you can pause updates again.
In the Windows 10 November 2019 Update (version 1909) or later, or in Windows version 1809 for Pro or Enterprise, select Start > Settings > Update & Security > Windows Update . Then choose one of the following options:
Select Pause updates for 7 days.
Select Advanced options. Then, in the Pause updates section, select the drop-down menu and specify a date for updates to resume.
To finish installing an update, your device will need to restart. Windows will try to restart your device when you’re not using it. If it can’t, you’ll be asked to schedule the restart for a more convenient time. Or, you can schedule anytime by following these steps:
Select Start > Settings > Update & Security > Windows Update > Windows Update .
Select Schedule the restart and choose a time that’s convenient for you.
You can set active hours to make sure automatic restarts for updates only happen when you’re not using your device. Learn about active hours for Windows 10.
Try deleting files you don’t need, uninstalling apps you don’t use, or moving files to another drive like an external USB drive or OneDrive. For more tips on freeing up disk space, see Free up drive space in Windows 10.
We recommend keeping devices like laptops and tablets plugged in when you’re not using them. This way, if updates are installed outside active hours, your device will have enough power to complete the installation. Windows updates don’t consume more battery than other typical system processes.
An update history is available so you can see which updates were installed, and when. You can also use this list to remove specific updates, although we don’t recommend this unless it’s necessary.
Select Start > Settings > Update & Security > Windows Update > Windows Update > View update history .
For more info about what’s included in updates for Windows 10, see Windows 10 update history.
We don’t recommend that you remove any installed updates. However, if you must remove an update, you can do so in update history.
Select Start > Settings > Update & Security > Windows Update > View update history > Uninstall updates.
Select the update you want to remove, then select Uninstall.
Feature updates are typically released twice per year and include new functionality and capabilities as well as potential fixes and security updates. Quality updates are more frequent and mainly include small fixes and security updates. Windows is designed to deliver both kinds of updates to devices through Windows Update.
To double check that your device is up to date, open Settings > Update & Security > Windows Update and see your update status and available updates.
To find which version of Windows you’re running, see Which version of Windows operating system am I running?
Reserved storage is not automatically turned on by Windows in any update scenarios. It is only turned on for new devices with the Windows 10 May 2019 Update (version 1903) or later preinstalled, or devices on which a clean install was performed.
Note: If you’re looking for Microsoft Office update info, see Install Office updates.
The best way to keep Windows 8.1 up to date is to turn on automatic updates. With automatic updates, you don’t have to search for updates online or worry about missing critical fixes or device drivers for your PC. Instead, Windows Update automatically installs important updates as they become available.
To turn on automatic updates:
Open Windows Update by swiping in from the right edge of the screen (or, if you’re using a mouse, pointing to the lower-right corner of the screen and moving the mouse pointer up), select Settings > Change PC settings > Update and recovery > Windows Update. If you want to check for updates manually, select Check now.
Select Choose how updates get installed, and then, under Important updates, select Install updates automatically (recommended).
Under Recommended updates, select Give me recommended updates the same way I receive important updates.
Under Microsoft Update, select Give me updates for other Microsoft products when I update Windows, and then select Apply.
Click the questions below to see answers about how Windows Update keeps your device up to date.
Note: If your PC is connected to a network where updates are managed by Group Policy, you might not be able to change settings related to Windows Update. For more info, contact your organization’s technical support.
Open Windows Update by swiping in from the right edge of the screen (or, if you’re using a mouse, pointing to the lower-right corner of the screen and moving the mouse pointer up), select Settings > Change PC settings > Update and recovery > Windows Update. To check for updates manually, select Check now.
An update history is available so you can see which updates were installed, and when. You can also use this list to remove specific updates, although we don’t recommend this unless it’s necessary.
To see your PC’s update history, open Windows Update by swiping in from the right edge of the screen (or, if you’re using a mouse, pointing to the lower-right corner of the screen and moving the mouse pointer up), select Settings > Change PC settings > Update and recovery > Windows Update > View your update history.
We don’t recommend that you remove any installed updates. However, if you must remove an update, you can do so in update history.
Open Windows Update by swiping in from the right edge of the screen (or, if you’re using a mouse, pointing to the lower-right corner of the screen and moving the mouse pointer up), select Settings > Change PC settings > Update and recovery > Windows Update > View your update history.
Select the update you want to remove, then select Uninstall.
Here are a few things to try if you’re having problems installing updates:
Make sure that your PC is connected to the internet. Some updates can’t be installed if you’re using a metered internet connection.
If you’re connected the internet and updates aren’t installed automatically, wait a few minutes and then try to install the updates manually.
See the Fix Windows Update errors guided walkthrough to try to fix the problem.
Support for Windows 7 ended on January 14, 2020
We recommend you move to a Windows 10 PC to continue to receive security updates from Microsoft.
Click the questions below to see answers about how Windows Update keeps your device up to date.
Manage Windows 10 software updates in Intune
Use Intune to manage the install of Windows 10 software updates from Windows Update for Business.
By using Windows Update for Business, you simplify the update management experience. You don’t need to approve individual updates for groups of devices and can manage risk in your environments by configuring an update rollout strategy. Intune provides the ability to configure update settings on devices and gives you the ability to defer update installation. You can also prevent devices from installing features from new Windows versions to help keep them stable, while allowing those devices to continue installing updates for quality and security.
Intune stores only the update policy assignments, not the updates themselves. When you save a policy, Intune passes the configuration details to Windows Update which then determines which updates will be offered to each device. Devices access Windows Update directly for the updates.
Learn more about Windows 10 feature and quality updates in the Windows documentation.
Policy types to manage updates
Intune provides the following policy types to manage updates, which you assign to groups of devices:
Windows 10 update ring: This policy is a collection of settings that configures when Windows 10 updates get installed.
Update ring policies are supported for devices that run Windows 10 version 1607 or later.
Windows 10 feature updates (public preview): This policy updates devices to the Windows version you specify, and then freezes the feature set version on those devices. This version freeze remains in place until you choose to update them to a later Windows version. While the feature version remains static, devices can continue to install quality and security updates that are available for their feature version.
Feature updates policies are supported for devices that run Windows 10 version 1709 or later.
Move from update ring deferrals to feature updates policy
When using Intune to manage Windows 10 updates, it’s possible to use both update rings policy with update deferrals, and feature updates policy to manage the updates you want to install on devices. If you’re using feature updates, we recommend you end use of deferrals as configured in your update rings policy. Combining update ring deferrals with feature updates policy can create complexity that might delay update installations. You can continue to use the user experience settings from update rings, as they don’t create issues when combined with feature updates policy.
While nothing prohibits use of both policy types to control which updates can install on a device, there is typically no advantage to doing so. When both policy types apply to a device, the conditions of both policy types must be met (be true) on the device before it’s offered an applicable update. This scenario can lead to updates not installing as expected due to a block by one of the policy types.
Plan to transition
Plan to manage the change from using update ring deferrals to feature updates so that the Windows Update service can be ready to deploy the updates you expect.
When Intune policies for Windows 10 updates are created or modified, Intune passes the policy details to Windows Update, which then determines the updates that are applicable for each device that’s assigned one or more update policies.
The process to evaluate updates for devices can take up to 10 minutes to complete, and in some cases might take a bit longer.
If a device starts a scan for updates after a deferral has been set to zero or removed for the device, but before Windows Update completes the processing of the feature updates policy, that device can be offered an update you didn’t plan for it to install.
Use the following process to ensure Windows Update has processed your feature updates policy before deferrals are removed.
Switch to feature updates policy
In the Microsoft Endpoint Manager admin center, create a feature updates policy that configures your desired Windows version, and assign it to applicable devices.
After the saved policy is assigned to devices, it will take a few minutes for Windows Update to process the policy.
View the Windows 10 feature updates (Organizational) report for the feature update policy, and verify devices have a state of OfferReady before you proceed. Once all devices show OfferReady, Windows Update has completed processing the policy.
After devices are verified to be in the OfferReady state you can safely reconfigure the Windows 10 update ring policy for that same set of devices to change the setting Feature update deferral period (days) to a value of 0.
Reporting on updates
To learn about report options for Windows 10 update ring policy and Windows 10 feature updates policy, see Intune compliance reports for updates.
Fix Windows Update errors by using the DISM or System Update Readiness tool
Original product version: В Windows 10, version 1809 and later versions, Windows 8.1, Windows Server 2012 R2, Windows 7 Service Pack 1, Windows Server 2008 R2 Service Pack 1
Original KB number: В 947821
Symptom
Windows updates and service packs may fail to install if there are corruption errors. For example, an update might not install if a system file is damaged. The DISM or System Update Readiness tool may help you to fix some Windows corruption errors.
This article is intended for Support agents and IT professionals. If you are home users and looking for more information about fixing Windows update errors, see Fix Windows Update errors.
Resolution for Windows 8.1, Windows 10 and Windows Server 2012 R2
To resolve this problem, use the inbox Deployment Image Servicing and Management (DISM) tool. Then, install the Windows update or service pack again.
Open an elevated command prompt. To do this, open Start menu or Start screen, type Command Prompt, right-select Command Prompt, and then select Run as administrator. If you are prompted for an administrator password or for a confirmation, type the password, or select Allow.
Type the following command, and then press Enter. It may take several minutes for the command operation to be completed.
When you run this command, DISM uses Windows Update to provide the files that are required to fix corruptions. However, if your Windows Update client is already broken, use a running Windows installation as the repair source, or use a Windows side-by-side folder from a network share or from a removable media, such as the Windows DVD, as the source of the files. To do this, run the following command instead:
Replace the C:\RepairSource\Windows placeholder with the location of your repair source. For more information about using the DISM tool to repair Windows, reference Repair a Windows Image.
Type the sfc /scannow command and press Enter. It may take several minutes for the command operation to be completed.
Close the command prompt, and then run Windows Update again.
DISM creates a log file (%windir%/Logs/CBS/CBS.log) that captures any issues that the tool found or fixed. %windir% is the folder in which Windows is installed. For example, the %windir% folder is C:\Windows.
Resolution for Windows 7 Service Pack 1 (SP1) and Windows Server 2008 R2 SP1
To resolve this problem, use the System Update Readiness tool. Then, install the Windows update or service pack again.
Download the System Update Readiness tool.
select the download link in the following table that corresponds to the version of Windows that is running on your computer. For more information about how to find the version of Windows that you installed, see Find out if your computer is running the 32-bit or 64-bit version of Windows.
This tool is updated regularly, we recommend that you always download the latest version. This tool is not available in every supported language. Check the link below to see if it is available in your language.
| Operating system | Download link |
|---|---|
| x86-based (32-bit) versions of Windows 7 SP1 | Download the package now. |
| x64-based (64-bit) versions of Windows 7 SP1 | Download the package now. |
| x64-based (64-bit) versions of Windows Server 2008 R2 SP1 | Download the package now. |
| Itanium-based versions of Windows Server 2008 R2 SP1 | Download the package now. |
Install and run the tool.
Select Download on the Download Center webpage, then do one of the following:
- To install the tool immediately, select Open or Run, and then follow the instructions on your screen.
- To install the tool later, select Save, and then download the installation file to your computer. When you’re ready to install the tool, double-select the file.
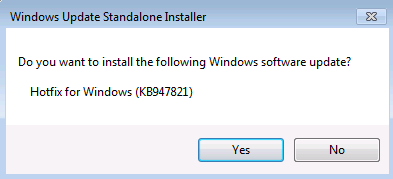
In the Windows Update Standalone Installer dialog box, select Yes.
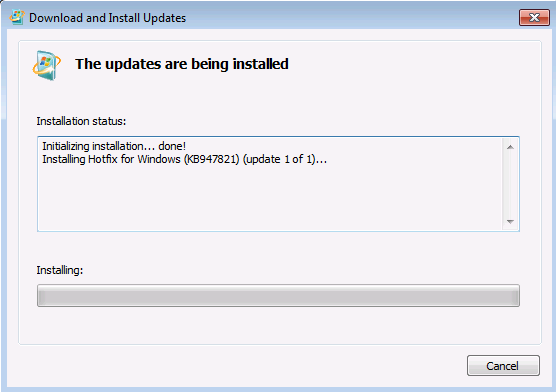
When the tool is being installed, it automatically runs. Although it typically takes less than 15 minutes to run, it might take much longer on some computers. Even if the progress bar seems to stop, the scan is still running, so don’t select Cancel.
When you see Installation complete, select Close.

Reinstall the update or service pack you were trying to install previously.
To manually fix corruption errors that the tool detects but can’t be fixed, see How to fix errors that are found in the CheckSUR log file.
Resolution — Download the package from Microsoft Update Catalog directly
You can also try to directly download the update package from Microsoft Update Catalog, and then install the update package manually.
For example, you may have problems when you try to install updates from Windows Update. In this situation, you can download the update package and try to install the update manually. To do this, follow these steps:
Open Microsoft Update Catalog in Internet Explorer.
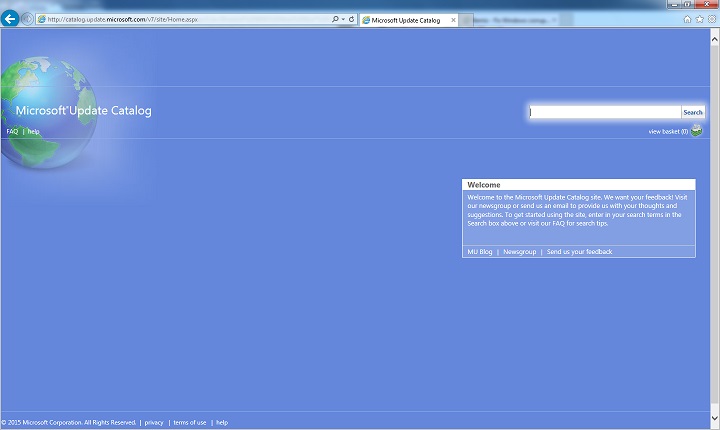
In the search box, input the update number that you want to download. In this example, input 3006137. Then, select Search.

Find the update that applies to your operating system appropriately in the search results, and then select Add to add the update to your basket.

Select view basket to open your basket.

Select Download to download the update in your basket.

Select Browse to choose a location for the update you are downloading, and then select Continue.

Select Close after the download process is done. Then, you can find a folder that contains the update package in the location that you specified.
Open the folder, and then double-select the update package to install the update.
If the Windows update or service pack installed successfully, you are finished. If the problem is not fixed, or if System Update Readiness Tool cannot find the cause, contact us for more help.
Description of the common corruption errors
The following table lists the possible error code with Windows Update for your reference:
| Code | Error | Description |
|---|---|---|
| 0x80070002 | ERROR_FILE_NOT_FOUND | The system cannot find the file specified. |
| 0x8007000D | ERROR_INVALID_DATA | The data is invalid. |
| 0x800F081F | CBS_E_SOURCE_MISSING | The source for the package or file not found. |
| 0x80073712 | ERROR_SXS_COMPONENT_STORE_CORRUPT | The component store is in an inconsistent state. |
| 0x800736CC | ERROR_SXS_FILE_HASH_MISMATCH | A component’s file does not match the verification information present in the component manifest. |
| 0x800705B9 | ERROR_XML_PARSE_ERROR | Unable to parse the requested XML data. |
| 0x80070246 | ERROR_ILLEGAL_CHARACTER | An invalid character was encountered. |
| 0x8007370D | ERROR_SXS_IDENTITY_PARSE_ERROR | An identity string is malformed. |
| 0x8007370B | ERROR_SXS_INVALID_IDENTITY_ATTRIBUTE_NAME | The name of an attribute in an identity is not within the valid range. |
| 0x8007370A | ERROR_SXS_INVALID_IDENTITY_ATTRIBUTE_VALUE | The value of an attribute in an identity is not within the valid range. |
| 0x80070057 | ERROR_INVALID_PARAMETER | The parameter is incorrect. |
| 0x800B0100 | TRUST_E_NOSIGNATURE | No signature was present in the subject. |
| 0x80092003 | CRYPT_E_FILE_ERROR | An error occurred while Windows Update reads or writes to a file. |
| 0x800B0101 | CERT_E_EXPIRED | A required certificate is not within its validity period when verifying against the current system clock or the time stamp in the signed file. |
| 0x8007371B | ERROR_SXS_TRANSACTION_CLOSURE_INCOMPLETE | One or more required members of the transaction are not present. |
| 0x80070490 | ERROR_NOT_FOUND | Windows could not search for new updates. |
| 0x800f0984 | PSFX_E_MATCHING_BINARY_MISSING | Matching component directory exist but binary missing |
| 0x800f0986 | PSFX_E_APPLY_FORWARD_DELTA_FAILED | Applying forward delta failed |
| 0x800f0982 | PSFX_E_MATCHING_COMPONENT_NOT_FOUND | Can’t identify matching component for hydration |
What does the System Update Readiness tool do
Verify the integrity of resources
The System Update Readiness tool verifies the integrity of the following resources:
- Files that are located in the following directories:
- %SYSTEMROOT%\Servicing\Packages
- %SYSTEMROOT%\WinSxS\Manifests
- Registry data that is located under the following registry subkeys:
- HKEY_LOCAL_MACHINE\Components
- HKEY_LOCAL_MACHINE\Schema
- HKEY_LOCAL_MACHINE\Software\Microsoft\Windows\CurrentVersion\Component Based Servicing
This list may be updated at any time.
When the System Update Readiness tool detects incorrect manifests, Cabinets, or registry data, it may replace the incorrect data with a corrected version.
Logging
The System Update Readiness tool creates a log file that captures any issues that the tool found or fixed. The log file is located here:
How to fix errors that are found in the CheckSUR log file
To manually fix corruption errors that the System Update Readiness tool detects but can’t fix, follow these steps:
%SYSTEMROOT% is an environment variable that saves the folder in which Windows is installed. For example, generally the %SYSTEMROOT% folder is C:\Windows.
Identify the packages that the tool can’t fix. For example, you may find the following in the log file:
In this case, the package that is corrupted is KB958690.
Copy the package (.msu) to the %SYSTEMROOT%\CheckSUR\packages directory. By default, this directory doesn’t exist and you need to create the directory.


