- 3 простых шага по исправлению ошибок DXGIADAPTERCACHE.EXE
- 1- Очистите мусорные файлы, чтобы исправить dxgiadaptercache.exe, которое перестало работать из-за ошибки.
- 2- Очистите реестр, чтобы исправить dxgiadaptercache.exe, которое перестало работать из-за ошибки.
- 3- Настройка Windows для исправления критических ошибок dxgiadaptercache.exe:
- Как вы поступите с файлом dxgiadaptercache.exe?
- Некоторые сообщения об ошибках, которые вы можете получить в связи с dxgiadaptercache.exe файлом
- DXGIADAPTERCACHE.EXE
- процессов:
- Trojan.Inject3.30385
- Техническая информация
- Рекомендации по лечению
- Как через ваш компьютер майнят? Как удалить вирус майнинга?
- Удаление вируса
- how to remove dxgiadaptercache.exe
- What is dxgiadaptercache.exe
- How dxgiadaptercache.exe gets inside into your PC
- Threat Summary
- Download to scan your PC and permanently Fix dxgiadaptercache.exe by below download Now Button. It is the Highest Selling Auto removal tool.
- dxgiadaptercache.exe Removal Options
- Auto dxgiadaptercache.exe Removal Process by SpyHunter
- How to Download and Install SpyHunter5 Depending on the Browser You Use
- Download and installation instructions for SpyHunter5 for Google Chrome
- Download and installation instructions for SpyHunter for Mozilla Firefox
- Download and installation instructions for SpyHunter for Internet Explorer
- Download and installation instructions for SpyHunter for Microsoft Edge
3 простых шага по исправлению ошибок DXGIADAPTERCACHE.EXE
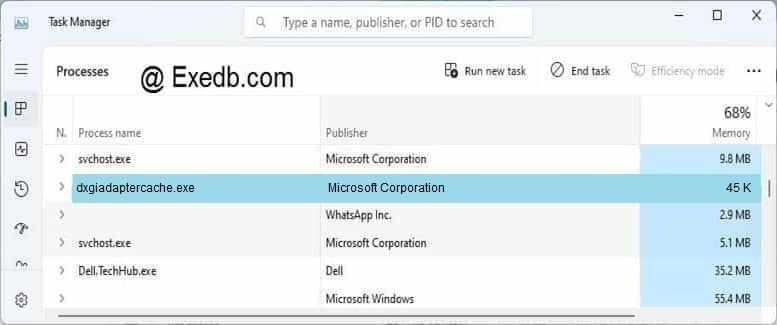
Файл dxgiadaptercache.exe из Microsoft Corporation является частью Microsoft Windows Operating System. dxgiadaptercache.exe, расположенный в c:\windows\ winsxsamd64_microsoft-windows-d . .tx-dxgiadaptercache_31bf3856ad364e35_10 .0 .17134 .1_none_8d1bb8649a5fd52f\ dxgiadaptercache .exe с размером файла 45568 байт, версия файла 10.0.17134.1, подпись 3e73262483d4fb1bb88ba1b2b9bb3d5a.
В вашей системе запущено много процессов, которые потребляют ресурсы процессора и памяти. Некоторые из этих процессов, кажется, являются вредоносными файлами, атакующими ваш компьютер.
Чтобы исправить критические ошибки dxgiadaptercache.exe,скачайте программу Asmwsoft PC Optimizer и установите ее на своем компьютере
1- Очистите мусорные файлы, чтобы исправить dxgiadaptercache.exe, которое перестало работать из-за ошибки.
- Запустите приложение Asmwsoft Pc Optimizer.
- Потом из главного окна выберите пункт «Clean Junk Files».
- Когда появится новое окно, нажмите на кнопку «start» и дождитесь окончания поиска.
- потом нажмите на кнопку «Select All».
- нажмите на кнопку «start cleaning».
2- Очистите реестр, чтобы исправить dxgiadaptercache.exe, которое перестало работать из-за ошибки.

3- Настройка Windows для исправления критических ошибок dxgiadaptercache.exe:

- Нажмите правой кнопкой мыши на «Мой компьютер» на рабочем столе и выберите пункт «Свойства».
- В меню слева выберите » Advanced system settings».
- В разделе «Быстродействие» нажмите на кнопку «Параметры».
- Нажмите на вкладку «data Execution prevention».
- Выберите опцию » Turn on DEP for all programs and services . » .
- Нажмите на кнопку «add» и выберите файл dxgiadaptercache.exe, а затем нажмите на кнопку «open».
- Нажмите на кнопку «ok» и перезагрузите свой компьютер.
Всего голосов ( 43 ), 17 говорят, что не будут удалять, а 26 говорят, что удалят его с компьютера.
Как вы поступите с файлом dxgiadaptercache.exe?
Некоторые сообщения об ошибках, которые вы можете получить в связи с dxgiadaptercache.exe файлом
(dxgiadaptercache.exe) столкнулся с проблемой и должен быть закрыт. Просим прощения за неудобство.
(dxgiadaptercache.exe) перестал работать.
dxgiadaptercache.exe. Эта программа не отвечает.
(dxgiadaptercache.exe) — Ошибка приложения: the instruction at 0xXXXXXX referenced memory error, the memory could not be read. Нажмитие OK, чтобы завершить программу.
(dxgiadaptercache.exe) не является ошибкой действительного windows-приложения.
(dxgiadaptercache.exe) отсутствует или не обнаружен.
DXGIADAPTERCACHE.EXE
Проверьте процессы, запущенные на вашем ПК, используя базу данных онлайн-безопасности. Можно использовать любой тип сканирования для проверки вашего ПК на вирусы, трояны, шпионские и другие вредоносные программы.
процессов:
Cookies help us deliver our services. By using our services, you agree to our use of cookies.
Trojan.Inject3.30385
Добавлен в вирусную базу Dr.Web: 2019-11-05
Описание добавлено: 2019-11-06
Техническая информация
- %APPDATA%\microsoft\windows\start menu\programs\startup\dxgiadaptercache.url
- %WINDIR%\microsoft.net\framework\v2.0.50727\regsvcs.exe
- %HOMEPATH%\dxgiadaptercache\dxgiadaptercache.vbs
- %HOMEPATH%\dxgiadaptercache\cliconfg.exe
- ‘%WINDIR%\microsoft.net\framework\v2.0.50727\regsvcs.exe’
Рекомендации по лечению
- В случае если операционная система способна загрузиться (в штатном режиме или режиме защиты от сбоев), скачайте лечащую утилиту Dr.Web CureIt! и выполните с ее помощью полную проверку вашего компьютера, а также используемых вами переносных носителей информации.
- Если загрузка операционной системы невозможна, измените настройки BIOS вашего компьютера, чтобы обеспечить возможность загрузки ПК с компакт-диска или USB-накопителя. Скачайте образ аварийного диска восстановления системы Dr.Web® LiveDisk или утилиту записи Dr.Web® LiveDisk на USB-накопитель, подготовьте соответствующий носитель. Загрузив компьютер с использованием данного носителя, выполните его полную проверку и лечение обнаруженных угроз.
На 1 месяц (без регистрации) или 3 месяца (с регистрацией и скидкой на продление)
По серийному номеру
Выполните полную проверку системы с использованием Антивируса Dr.Web Light для macOS. Данный продукт можно загрузить с официального сайта Apple App Store.
На 1 месяц (без регистрации) или 3 месяца (с регистрацией и скидкой на продление)
По серийному номеру
На загруженной ОС выполните полную проверку всех дисковых разделов с использованием продукта Антивирус Dr.Web для Linux.
На 1 месяц (без регистрации) или 3 месяца (с регистрацией и скидкой на продление)
Как через ваш компьютер майнят? Как удалить вирус майнинга?
На данный момент, по статистике каждый третий пк заражён вирусом майнинга, в данной статье мы кратко разберём, что это такое, как он работает, как его распознать и уничтожить.
Приветствую вас, господа. Вирус майнинга может попасть на ваш компьютер абсолютно случайно, возможно, вы скачали какую-то игру, файл, программу или просто перешли по какой-то «мутной ссылке», данный тип майнеров — это обычные хакеры, написавшие скрипт, который будет приносить хакеру доход за счёт ресурса вашего пк. Это чистой воды мошенничество и с этим надо бороться! Также рекомендую ознакомиться с моей прошлой статьёй «Как через ваш компьютер майнят? Как распознать вирус майнинга?» , обязательно прочтите её, там много полезной информации.
Важная информация 1. Вирус майнинга практически не детектится антивирусниками, ни Касперский, ни Аваст, ни Тотал Секьюрити не могут распознать его. 2. Если вы увидели у себя в системе пустую папку, без каких-либо файлов, возможно, это скрытый вирус, файлы там есть, но вы их видеть не будете. 3. Также хитрый майнер может внести в скрипт задачу по отключению вируса при открытии диспетчера задач, то есть, допустим, вы слышите, что ваш пк работает громче, чем обычно, вентилятор ЦП крутится быстрее, но когда вы заходите в диспетчер задач, чтобы посмотреть, почему так, что загружает систему, вы видите, что процессор загружен всего на 1-3%, и просто не замечаете вирус. И так работают почти все вирусы майнинга. 4. Вирус майнинга — это просто скрипт, внедрённый в вашу систему, его может купить или найти кто угодно в интернете, поэтому будьте бдительны, нередки случаи, когда люди отдавали пк в сервис и получали обратно пк с вирусом.
Удаление вируса
Самым эффективным способом избавления от вируса будет
просто-напросто форматирование жёсткого диска, сброс винды и последующая её переустановка, тогда ваш пк будет кристально чист от любых вредоносных программ. Но зачастую на компьютере хранятся нужные фотографии, файлы, документы, так что будем удалять вирус, а удалять придётся вручную.
Первое , что нужно будет сделать — это скачать программу AIDA 64 Extreme, данная программа показывает загруженность вашего процессора, майнер такие программы не детектит и не отключается, если в простое процессор загружен, вирус есть.
Второе: чтобы отследить скрытые файлы, нужно будет вбить в поисковике windows » параметры проводника » (windows 10) или » параметры папок «, если у вас (Vista или Windows 7), там во вкладке » вид» нажать «отслеживать скрытые файлы, папки, диски.» После чего скрытые файлы и папки следует проверить на антивирусе.
Третье: вирусы любят базироваться в файлах винды, обычно в папке «пользователи», «App Data», «Local Low», «Windows «,»Program Files». В этих папках находится папка «Temp», там обычно они и есть, можете смело очищать данную папку, даже если там нет вирусов, ничего не случится.
Четвёртое: в некоторых из этих папок может быть две папки Microsoft, очень внимательно проверьте, возможно, одна из букв написана на русском языке — это майнер 100%. Проверить название можно в настройках. Если есть буква на русском или слово написано
неправильно — удалить папку.
Пятое: проверяйте каждый скрытый файл отдельно на антивирусе. Если какая-то папка, программа или файл вызывают у вас подозрения, удаляйте его и смотрите по Aide, если всё же файл оказался нужным и система выдаёт ошибку, всегда можно воспользоваться старым, добрым восстановлением системы.
И всё же, данные действия не будут являться 100% вариантом удаления. Убедились, что майнер есть, сбивайте систему, ставьте новую винду.
А если эта статья была для вас полезна, не забудьте поставить «нравится» и подписаться, будет еще много интересной информации. Если вам интересен подобного рода контент, дайте знать в комментариях. А я всем желаю удачи, не ловите вирусов, люди. До скорого.
how to remove dxgiadaptercache.exe
What is dxgiadaptercache.exe
dxgiadaptercache.exe is a dangerous Trojan. dxgiadaptercache.exe is newly discovered computer virus detected as Trojan. This Suspicious PC threat is a serious risk for all windows computers. This virus gets into your PC through different ways. It gets installed into your PC via free third party programs. dxgiadaptercache.exe can also get spread through junk email attachments and contaminated USB drives.
dxgiadaptercache.exe trespasses your machine without your knowledge and does severe damaging to your system. You will find it extremely difficult to work in ur computer as it will slow down your PC and causes lethargic performance. It also turns off your anti-virus program so that it stays for a longer period of time. Most of the system programs will keep freezing and frequently cease to work. dxgiadaptercache.exe Trojan virus can loot It can gather your banking details, credit and debit card credentials, IP address, user names, passwords and a lot more. Personal data and forward it to hackers. It can leads to major data loss if you will not remove this infection soon from your computer.
- Starts damage registry files.
- Modify system setting.
- Damages to various running processes like Task Manager, Control panel and System Restore
- Disables security programs.
- Track your personal details like user ID and passwords
- Blocks system updates to hide its identity.
How dxgiadaptercache.exe gets inside into your PC
- Downloading outdated infected drivers
- Further spread through downloads of suspicious applications,
- Freeware and shareware
- Using external storage devices
Threat Summary
| Name | dxgiadaptercache.exe Malware |
| Type | CryptoCurrency Trojan |
| Short Description | Aims to infect your computer and use it’s CPU, GPU and other resources to turn it into a miner for cryptocurrencies. |
| Symptoms | Hightened CPU and GPU usage and overheating. Loss of CPU’s and graphics cards’ power. User will experience unexpected sounds reproduced in random order from the PC. The victim PC may break if this virus mines for longer periods of time. |
| Distribution Method | Spam Emails, Email Attachments, Executable files |
| Detection Tool | dxgiadaptercache.exe is may crucial to track down. Recommended to Use SpyHunter real time Anti- malware to remove dxgiadaptercache.exe and associated files to protect your PC safely. |
Download to scan your PC and permanently Fix dxgiadaptercache.exe by below download Now Button. It is the Highest Selling Auto removal tool.

 dxgiadaptercache.exe Removal Options
 dxgiadaptercache.exe Removal Options
 Auto dxgiadaptercache.exe Removal Process by SpyHunter

How to Download and Install SpyHunter5 Depending on the Browser You Use
Download and installation instructions for SpyHunter5 for Google Chrome
You are just a few easy steps away from being able to safely and thoroughly remove Trojans, Spyware, rootkits, plus other malware and unwanted programs from your computer. Follow these few easy steps given below for the download and installation of SpyHunter:
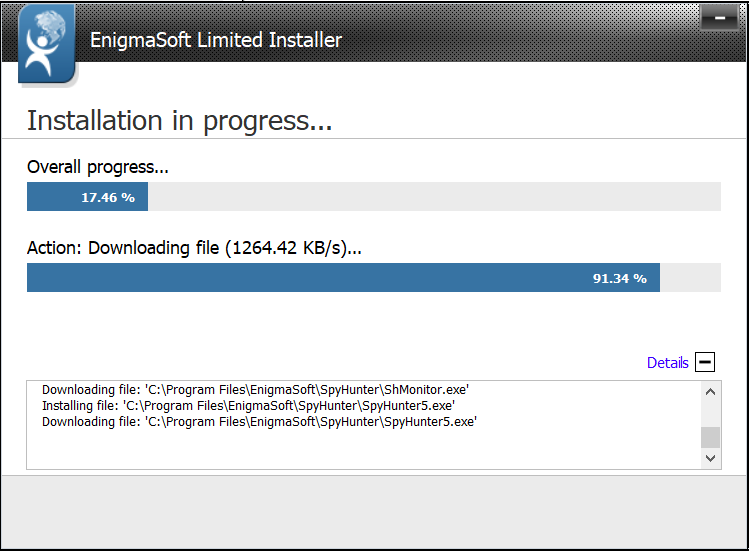
1. “SpyHunter-Installer.exe” will start to download on your computer, once you click on the download button. If needed, you could refresh the page to start the download. ( Press F5 or press the rounded arrow on the right side of the address bar )

2. Click on “SpyHunter-installer.exe” in the “download” dialog box to open the file. If a dialog stating “User Account Control” appears, select “YES”.
3. Choose your language option and press “OK”.

4. After reviewing the “License agreement”, select “I agree with the license agreement” then press “ACCEPT & INSTALL”.

5. Please wait for the download and installation to complete, and press “FINISH”.
(Optional) After the installation is complete, the installation file “SpyHunter-Installer.exe” can be deleted. To do that, click the green arrow for the “downloads” dialog box, right click on the “SpyHunter-Installer.exe”, choose “Open Containing Folder”, locate the file and delete it.
To start “SpyHunter” :
Locate its icon on the Desktop and click it.
or
Go to Windows “Start” menu, select “Programs” or “All Programs” and click on the “Spy Hunter” icon.
Download and installation instructions for SpyHunter for Mozilla Firefox
“Opening SpyHunter-Installer.exe” window will open on your computer, once you click on the download button. If needed, you could refresh the page to start the download. (Press F5 or press the rounded arrow on the right of the address bar).
Once the “Opening SpyHunter-installer.exe” appears, click on the “Save File” button. 
Click the “SpyHunter-Installer.exe” file from the “downloads” dialog box. If a dialog stating “User Account Control” appears, select “YES”. 
Choose your language option and press “OK”.
After reviewing the “License agreement”, select “I agree with the license agreement” then press “ACCEPT & INSTALL”.
Wait for the installation process to complete and press “FINISH”.
(Optional) After the installation is complete, the installation file “SpyHunter-Installer.exe” can be deleted. To do that, click the green arrow for the “downloads” dialog box, right click on the “SpyHunter-Installer.exe”, choose “Open Containing Folder”, locate the file and delete it.
To start “SpyHunter”:
Locate its icon on the Desktop and click it.
or
Go to Windows “Start” menu, select “Programs” or “All Programs” and click on the “Spy Hunter” icon.
Download and installation instructions for SpyHunter for Internet Explorer
You are just a few easy steps away from being able to safely and thoroughly remove Trojans, Spyware, rootkits, plus other malware and unwanted programs from your computer. Follow these few easy steps given below for the download and installation of SpyHunter:
1.“SpyHunter-Installer.exe” will start to download on your computer, once you click on the “Save” button. If needed, you could refresh the page to start the download. (Press F5 or click on the rounded arrow on the right side of the address bar).

2.Click on “SpyHunter-installer.exe” in the “download” dialog box to open the file. If a dialog stating “User Account Control” appears, select “YES”.
3.Press “Run” and follow the instructions.

4.Choose your language option and press “OK”.
5. After reviewing the “License agreement”, select “I agree with the license agreement” then press “ACCEPT & INSTALL” to being the installation process.
6.Please wait for the download and installation to complete, and press “FINISH”.
(Optional) After the installation is complete, the installation file “SpyHunter-Installer.exe” can be deleted. To do that, click the green arrow for the “downloads” dialog box, right click on the “SpyHunter-Installer.exe”, choose “Open Containing Folder”, locate the file and delete it.
To start “SpyHunter” :
Locate its icon on the Desktop and click it.
or
Go to Windows “Start” menu, select “Programs” or “All Programs” and click on the “Spy Hunter” icon.
Download and installation instructions for SpyHunter for Microsoft Edge
You are just a few easy steps away from being able to safely and thoroughly remove Trojans, Spyware, rootkits, plus other malware and unwanted programs from your computer. Follow these few easy steps given below for the download and installation of SpyHunter:
1. “SpyHunter-Installer.exe” download box will appear on the bottom of Microsoft Edge. If needed, you could refresh the page to see the Window. (Press F5 or click on the rounded arrow on the right side of the address bar). When you see it, make sure you click on “Save”

2. After the download, press the “Run” button and follow the instructions. If a dialog stating “User Account Control” appears, select “YES”.

3. Choose your language option and press “OK”.
5. After reviewing the “License agreement”, select “I agree with the license agreement” then press “ACCEPT & INSTALL” to start the installation process.
6. Please wait for the download and installation to complete, and press “FINISH”.


