- How to Install Drop Down Terminal Guake 3.7 in Ubuntu 18.04
- How to Install Guake in Ubuntu:
- Uninstall:
- Xfce и Drop Down в её терминале
- 7 комментариев к “ Xfce и Drop Down в её терминале ”
- Оставьте комментарий Отменить ответ
- XFCE drop-down terminal
- INTRODUCTION
- VIDEO TUTORIAL
- XFCE drop-down terminal feature
- Create a shortcut for the XFCE drop-down terminal
- CONCLUSION
- Drop down terminal linux
- About
- New Guake Drop-Down Terminal PPA (Ubuntu And Linux Mint Installation)
- Guake drop-down terminal
- Installing and using Guake
- Reverting Guake to the default Ubuntu-provided Guake version
How to Install Drop Down Terminal Guake 3.7 in Ubuntu 18.04
This simple tutorial shows how to install the latest drop-down terminal Guake 3.7 in Ubuntu 18.04, or Ubuntu 19.10.
Guake is an open-source drop-down terminal for Gnome desktop. While the software in Ubuntu main repository is old, the latest Guake 3.7 was released with following changes:
- Add tab selection popover in each notebook
- Add fullscreen hide tabbar option
- Set custom colors for each terminal tab.
- Add —select-terminal and —selected-terminal options to Guake CLI
- Adds an option to display only the last directory on the current path as the tab name.
- Reworked the tab name selection to use a drop-down menu.
- Unfullscreen through D-Bus interface, as well as through CLI.
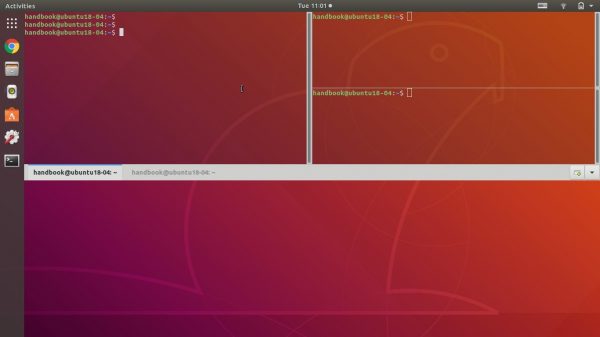
Guake Split Terminal Screen
How to Install Guake in Ubuntu:
Linux Uprising team maintains a PPA repository that contains the latest packages for Ubuntu 18.04 and Ubuntu 19.10.
1.) Open terminal and run command to add the PPA:
Type user password, no asterisk feedback, when it prompts and hit Enter to continue.

2.) Then run command to install the drop-down terminal application via commands:
Once installed, launch Guake Preferences from system application menu and enjoy!
If an old version was installed previously, you may first kill Guake process or just reboot your machine to make it well working.
Uninstall:
To remove the PPA, simply go to Software & Updates -> Other Software, then remove the repository line.
Источник
Xfce и Drop Down в её терминале
Я уже неоднократно признавался в своём тайном грехе — любви к выпадающим терминалам. А тут волею случая, о котором я расскажу в другой раз, образовалась у меня система с Xfce. О которой я слышал, что родной её терминал, который так и зовётся — xfce4-terminal , обладает способностью переключаться в режим Drop Down. Что я не преминул проверить.
Оказалось, да, так оно и есть. Для этого всего и нужно, что запустить терминал из командной строки терминала же (или из мини-терминала по Alt+F2) таким образом:
После чего на верхней стороне экрана, в середине её, появляется копия обычного терминального окна.
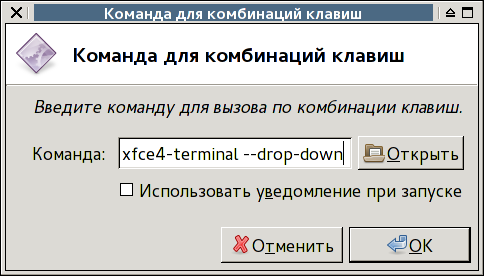
Однако обращаться с ним таким образом нет ни малейшего смысла. А нужно просто привязать указанную команду к горячей клавише через главное меню Настройки -> Клавиатура -> Комбинации клавиш -> Добавить:

Появляется панелька, в которую достаточно вписать указанную команду:
А затем нажать клавишу или комбинацию клавиш, к которой желательно привязать команду — традиционно для вызова выпадающих терминалов используется клавиша F12:

После чего в списке горячих клавиш добавится соответствующий элемент:

А нажатие на клавишу F12 в любой момент времени и (рабочего) места будет вызывать терминальное окно:

Как и в обычном терминале, правый клик мышью вызывает контекстное меню с пунктом Параметры:

А вызванная при этом настроечная панель обретает новую вкладку с забавным названием Цвет полужирного текста (в панели настроек терминала, запущенного обычным образом, такой нет):

Параметры, фигурирующие в этой панели, такие, как ширина, высота и прозрачность, настраиваются независимо от таковых обычного терминала, причём прозрачность исчисляется в процентах от установленной в обычном терминале. Все же прочие свойства выпадающего терминала наследуются от настроек родительского. В частности, нельзя убрать показ меню в выпадающем терминале, сохранив его в терминале обычном.
Из специфически «выпадающих» настроек обращаю внимание на боксик Использовать быструю клавишу… При её включении нажатие клавиши вызова выпадающего терминала, находящегося в «расфокусированном» состоянии, передаёт фокус ему, без промежуточных шагов скрытия и повторного вызова, как во всех прочих Drop-Down’ах, которых я до сих пор видел.
Главное же преимущество рассмотренного выпадающего терминала — его привязка к среде: применитель любого дистрибутива, поддерживающего Xfce, может быть уверенным в его наличии. А не заниматься поисками «внедесктопного» Drop-Down’а, который может и отсутствовать. Впрочем, это же — и его главный недостаток, поскольку ставить в каком-либо ином окружении отдельно xfce4-terminal обычно нет никакого резона.
7 комментариев к “ Xfce и Drop Down в её терминале ”
«ставить в каком-либо ином окружении отдельно xfce4-terminal обычно нет никакого резона»
Не знаю, я без него не могу ни в каком окружении. Помимо прочих уникальных свойств (вроде зелёного немигающего курсора и отлично настроенных дефолтных фонта и цветов) его ещё и можно сколлировать с клавиатуры (шифт со стрелками). Да и ставится он то ли вообще независимо от остальных частей xfce, то ли почти независимо.
yoshakar, мне собственно терминал нужен не часто — только когда надо смотреть какой-нибудь массированный вывод. В повседневной жизни (мне) удобнее выпадающий терминал и терминалы, встроенные в редактор или файл-менеджер (где ты, старый добрый konqueror, это придумавший?).
За подсказку про Shift+стрелки — большой рахмат.
> ставится он то ли вообще независимо от остальных частей xfce, то ли почти независимо.
В Void’е поглядел — говорит, что только libxfce4ui и libxfce4util.
Но в принципе — как у майнтайнера в левой пятке почешется: может и весь Xfce метапакетом в обязательные зависимости зафигачить.
Повторный вызов почему-то не ставит фокус в это окно, в итоге только лишь из-за этого пользоваться этим терминалом невозможно.
Волька, у меня прекрасно ставит, во-первых, во-вторых, ни один более иной D-D терминал этого не делает без предварительного сворачивания и выпадения
Так что, по Вашей логике, ими всеми невозможно пользоваться.
А мужики-то и не знали…
Алексей, спасибо за информацию и анализ.
Являясь давним пользователем Xfce не догадывался о такой возможности xfce4-terminal.
> с забавным названием Цвет полужирного текста
Можно попытаться исправить. Я делал пару мелких переводов для терминала на Transifex. Как оказалось, два года назад. http://itmages.ru/image/view/3012028/8165afc2. Но в релизе 4.12 так и не вижу.
Косяк с переводом исправлен.
Рекомендую перейти на gtk3 версию: наиболее свежий девелоперский релиз 0.6.92 или сборка из git. Помимо перехода на gtk3, я там добавляю новые фичи и исправляю баги.
Igor, спасибо за информацию. Принял к сведению для тех систем, которые буду устанавливать с Xfce.
Оставьте комментарий Отменить ответ
Для отправки комментария вам необходимо авторизоваться.
Источник
XFCE drop-down terminal
A drop-down terminal is very useful to have access to a terminal quickly and easily, especially if you are a person who uses a terminal frequently. There are several applications that have a drop-down feature but did you know that XFCE terminal supports the drop-down mode? In this post, you will learn to enable the XFCE drop-down terminal.
INTRODUCTION
XFCE is a lightweight desktop environment and to keep it light, I recommend using the XFCE built-in features instead of installing additional apps. For example, if you need a drop-down terminal, you do not have to install separate terminal apps such as quake, yakuake , or tilda . You can simply enable the drop-down option in the native XFCE terminal. This way you will get a lightweight terminal without spending additional resources of your system.
So, let us enable the XFCE drop-down terminal.
VIDEO TUTORIAL
XFCE drop-down terminal feature
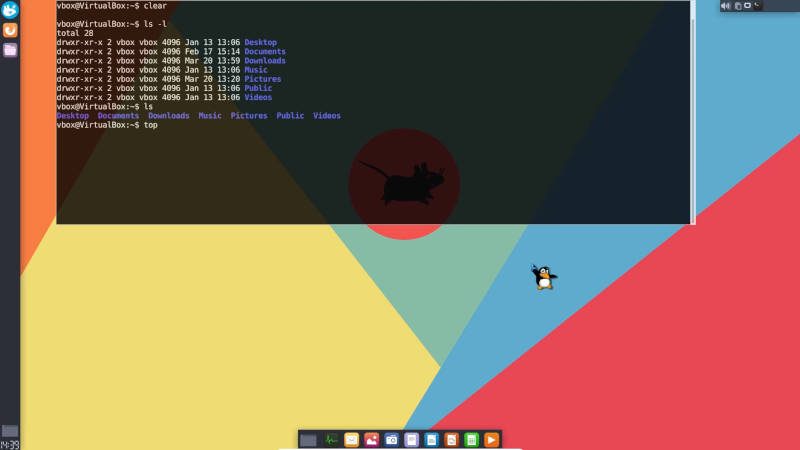
First, open a new terminal window from the main menu and start the XFCE terminal in the drop-down mode from the terminal.
You should see the terminal at the top of the screen.
I do not like its default border and menu at the top. It looks little bulky, Let us change that. First, disable the top menu by a right click on the terminal and disabling the Show MenuBar option.
Then, go to the terminal Preferences again with a right click of a mouse and configure it further. For example, I disable the tabs bar. You can also change the width, height, and opacity. I usually keep the dimensions by default and only changed the opacity to 80%. The default position of the terminal is fine as for me, but you can adjust it too.
In the rest of the tabs, you will find more options, but they are very generic and not very important for this case.
Create a shortcut for the XFCE drop-down terminal
Now, the XFCE drop-down terminal is configured and you only have to create a shortcut for this terminal. Because you are not going to run a drop-down terminal from a regular terminal every time you need it :-).
To create a shortcut , open the system settings and go to the Keyboard section.
In the Application shortcuts tab, you can add a new one by clicking on the add button.
In the shortcut command type xfce4-terminal —drop-down and click on the OK button.
After that, you need to press the shortcut key you want to link to the drop-down terminal. I usually use the F12 key.
Close the Settings and test your new shortcut by pressing it. When I press F12 and the terminal appears. When it loses a mouse focus it disappears, but it does not close. On the next F12 press it will appear in the same state as when it disappeared.
You can also open different tabs in this drop-down terminal by pressing Ctrl+Shift+T.
CONCLUSION
As you can see, it is not necessary to load your XFCE desktop with applications to have a drop-down terminal if the XFCE default terminal can do it. Now, you know that and with this drop-down configuration, you will be able to have constant and quick access to your XFCE terminal. I believe your work will be much more efficient now.
I hope this tip was useful for you. So, did you know about this? Do you use it? Let me know in the comments section.
You can also read my post about the terminal color scheme.
Источник
Drop down terminal linux

A GNOME Shell drop down terminal with extra feautures
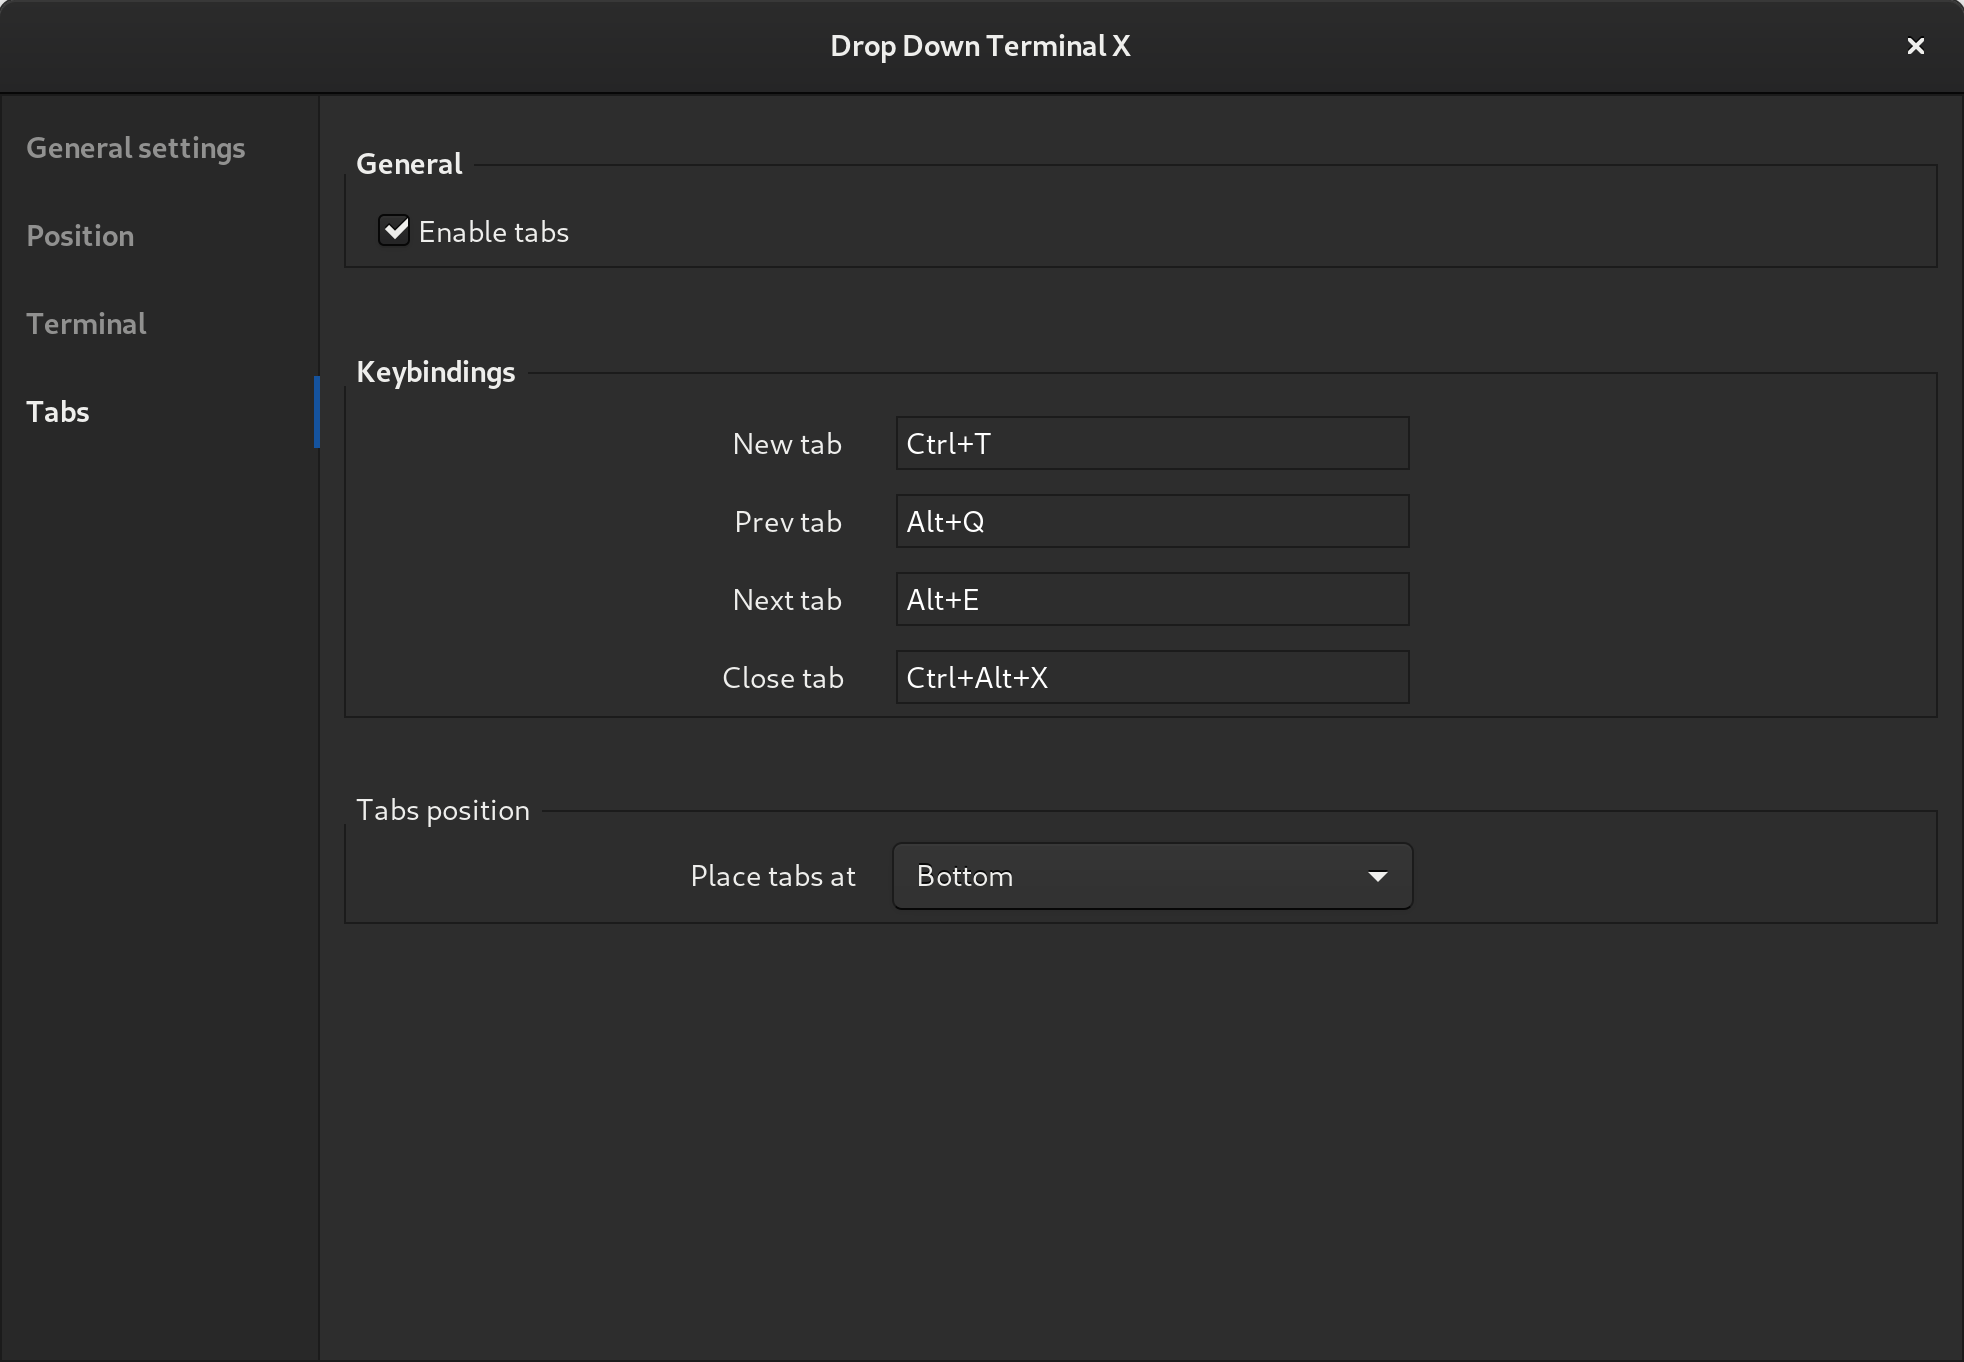
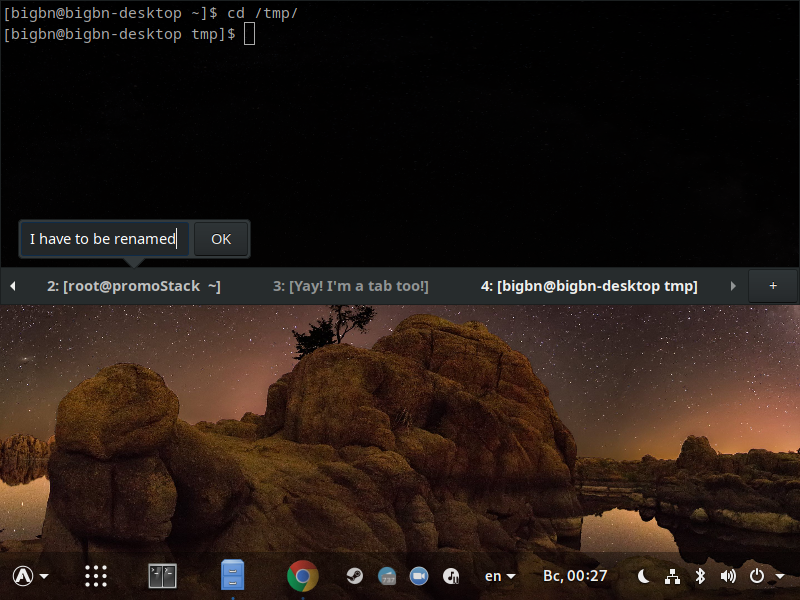
- Tabs support
- Multi-monitor support
- Font scaling support
- [Focus out] / [Escape pressed] events for hide
- Custom shortcuts
- SSH
/.config hosts fast acess


Shortcuts file format
You can create file
/.config/drop-down-terminal-x/shortcuts with such format:
There is two parts divided by colon: right part is a command, left one is a JSON array, it contains string with human readable name of launcher (maybe some new properties like icon, «open» mode and etc will appear in future).
Line started with # interpreted as comment and will be ignored by parser.
These items are displayed as executable actions under special kebab button at right corner. Extension must be restarted (off/on in gnome-tweaks) after file creation to take effect.


About
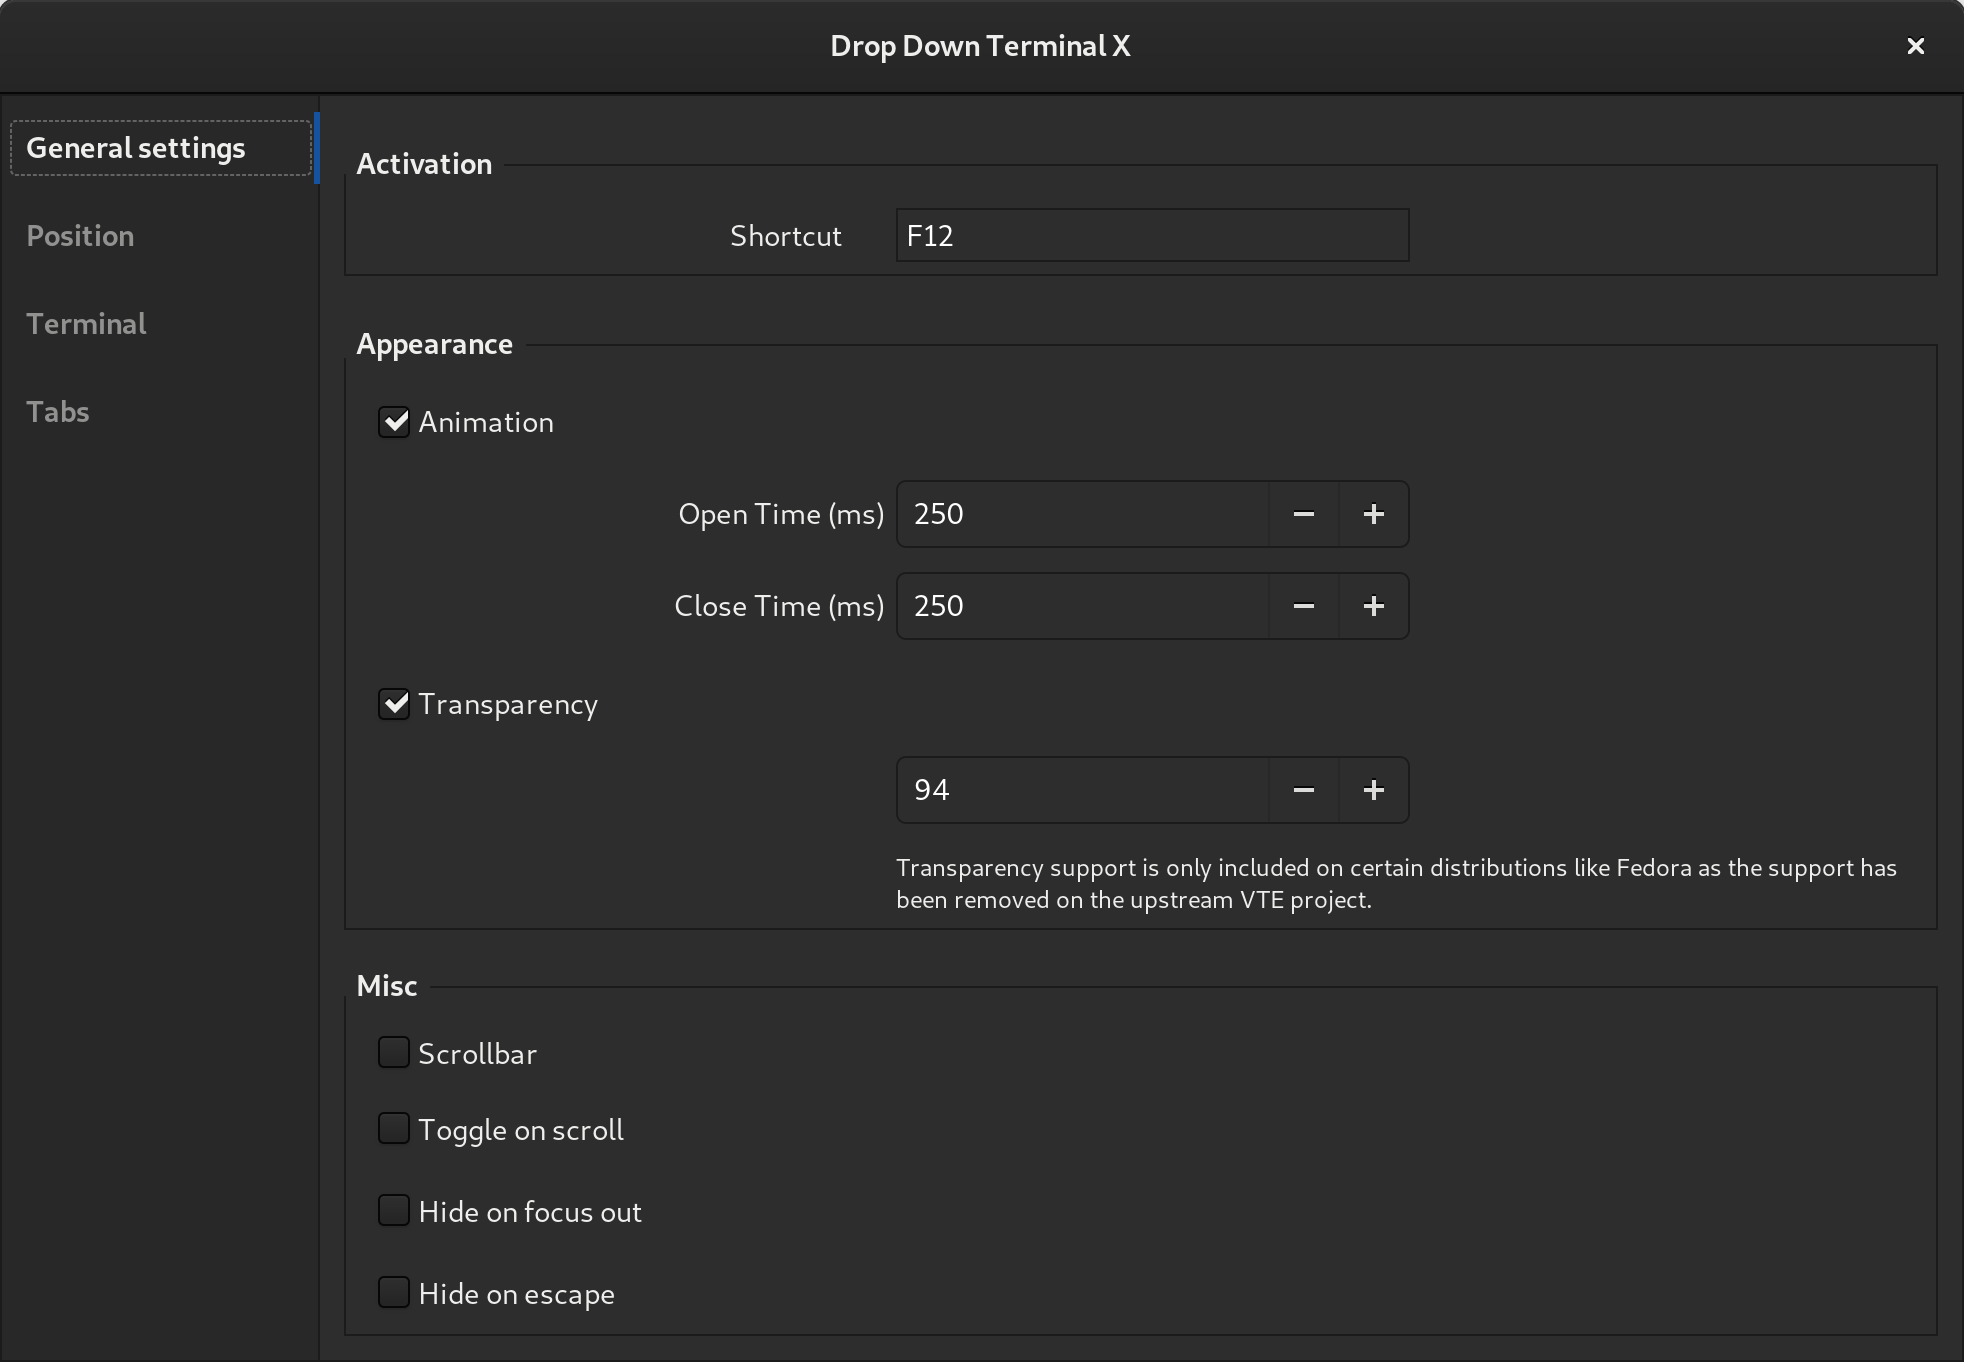
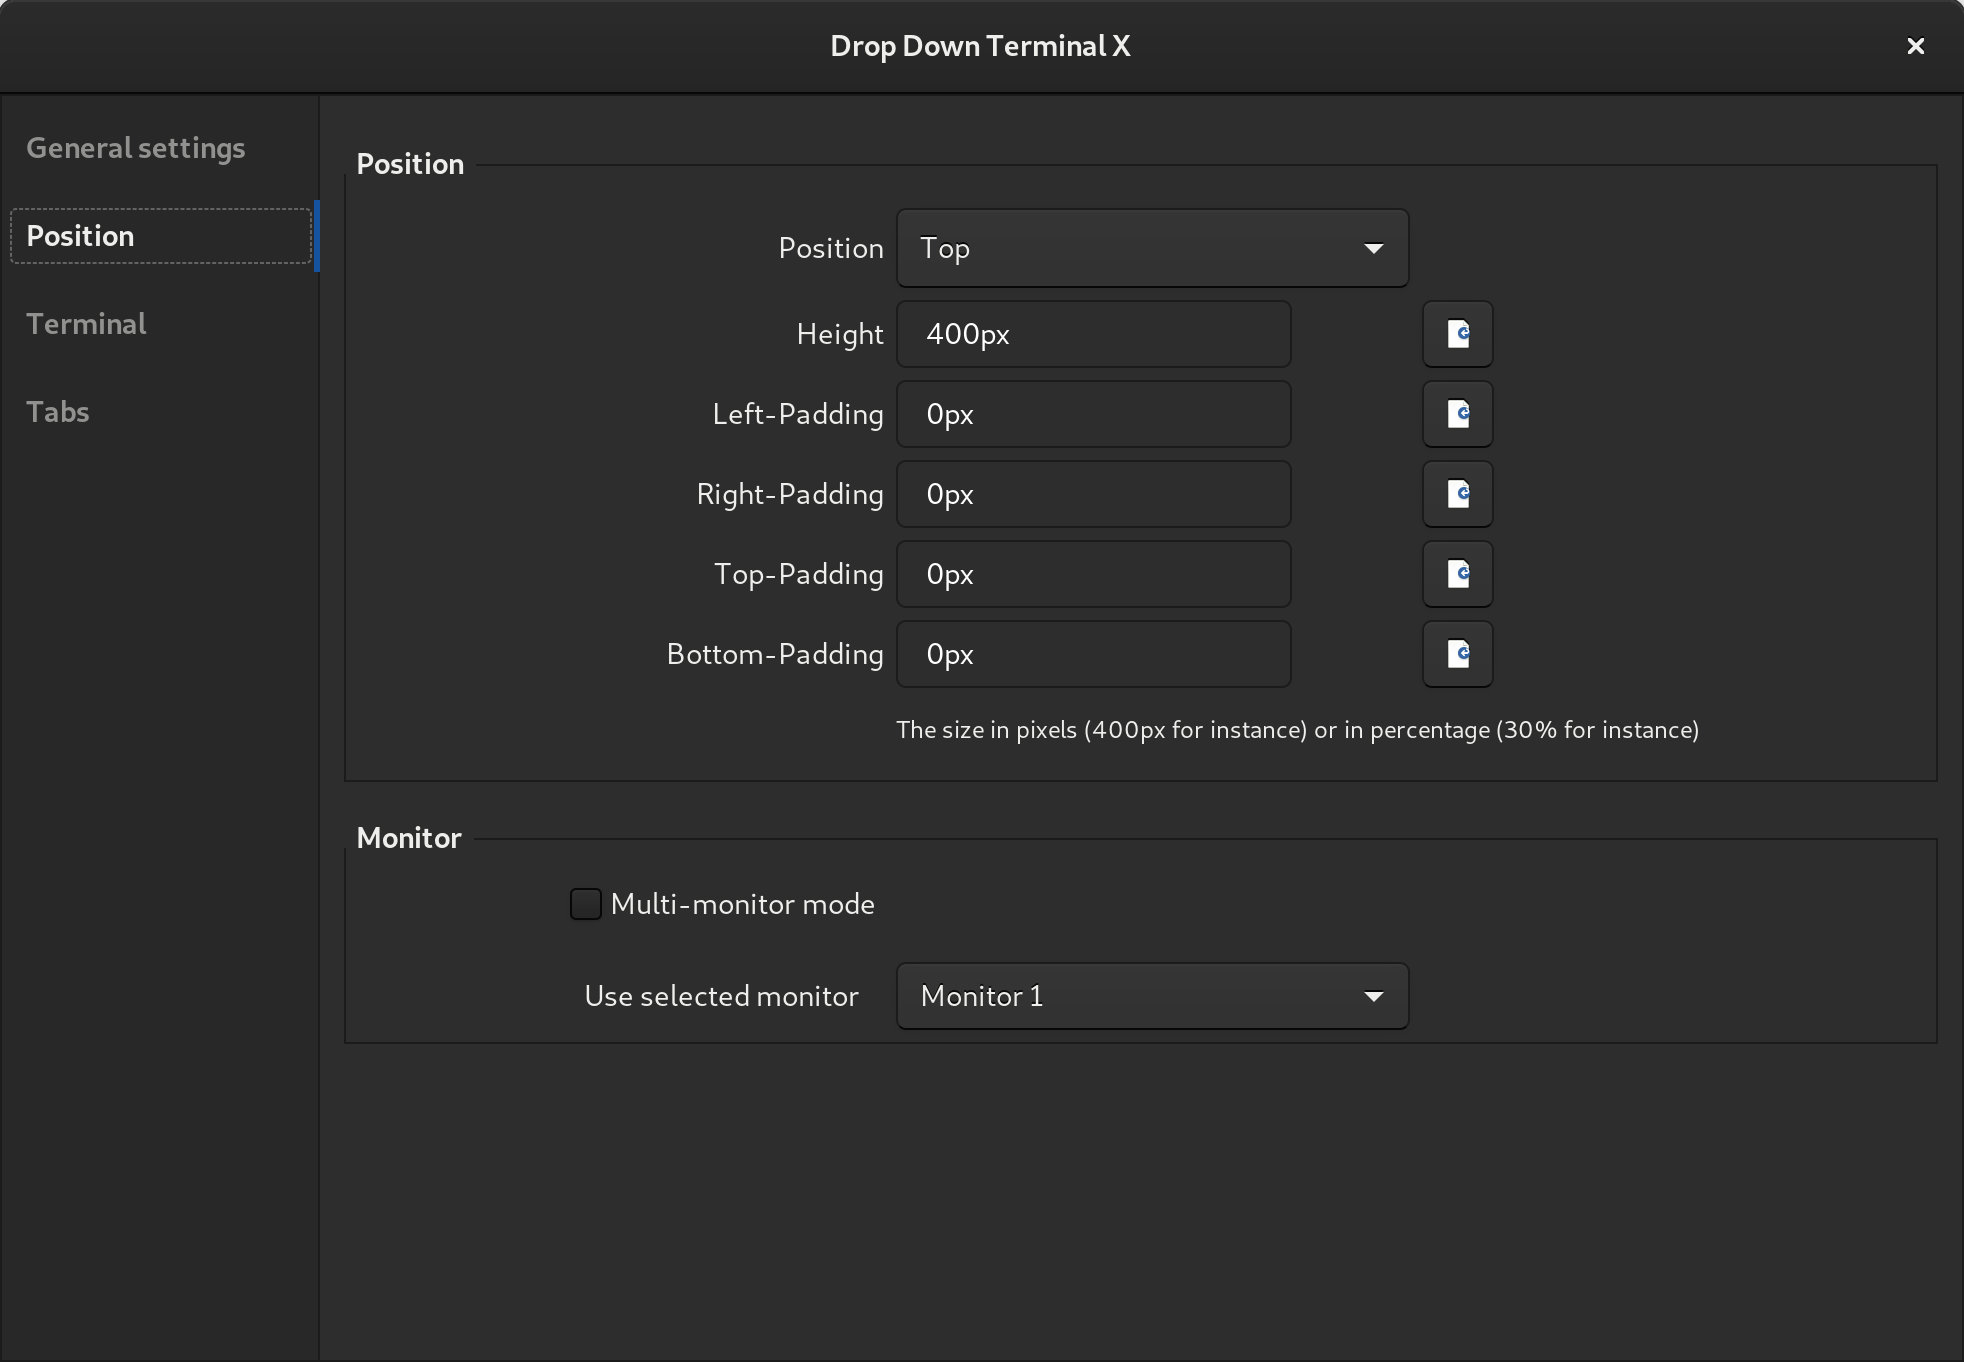
Drop Down Terminal X extension for the Gnome Shell
Источник
New Guake Drop-Down Terminal PPA (Ubuntu And Linux Mint Installation)
Guake is a drop-down terminal for the GNOME desktop which includes split terminal functionality, session save/restore, support for transparency, and many other features.
Seeing that Ubuntu has quite outdated Guake versions (3.4.0 for Ubuntu 19.04, and 3.0.5 for Ubuntu 18.04, while the latest Guake version is 3.6.3), and creating a Launchpad PPA for the latest Guake releases is the most requested «feature», I created a Guake APT PPA for Ubuntu 19.04, 18.10 and 18.04. Ideally Guake should be packaged as a Snap or Flatpak package, so it can be installed on many other Linux distributions, but I don’t have experience with those types of packages.
The PPA also works in Linux Mint 19.x, and any other Linux distributions based on Ubuntu (18.04-19.04).
You can see what’s new in recent Guake releases by visiting its project page.
Guake drop-down terminal
Guake is inspired by the famous Quake console — the terminal stays hidden until you press a key (default is F12 ). Execute a command, then press the same key again to hide the terminal, going back to your previous task without breaking your workflow.
Main Guake features:
- Drop-down terminal, is shown or hidden with a keyboard shortcut (can also automatically hide when it loses focus)
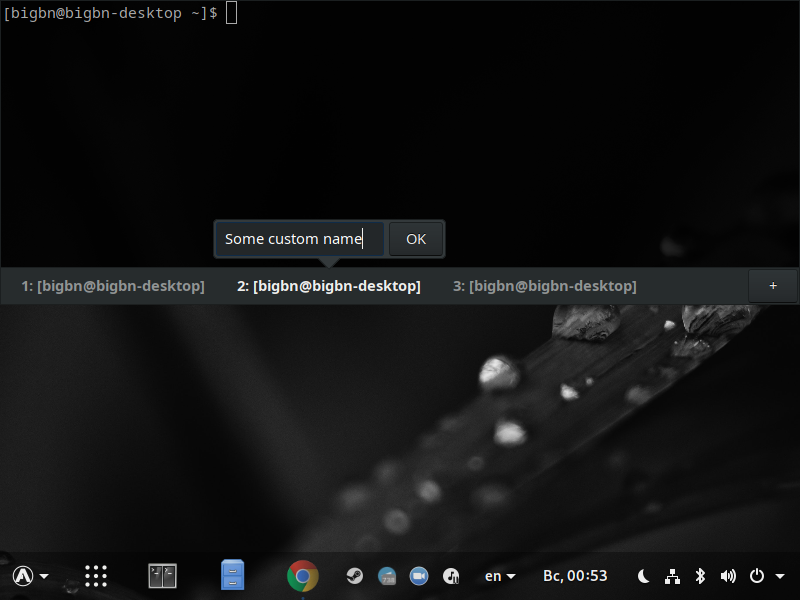
- Supports tabs that can be renamed
- Multi-monitor support (you can set it to a monitor, or you can have it appear on the display where the mouse is)
- Split terminal functionality (have multiple vertical and horizontal terminals in the same window)
- Quick open: click a file in the terminal output to open it with your favorite text editor
- Session save/restore (by default it saves your previous session and restores it the next time you run Guake), as well as settings export and import
- Workspace-specific tab sets (show a different tab set depending on current workspace). This only works on X11
- Search in current terminal ( Ctrl + Shift + F )
- Many customization options: configure the window width, height and alignment, show the tabs at the top or bottom, set the window transparency, and more.
- More than 130 built-in color palettes
Related: Tilix: The Almost Perfect Tiling GTK+ 3 Terminal Emulator
Installing and using Guake
I created this PPA for Guake only, so no other packages are in the PPA. That means no other packages on your system are upgraded, and you can easily purge the PPA if you want to downgrade Guake to the version you had installed previously.
Use this to add the PPA and install the latest Guake in Ubuntu 18.04, 18.10 or 19.04, and Linux Mint 19.x:
Guake starts hidden by default, so the first time you run it you won’t see any terminal window.
Press F12 to show the Guake window if you’re using X11 (this can be changed in the Guake Preferences). On Wayland, you’ll need to create a custom keyboard shortcut for the guake -t command ( -t toggles the visibility of the terminal window).
E.g. on Gnome, go to System Settings -> Keyboard , scroll down to the bottom, and click the + button to create a new shortcut. Use guake -t as the command, and assign a shortcut, like F12 for example.
| Guake General preferences |
| Guake Main Window preferences |
A few settings you may want to change:
- Guake has an option to automatically start (hidden) on login, so yo don’t have to launch it manually. Enable it from its Preferences, on the General tab (enable the Start Guake at login option)
- If you want the Guake window to hide automatically when you focus another window, open the Guake Preferences, and enable Hide on lose focus on the Main Window tab
- In some cases on multi-monitor setups with a dock on the left or right of the screen, like it’s the case with the default Ubuntu Dock, Guake may be shown behind the dock, or extend slightly to the other screen. A solution for this is to set the Guake window width to less than 100% ( Preferences -> Main Window -> Geometry at the bottom of the window)
- Newer Guake versions support using a custom GTK theme (as well as preferring dark theme). Choose the theme you want Guake to use from Preferences -> General -> Gtk theme
Reverting Guake to the default Ubuntu-provided Guake version
Don’t want to use the Guake version from this PPA any more? No problem, you can purge the PPA and downgrade Guake to the Ubuntu / Linux Mint provided version:
Источник


