- How to Inject Drivers into a Windows 10 WIM/ISO Install Image?
- How to Inject Driver into a Windows 10 Install Image using PowerShell?
- Adding Drivers to an Offline Windows Server 2012 R2 Image Using DISM
- Add a Device Driver Path to an Answer File
- How to Install a Driver Manually in Windows 7, 8, 10 (Basic .inf driver)
- What are Basic Drivers?
- How to Install a Driver Manually using its basic driver
How to Inject Drivers into a Windows 10 WIM/ISO Install Image?
In this article, we will show you how to add the necessary device drivers directly into the Windows installation image. The integration of the device drivers into your offline Windows image is widely used when you need to deploy a large number of workstations and servers on the same hardware. Instead of manually installing specific drivers (including AHCI/ RAID/ NVMe) on each device, you can significantly simplify and accelerate OS deployment process by integrating the drivers directly into the Driver Store of the Windows installation image in the ISO/WIM or the VHD/VHDX file. When installing such an image, the Plug and Play service (PnP) will automatically install the necessary drivers for the detected hardware.
This manual is about the integration of device drivers into a Windows image and can be used both on desktop editions of Windows 10, Windows 8.1 and on Windows Server 2016, 2012 R2.
In modern Windows editions you can add drivers to the installation ISO image in two ways:
- using the DISM utility;
- using the PowerShell CLI.
In fact, both techniques perform the same operation: add additional drivers into the offline Windows image. How to use it is a matter of personal administrator preference. Let us consider in more detail both ways on the example of integrating drivers into the Windows 10 installation image.
How to Inject Driver into a Windows 10 Install Image using PowerShell?
First of all you need to download and place all the necessary device drivers in one directory (for each driver you need to create a separate folder). Please note that many vendors (including Dell, HP) supply their drivers in the form of self-extracting exe or zip archive files. Such archives must be unpacked to local drive so that the directory with drivers contains inf, cat and sys files.
Before you start, create the following directory structure on your local drive:
- The Drivers folder – it contains unpacked driver files for your Windows 10 edition (which are supposed to be integrated into the install media);
List all Windows editions contained in the Install.wim file using the Get-WindowsImage PowerShell cmdlet. This is necessary in order to specify the Widows edition into which it is planned to integrate the additional drivers.
Get-WindowsImage -ImagePath C:\WinWork\ISO\install.wim
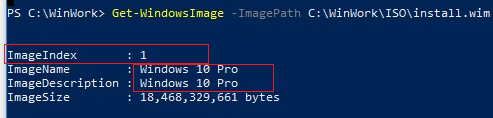
In our example, the WIM file contains only one Windows 10 Pro edition with the index 1 (ImageIndex: 1).
Next you need to mount the image of the selected Windows edition in the directory Mount. The Windows image index, which you need to mount, must be specified as an argument of the Index parameter:
Mount-WindowsImage -Path C:\WinWork\Mount\ -ImagePath C:\WinWork\ISO\install.wim -Index 1

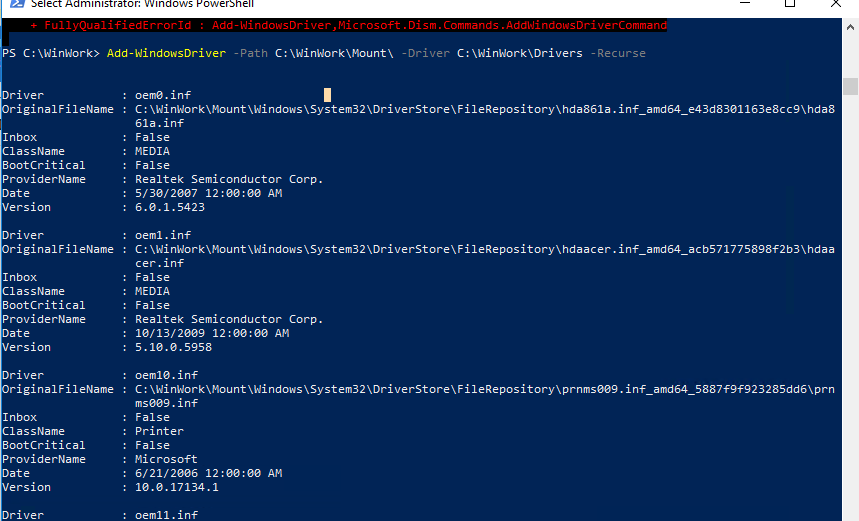
After the image is mounted, you can add drivers to it from the Drivers directory using the command:
Add-WindowsDriver -Path C:\WinWork\Mount\ -Driver C:\WinWork\Drivers -Recurse
The Add-WindowsDriver cmdlet will recursively search (the -Recurse parameter) the specified folder for all *.inf files with driver description. According to the description in the inf file, the cmdlet will add the dependent INF, DLL, CAT, PNF, etc. files to the Driver Store of your Windows image.
So, the drivers are copied, and the current image can be unmounted with saving changes:
Dismount-WindowsImage -Path C:\WinWork\Mount\ –Save

In the above example, we added drivers to the Install.wim image file. This is the Windows image that will be deployed to a computer local disk. If you need to add drivers to a Windows boot image (from which the computer boots when you install Windows), you need to add drivers to the Boot.wim file. This is usually necessary when installing Windows, the computer doesn’t detect local hard drives or doesn’t connect to LAN. Usually, only drivers of disk controllers and network adapters need to be integrated into the boot.wim image.
You can convert your install.wim file containing the Windows installation image with integrated drivers into the install.esd format using the DISM compress option:
DISM /Export-Image /SourceImageFile:C:\WinWork\ISO\install.wim /SourceIndex:1 /DestinationImageFile:C:\WinWork\ISO\install.esd /Compress:recovery
It remains to create an ISO file using Dism++ or the oscdimg command and write it to a disk or USB flash drive:
oscdimg -n -m -bc:\ISO\boot\etfsboot.com C:\ISO C:\new_win10pro_image.iso
Adding Drivers to an Offline Windows Server 2012 R2 Image Using DISM
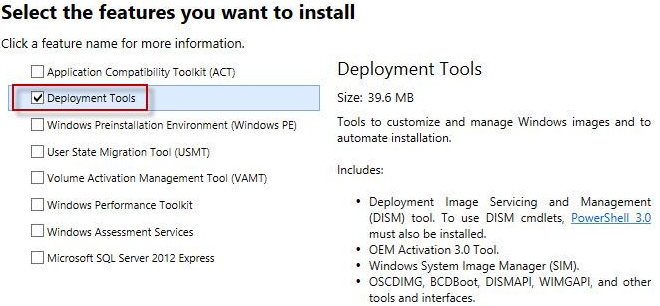
Now we will show an example of integrating drivers into the install image of Windows Server 2012 R2. If you are building an image on Windows 8.1, you will need to download and install Windows 8 ADK (http://www.microsoft.com/en-us/download/details.aspx?id=30652) to continue working with the latest version of DISM. You need to install the Deployment Tools component.
Use the same directory structure: Drivers (drivers and *.inf files are stored), ISO (unpacked image of Windows Server 2012 R2), Mount (image mount directory). It is assumed that in the install.wim file we are interested in the Windows Server 2012 R2 Datacenter edition with index 3.
Mount the install.wim installation image:
dism /Mount-Wim /WimFile:c:\iso\sources\install.wim /Index:3 /MountDir:c:\mount
Run a recursive search and integration of the new drivers into the driver store of the Windows Server 2012 R2 image:
dism /image:c:\mount /Add-Driver «/driver:c:\drivers\» /recurse
Save the changes to the WIM image:
dism /unmount-wim /mountdir:d:\mount /commit
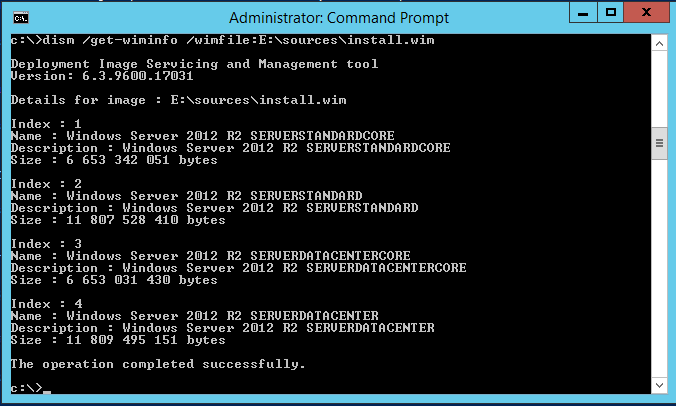
If you need to add drivers to all Windows Server editions contained in the wim file, these operations must be performed for all indexes of OS versions that the command returned:
dism /get-wiminfo /wimfile:d:\install.wim
In addition to driver integration, it is usually necessary to inject security updates to the Windows image to be installed (How to add updates into the Windows installation image). This will increase the security of your OS immediately after the installation. It remains to write the resulting installation image to the DVD disk or USB flash drive or convert it to the ISO image.
Add a Device Driver Path to an Answer File
The following procedure describes how to add a device driver path to an answer file by using WindowsВ® System Image Manager (WindowsВ SIM).
This device-driver path is used to process additional out-of-box device drivers during WindowsВ Setup. Out-of-box device drivers can be copied to a Windows image during the windowsPE configuration pass. In this configuration pass, you can add boot-critical drivers to a Windows image before that image is installed.
You can add more drivers to the Windows installation during the auditSystem configuration pass.
When you select a driver path, you select a folder that contains one or more .inf drivers. The folder path is added to the answer file and, during an unattended installation, is referenced to find all drivers in the path and install them.
You can add only .inf drivers to a Windows image by using this procedure. You must install drivers that are packaged as a .exe file or other file types on a running Windows operating system.
To add a device-driver path to an answer file:
Open WindowsВ SIM.
Create or open an answer file. For more information, see Create or Open an Answer File.
On the Insert menu, click Driver Path.
Select the configuration pass in which you want to install the driver. This can be the windowsPE or the auditSystem configuration pass.
Adding a driver to the auditSystem configuration pass processes the driver during Audit mode only.
The Browse for Folder dialog box appears. Select the driver path that you want to add to the answer file, and then click OK. The driver path is added to the answer file under the configuration pass that you selected. Depending on the configuration pass that you selected, the driver path is included as a list item to one of the following components:
Microsoft-Windows-PnpCustomizationsWinPE for the windowsPE configuration pass
Microsoft-Windows-PnpCustomizationsNonWinPE for the auditSystem configuration pass
You can also drag drivers from an Out-of-Box Drivers folder in the Distribution Share pane to either the windowsPE or auditSystem configuration pass in the Answer File pane. Or, right-click to add it.
How to Install a Driver Manually in Windows 7, 8, 10 (Basic .inf driver)
Every device needs a driver to communicate with the computer. As you all know, Device driver is a mandatory thing to communicate with any devices like printer, LAN card, Bluetooth, Wi-Fi, audio device etc. Installing a device through its driver setup file is an easy task. But it won’t be easy, if you install a device through its basic driver (inf driver). Here in this article we’ll show you how to install a driver manually using its basic INF driver through device manager.

What are Basic Drivers?
Usually drivers comes as installer. They can be easily installed by running a setup file. But Basic drivers comes without installer. Basic drivers are available in INF format. So to install these type of basic drivers we need to perform some tasks manually. Basic drivers takes very less size, so they are easy to keep as backup. And some times full feature installer is unable to detect the device in this case also we have to install them manually. Sometimes the only basic driver is available for download instead of full feature driver (with installer). So, we only have an option to install the basic driver manually using its basic driver on our computer, but some peoples don’t know how to do it. Here in this article, we will show you how you can install a computer device using its basic “.inf” driver.
How to Install a Driver Manually using its basic driver
We are taking an example of a laptop Wi-Fi driver (Wireless card driver). So let’s get started without any delay.
Before starting you must have the basic driver files available with you. Or first download the drivers from the Internet. Then proceed the following steps
- Step 1: To install basic driver manually, you’ll require to download its basic driver (.sys, .inf driver) which should be in zip format.

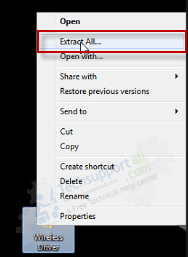
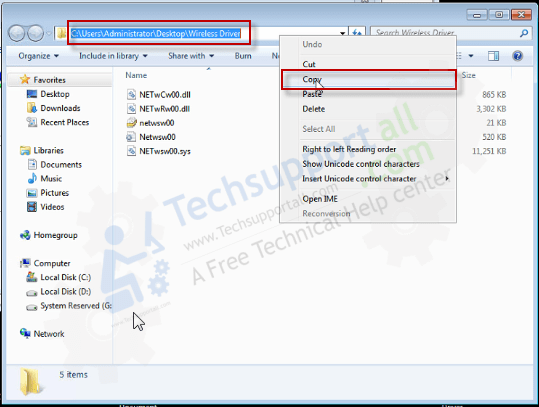
- Step 2: Extract the zipped driver file to a location and copy the location path.
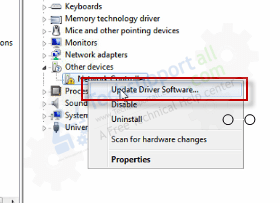
- Step 3: Right-click on “My computer / This PC” → click on Manage → Device Manager→ Other devices.
- Step 4: Under other devices you’ll see a device named “Network Controller“. Right-click on Network Device and click on Update driver. You may find the devices with Yellow mark which are without proper device drivers. Select your targeted device from the list.
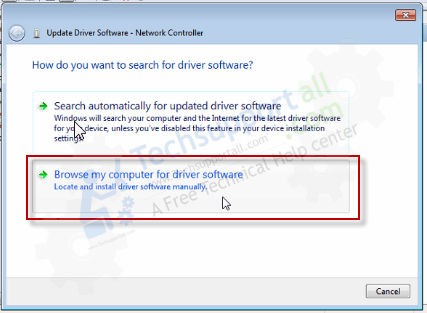
- Step 5: Choose the second option “Browse my computer for driver software“.
- Step 6: Click on second option “Let me pick from a list of available drivers on my computer“.
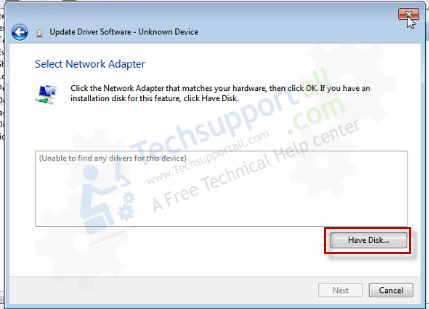
- Step 7: Click on Have Disk.
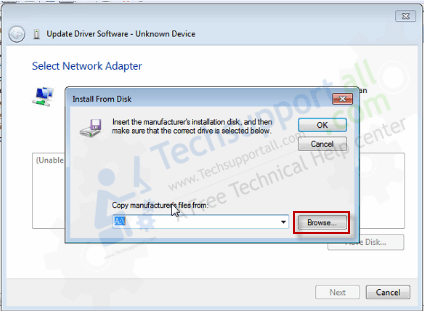
- Step 8: Click on Browse.
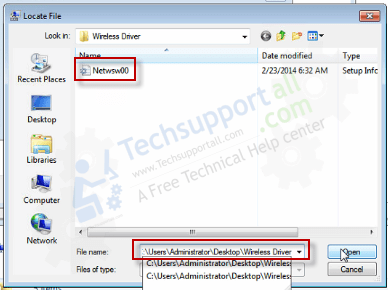
- Step 9: Now, paste the copied path in the “File name” field, and click on open button. Choose the INF file and click on Open. You may extract the full feature driver file and then find the .inf driver file in it.
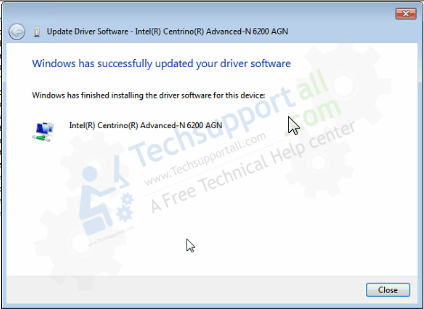
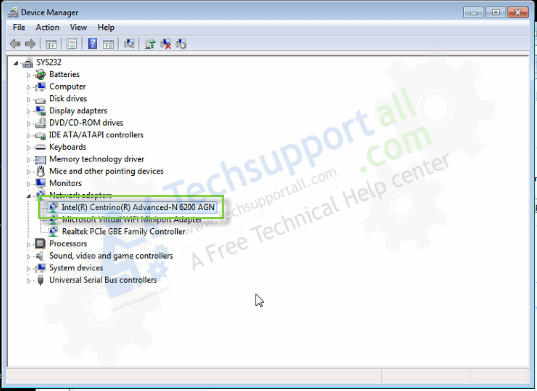
- Step 10 : It will update the driver’s list, choose the driver “Centrino Advanced-N 6200 AGN” and then click on Next.
- Step 11: It will start installing the driver automatically and then it will give you the successfully installed message.
- Step 12: You could go to the device manger and check the basic driver (.inf) has been installed successfully.


If you are unable to find the appropriate drivers you may look for some driver finder utilities or automatic driver installer software. Check out the Best Driver Finder Software.


