- Управление питанием процессора в Windows 10
- Изменение стандартных параметров плана электропитания
- Включение дополнительных параметров
- Использование командной строки
- FIX: CPU Not Running at Full Speed in Windows 10.
- How to fix: Windows 10 Not Running at Full CPU Speed.
- Full household PC Protection — Protect up to 3 PCs with NEW Malwarebytes Anti-Malware Premium!
- 35 Comments
Управление питанием процессора в Windows 10

В операционной системе Windows 10 имеется отдельное меню настроек, отвечающее за управление питанием. Особенно актуальна эта тема для обладателей ноутбуков, когда требуется оптимизировать потребление энергии при работе устройства от батареи. Однако и пользователи стационарных компьютеров тоже нередко сталкиваются с такой задачей. Основное влияние на потребление энергии оказывает процессор, поэтому для оптимизации или настройки максимальной производительности в первую очередь следует обращать внимание на питание именно этого комплектующего. Об этом и пойдет речь далее.
Изменение стандартных параметров плана электропитания
Для начала поговорим о стандартных параметрах планов электропитания. Как известно, в ОС можно настроить сразу несколько профилей, чтобы быстро переключаться между ними. Сейчас мы разберем только текущий план, а вы, отталкиваясь от увиденных инструкций, сможете точно так же настроить и другие профили, изменяя только значения пунктов, чтобы создать необходимое питание для процессора.
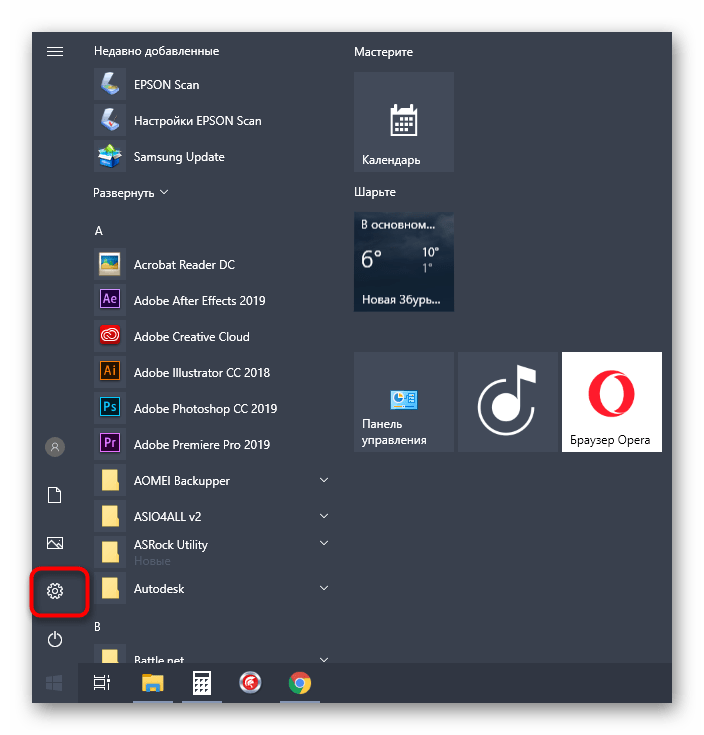
- Откройте меню «Пуск» и перейдите оттуда в «Параметры», щелкнув по значку в виде шестеренки.
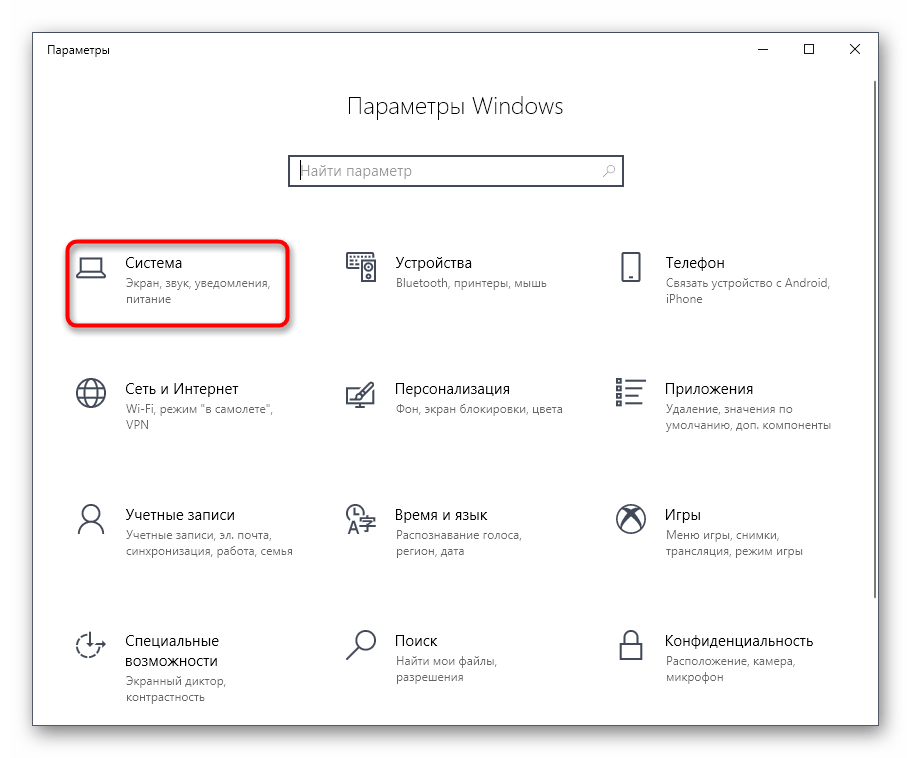
Через панель слева переместитесь в «Питание и спящий режим».

Отыщите надпись «Дополнительные параметры питания» и кликните по ней левой кнопкой мыши.

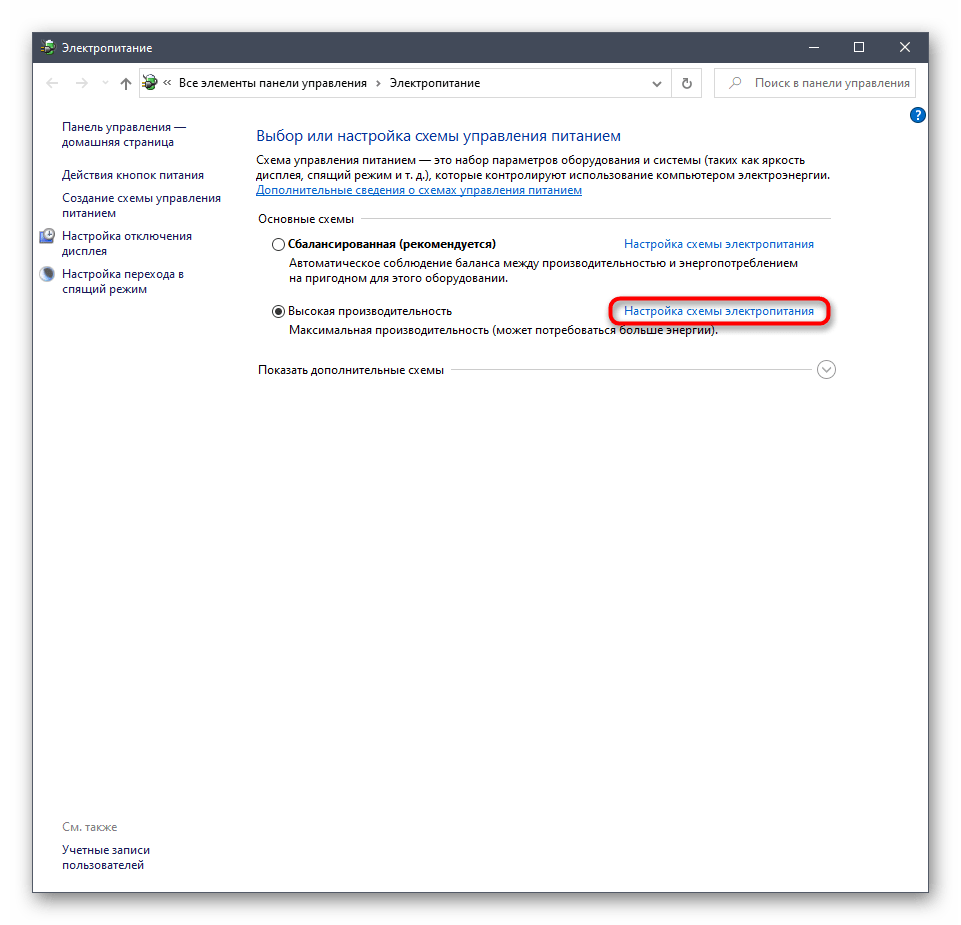
В открывшемся окне щелкните ЛКМ по «Изменить дополнительные параметры питания».

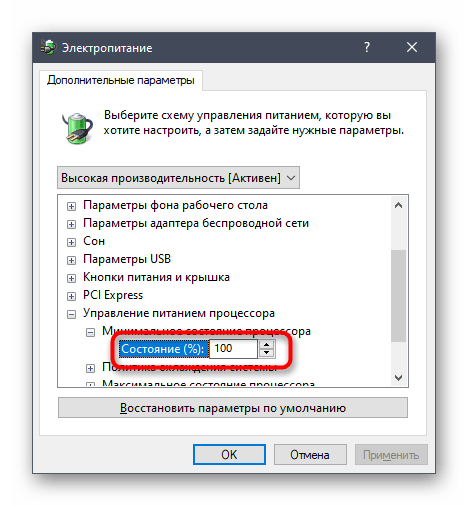
Теперь в появившемся списке вам нужно выбрать раздел «Управление питанием процессора», развернув его.
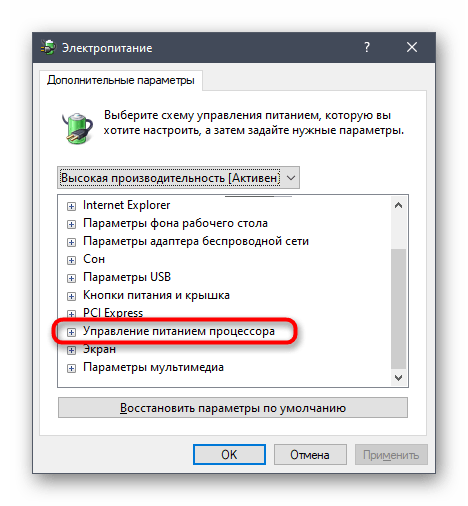
Обратите внимание на находящиеся здесь три пункта «Минимальное состояние процессора», «Политика охлаждения системы» и «Максимальное состояние процессора». Первый параметр отвечает за минимальную производительность процессора в процентах. Например, если какое-то приложение будет запущено, то для него выделятся все мощности комплектующего, чтобы быстро выполнить задачу. Полной противоположностью является третий параметр, ведь в нем вы устанавливаете максимально допустимую нагрузку, ограничив тем самым производительность.

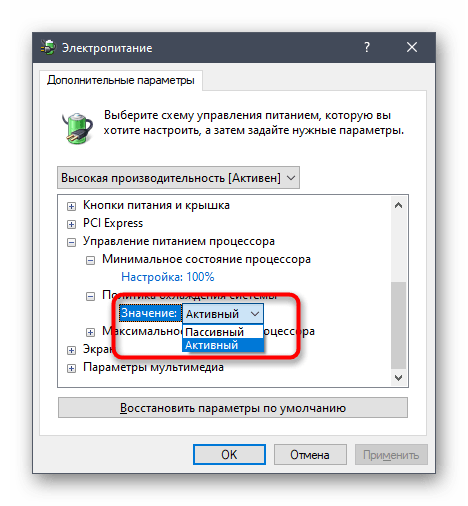
Пункт «Политика охлаждения системы» позволит установить, будут ли вентиляторы ускорять свою работу при замедлении быстродействия центрального процессора.
Все остальные настройки плана электропитания в Windows 10 не имеют никакого отношения к процессору, поэтому мы их пропустим. Однако если вы хотите их изменить, сначала наведите курсор на пункт, чтобы отобразилась всплывающая подсказка. Там вы сможете узнать, за что отвечает конкретный параметр.
Включение дополнительных параметров
По умолчанию один важный параметр питания процессора в рассмотренном выше меню не отображается, хотя он может быть полезен ряду пользователей. Эта настройка отвечает за ограничение частот процессора, то есть если их понизить, потребление энергии значительно снизится, но вместе с этим упадет и производительность. В случае заинтересованности данным параметром выполните следующие действия:
- Откройте утилиту «Выполнить», зажав комбинацию клавиш Win + R. Введите там regedit и нажмите на Enter.

Перейдите к HKEY_LOCAL_MACHINE\SYSTEM\CurrentControlSet\Control\Power\PowerSettings\54533251-82be-4824-96c1-47b60b740d00\75b0ae3f-bce0-45a7-8c89-c9611c25e100 , вставив этот путь в адресную строку.
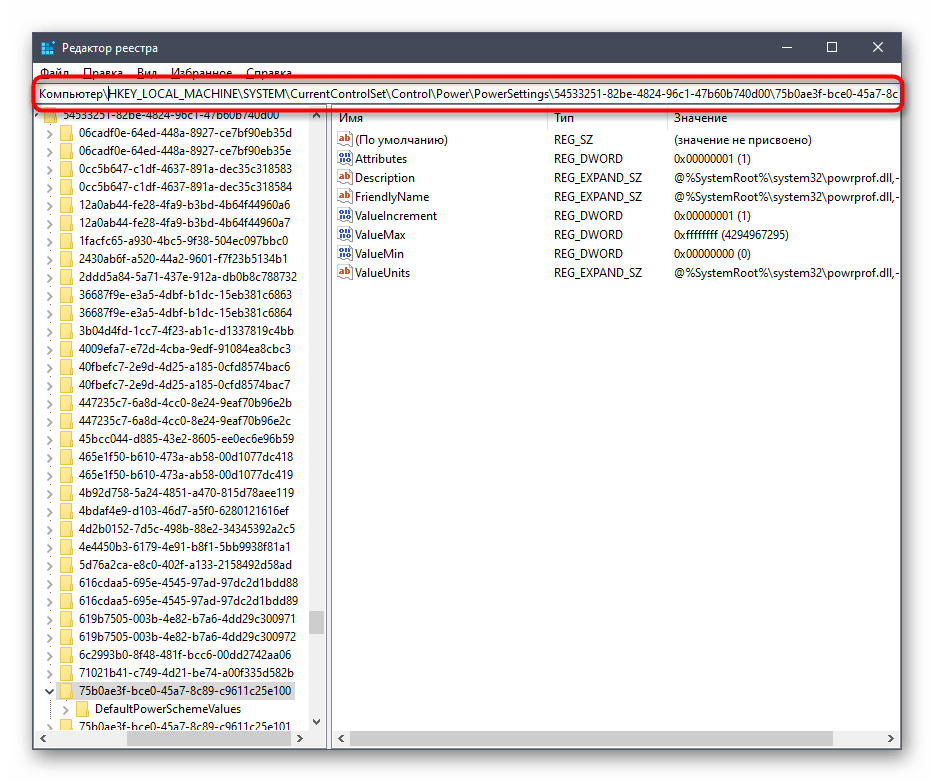
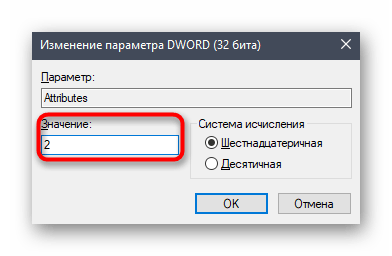
В корне конечной директории отыщите параметр «Attributes» и дважды кликните по нему правой кнопкой мыши.
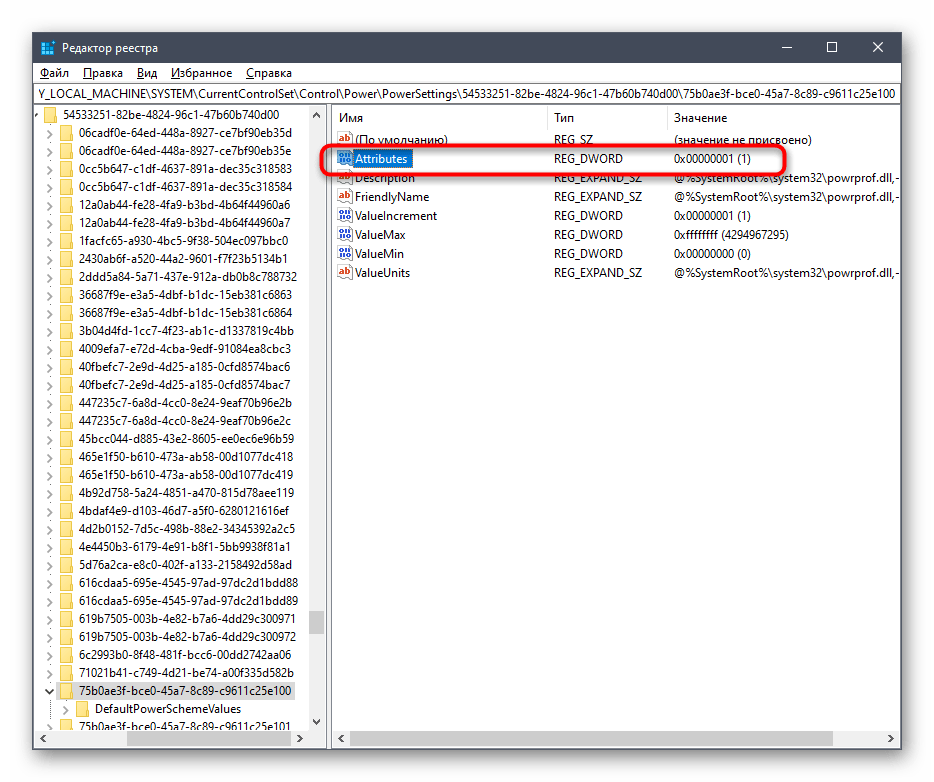
Откроется окно свойств, где следует изменить значение на 2. После этого настройка будет применена автоматически, однако в некоторых случаях это происходит только после перезагрузки операционной системы.
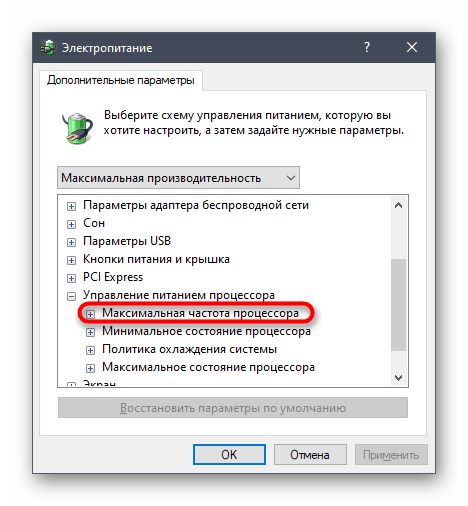
Закончив с этим, снова перейдите к настройкам плана электропитания так, как это показано в предыдущей инструкции. Кликните по надписи «Изменить дополнительные параметры питания».

Отыщите в «Управление питанием процессора» пункт «Максимальная частота процессора» и раскройте его для изменения значения.
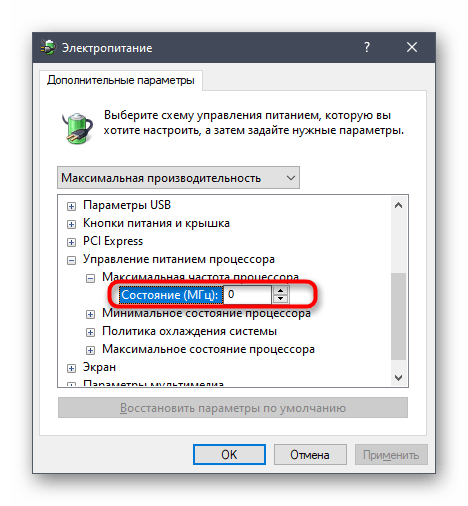
Выставьте необходимое ограничение. Учитывайте, что здесь оно вводится в МГц, а во всех программах и Диспетчере задач скорость отображается в ГГц. То есть вам необходимо прописать, например, 1500 МГц, чтобы установить ограничение до 1.5 ГГц.
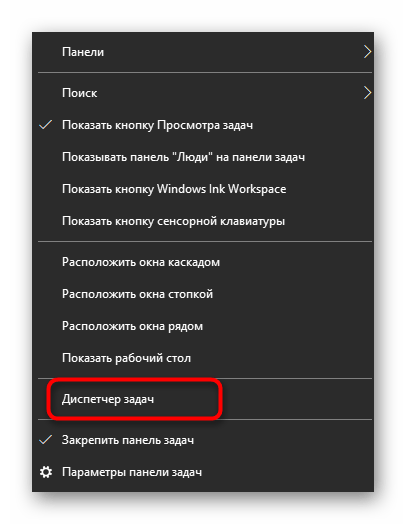
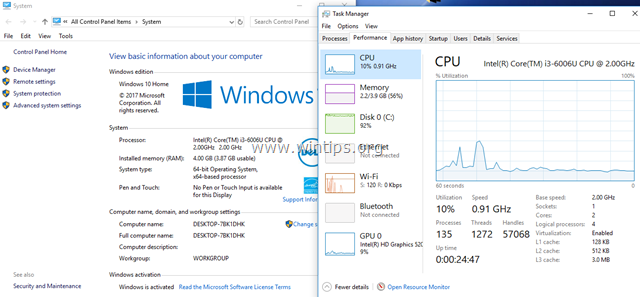
После внесенных изменений предлагаем проверить их действенность. Щелкните ПКМ по пустому месту на панели задач и в появившемся контекстном меню выберите пункт «Диспетчер задач».
Переместитесь на вкладку «Производительность».
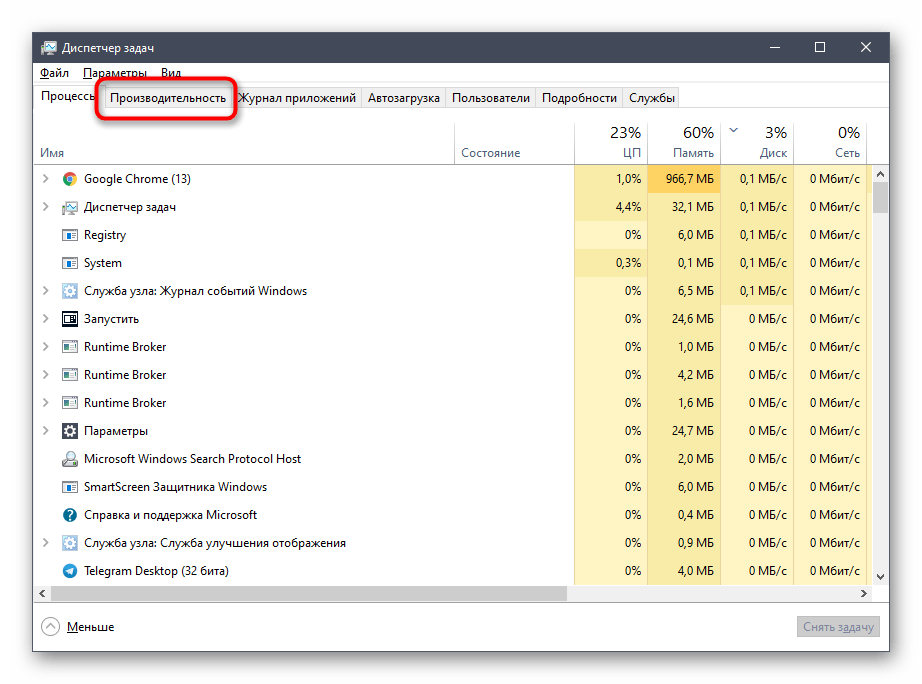
Обратите внимание на показатель скорости процесса, чтобы убедиться в том, что установленное ограничение работает.

Если этот пункт в настройках плана электропитания вам больше не будет нужен, просто скройте его, установив значение 1 в рассмотренном только что параметре редактора реестра.
Использование командной строки
Некоторым пользователям проще управлять компьютером, вводя команды в консоли. Настроить питание процессора тоже можно в этом приложении. Для этого понадобится выполнить всего пару простых действий и освоить несколько команд.
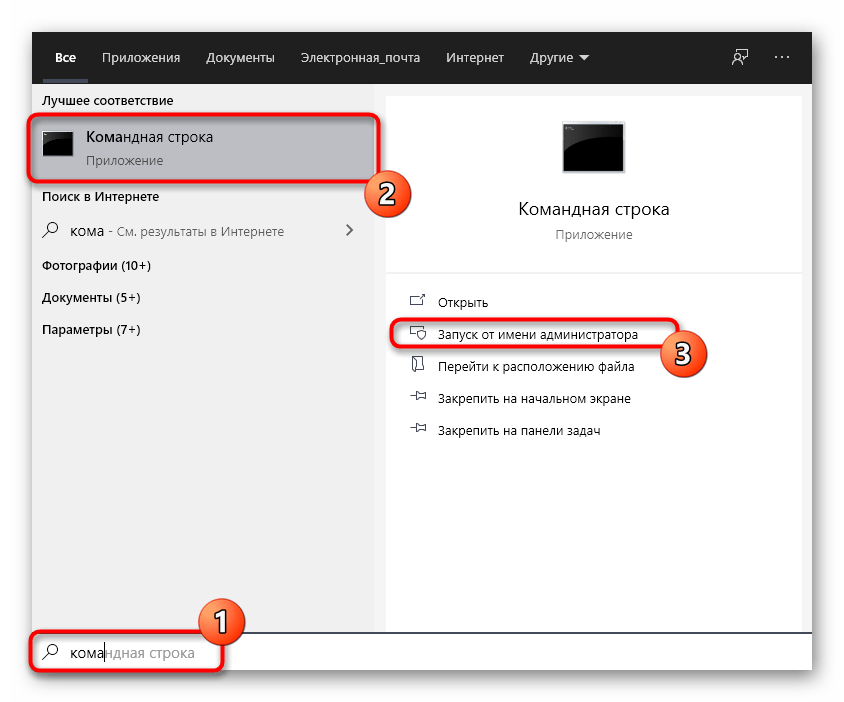
- Для начала запустите консоль от имени администратора. Сделать это можно, например, через меню «Пуск».
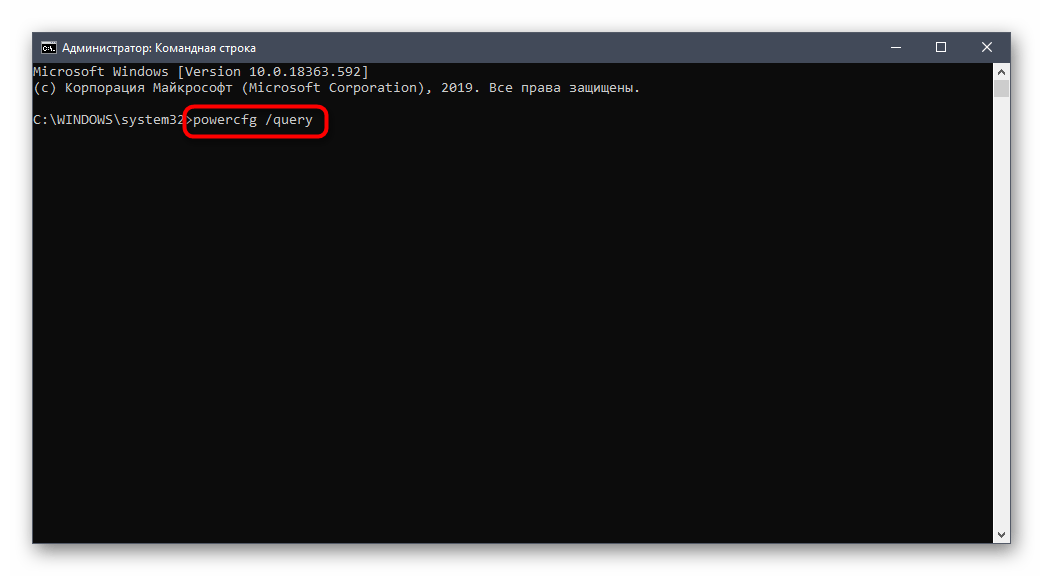
Введите powercfg /query , чтобы просмотреть все доступные настройки питания.
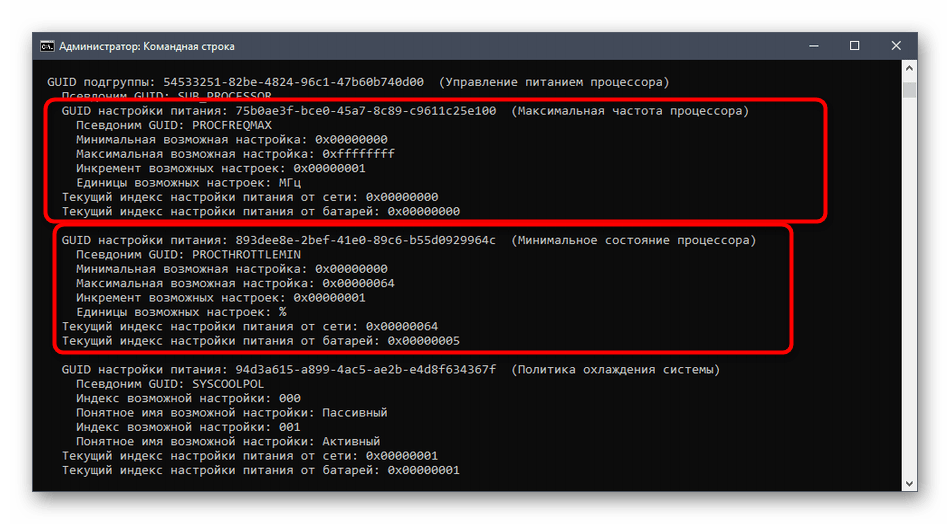
Обратите внимание на представленные строки — там указано название параметра, которое отображается в графическом меню. Здесь вам нужно запомнить «Псевдоним GUID» и «Текущий индекс настройки питания». По первому значению будет производиться изменение, а второй отвечает за текущую конфигурацию. 64 на конце означает 100%, а 00 — отсутствие ограничений.
Теперь осталось только ввести, например, powercfg /query SCHEME_CURRENT SUB_PROCESSOR PROCTHROTTLEMAX 100 , где SCHEME_CURRENT — текущий профиль электропитания, SUB_PROCESSOR — GUID раздела «Управление питанием процессора», а PROCTHROTTLEMAX — псевдоним самого параметра.
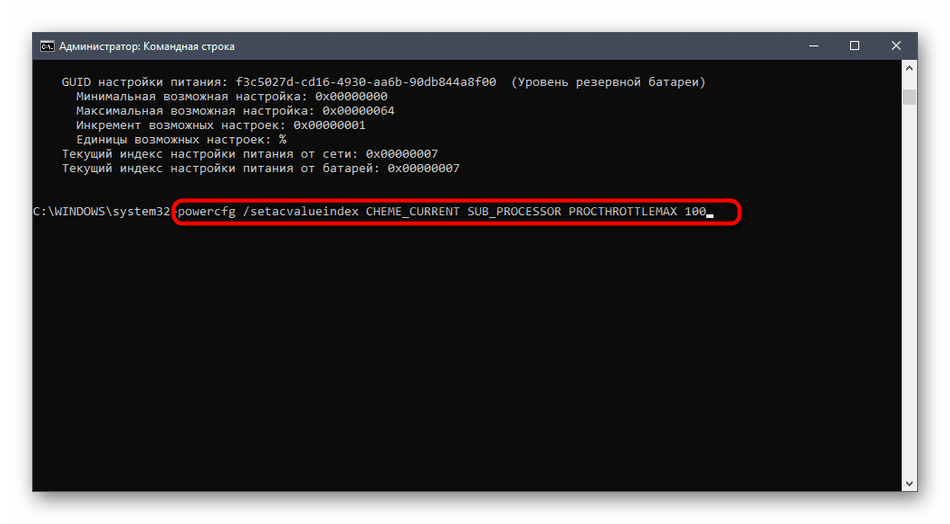
Меняйте все значения и псевдонимы на необходимые, чтобы успешно управлять значениями. Если вдруг при вводе команды возникнет какая-то ошибка, на экране отобразится отчет с рекомендациями по исправлению ситуации, что поможет разобраться с данной операцией даже начинающему пользователю.
Это были все сведения о настройке питания процессора в операционной системе Windows 10, о которых мы хотели рассказать. Не забывайте, что любые изменения как-то отражаются на быстродействии и энергопотреблении, поэтому производите конфигурацию с умом.
FIX: CPU Not Running at Full Speed in Windows 10.
Last updated on July 14th, 2020
A few days ago, I upgraded one more laptop from Windows 7 to Windows 10. After the OS upgrade, I proceeded – as I always do – to test the laptop’s performance using the AIDA64 stressing tool. But, when I ran the AIDA64 CPU stress test tool, I found that the CPU was not running at full speed in Windows 10, while in Windows 7 it was working at maximum speed.
In this tutorial you ‘ll find detailed instructions to resolve the CPU low speed issue in Windows 10 OS.
How to fix: Windows 10 Not Running at Full CPU Speed.
Important: Before you continue to the methods below, first install all available Windows updates and then check if the problem persists.
Method 1. Set the CPU Performance to Maximum.
Method 2. Perform a Clean Boot.
Method 3. Update or Disable the Intel Power Management Driver.
Method 4. Disable the ‘intelppm» service from Registry.
Method 5. Increase CPU performance using ThrottleStop.
Method 1. Set the CPU Power Options to Maximum.
The first method to resolve the low CPU speed in Windows 10, is to set the processor performance state to maximum. To do that:
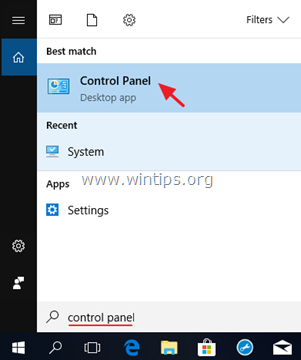
1. At the search box type control panel and press Enter.
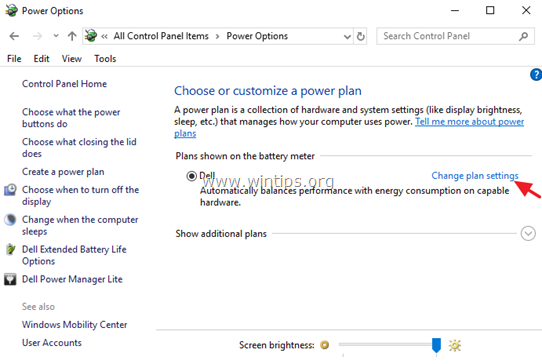
2. Change the View By (at the up right) to Small icons and then click Power Options.

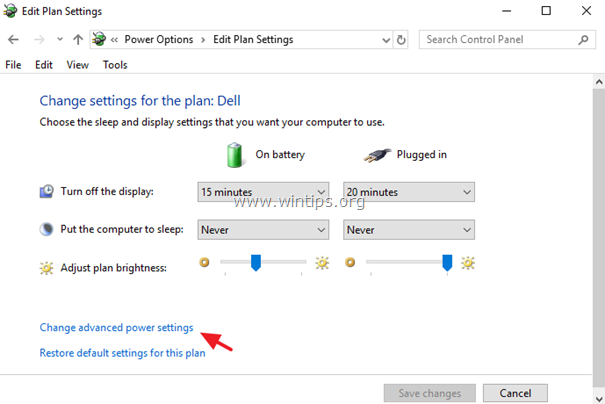
3. Click Change Plan Settings.
4. Click Change Advanced power settings.
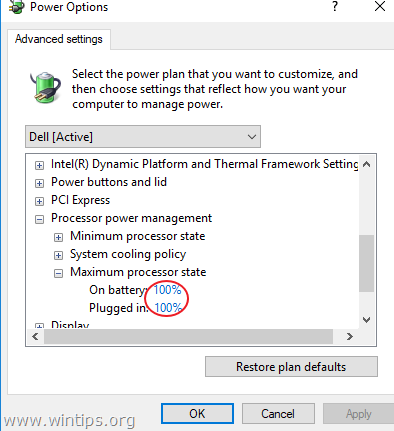
5. At ‘Processor power management’ options, set in Maximum processor state to 100% and click OK.
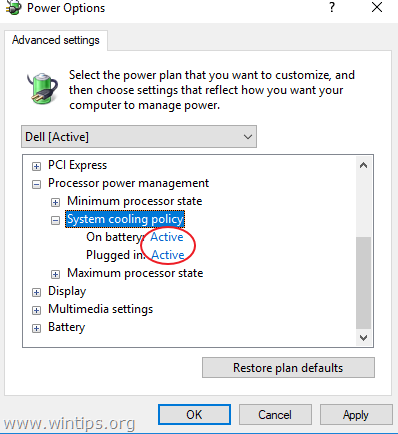
6. Then expand the System cooling policy settings and make sure that is set to Active, in order to avoid overheating.
7. Now check your CPU Speed, and if the problem persists continue to next method.
Method 2. Perform a Clean Boot.
The next method to troubleshoot CPU performance problems, is to start Windows 10 in a Clean Boot State. To do that:
1. Simultaneously press the Windows  + R keys to open the ‘Run‘ command box.
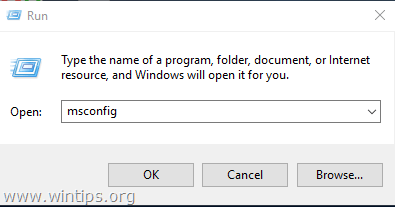
2. In run command box, type msconfig press Enter to open the System Configuration utility.
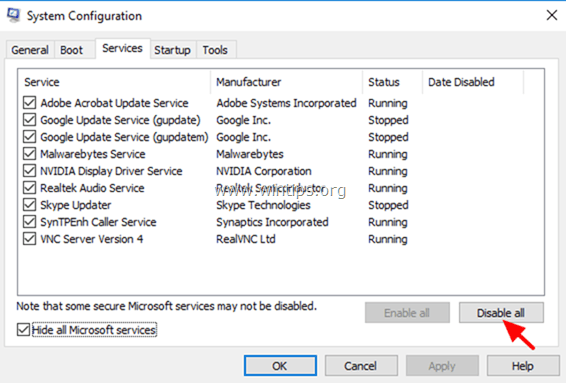
3. At Services tab, check the Hide all Microsoft services checkbox.

4. Then press the Disable all button, to disable all non Windows services that start with Windows. *
* Note: If you own a Samsung laptop then just disable the ‘Easy Launcher’ service and skip the rest steps.
5. Then select the Startup tab and click Open Task Manager.
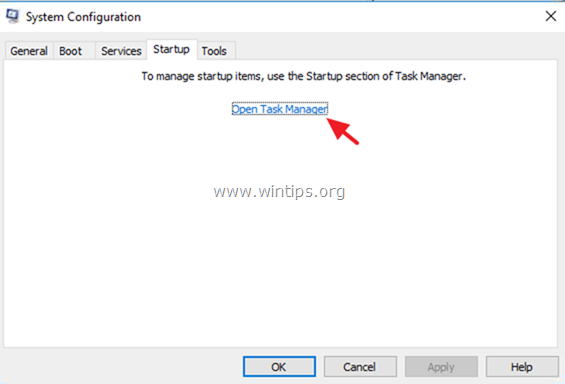
6. Select one by one all startup items and click Disable.
7. Finally click OK and restart your computer.
8. Check if the CPU is working at full speed now. If the speed is normal, then open the System Configuration (msconfig) utility again and enable one by one the disabled services and programs and restart your system, until you find out which one cause the CPU to work with low speed.
Method 3. Update or Disable the Intel Power Management Driver.
The Intel Power Management, manages the power consumption on Intel processor based computers, but sometimes prevents the CPU to run at full speed when needed. To fix this issue:
1. Download and install the latest ‘Intel Power Management’ * driver, from your laptop’s manufacturer support site.
* Note: If you own an AMD based laptop, then skip this step.
2. After installation, test the CPU performance again. If the problem persists, then proceed and disable the Intel Power Management driver, by following the instructions below:
1. Hold down the SHIFT key and go to Power
and click Restart.
 and click Restart.
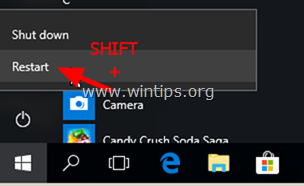
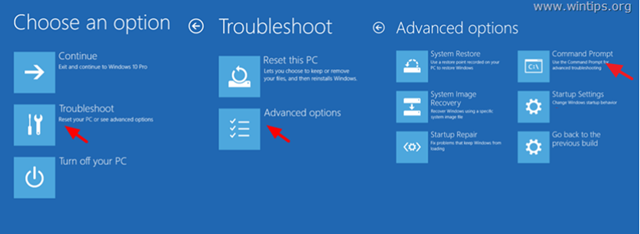
2. After restart, go to Troubleshoot > Advanced Options > Command Prompt.
3. Type the following command to navigate to «C:\Windows\System32\drivers» folder and press Enter:
4. Then give the following command and press Enter:
-
-
- ren intelppm.sys intelppm.sys.bak
-
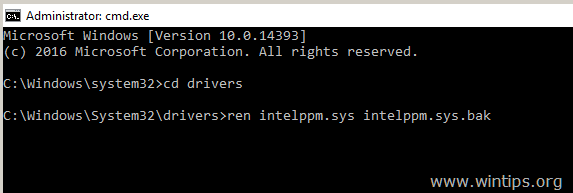
5. Type exit to close command prompt and then restart your computer (Exit and Continue to Windows 10).
Method 4. Disable the ‘intelppm» service from Registry.
The next method, to fix the «CPU Not Running at Full Speed in Windows 10» issue, is to prevent the «intelppm» service to start, using registry. To do that:
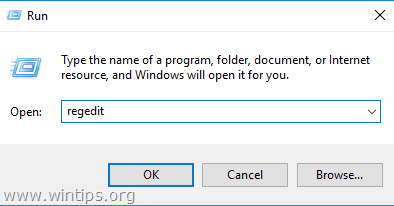
1. Simultaneously press the Windows  + R keys to open the ‘Run‘ command box.
2. In run command box, type regedit press Enter to open the Registry Editor.
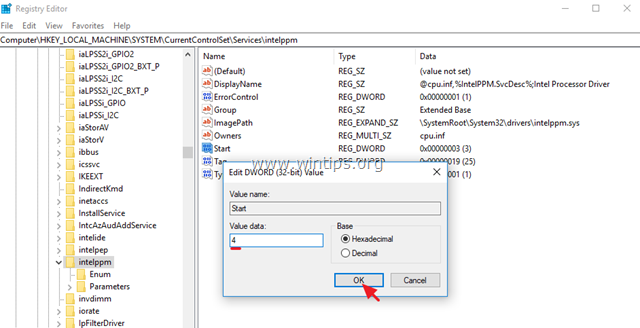
3. At the left pane, navigate to the following registry key:
4. At the right pane: *
a. Double click at ‘Start‘ key.
c. Modify the value data to ‘4‘
c. Click OK.
* Note: The above setting, will cause the CPU to work at full speed at all times. If you need the CPU to work at full speed only when needed, change the value data to ‘1’
5. Close registry editor and restart your computer.
Method 5. FIX Slow CPU Performance with ThrottleStop.
The final method to solve the «Slow CPU performance» issue, is to use the ThrottleStop utility, which is designed to correct the three main types of CPU throttling that are being used on many laptop computers. *
* Important:
1. Keep in mind, that many laptop manufacturers slow down the performance of the laptop if the power supply is not sufficient to fully power your laptop. So, I suggest to check if the «slow CPU speed» issue persists with a new power supply, before using ThrottleStop.
2. Use of ThrottleStop to bypass these throttling schemes is at your own risk and can result in permanent damage to your power adapter or computer or both which may not be covered by your warranty.
To bypass throttling issues with ThrottleStop:
1. Download ThrottleStop utility and then extract the downloaded .zip file to a folder.
2. From the extracted folder, double-click to open the «ThrottleStop.exe» application.
3. At ThrottleStop utility, uncheck the BD PROCHOT checkbox an click Save.
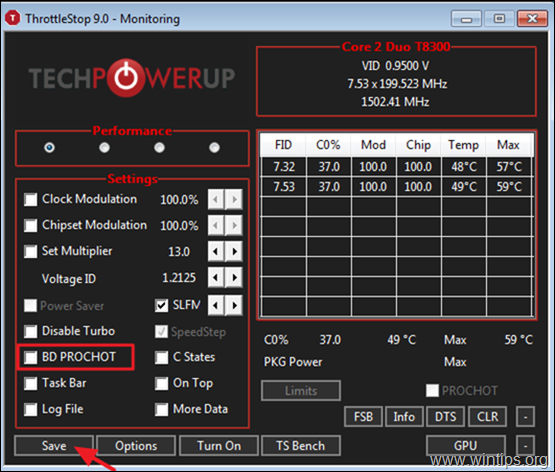
4. Now check your CPU performance. Normally the slow CPU speed problem should be solved. *
* Note: If the problem is solved, follow the instructions below, in order to run automatically ThrottleStop at every startup, by using a scheduled task.
To Start ThrottleStop at Windows Startup:
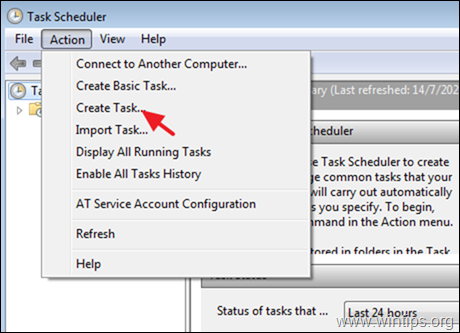
1. Open Task Scheduler.
2. From the ‘Actions’ menus choose Create Task.
3. At General tab, type ta name for the new task and select the Run with highest privileges checkbox.

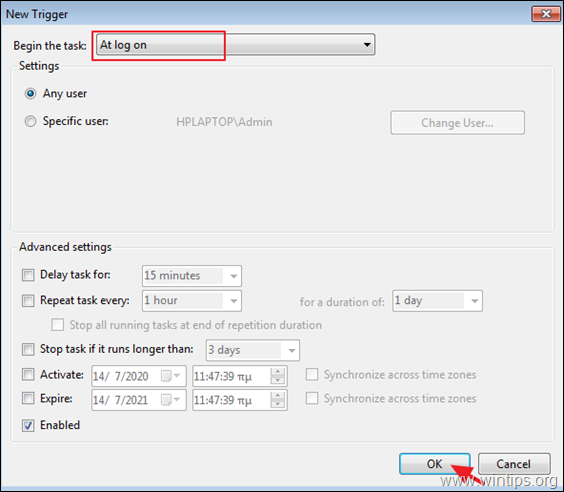
4. At the Triggers tab, click New and at the ‘New Trigger’ window, select Begin the task: At log on and click OK.
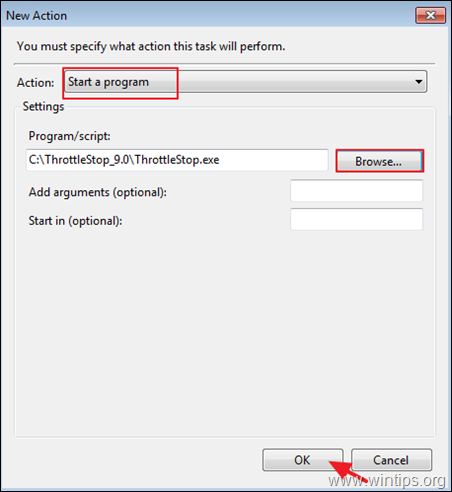
5. At the Actions tab click New, and at the ‘New Action’ window, select :
a. At ‘Action’, select: Start a program.
b. Click Browse, navigate to ThrottleStop folder, select the ‘ThrottleStop.exe’ and click Open.
c. When done, click OK.
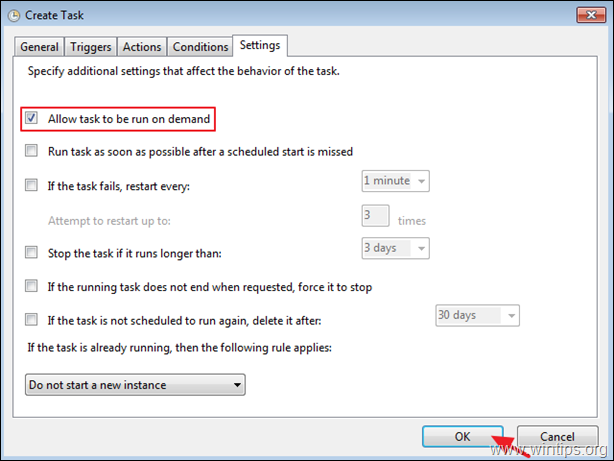
6. At the Settings tab, check only the Allow task to be run on demand box and clear all other checkboxes. When done, click OK to save your settings.
7. Restart your PC.
That’s it! Which method worked for you?
Let me know if this guide has helped you by leaving your comment about your experience. Please like and share this guide to help others.

Full household PC Protection — Protect up to 3 PCs with NEW Malwarebytes Anti-Malware Premium!
35 Comments
Adriano Bini
December 18, 2020 @ 6:26 pm
Thank you so much for the article!
hatim
September 28, 2020 @ 5:49 pm
In the bios settings I disabled intel speed stepping and that fixed the problem for me
Anjit Maharjan
September 12, 2020 @ 3:08 pm
Method 4. Disable the ‘intelppm» service from Registry.
Worked for me.
Thanks TEAM
Chayon
July 12, 2020 @ 12:42 pm
It seems like everyone got a solution at no. 4. But ai tried the same thing, it didn’t work…. my laptop works fine for a minute or so, then, th cpu clock, gpu clock and ram clock everything gets down to 1600, 400, 200 MHz. It happens when I play games. Ryzen 7 2700U Apu
lakonst
July 14, 2020 @ 6:55 pm
Re-check the article. I updated it with one more method to fix the issue.
NYC HDL
November 2, 2019 @ 7:12 pm
My 2.80 GHz CPU was running at just 0.35 GHz… I tried Methods 1 & 2 without success, then I read the comments and noted a number of people reported that Method #4 worked.
I tried #4, but it didn’t help, either, so I searched some more, and found a forum that stated an under-charged battery could cause this. I shut down the PC, removed the battery and powered it with only the A/C power cord. I restarted the PC, and VOILA! It is now running at 3.0 GHz or higher…
The battery was fully charged, BTW, so now I need to figure out why it had this effect.
Infiniti
November 6, 2019 @ 6:38 pm
I had a similar problem. My laptop battery had passed it’s service life and was no longer holding much charge. After Windows 10 1903 update I faced many performance issues and noticed the cpu speed was forcibly slower. I eventually mangaged to bypass this by setting the Start value in the registey to 4 (disable power management) which cpu then ran at max speed. I have since replaced the battery, resetting the Start value to 1 and all is back to normal. I suspect that the old battery’s electronics could no longer operate correctly with windows and the power management dropped the performance, possibly to protect the laptop, my guess. All’s well with new battery.
JESUS
October 13, 2019 @ 9:32 am
number 4 works thaNKS
Lucas
October 1, 2019 @ 7:46 pm
Thanks, method 4 fixed trhe problem.
XC XC
September 17, 2019 @ 3:34 pm
Great Help! Method4 works
Jawhar
September 15, 2019 @ 5:39 pm
Thanks ,I used m4 , I have i7 7500 and now it’s running @2.9Ghz . but the problem its not using turbo boost ( i guess that’s what they call it) since it’s capable of reaching 3,5Ghz any idea how to unlock full potential??
lakonst
September 16, 2019 @ 8:49 am
@Jawhar: 1. If you own a DELL laptop make sure that you’re using an original DELL AC adapter. 2. Enable the ‘Intel Turbo Boost Technology’ in BIOS settings.
QC
August 31, 2019 @ 1:26 pm
My PC was going down to 0.50Ghz after updating to 1903 but method 4 worked well… thanks a lot
John Armstrong
August 28, 2019 @ 7:43 am
All methods tried, but only Method 4 made a difference. A variation worth trying is as follows. Setting the Start value of intelppm to 4, as in the instructions, caused my cpu to run at full speed (2.3GHz) at all times. I tried other Start values, the best being a value of 1. Now my cpu runs at 2.3GHz when needed, and drops down to lower speeds when it can. This probably allows cooler running of the machine, less fan noise, etc, so that’s how I will leave it.
Khizar Ali Khan
November 14, 2020 @ 3:27 pm
i had the same experience. Setting Value to 1 is i believe the best solution
tbaggervance
August 25, 2019 @ 7:55 pm
This issue was complete aggravation for the entire weekend for me after going to Win 10 1903. Finally tried method 4 and it worked. Thanks.
KOBBY
August 23, 2019 @ 2:00 pm
Method 1 worked for me. Thanks
Vic Road
August 18, 2019 @ 4:03 pm
Method 4, Perfect thanks and no it doesn’t run constantly at full load, if it does you have additional problems. If you also used method 2 don’t forget to re-enable normal startup afterwards …. A tip for slow laptop users – Cortana is a cpu hog, if you don’t use it then disable it in the registry (google it).
Rhumaz
August 2, 2019 @ 6:32 pm
Method 4 ty so much !! i try everything no result until now love you guys! god bless
Josue
June 28, 2019 @ 4:51 am
the last method worked
Henry
June 27, 2019 @ 6:29 pm
Henry
Method 4 worked, finally!! Thank You very much.
Roiikka
June 23, 2019 @ 3:41 am
Thanks, man. Method 4 seems to still be working on the May 2019 Windows 10 update
Neal
June 16, 2019 @ 3:24 am
Not really a solution. It did fix the CPU clock in Task manager->Performance->CPU but it did not actually solve my issue. I used CPUID HWMonitor and it still shows my CPU clock rate at 800 MHz.
Kd
May 4, 2019 @ 8:41 pm
Thanks method 4 worked for me
Jeff Armstrong
May 3, 2019 @ 12:18 am
My 2.8 GHz computer was running at 0.39 GHz, about 14% of it’s capacity. After disabling the intelppm service via the registry, my CPU is now running at 2.8 GHz again.
Paryanto
April 25, 2019 @ 12:05 pm
method 4 work for me tanks, now i can enjoy play games
J van Ingen
April 3, 2019 @ 11:02 pm
Method 4 works for me too; thank you very much.
ismail
April 3, 2019 @ 10:33 am
Thanks Method 4 worked for me
John R Morales
March 28, 2019 @ 10:29 am
Method 4 worked
Jiss abraham
March 25, 2019 @ 7:59 am
Method 1 worked for me. Thanks
Rodrigo
February 23, 2019 @ 8:11 pm
Changing the registry setting to 4, worked like a charm. Using a Lenovo ThinkPad T430 Intel i5 3320m. Processor used to be at 46% of its capacity, now it reaches 100% when necessary. Thank you.
Enggar
February 2, 2019 @ 1:43 pm
Method 4 work for me thanks, also it did not lock my cpu usage to 100%, thats great
Ionel
October 18, 2018 @ 11:41 am
It happens sometime after a Windows Update. Just update driver for each processor from Device Manager\processor.
Cs
September 27, 2018 @ 9:51 am
Method 4 locks CPU in constant 100%. Not really a solution unless you don’t love your pc.
Simon Gorton
September 2, 2018 @ 8:55 pm
Method 4 did it for me thank you so much. My anger is down by 90% cheers


